


 本文详细介绍了如何使用PackageCloud提供的脚本设置Yum仓库,以便安装Erlang和RabbitMQ。首先,通过curl命令下载并执行安全检查后的脚本来添加仓库,然后更新Yum包元数据并安装所需依赖。接着,从新添加的仓库中安装Erlang和RabbitMQ,启动RabbitMQ服务,并启用管理插件。最后,创建管理员用户并提供了一些管理RabbitMQ的命令。
Set-up Yum Repository
A quick way to set up the repository is to use a Package Cloud-provided script. It is not a requirement and should be carefully considered since it pipes a generated script from the public Internet to a privileged shell.
# Uses a PackageCloud-provided Yum repository setup script.
## Always verify what is downloaded before piping it to a privileged shell!

## for erlang
curl -s https://packagecloud.io/install/repositories/rabbitmq/erlang/script.rpm.sh | sudo bash

## for rabbitmq
curl -s https://packagecloud.io/install/repositories/rabbitmq/rabbitmq-server/script.rpm.sh | sudo bash
View the installed repositories in the "/etc/yum.repos.d" directory.
[itboone@localhost yum.repos.d]$ pwd
/etc/yum.repos.d
[itboone@localhost yum.repos.d]$ ls
CentOS-Base.repo      CentOS-Debuginfo.repo  CentOS-Sources.repo        rabbitmq_erlang.repo
CentOS-Base.repo.bak  CentOS-fasttrack.repo  CentOS-Vault.repo          rabbitmq_rabbitmq-server.repo
CentOS-CR.repo        CentOS-Media.repo      CentOS-x86_64-kernel.repo
[itboone@localhost yum.repos.d]$
Install Packages with Yum
Update Yum package metadata:
yum update -y
yum -q makecache -y --disablerepo='*' --enablerepo='rabbitmq_erlang' --enablerepo='rabbitmq_rabbitmq-server'
Next install dependencies from the standard repositories:
## install these dependencies from standard OS repositories
yum install socat logrotate -y
Finally, install modern Erlang and RabbitMQ:
## install RabbitMQ and zero dependency Erlang from the above repositories,
## ignoring any versions provided by the standard repositories
yum install erlang rabbitmq-server -y
Start RabbitMQ
# Service Mode1
service rabbitmq-server start
# Service Mode2
systemctl start rabbitmq-server
# App Mode
cd /usr/lib/rabbitmq/bin/
# Starting in the background
./rabbitmq-server -detached
# Starting directly: Exit the terminal or execute ctrl+D to terminate
./rabbitmq-server start
Enable Plugins
# Enable Plugin
rabbitmq-plugins enable rabbitmq_management rabbitmq_prometheus

# View Plugin List
rabbitmq-plugins list
isting plugins with pattern ".*" ...
 Configured: E = explicitly enabled; e = implicitly enabled
 | Status: * = running on rabbit@centos156
 |/
[  ] rabbitmq_amqp1_0                  3.10.0
[  ] rabbitmq_auth_backend_cache       3.10.0
[  ] rabbitmq_auth_backend_http        3.10.0
[  ] rabbitmq_auth_backend_ldap        3.10.0
[  ] rabbitmq_auth_backend_oauth2      3.10.0
[  ] rabbitmq_auth_mechanism_ssl       3.10.0
[  ] rabbitmq_consistent_hash_exchange 3.10.0
[  ] rabbitmq_event_exchange           3.10.0
[  ] rabbitmq_federation               3.10.0
[  ] rabbitmq_federation_management    3.10.0
[  ] rabbitmq_jms_topic_exchange       3.10.0
[E*] rabbitmq_management               3.10.0
[e*] rabbitmq_management_agent         3.10.0


# Restart Service
systemctl restart rabbitmq-server.service

# Displays Network Status
netstat -pltn
Proto Recv-Q Send-Q Local Address           Foreign Address         State       PID/Program name
tcp        0      0 0.0.0.0:25672           0.0.0.0:*               LISTEN      3081/beam.smp
tcp        0      0 0.0.0.0:15692           0.0.0.0:*               LISTEN      3081/beam.smp  # prometheus metrics
tcp        0      0 0.0.0.0:4369            0.0.0.0:*               LISTEN      3211/epmd
tcp        0      0 0.0.0.0:15672           0.0.0.0:*               LISTEN      3081/beam.smp
tcp6       0      0 :::5672                 :::*                    LISTEN      3081/beam.smp

# Test Metrics API
curl localhost:15692/metrics

# Test Management UI
Browser access: http://{Host address}:15672/
Notes: User[guest] can only log in via localhost.
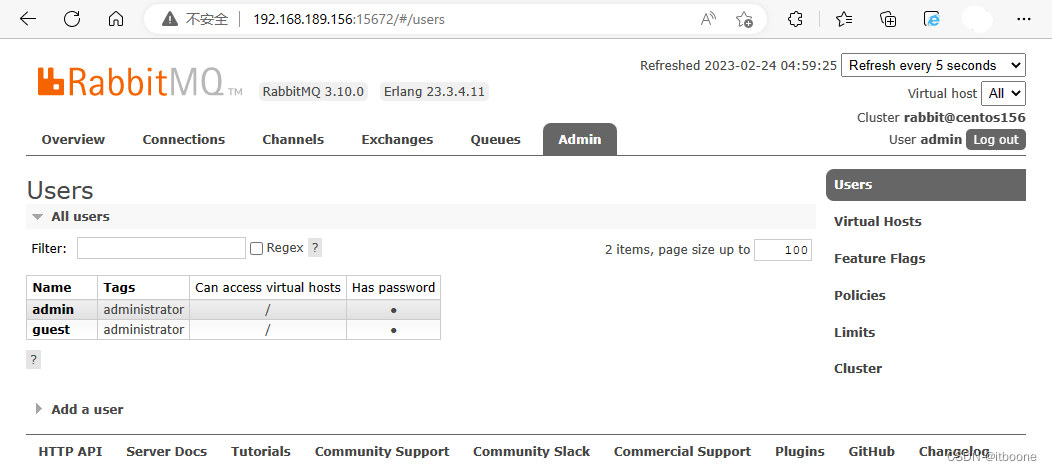
Create Admin User
# Create user
rabbitmqctl add_user admin admin
# Set user tags
rabbitmqctl set_user_tags admin  administrator
# Set user permissions
rabbitmqctl set_permissions -p / admin  ".*" ".*" ".*"
Other Commands
# View RabbitMQ service status
service rabbitmq-server status
# View RabbitMQ service status
systemctl status rabbitmq-server

# View RabbitMQ node status
rabbitmqctl status
# Start RabbitMQ application when Erlang VM running
rabbitmqctl start_app
# Stop RabbitMQ application when Erlang VM running
rabbitmqctl stop_app

# List users
rabbitmqctl list_users
# List VHosts
rabbitmqctl list_vhosts
# View all user permission info of the specified Vhostpath
rabbitmqctl  list_permissions  [-p  VHostPath]
# View the permission info of the specified user
rabbitmqctl  list_user_permissions  [username]
# Clear the permission info of the specified user
rabbitmqctl  clear_permissions  [-p VHostPath]  [username]
# Remove all data. Use it after "rabbitmqctl stop_app".
rabbitmqctl reset

# Stop RabbitMQ only for service mode
service rabbitmq-server stop
# Stop RabbitMQ only for service mode
systemctl stop rabbitmq-server
# Stop RabbitMQ with rabbitmqctl
rabbitmqctl stop
# Stop RabbitMQ with kill
ps -ef|grep rabbitmq
kill -9 <pid>
Log in to the web management page using the Admin account:
 https://www.rabbitmq.com/install-rpm.html#package-cloud


 被折叠的 条评论
为什么被折叠?
被折叠的 条评论
为什么被折叠?
 到【灌水乐园】发言


