


Centos7 ELK7.6.2集群搭建
ELK7.6.2网盘安装包下载
链接:https://pan.baidu.com/s/1ONATehzWDcH5B8Rzzv_m-A
提取码:mma6
一、单节点准备
配置ip
vi /etc/sysconfig/network-scripts/ifcfg-ens33
#配置信息
BOOTPROTO="static"
ONBOOT="yes"
IPADDR="192.168.108.141"
NETMASK="255.255.225.0"
GATEWAY="192.168.108.2"
DNS1="114.114.114.114"
DNS2="8.8.8.8"

#重启网络
service network restart
#查看ip
ip addr
配置主机名和主机名映射
hostnamectl set-hostnaem es01
vi /etc/hosts
192.168.108.141 es01
192.168.108.142 es02
192.168.108.143 es03
关闭防火墙
# 关闭防火墙
systemctl stop firewalld
# 开机时关闭防火墙
systemctl disable firewalld
事件同步
yum install ntpdate -y
ntpdate cn.pool.ntp.org

crontab -e
*/10 * * * * ntpdate cn.pool.ntp.org
更换yum源(阿里云yum源)
# 先安装wget
yum install -y wget
# 1.备份当前yum源(可选)
cd /etc/yum.repos.d/
cp CentOS-Base.repo /CentOS-Base-repo.bak

# 2.使用wget下载阿里yum源repo文件
wget http://mirrors.aliyun.com/repo/Centos-7.repo

# 3.清理默认缓存包
yum clean all

# 4.把下载下来的阿里云repo文件设置成为默认源
mv Centos-7.repo CentOS-Base.repo

# 5.生成阿里云yum源缓存并更新yum源
yum makecache
yum update
安装常用软件
yum install net-tools bash-completion wget vim ntpdate -y
系统优化
vim /etc/sysctl.conf
fs.file-max=65536
vm.max_map_count = 262144
创建用来启动es的普通用户
elasticsearch,kibana不能使用root用户登入,所以需要创建一个普通用户
groupadd elsearch
useradd elsearch -g elsearch
注意:
fs.file-max:该文件指定了可以分配的文件句柄的最大数目, 为512 乘以 processes (如128个process则为 65536);
vm.max_map_count:限制一个进程可以拥有的VMA(虚拟内存区域)的数量。 //这个值最好设置大一点,不然ES会启动失败。
vim /etc/security/limits.conf
*        soft  nofile  65535
*        hard  nofile  131072
*        soft  nproc   2048
*        hard  nproc   4096
添加线程,不然会在启动的时候报错,如下所示:
[1]: max number of threads [1024] for user [leyou] is too low, increase to at least [4096]
jdk安装
mkdir /opt/install
mkdir /opt/software
cd /opt/install/
#将jdk1.8压缩包放到该目录下
tar -zxvf jdk-8u221-linux-x64.tar.gz -C /opt/software/
cd /opt/software/jdk1.8.0_221/
pwd
/opt/software/jdk1.8.0_221
#将目录复制准备配置环境变量
vi /etc/profile
#JAVA_HOME
export JAVA_HOME=/opt/software/jdk1.8.0_221
export PATH=$PATH:$JAVA_HOME/bin
#保存并推出,重新加载配置文件
source /etc/profile
java -version
二、克隆两台虚拟机
注意:克隆的两天虚拟机需要更改mac地址、ip地址、主机名
这里就不在详写
配置免密登录(三台机器都要)
# 生成密钥
ssh-keygen -t rsa
ssh-copy-id es01
ssh-copy-id es02
ssh-copy-id es03
配置完免密登录后基础配置工作就完成了,最好保存快照,防止安装出错后恢复
三、安装elasticsearch
上传及解压
上传kibana-7.6.2-linux-x86_64.tar.gz和elasticsearch-7.6.2-linux-x86_64.tar.gz到/opt/install/目录下
解压elasticsearch到/opt/software/目录下
tar -zxvf elasticsearch-7.6.2-linux-x86_64.tar.gz -C /opt/software/
配置elasticsearch.yml
cd /opt/software/elasticsearch-7.6.2/config
vi elasticsearch.yml
#直接在末尾添加配置
cluster.name: elasticsearch
node.name: node-1
path.data: /data/es/data
path.logs: /data/es/logs
bootstrap.memory_lock: false
network.host: 192.168.108.141
http.port: 9200
discovery.seed_hosts: ["192.168.108.141", "192.168.108.142", "192.168.108.143"]
cluster.initial_master_nodes: ["192.168.108.141", "192.168.108.142", "192.168.108.143"]
http.cors.enabled: true
http.cors.allow-origin: "*"
discovery.zen.minimum_master_nodes: 2
gateway.recover_after_nodes: 2
将本节点的elasticsearch-7.6.2发送到另外两台机器上
scp -r /opt/software/elasticsearch-7.6.2/ root@es02:$PWD
scp -r /opt/software/elasticsearch-7.6.2/ root@es03:$PWD
修改另外两台节点的elasticsearch.yml配置信息
network.host:   #本机IP地址
node.name:   #分配的节点名称
给所有节点上的elasticsearch-7.6.2赋权(每台机器都要做)
chown -R elsearch:elsearch /opt/software/elasticsearch-7.6.2/
创建es数据和日志存放的目录并赋权(每台机器都要做)
mkdir -p /data/es/data
mkdir -p /data/es/logs
chown -R elsearch:elsearch /data/es
启动服务(每台都要启动)
su elsearch
cd /opt/software/elasticsearch-7.6.2/bin/
#后台启动
./elasticsearch -d
# 查看端口号是否启动成功
netstat -luntp | grep 9200

访问web界面
http://192.168.108.141:9200

四、head插件安装
上传压缩包到节点并解压
安装包统一放到/opt/install目录下
elasticsearch-head-master.zip
yum -y install unzip
unzip /opt/install/elasticsearch-head-master.zip -d /opt/software/
配置head文件
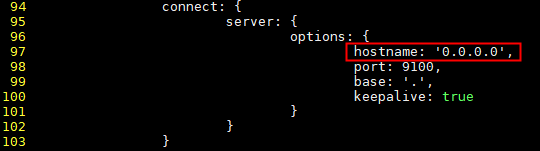
Gruntfile.js
vi /opt/software/elasticsearch-head-master/Gruntfile.js
#在第96行下面配置
hostname: '0.0.0.0',
_site/app.js
vi /opt/software/elasticsearch-head-master/_site/app.js
#在第4374行配置,将localhost改为该节点的ip地址
this.base_uri = this.config.base_uri || this.prefs.get("app-base_uri") || "http://192.168.108.141:9200";

下载Node.js
curl --silent --location https://rpm.nodesource.com/setup_10.x | sudo bash -
yum -y install nodejs
开始安装
# 修改源地址为淘宝NPM镜像,因为默认NPM的官方源为https://registry.npmjs.org/  。国外下载速度会很慢,所以这里建议切换到淘宝的NPM镜像站点比较好。
npm config set registry=http://registry.npm.taobao.org/
#切换到elasticsearch-head-master目录下
cd /opt/software/elasticsearch-head-master/
npm install
npm install 安装时,可能会报 phantomjs-prebuilt@2.1.16安装失败。解决方法:
npm install phantomjs-prebuilt@2.1.16 --ignore-scripts
npm install
启动head插件
在/opt/software/elasticsearch-head-master/目录下
npm run start
head插件服务启动之后,默认的访问端口为9100
访问web界面
http://192.168.108.141:9100/

五、安装kibana
安装配置kibana
tar -zxvf kibana-7.6.2-linux-x86_64.tar.gz -C /opt/software/
cd /opt/software/kibana-7.6.2-linux-x86_64/config/
ll
vi kibana.yml
#配置
server.port: 5601
server.host: "192.168.108.141"
elasticsearch.hosts: ["http://192.168.108.141:9200", "http://192.168.108.142:9200", "http://192.168.108.143:9200"]
i18n.locale: "zh-CN"
启动服务
cd /opt/software/kibana-7.6.2-linux-x86_64/bin/
./kibana --allow-root
访问web界面
http://192.168.108.141:5601/


 1758
1758


 被折叠的 条评论
为什么被折叠?
被折叠的 条评论
为什么被折叠?
 到【灌水乐园】发言


