


前言
这个技巧说来很简单。我们让Apache把任何stylesheet重定向到一个指定的PHP脚本。该脚本会一行行读取stylesheet的内容,找到并替换任何用户自定义的变量,最终会重新生成一个CSS样式表。浏览器不会发觉到有什么地方不同。在后面,我们会讨论如何缓存生成的最终结果避免加大CPU的负载。
请注意,这个教程需要读者懂得一些基本的PHP(OOP)、Apache和HTTP知识。
系统要求:
- Apache,Rewrite mod 打开
- PHP 5
第一步 – 创建项目工程
首先,建立一个简单的项目结构,在项目的根目录下创建一个index.html文件。
- <!DOCTYPE html PUBLIC ”-//W3C//DTD XHTML 1.0 Transitional//EN” ”http://www.w3.org/TR/xhtml1/DTD/xhtml1-transitional.dtd”>
- <html xmlns=“http://www.w3.org/1999/xhtml”>
- <head>
- <meta http-equiv=“Content-Type” content=“text/html; charset=utf-8″ />
- <title>Variables in CSS Files… It’s possible!</title>
- <link href=“css/styles.css” rel=“stylesheet” type=“text/css” />
- </head>
- <body>
- <h1>Variables in Stylesheets</h1>
- <p>It’s possible!</p>
- <p>With PHP and Apache URL Rewrite Mod</p>
- </body>
- </html>
接着,创建一个CSS文件带有以下变量,保存在css目录下。
- $font: arial, sans-serif;
- $main-color: #3D7169; $secondary-color: #000;
- h1 {
- font: 200% $font;
- color: $main-color;
- }
- p {
- background: $secondary-color;
- color: $main-color;
- font-family: $font;
- padding: 10px;
- }
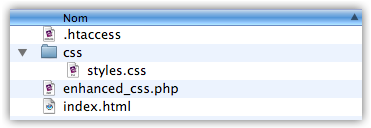
最后,创建一个名为enhanced_css.php的空PHP文件和一个空.htaccess文件。.htaccess 文件会覆盖服务器缺省的配置,并应用到各个子目录下去。
现在我们的项目看上去如下图所示:
第二步 – 重定向CSS文件到一个PHP脚本
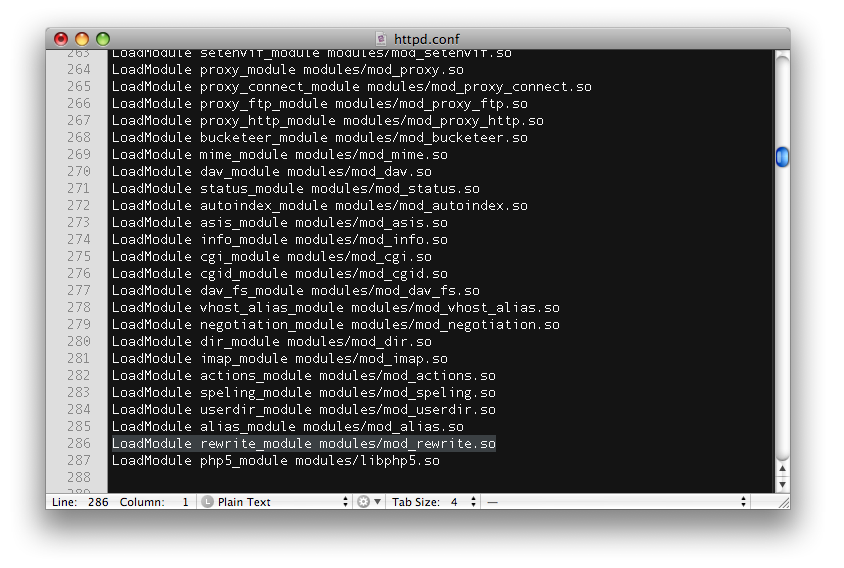
我们希望把任何一个带有CSS后缀名的URL地址重定向到指定的PHP脚本。利用Apache的URL Rewrie模块可以实现这点。首先,确认rewrite_module模块已经打开。在Apache安装目录下找到httpd.conf文件。打开它,搜索下面这行代码:
- LoadModule rewrite_module modules/mod_rewrite.so
如果在前面有“#”号,把前面的“#”号去除,重新启动Apache以使设置生效。
接着,编辑.htaccess文件加入下面这些内容:
- RewriteEngine on
- RewriteRule ^(.*/.css)$ enhanced_css.php?css=$0
然后保存。如前面提到过的,上面这些内容就是让Apache捕捉所以带有.css后缀名的URL地址并重定向到enhanced_css.php。原CSS文件作为一个css参数对象传入。
例如:/css/styles.css 会被重定向到nhanced_css.php?css=/css/styles.css
注意:
一些服务器不允许它们的设置被用户覆盖。如果是这样,HTML代码里的样式表链接就要手工来替换。
例如,你要把
- <link href=“css/styles.css” rel=“stylesheet” type=“text/css” />
替换为
- <link href=“enhanced_css?css=css/styles.css” rel=“stylesheet” type=“text/css” />
第三步 – 通过PHP来分析CSS文件
因为CSS文件都被重定向到PHP脚本,我们要创建一个名为Enhancedcss的类来读取这些文件的内容,找到并替换变量,再生成纯CSS。通过传递$_GET['css']给构造函数来实例化这个类。记住.htaccess重定向访问请求后,通过$_GET可以获取当前stylesheet文件的路径。
- if (isset($_GET['css'])) {
- $css = new EnhancedCss($_GET['css']);
- $css->display();
- }
基本实现由四个方法组成,最后再加上一个把结果缓存的方法。
- class EnhancedCss {
- public $values;
- public $cssFile;
- public function __construct($cssFile) {
- // check if the css file exists
- }
- private function parse() {
- // open the css file and throw every line to
- // findAndReplaceVars method
- }
- private function findAndReplaceVars($line) {
- // find the variable definitions, store the values,
- // replace the variable by their defined values.
- }
- public function display() {
- // display the new parsed content
- }
- }
构造函数
我们检查是否有CSS文件存在。如果没有,脚本返回一个404 http错误。CSS文件的路径保存在$this->cssFile属性里,后面要用来生成缓存文件的名字。
- public function __construct($cssFile) {
- if (!file_exists($cssFile)) {
- header(‘HTTP/1.0 404 Not Found’);
- exit;
- }
- $this->cssFile = $cssFile;
- }
分析方法
该方法打开CSS文件并一行行读取里面的内容。
- private function parse() {
- $content = ”;
- $lines = file($this->cssFile);
- foreach($lines as $line) {
- $content .= $this->findAndReplaceVars($line);
- }
- return $content;
- }
这里用到了file 函数。该函数很有用,因为它打开一个文件并返回一个包含了每一行内容的数组对象。程序遍历每行内容,通过findAndReplaceVars这个方法来处理包含的变量。最后返回处理后的内容。
FindAndReplace方法
这个方法是最主要的部分。它找到定义好的变量后,把对应的值保存到一个数组里。当找到一个变量后,如果它对应的值已经存在,就用它的值替换已有值。
- private function findAndReplaceVars($line) {
- preg_match_all(‘//s*//$([A-Za-z1-9_/-]+)(/s*:/s*(.*?);)?/s*/’, $line, $vars);
- $found = $vars[0];
- $varNames = $vars[1];
- $varValues = $vars[3];
- $count = count($found);
- for($i = 0; $i < $count; $i++) {
- $varName = trim($varNames[$i]);
- $varValue = trim($varValues[$i]);
- if ($varValue) {
- $this->values[$varName] = $this->findAndReplaceVars($varValue);
- } else if (isset($this->values[$varName])) {
- $line = preg_replace(‘///$’.$varName.‘(/W|/z)/’, $this->values[$varName].‘//1′, $line);
- }
- }
- $line = str_replace($found, ”, $line);
- return $line;
- }
这里有很多代码,我们仔细一段段分析。
- private function findAndReplaceVars($line) {
- preg_match_all(‘//s*//$([A-Za-z1-9_/-]+)(/s*:/s*(.*?);)?/s*/’, $line, $vars);
这里,我们应用了正则表达式来处理当前行。这个表达式匹配当前行里所有像$variable:$value或$variable的变量。在本教程里,我们不对正则表达式做深入的讨论。
例如:CSS文件里第三行
$main-color: #3D7169; $secondary-color: #000;
将返回以下这个数组对象:
- $vars => Array
- (
- [0] => Array
- (
- [0] => $main-color: #3D7169;
- [1] => $secondary-color: #000;
- )
- [1] => Array
- (
- [0] => main-color
- [1] => secondary-color
- )
- [2] => Array
- (
- [0] => : #3D7169;
- [1] => : #000;
- )
- [3] => Array
- (
- [0] => #3D7169
- [1] => #000
- )
- )
我们假设$vars[0]包含了全部匹配的变量,$vars[1]包含了所有变量的名称,$vars[3]包含了所有变量的值。让我们重新对它们做一下调整,
- $found = $vars[0];
- $varNames = $vars[1];
- $varValues = $vars[3];
现在清晰多了。
- $found => Array
- (
- [0] => $main-color: #3D7169;
- [1] => $secondary-color: #000;
- )
- $varNames => Array
- (
- [0] => main-color
- [1] => secondary-color
- )
- $varValues => Array
- (
- [0] => #3D7169
- [1] => #000
- )
统计当前行找到多少个变量
- $count = count($found);
这样,我们就能遍历变量数组。为了更清晰一些,我们设置一些新的变量来处理名称和数值。
- for($i = 0; $i < $count; $i++) {
- $varName = trim($varNames[$i]);
- $varValue = trim($varValues[$i]);
- // …
- }
变量定义
如果$varValue值不为空,将面对一个定义变量的问题。因此把这个值保存到$this->values属性。
- if ($varValue) {
- $this->values[$varName] = $this->findAndReplaceVars($varValue);
- } else if …
注意,我们要再把变量值作为参数传递给findAndReplaceVars方法。这样的话,其他潜在的变量也会被处理。保存在$this->values数组的变量值用变量名称作为键值。最后,$this->values数组看上去像这样:
- Array
- (
- [font] => arial, sans-serif
- [main-color] => #3D7169
- [secondary-color] => #000
- )
变量应用
如果$var的值为空,则面对一个应用变量的问题。我们检查是否在变量值数组里存在该变量。如果存在,把替换变量替换为对应的值。
- } else if (isset($this->values[$varName])) {
- $line = preg_replace(‘///$’.$varName.‘(/W|/z)/’, $this->values[$varName].‘//1′, $line);
- }
替换过程看上去异常复杂。实际上不是这样,替换过程仅仅替换$variable如果它后面跟着一个非字符(/W)或行结束符(/z)。
最后,我们去除所有匹配的变量已使stylesheet干净和正确,最后返回处理后的内容。
- $line = str_replace($found, ”, $line);
- return $line;
- }
Display方法
该方法显示处理过的stylesheet。为了让浏览器识别CSS内容,把header设置为text/css content type.
- public function display() {
- header(‘Content-type: text/css’);
- echo $this->parse();
- }
第四步 – 缓存结果
到了这一点,所有事情都已很完美了。然而,当应用于大型网站时,该操作会很消耗CPU资源。
毕竟,当浏览器需要CSS文件的时候,我们不用每次都去处理它。只要第一次运行或CSS文件有修改时,生成一个缓存。
创建一个名为cache的目录。如有需要,执行chmod 777命令把该目录的权限设置为可写。现在我们的项目应该如下面所示:

Cache方法
加入一个新方法:
- read the cache file if it exists.
- create and store the rendered results.
- update existing cache file if the CSS file has been modified.
所有逻辑按照下面方法处理:
- private function cache($content = false) {
- $cacheFile = “cache/”.urlencode($this->cssFile);
- if (file_exists($cacheFile) && filemtime($cacheFile) > filemtime($this->cssFile)) {
- return file_get_contents($cacheFile);
- } else if ($content) {
- file_put_contents($cacheFile, $content);
- }
- return $content;
- }
我们解释一下这段代码。缓存文件名称是通过之前保存在$this->cssFile属性里面的CSS文件名计算出来的。最后,要用到urlencode函数。
- $cacheFile = “cache/”.urlencode($this->cssFile);
我们需要检查是否缓存文件已经存在(file_exists)了。如果存在,继续检查缓存文件的创建时间是否比CSS文件的修改时间(filemtime)早。
- if (file_exists($cacheFile) && filemtime($cacheFile) > filemtime($this->cssFile)) {
- return file_get_contents($cacheFile);
否则,系统要新生成一个缓存文件。
- } else if ($content) {
- file_put_contents($cacheFile, $content);
- }
最后,要处理这个新方法。有两个方法需要做修改。
- private function parse() {
- if (!$content = $this->cache()) {
- $lines = file($this->cssFile);
- foreach($lines as $line) {
- $content .= $this->findAndReplaceVars($line);
- }
- }
- return $content;
- }
Parse方法现在在运行前要检查缓存。如果没有有效的缓存,CSS文件就要被处理,否则直接返回缓存的内容。
- public function display() {
- header(“Content-type: text/css”);
- echo $this->cache($this->parse());
- }
最后,display方法显示了正确的内容(新的或缓存的)。
浏览器缓存
出于安全原因(sessions,动态内容)浏览器不能把PHP脚本产生的结果缓存到它的缓存里去。一个真实的CSS文件可能被缓存但不是我们代码所产生的结果。我们不得不让浏览器去模拟真实CSS文件的行为。我们在构造函数里加入一些行。
- public function __construct($cssFile) {
- if (!file_exists($cssFile)) {
- header(‘HTTP/1.0 404 Not Found’);
- exit;
- }
- // Deals with the Browser cache
- $modified = filemtime($cssFile);
- header(‘Last-Modified: ’.gmdate(“D, d M Y H:i:s”, $modified).‘ GMT’);
- if(isset($_SERVER['HTTP_IF_MODIFIED_SINCE'])) {
- if (strtotime($_SERVER['HTTP_IF_MODIFIED_SINCE']) == $modified) {
- header(‘HTTP/1.1 304 Not Modified’);
- exit();
- }
- }
- $this->cssFile = $cssFile;
- }
我们把原CSS文件的最后修改时间复制到header。基本上在传递数据前,headers被浏览器和服务器之间交换。当浏览器在它的缓存里有一页拷贝,它会发送一个HTTP_IF_MODIFIED_SINCE请求给服务器,带着之前由header(’Last-Modified’, …)保存的缓存日期。如果日期相匹配,内容是新的不需要重载。因此我们发送一个304不需要修改的响应,退出脚本。
有个简单的方法,在文件里加header(’Cache-Control: max-age=3600′)。内容会被任意一个浏览器缓存一个小时(3600秒)。
结论
搞定!你现在可以在你的服务器上测试一下。例如:http://localhost/myproject/css/styles.css
- $font: arial, sans-serif;
- $main-color: #3D7169; $secondary-color: #000;
- h1 {
- font: 200% $font;
- color: $main-color;
- }
- p {
- background: $secondary-color;
- color: $main-color;
- font-family: $font;
- padding: 10px;
- }
变成为
- h1 {
- font: 200% arial, sans-serif;
- color: #3D7169;
- }
- p {
- background: #000;
- color: #3D7169;
- font-family: arial, sans-serif;
- padding: 10px;
- }
转自:http://blog.toeach.net/2009/03/19/how-to-add-variables-to-your-css-files/


 1万+
1万+

 被折叠的 条评论
为什么被折叠?
被折叠的 条评论
为什么被折叠?
 到【灌水乐园】发言


