


目录
简介
什么是ActiveMQ
消息队列(Message Queue)是一种进程间或者线程间的异步通信方式。使用消息队列,消息生产者会将消息保存在消息队列中,知道消息消费者来取走它。实现服务的解耦合,并提高系统的可靠性和扩展性。
目前常用的开源消息队列有很多,RabbitMQ、ActiveMQ、Redis、Kafka等,也就是常说的消息中间件。
本篇文章以Apache ActiveMQ为例,实战整合ActiveMQ的队列模式和广播模式两种以及兼容两种的实战。
JMS的概念
JMS
JMS即Java消息服务应用程序接口,是一个Java平台中关于面向消息中间件(MOM)的API,用于在两个应用程序之间,或分布式系统中发送消息,进行异步通信。Java消息服务是一个与具体平台无关的API,绝大多数中间件提供商都对JMS提供支持。JMS与ActiveMQ的关系类似于JDBC与JDBC驱动的关系。。
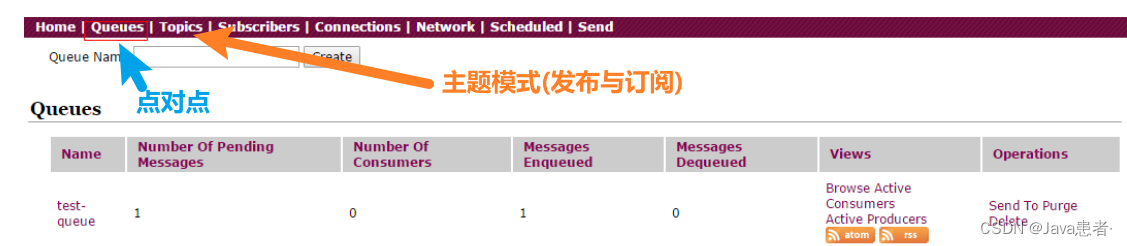
JMS包括两种消息模型:点对点、发布者/订阅者;
点对点式: – 消息发送者发送消息,消息代理将其放入一个队列中,消息接收者从队列中获取消息内容, 消息读取后被移出队列 – 消息只有唯一的发送者和接受者,但并不是说只能有一个接收者
发布订阅式: – 发送者(发布者)发送消息到主题,多个接收者(订阅者)监听(订阅)这个主题,那么 就会在消息到达时同时收到消息
JMS是定义了统一的接口,来对消息操作进行统一;
JMS限定了必须使用Java语言;
JMS规定了两种消息模型;而AMQP的消息模型更加丰富。
linux中安装并运行ActiveMQ
链接:https://pan.baidu.com/s/1tZSs6iefzKVLHSwxihQ3Nw?pwd=1234
提取码:1234
//复制到虚拟机,解压出来
tar -zxvf apache-activemq-5.14.5-bin.tar.gz

//解压完成之后,进入文件/bin目录下
cd apache-activemq-5.14.5/bin
//启动activemq
 ./activemq start
启动成功
注意:
关闭防火墙
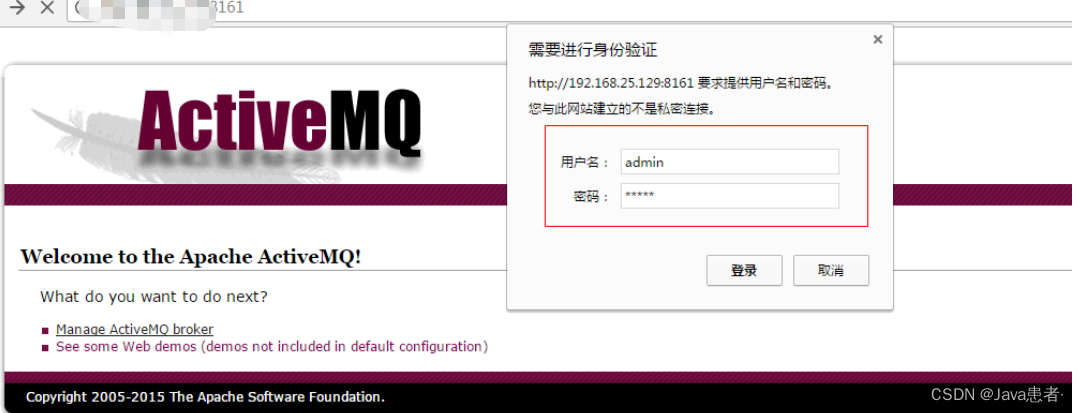
进入activemq管理页面
http://自己的IP地址:8161/ 即可进入ActiveMQ管理页面

输入账号密码均为:admin
SpringBoot整合ActiveMQ-队列模式
springboot版本:2.3.4.RELEASE
注意:
队列模式:
队列模式可以理解为先进先出模式,生产者发布完消息后存入队列中一直等监听者接收。监听者上线就会收到队列中的信息!但是只要收到,那么队列中的信息就会消失。
生产者
pom依赖
   <!-- ActiveMQ -->
        <dependency>
            <groupId>org.springframework.boot</groupId>
            <artifactId>spring-boot-starter-activemq</artifactId>
        </dependency>
  <dependency>
            <groupId>org.springframework.boot</groupId>
            <artifactId>spring-boot-starter-test</artifactId>
            <scope>test</scope>
        </dependency>
配置yml
spring:

  activemq:
    broker-url: tcp://自己的activemq服务器ip:61616
    packages:
      #配置信任所有的包,这个配置为了支持发送对象消息
      trust-all: true
    user: admin
    password: admin
启动类
@SpringBootApplication
@EnableJms #开启JMS
public class SpringBootThree {
    public static void main(String[] args) {
        SpringApplication.run(SpringBootThree.class,args);
    }
}
配置通道
/**
 * 专门配置mq通道的配置类
 */
@Configuration
public class QueueConfig {


    @Bean(name = "queueName")
    Queue queueName(){

        return  new ActiveMQQueue("test_queue");
    }


}
测试发送信息进入通道
@SpringBootTest
public class RedisTest {


  @Autowired
    JmsMessagingTemplate jmsMessagingTemplate;
@Autowired
    Queue queueName;
    @Test
    public void test5(){

            String message="我是发送消息的人,听得到吗";
            jmsMessagingTemplate.convertAndSend(queueName, message);

    }

}
接受者
pom依赖
<!-- ActiveMQ -->
        <dependency>
            <groupId>org.springframework.boot</groupId>
            <artifactId>spring-boot-starter-activemq</artifactId>
        </dependency>
yml配置
server:
  port: 10006


spring:

  activemq:
    broker-url: tcp://自己的activemq服务器的ip:61616
    packages:
      #配置信任所有的包,这个配置为了支持发送对象消息
      trust-all: true
    user: admin
    password: admin
启动类
@SpringBootApplication
public class ConsumerMain10006 {

    public static void main(String[] args) {
        SpringApplication.run(ConsumerMain10006.class,args);
    }
}
接受mq类
/**
 * 用于监听MQ
 */
@Component
public class MQConfig {


    @JmsListener(destination = "test_queue")
    public  void  onMessage(String message){


        System.out.print(message)
        //获取到消息后可以干一些事情


    }
}
SpringBoot整合ActiveMQ-主题模式
注意:
主题模式与队列模式的区别:
1、主题模式发布的消息,可以分发给所有订阅者
2、主题模式为发布订阅模式,只有订阅者(监听的类)在线时,才能接受到消息,如果中途连接进来,之前的消息是接收不到的,只能接收之后的信息!
生产者
生产者的pom、yml、启动类和队列模式一样
创建主题通道
/**
 * 专门配置mq通道的配置类
 */
@Configuration
public class QueueConfig {


    @Bean(name = "queueName")
    Queue queueName(){

        return  new ActiveMQQueue("test_queue");
    }

//主题(发布\订阅模式)通道
   @Bean(name="queueFind")
    Topic queueFind(){
        return new ActiveMQTopic("cctv");
    }


}
测试发信息进入主题
@SpringBootTest
public class RedisTest {


  @Autowired
    JmsMessagingTemplate jmsMessagingTemplate;
@Autowired
    Queue queueName;

@Autowired
Topic  queueFind;

    @Test
    public void test5(){

            String message="我是发送消息的人,你接受我就没了";
            jmsMessagingTemplate.convertAndSend(queueName, message);

    }

 @Test
    public void test6(){

            String message="我是主题可以发布所有监听我的人,但是我发布你必须在线";
            jmsMessagingTemplate.convertAndSend(queueFind, message);

    }

}
接受者
pom与启动类队列一样
yaml
spring:

  activemq:
    broker-url: tcp://自己acvtvemq服务器的ip:61616
    packages:
      #配置信任所有的包,这个配置为了支持发送对象消息
      trust-all: true
    user: admin
    password: admin

#开启主题策略,默认是关闭 开启主题模式
  jms:
    pub-sub-domain: true
接收类
/**
 * 用于监听MQ
 */
@Component
public class MQConfig {


    @JmsListener(destination = "test_queue")
    public  void  onMessage(String message){


        System.out.print(message)
        //获取到消息后可以干一些事情


    }


    @JmsListener(destination = "cctv")
    public  void  cctv(String message){


        System.out.print(message)
        //获取到消息后可以干一些事情


    }
}


 2825
2825


 被折叠的 条评论
为什么被折叠?
被折叠的 条评论
为什么被折叠?
 到【灌水乐园】发言


