


微信小程序保存当前画布指定区域的内容导出生成指定大小的图片,记录一下
api:wx.canvasToTempFilePath
效果:
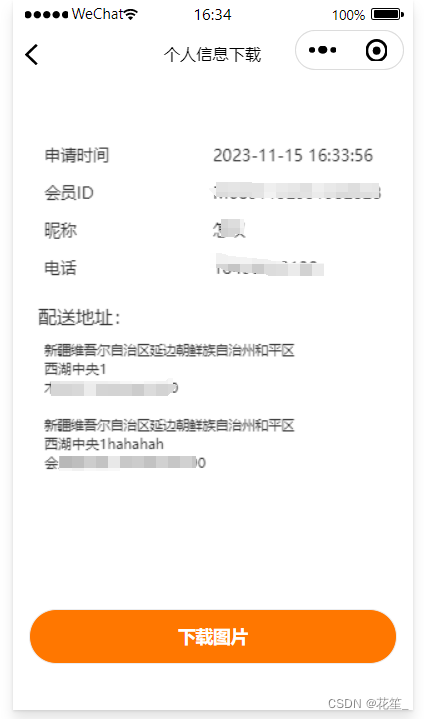
代码:wxml
 <canvas style="width: {{screenWidth}}px; height: {{canvasHeight}}px;" canvas-id="myCanvas"></canvas>

  <view class="bottom-btn">
    <van-button custom-class="info-sub" bind:tap="submit" block>下载图片</van-button>
  </view>
js
onLoad(options) {
	this.initCanvas()
},
initCanvas(){
	  // 自动计算收货地址高度,每一个收货地址占高度60,所以没加一条,高度+60
      let height = this.data.list.length <7?this.data.canvasHeight:this.data.canvasHeight + (this.data.list.length -6 )*60;
      console.log(height,'height');
      var ctx = wx.createCanvasContext('myCanvas')
      ctx.fillStyle = '#fff'  // 背景色一定要设置,否则下载到图库中会有bug
      ctx.fillRect( 0, 0, this.data.screenWidth, height)   // 设置画布宽高
      ctx.setFillStyle('#333')
      ctx.setFontSize(13);
      ctx.setTextAlign('left');
      // 填充内容
      ctx.fillText('申请时间', 25, 65, 200, 30);
      ctx.fillText(this.data.time, 160, 65, 200, 30);
      ctx.fillText('会员ID', 25, 95, 200, 30);
      ctx.fillText(this.data.member, 160, 95, 200, 30);
      ctx.fillText('昵称', 25, 125, 200, 30);
      ctx.fillText(this.data.nickName, 160, 125, 200, 30);
      ctx.fillText('电话', 25, 155, 200, 30);
      ctx.fillText(this.data.mobile, 160, 155, 200, 30);
      ctx.setFontSize(15);
      ctx.setFillStyle('#333')
      ctx.fillText('配送地址:', 20, 195, 200, 30);
      ctx.setFillStyle('#333')
      ctx.setFontSize(11);
      // 地址是循环出来的,由于后端返回省市区是编号,我这边要转换
      for (var i = 0; i < this.data.list.length; i++) {
        let pro = seekProvince(this.data.list[i].province).name
        let city = seekCity(this.data.list[i].city).name
        let area = seekArea(this.data.list[i].area).name
        ctx.fillText(pro+city+area, 25, 220+(i*60), 200, 30);
        ctx.fillText(this.data.list[i].addressDetail, 25, i==0?235:235+(i*60), 200, 30);
        ctx.fillText(this.data.list[i].memberName+' '+this.data.list[i].mobile, 25, i==0?250:250+(i*60), 200, 30);
      }
      let self = this
      // 这里需要注意,直接使用ctx.draw(),会提示我报错画布为空,将延迟期异步写到draw回调里,可以解决这个问题
      ctx.draw(false,
        async()=>{
          setTimeout(() => {
            wx.canvasToTempFilePath({
              x: 0,
              y: 0,
              width: self.data.screenWidth,
              height: self.data.canvasHeight,
              destWidth: self.data.screenWidth * 3,
              destHeight: self.data.canvasHeight * 3,
              canvasId: 'myCanvas',
              success(res) {
                self.setData({
                  temp_path: res.tempFilePath
                })
                console.log(res.tempFilePath)
              },
              fail(err){
                console.log(err,'这是报错的');
              }
            },self)
          }, 100);
        }
      )
    },
// 点击下载图片将画布内容下载到手机相册中
submit() {
    this.saveImgToAlbum()
  },
  saveImgToAlbum() {
      console.log(this.data.temp_path,'----')
      let self = this
      wx.showLoading({
        title: '保存中...',
        icon: 'none'
      })
      setTimeout(()=>{
          wx.saveImageToPhotosAlbum({
              filePath: self.data.temp_path,
              success(res) {
                  wx.hideLoading({
                    success: (res) => {},
                  })
                  wx.showToast({
                      title: '保存成功',
                      icon: 'none'
                  })
              },
              fail(res) {
                  wx.hideLoading({
                      success: (res) => {},
                    })
                  wx.showToast({
                      title: '保存失败,请重新保存'+res.errMsg,
                      icon: 'none'
                  })
                  console.log(res.errMsg)
                   wx.getSetting({
                      success(res) {
                          if (!res.authSetting['scope.writePhotosAlbum']) {
                              self.setData({
                                  showAuth: true
                              })
                          } else {
                              self.setData({
                                  showAuth: false
                              })
                          }
                      }
                  })

              }
          })
      }, 1000)
  },
css部分就不写了,主要是底部按钮的样式,至此就完成啦!


 1万+
1万+


 被折叠的 条评论
为什么被折叠?
被折叠的 条评论
为什么被折叠?
 到【灌水乐园】发言


