


上一篇我们创建了个简单的app,接下来,我们用webview打开一个本地html页面,并做相关的交互。
1、首先,我们先创建一个新的activity用来全屏显示webview连接的html页面。
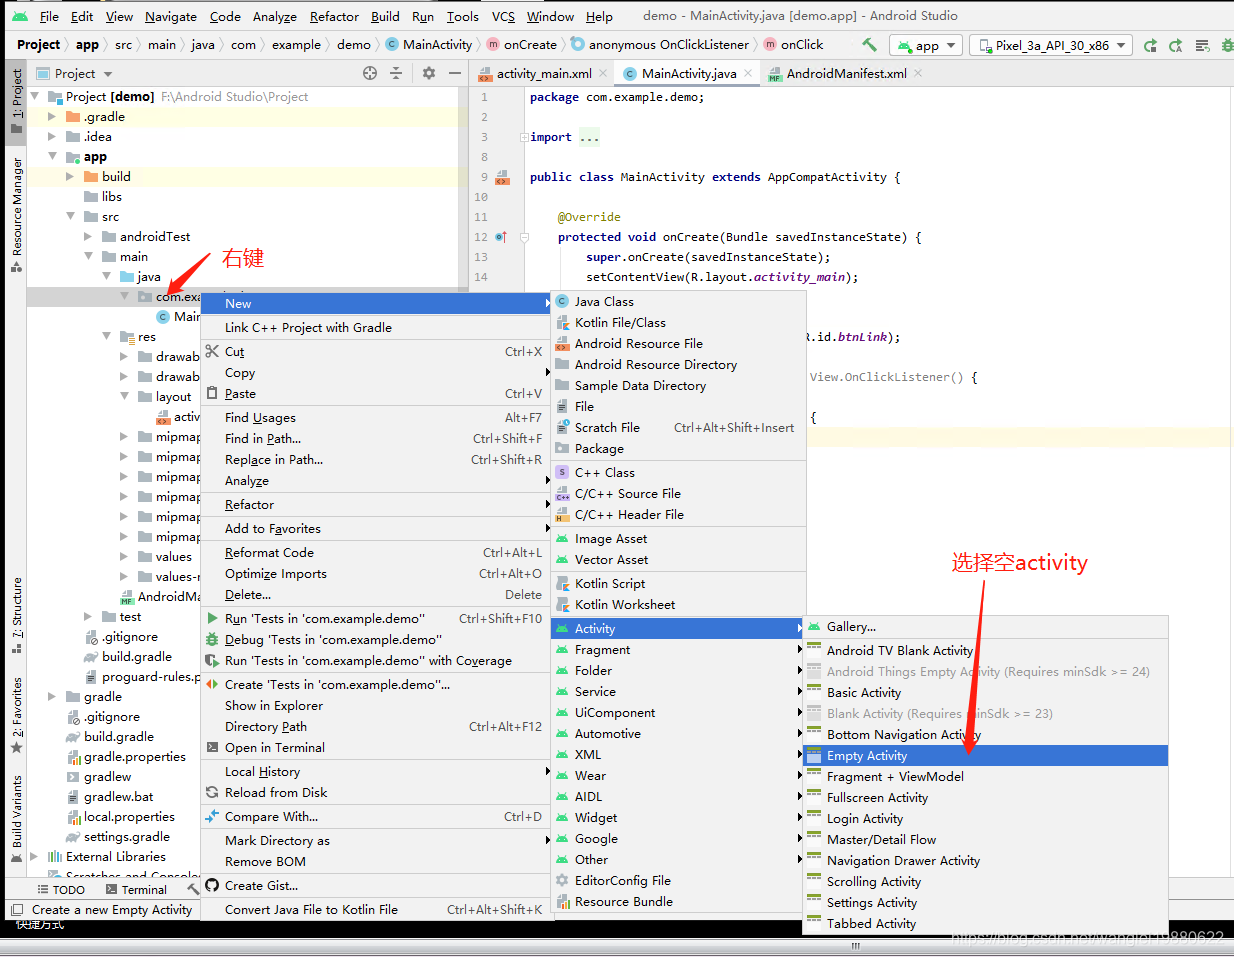
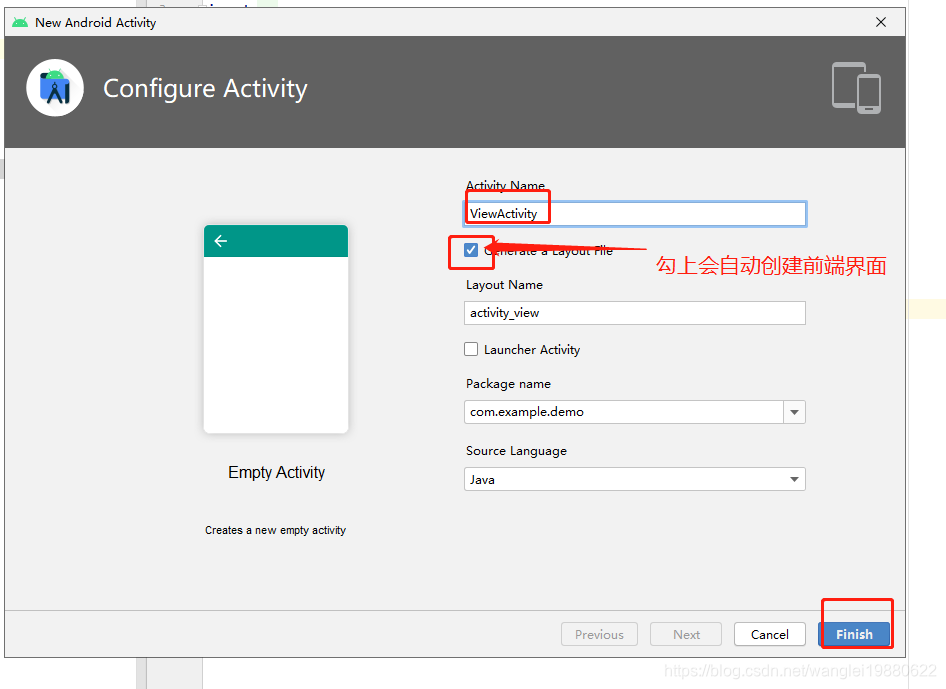
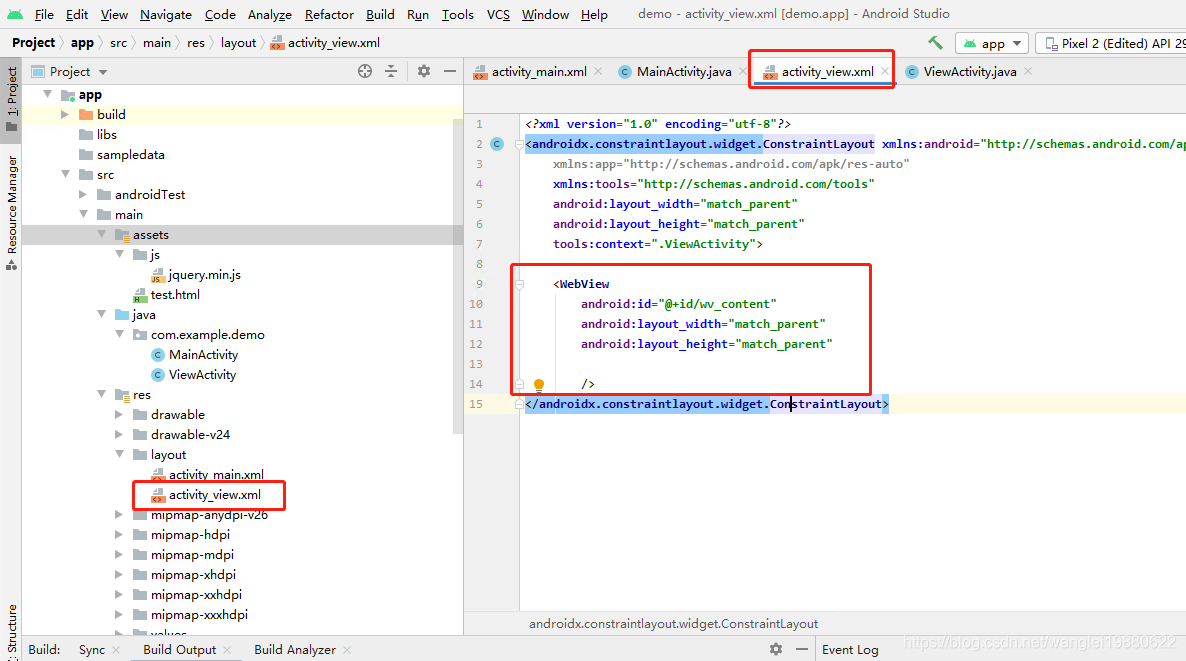
生成过程中会自动在AndroidManifest.xml配置上添加activity配置。并在res/layout文件夹下创建对应的view文件,如下图所示

2、接下来我们在新的activity上加一个webview控件
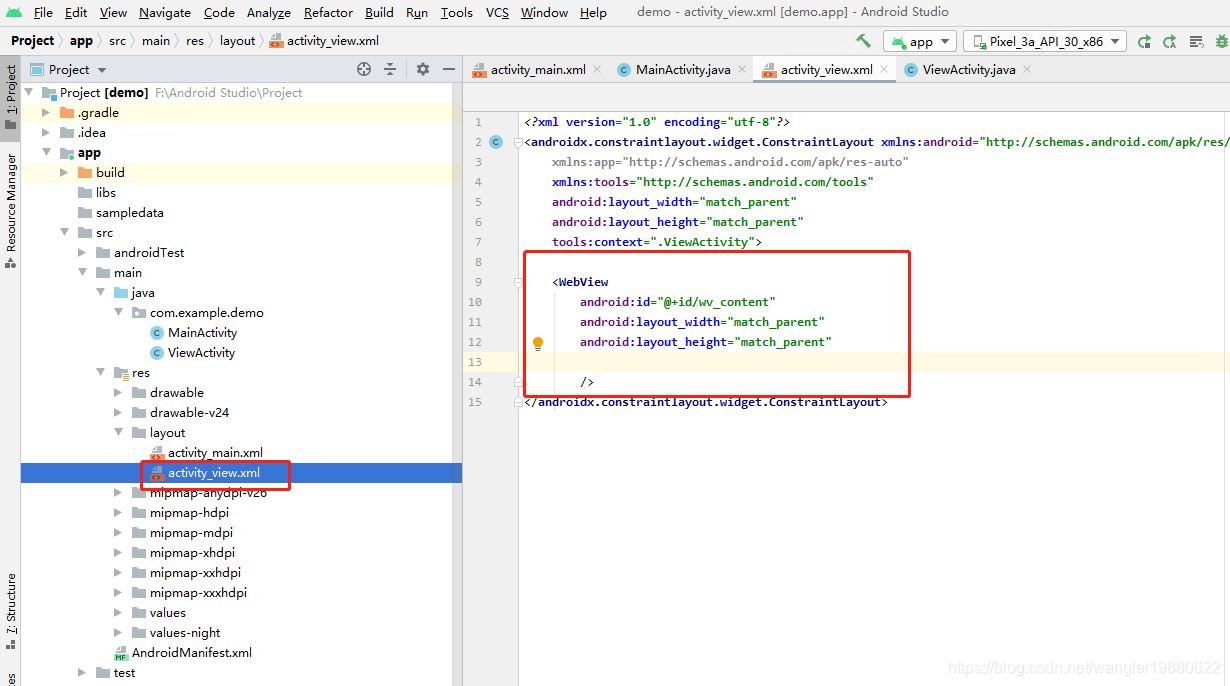
3、在对应的activity页面添加控件定义
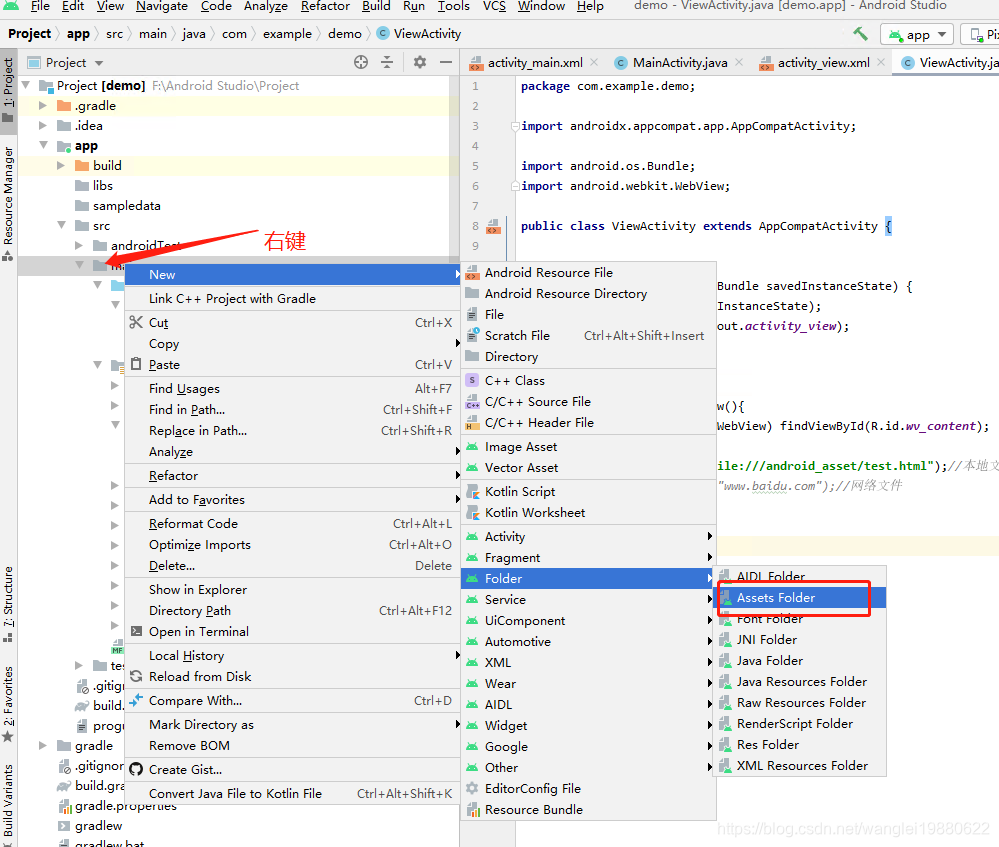
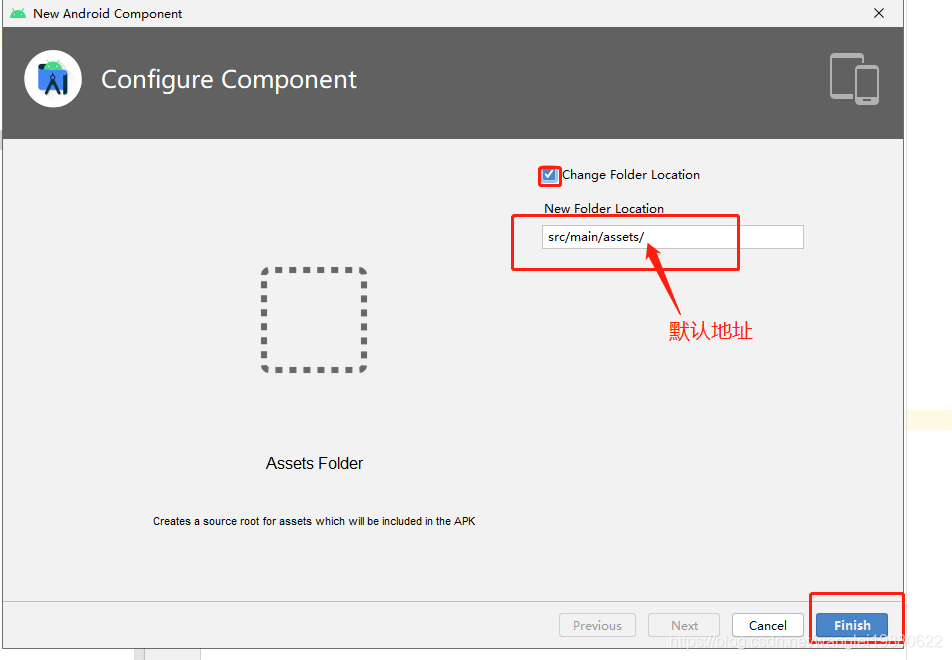
4、添加一个本地html页面


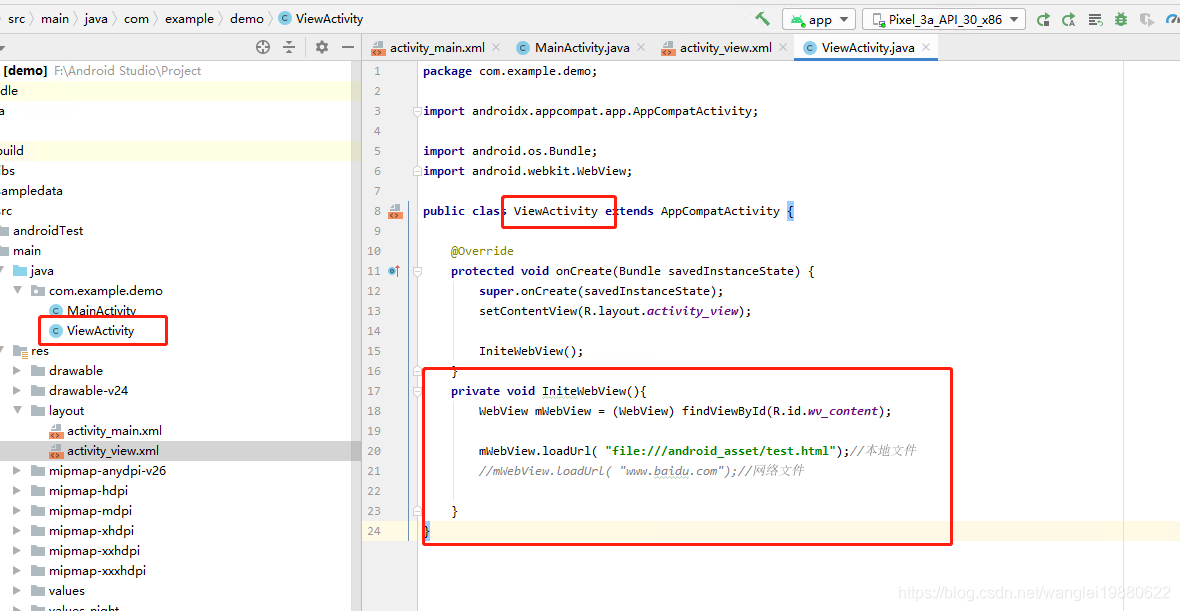
5、编辑新Activity(ViewActivity)页面。
 <WebView
        android:id="@+id/wv_content"
        android:layout_width="match_parent"
        android:layout_height="match_parent"

 />
接下来对webview进行控制,在ViewActivity中进行代码操作
package com.example.demo;

import androidx.appcompat.app.AppCompatActivity;

import android.content.Context;
import android.content.pm.PackageInfo;
import android.content.pm.PackageManager;
import android.os.Bundle;
import android.os.Handler;
import android.os.Message;
import android.text.TextUtils;
import android.webkit.JavascriptInterface;
import android.webkit.WebSettings;
import android.webkit.WebView;

public class ViewActivity extends AppCompatActivity {
    private WebView mWebView;
    private  final int hand_js_doJsFunction = 1;

    @Override
    protected void onCreate(Bundle savedInstanceState) {
        super.onCreate(savedInstanceState);
        setContentView(R.layout.activity_view);

        IniteWebView();
    }
    //绑定webview配置及加载本地页面
    private void IniteWebView(){
        mWebView = (WebView) findViewById(R.id.wv_content);

        WebSettings settings = mWebView.getSettings();
        //允许js交互
        settings.setJavaScriptEnabled(true);

        mWebView.loadUrl( "file:///android_asset/test.html");//本地文件
        //mWebView.loadUrl( "www.baidu.com");//网络文件

        //定义给页面js调用app的方法
        mWebView.addJavascriptInterface(appToJsObject, "AndroidJS");

    }


    //== webview 与js交互=========================
    //定义提供html页面调用的方法
    public final Object appToJsObject = new Object() {

        @JavascriptInterface
        public void GetAppInfo() {//获取app信息
            String appInfo =  getAppInfo();

            doJsFunction("backInfo('"+appInfo+"')");
        }
    };
    //定义公共方法调用页面js方法
    public void doJsFunction(String _url)
    {

        Message msg = new Message();
        msg.what = hand_js_doJsFunction;
        Bundle bundle = new Bundle();
        bundle.putString("url",_url);  //往Bundle中存放数据
        msg.setData(bundle);//mes利用Bundle传递数据
        handler.sendMessage(msg);//用activity中的handler发送消息

    }
    //用handler访问让方法在主进程内处理
    Handler handler = new Handler(){
        @Override
        public void handleMessage(Message msg) {

            String[] args = (String[]) msg.obj;

            switch (msg.what) {

                case hand_js_doJsFunction:
                    // String str1 = msg.getData().getString("url");//接受msg传递过来的参数
                    //调用页面js方法
                    mWebView.loadUrl("javascript:"+msg.getData().getString("url"));
                    break;

                default:
                    break;

            }

        }
    };

    //获取应用信息
    public  String getAppInfo() {
        String info = "";
        try {
            Context mContext = getApplicationContext();
            PackageManager packageManager = mContext.getPackageManager();
            PackageInfo packageInfo = packageManager.getPackageInfo(mContext.getPackageName(), 0);
            info += "版本号:" + packageInfo.versionName + "\n";
            info += "包  名:" + packageInfo.packageName + "\n";


        } catch (Exception e) {
            e.printStackTrace();
        }
        return info;
    }

}
对应的test.html页面
<!DOCTYPE html PUBLIC "-//W3C//DTD XHTML 1.0 Transitional//EN" "http://www.w3.org/TR/xhtml1/DTD/xhtml1-transitional.dtd">
<html xmlns="http://www.w3.org/1999/xhtml">
<head>
    <meta charset="utf-8">
    <title></title>

    <script src="js/jquery.min.js"></script>
</head>
<body>
<p>webviewer交互</p>
<br />
<input type="button" id="btn1" value="查看app信息" onclick="UploadFiles()" />
<p id="detail">
</p>
</body>

<script type="text/javascript">

    $(function () {
        $("#btn1").on("click", function (e) {
			var _info =  window.AndroidJS.GetAppInfo();
			$("#detail").html("开始请求app信息...\n");

        });
    })

	function backInfo(str) {
		var _html = $("#detail").html() + "\n";
		_html += str;
		$("#detail").html( _html);
	}

</script>
</html>
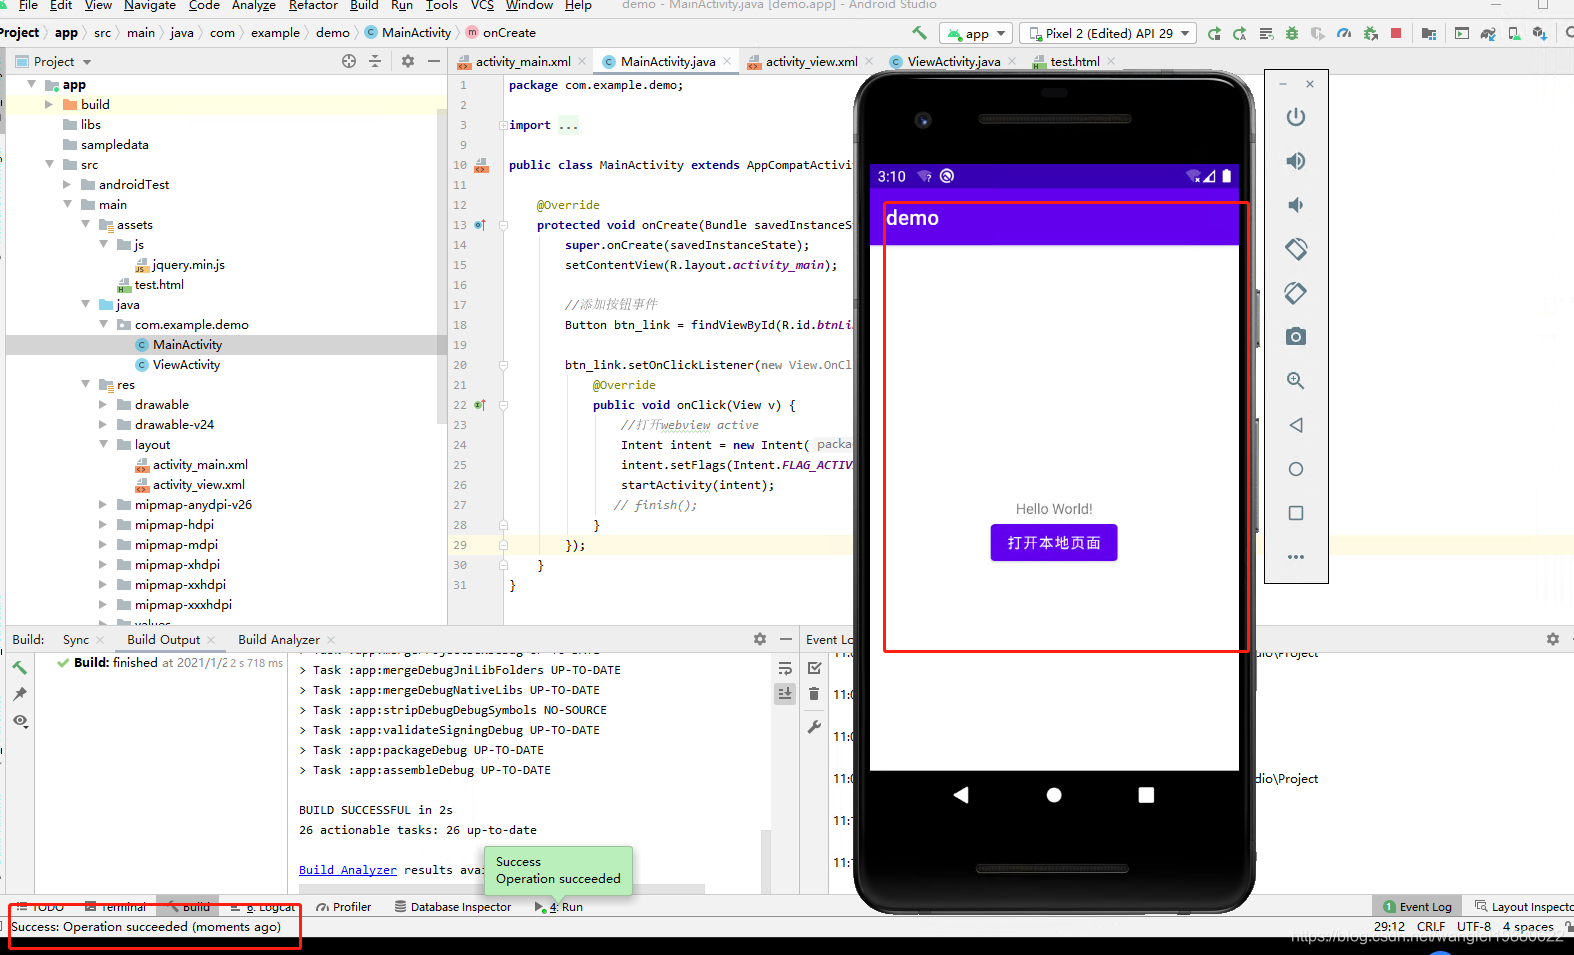
6、在MainActivity中添加按钮跳转方法
前端页面activity_main.xml
<?xml version="1.0" encoding="utf-8"?>
<androidx.constraintlayout.widget.ConstraintLayout xmlns:android="http://schemas.android.com/apk/res/android"
    xmlns:app="http://schemas.android.com/apk/res-auto"
    xmlns:tools="http://schemas.android.com/tools"
    android:layout_width="match_parent"
    android:layout_height="match_parent"
    tools:context=".MainActivity">

    <TextView
        android:id="@+id/hello"
        android:layout_width="wrap_content"
        android:layout_height="wrap_content"
        android:text="Hello World!"
        app:layout_constraintBottom_toBottomOf="parent"
        app:layout_constraintLeft_toLeftOf="parent"
        app:layout_constraintRight_toRightOf="parent"
        app:layout_constraintTop_toTopOf="parent" />

    <Button
        android:id="@+id/btnLink"
        android:layout_width="wrap_content"
        android:layout_height="wrap_content"
        android:text="打开本地页面"
        app:layout_constraintLeft_toLeftOf="parent"
        app:layout_constraintRight_toRightOf="parent"
        app:layout_constraintTop_toBottomOf="@+id/hello">

    </Button>

</androidx.constraintlayout.widget.ConstraintLayout>
MainActivity 页面
package com.example.demo;
import androidx.appcompat.app.AppCompatActivity;
import android.content.Intent;
import android.os.Bundle;
import android.view.View;
import android.widget.Button;
public class MainActivity extends AppCompatActivity {
@Override
protected void onCreate(Bundle savedInstanceState) {
super.onCreate(savedInstanceState);
setContentView(R.layout.activity_main);
//添加按钮事件
Button btn_link = findViewById(R.id.btnLink);
btn_link.setOnClickListener(new View.OnClickListener() {
@Override
public void onClick(View v) {
//打开webview active
Intent intent = new Intent(MainActivity.this, ViewActivity.class);
intent.setFlags(Intent.FLAG_ACTIVITY_CLEAR_TOP);
startActivity(intent);
// finish();
}
});
}
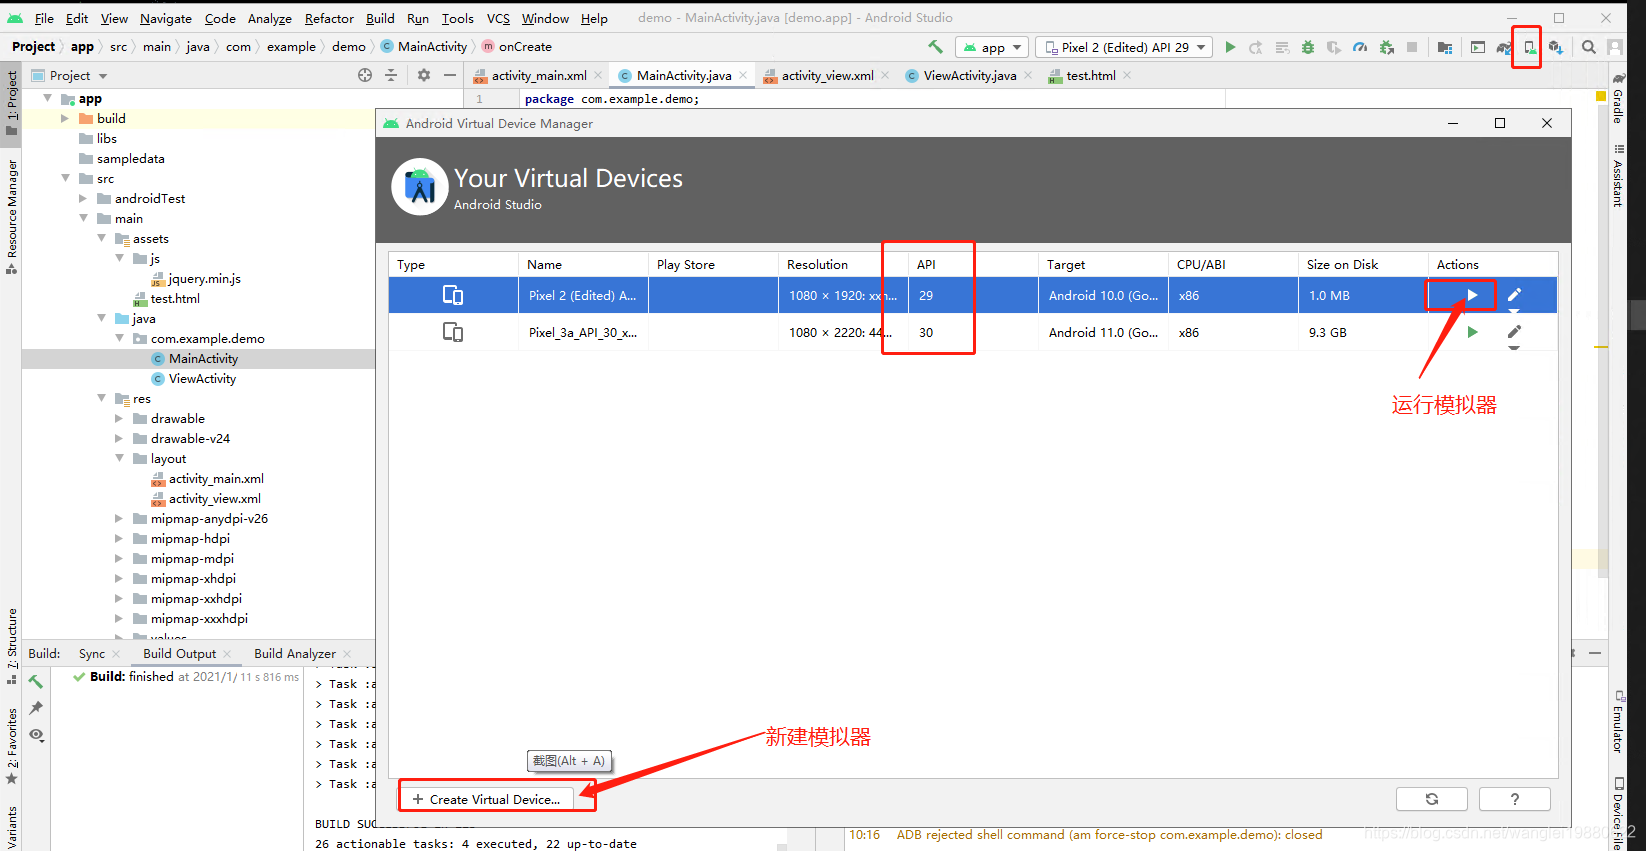
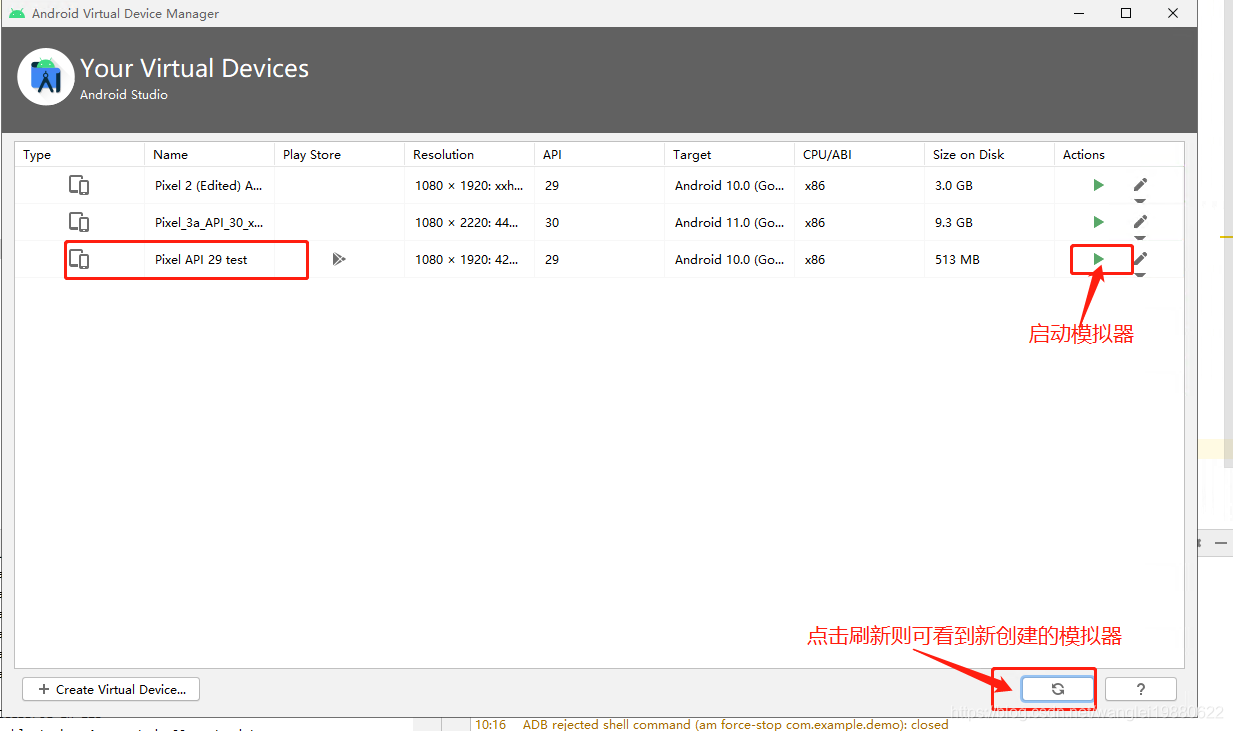
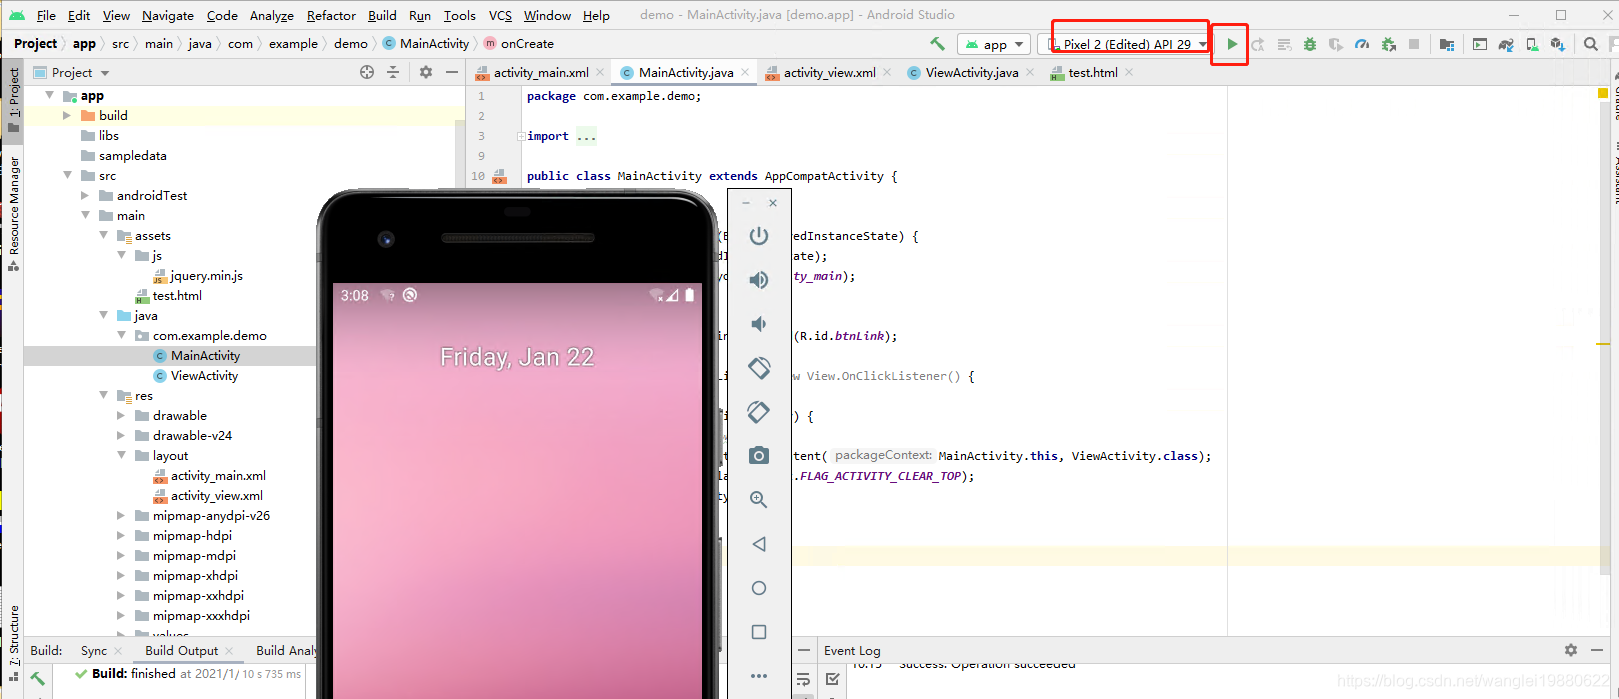
}7、运行app
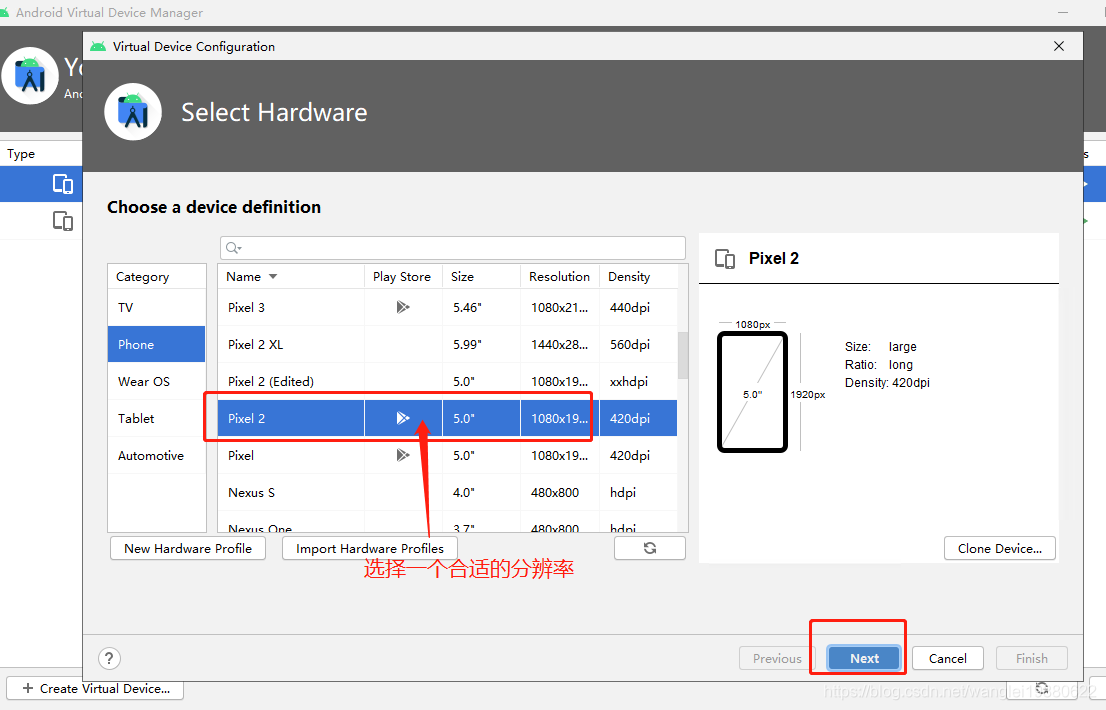
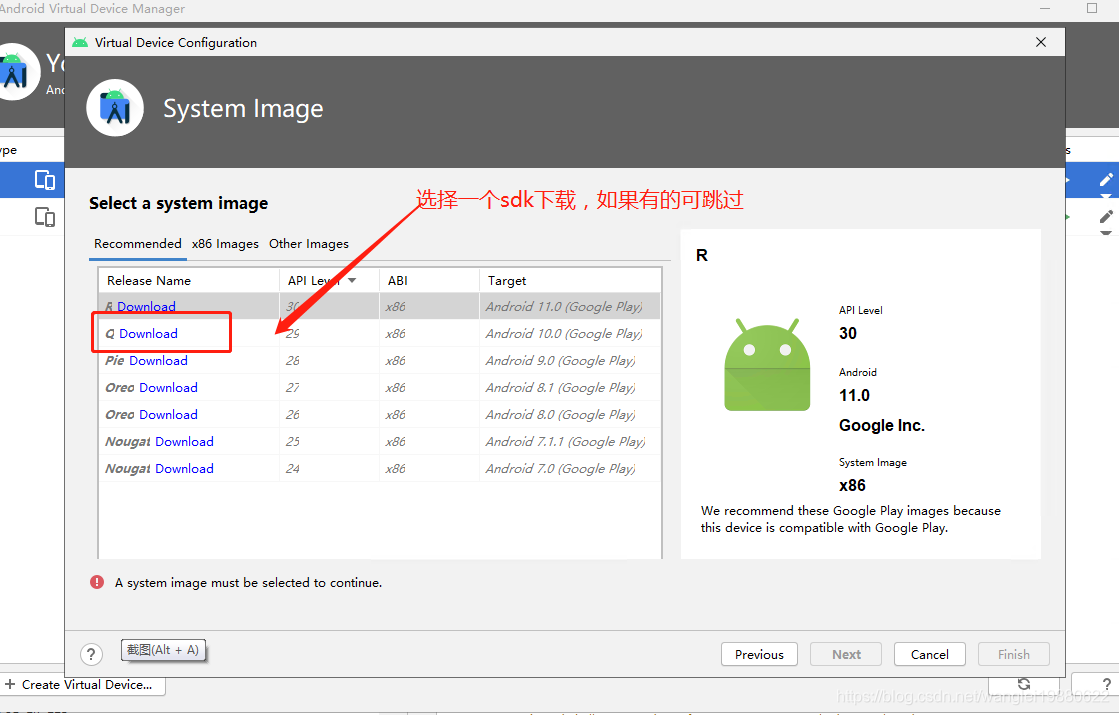
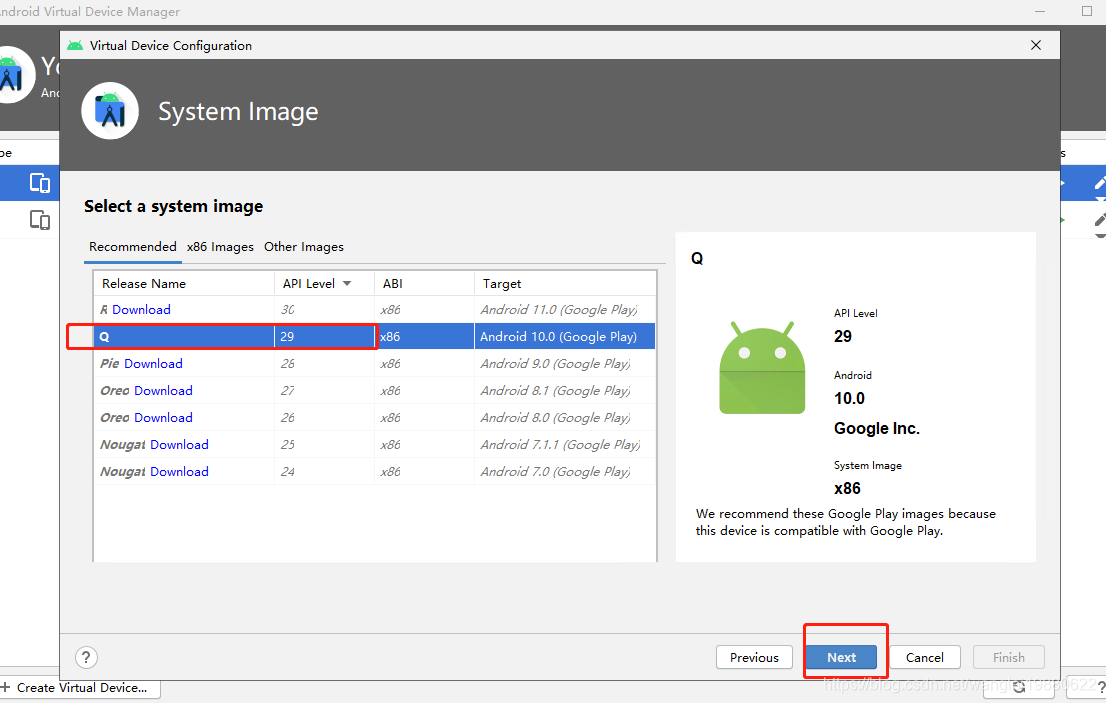
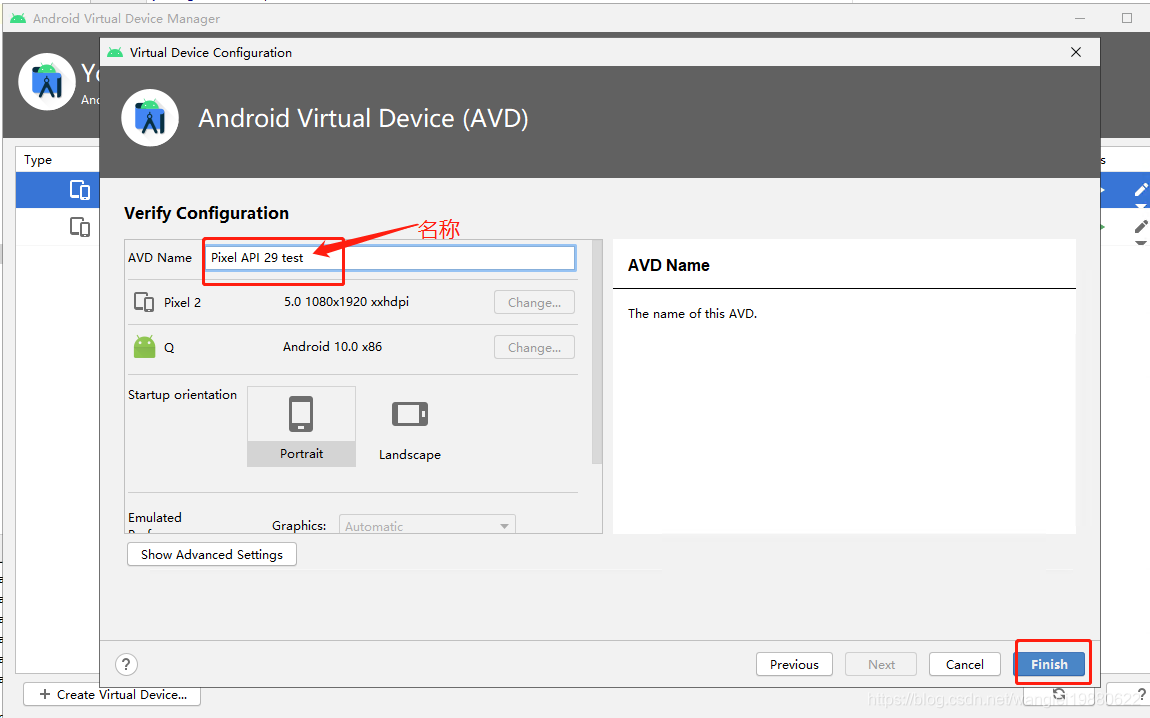
创建并运行模拟器(如果有则直接运行)
主要代码在上面已经都有了,整个工程放在下面的下载地址。设置的是0分,不过现在csnd有时候会自动改,也是醉了。


 1万+
1万+

 被折叠的 条评论
为什么被折叠?
被折叠的 条评论
为什么被折叠?
 到【灌水乐园】发言


