


上一篇文章《UiAutomator源码分析之UiAutomatorBridge框架》中我们把UiAutomatorBridge以及它相关的类进行的描述,往下我们会尝试根据两个实例将这些类给串联起来,我准备做的是用如下两个很有代表性的实例:
- 注入事件
- 获取控件
这一篇文章我们会通过分析UiDevice的pressHome这个方法来分析UiAutomator是如何注入事件的,下一篇文章会描述如何获取控件,敬请期待。
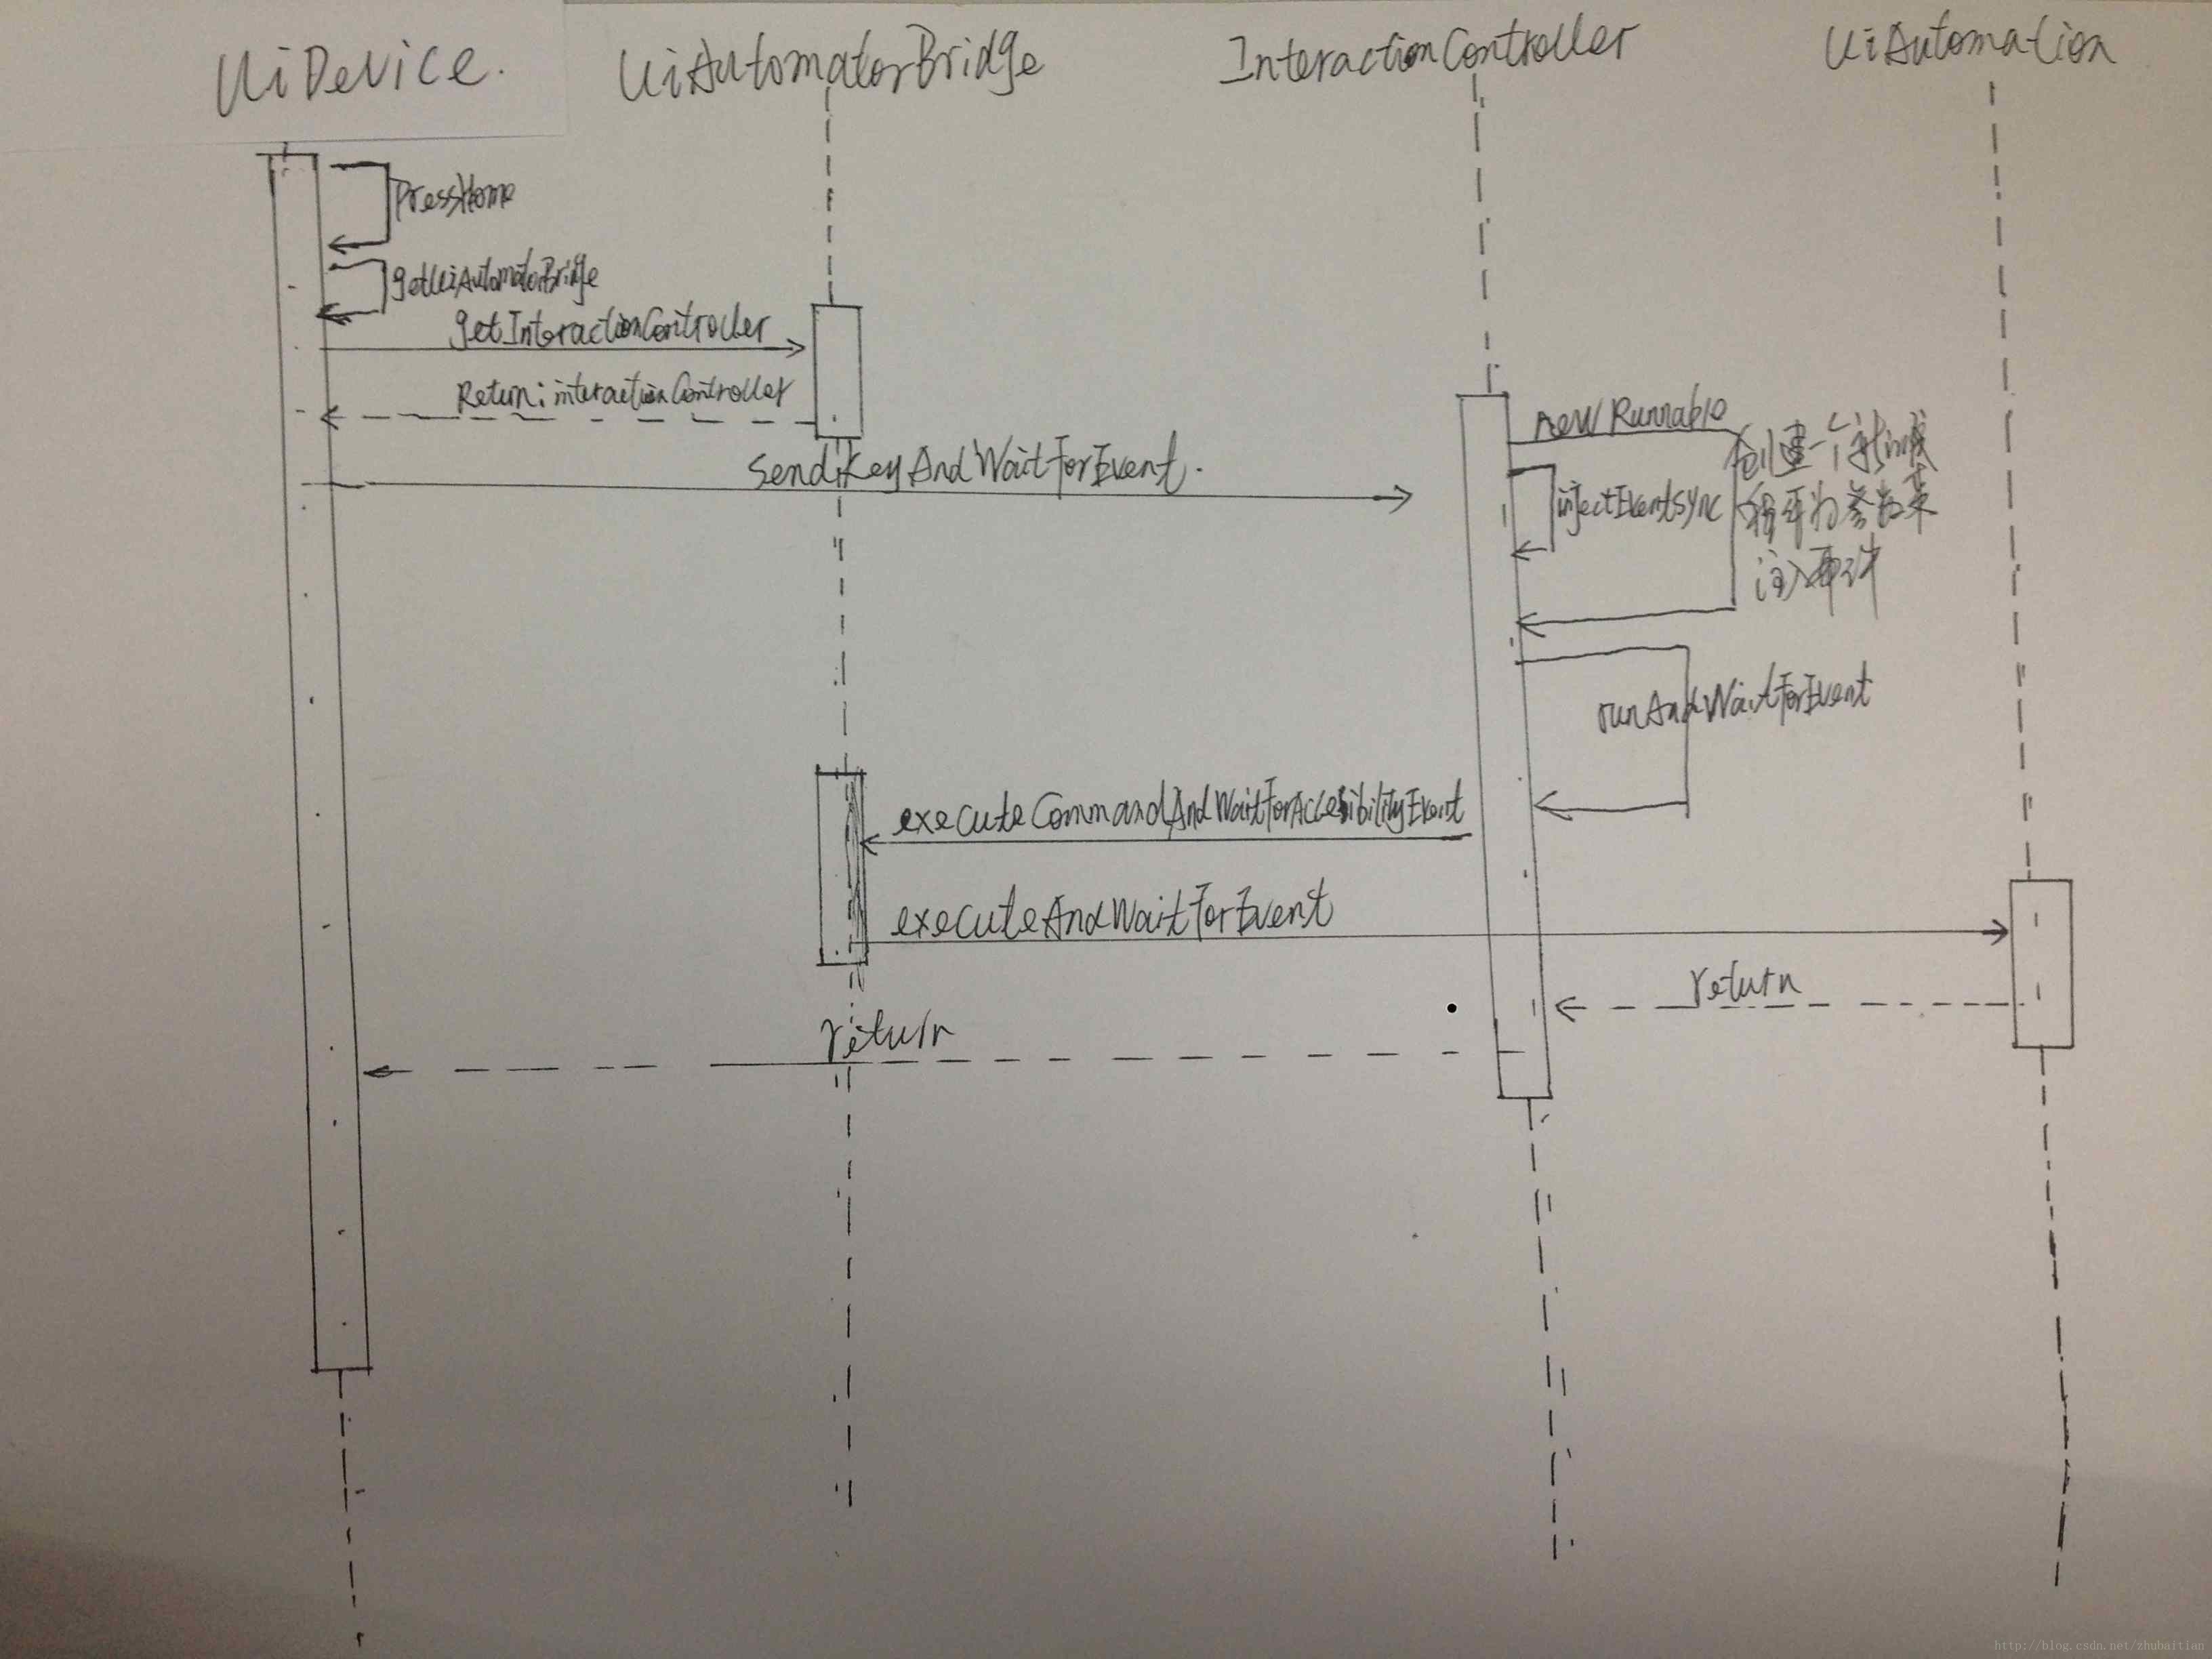
1. UiObject.pressHome顺序图
首先我们看一下我手画的非规范的顺序图,从中我们可以看到pressHome这个动作究竟需要和多少个类进行交互,以及它们是怎么交互的。
2.这些类是什么时候初始化的
在我们编写测试用例脚本的时候我们不会对以上所有的类进行初始化,包括UiObject对象都是通过直接在脚本中调用父类UiAutomationTestCase的getUiDevice()这个方法来获得的。其实这些都是在uiautomator运行时由RunTestCommand类的start()这个方法进行初始化的,具体请看《
UIAutomator源码分析之启动和运行》的 3.6章节“初始化UiDevice和UiAutomationBridge“,这里就不做累述。我们这里会看下在初始化UiAutomatorBridge的时候是如何把QuneryControoler和InteractionController一并初始化了的,具体请看UiAutomatorBridge的构造函数:
- /* */ UiAutomatorBridge(UiAutomation uiAutomation)
- /* */ {
- /* 48 */ this.mUiAutomation = uiAutomation;
- /* 49 */ this.mInteractionController = new InteractionController(this);
- /* 50 */ this.mQueryController = new QueryController(this);
- /* */ }
3. 代码跟踪
首先看UiDevice的pressHome方法:
- public boolean pressHome() {
- 218 Tracer.trace();
- 219 waitForIdle();
- 220 return getAutomatorBridge().getInteractionController().sendKeyAndWaitForEvent(
- 221 KeyEvent.KEYCODE_HOME, 0, AccessibilityEvent.TYPE_WINDOW_CONTENT_CHANGED,
- 222 KEY_PRESS_EVENT_TIMEOUT);
- 223 }
220行:
- 获得UiDevice对象保存的UiAutomatorBridge对象。着两个对象都是在运行时初始化的,不清楚的话请翻看上面提到的文章
- 通过UiAutomatorBridge对象获得上面章节初始化的InteractionController对象
- 调用InteractionController对象的sendKeyAndWaitForEvent方法,里面参数关键是第一个keycode和第二个eventType
- keycode:代表我们要注入的是按下哪个按键的事件,比如这里我们是KEYCODE_HOME
- eventType:代表我们注射了该事件后预期会获得窗口返回来的哪种AccessibilityEvent类型,比如我们这里是TYPE_WINDOW_CONTENT_CHANGE
- /* */ public boolean sendKeyAndWaitForEvent(final int keyCode, final int metaState, int eventType, long timeout)
- /* */ {
- /* 188 */ Runnable command = new Runnable()
- /* */ {
- /* */ public void run() {
- /* 191 */ long eventTime = SystemClock.uptimeMillis();
- /* 192 */ KeyEvent downEvent = new KeyEvent(eventTime, eventTime, 0, keyCode, 0, metaState, -1, 0, 0, 257);
- /* */
- /* */
- /* 195 */ if (InteractionController.this.injectEventSync(downEvent)) {
- /* 196 */ KeyEvent upEvent = new KeyEvent(eventTime, eventTime, 1, keyCode, 0, metaState, -1, 0, 0, 257);
- /* */
- /* */
- /* 199 */ InteractionController.this.injectEventSync(upEvent);
- /* */ }
- /* */
- /* */ }
- /* 203 */ };
- /* 204 */ return runAndWaitForEvents(command, new WaitForAnyEventPredicate(eventType), timeout) != null;
- /* */ }
- /* */ private boolean injectEventSync(InputEvent event) {
- /* 655 */ return this.mUiAutomatorBridge.injectInputEvent(event, true);
- /* */ }
- /* */ public boolean injectInputEvent(InputEvent event, boolean sync) {
- /* 70 */ return this.mUiAutomation.injectInputEvent(event, sync);
- /* */ }
我们继续看InteractionController中真正执行注入事件线程的runAndWaitForEvents方法:
- /* */ private AccessibilityEvent runAndWaitForEvents(Runnable command, UiAutomation.AccessibilityEventFilter filter, long timeout)
- /* */ {
- /* */ try
- /* */ {
- /* 161 */ return this.mUiAutomatorBridge.executeCommandAndWaitForAccessibilityEvent(command, filter, timeout);
- /* */ }
- /* */ catch (TimeoutException e) {
- /* 164 */ Log.w(LOG_TAG, "runAndwaitForEvent timedout waiting for events");
- /* 165 */ return null;
- /* */ } catch (Exception e) {
- /* 167 */ Log.e(LOG_TAG, "exception from executeCommandAndWaitForAccessibilityEvent", e); }
- /* 168 */ return null;
- /* */ }
- /* */ public AccessibilityEvent executeCommandAndWaitForAccessibilityEvent(Runnable command, UiAutomation.AccessibilityEventFilter filter, long timeoutMillis) throws TimeoutException
- /* */ {
- /* 104 */ return this.mUiAutomation.executeAndWaitForEvent(command, filter, timeoutMillis);
- /* */ }
| Item | Description | Warning |
| Author | 天地会珠海分舵 | 转载请注明出处! 更多精彩文章请查看本人博客! |
| Blog Address |


 2608
2608


 被折叠的 条评论
为什么被折叠?
被折叠的 条评论
为什么被折叠?
 到【灌水乐园】发言


