


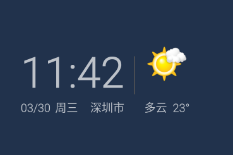
最近无聊,写了一个天气挂件,再不写代码,就快荒废了~~~
不多说了,上源码:https://github.com/WanShenHere/WeatherWidget.git
首先,考虑天气数据的来源。在网上找了半天,最后还是用的聚合数据的天气数据。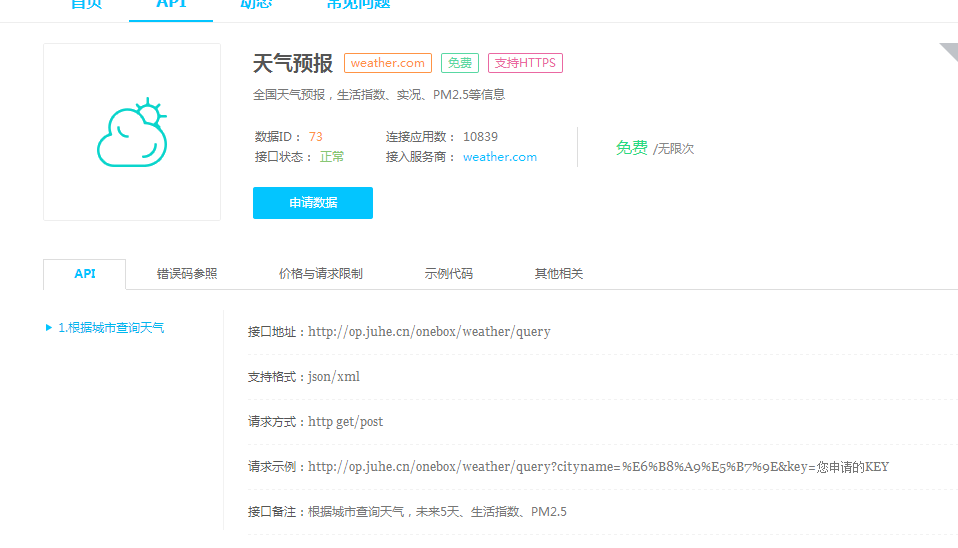
这是自己写的申请数据接口:
public class HttpApi {
private static HttpUtils httpUtils = new HttpUtils();
public static void getJsonData(String cityName,
final OnHttpRequestCallBack<StatusBean> callBack) {
String url = Constant.URL;
url = url + "?cityname=" + cityName + "&key=" + Constant.APIKEY;
httpUtils.send(HttpMethod.GET, url, new RequestCallBack<String>() {
@Override
public void onFailure(HttpException arg0, String arg1) {
Log.e("API", "下载失败");
}
@Override
public void onSuccess(ResponseInfo<String> responseInfo) {
String result = responseInfo.result;
StatusBean statusBean = null;
try {
statusBean = new Gson().fromJson(result, StatusBean.class);
callBack.onSuccess(statusBean);
} catch (Exception e) {
// TODO: handle exception
}
}
});
}
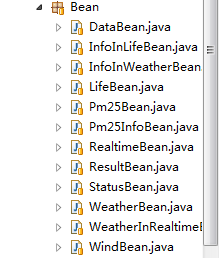
}这里是用的xutils 工具申请数据,使用了gson把数据解析成了StatusBean对象,方便使用。由于聚合数据提供的字符串数据较复杂,所以对应数据建立了比较多的Bean。
 得到了天气数据,现在还缺的就是定位了。这里使用的是百度定位api,具体流程网上都有,按百度api文档来写就可以了。

 下面是写布局文件:
    <?xml version="1.0" encoding="utf-8"?>
<RelativeLayout xmlns:android="http://schemas.android.com/apk/res/android"
    android:layout_width="match_parent"
    android:layout_height="wrap_content" >

    <TextView
        android:id="@+id/tv_time"
        android:layout_width="wrap_content"
        android:layout_height="wrap_content"
        android:layout_alignParentLeft="true"
        android:layout_alignParentTop="true"
        android:text="11:24"
        android:textSize="45sp" />

    <TextView
        android:id="@+id/tv_day"
        android:layout_width="wrap_content"
        android:layout_height="wrap_content"
        android:layout_below="@id/tv_time"
        android:text="3/17"
        android:textSize="12sp" />

    <TextView
        android:id="@+id/tv_week"
        android:layout_width="wrap_content"
        android:layout_height="wrap_content"
        android:layout_below="@id/tv_time"
        android:layout_marginLeft="5dp"
        android:layout_toRightOf="@id/tv_day"
        android:text="周四"
        android:textSize="12sp" />

    <TextView
        android:id="@+id/tv_city"
        android:layout_width="wrap_content"
        android:layout_height="wrap_content"
        android:layout_alignRight="@id/tv_time"
        android:layout_below="@id/tv_time"
        android:text="深圳市"
        android:textSize="12sp" />

    <TextView
        android:id="@+id/v_h"
        android:layout_width="1dp"
        android:layout_height="40dp"
        android:layout_marginLeft="10dp"
        android:layout_marginRight="10dp"
        android:layout_marginTop="15dp"
        android:layout_toRightOf="@id/tv_time"
        android:background="#555" />

    <ImageView
        android:id="@+id/iv_pic"
        android:layout_width="46dp"
        android:layout_height="46dp"
        android:layout_toRightOf="@id/v_h"
        android:src="@drawable/ic_launcher" />

    <TextView
        android:id="@+id/tv_weather"
        android:layout_width="wrap_content"
        android:layout_height="wrap_content"
        android:layout_alignBottom="@id/tv_city"
        android:layout_alignLeft="@id/iv_pic"
        android:text="阵雨 17°"
        android:textSize="12sp" />

</RelativeLayout>
再就是按写widget的流程,要有WeatherService
public class WeatherService extends Service {
    Timer timer;
    StatusBean statusBean;
    String cityname = null;

    public LocationClient mLocationClient = null;
    public BDLocationListener myListener = new MyLocationListener();
    private SimpleDateFormat sdf = new SimpleDateFormat("HH:mm");

    @Override
    public IBinder onBind(Intent arg0) {

        return null;
    }

    @Override
    public void onCreate() {
        super.onCreate();

        mLocationClient = new LocationClient(getApplicationContext()); // 声明LocationClient类
        mLocationClient.registerLocationListener(myListener);
        initLocation();
        mLocationClient.start();

        timer = new Timer();
        timer.schedule(new TimerTask() {

            @Override
            public void run() {
                updateTime();
            }
        }, 0, 1000);

    }

    @Override
    public void onDestroy() {
        super.onDestroy();

    }

    private void updateTime() {
        String time = sdf.format(new Date());
        RemoteViews rv = new RemoteViews(getPackageName(), R.layout.widget);
        rv.setTextViewText(R.id.tv_time, time);
        AppWidgetManager manager = AppWidgetManager
                .getInstance(getApplicationContext());
        ComponentName cn = new ComponentName(getApplicationContext(),
                WidgetProvider.class);
        manager.updateAppWidget(cn, rv);
    }

    public class MyLocationListener implements BDLocationListener {

        @Override
        public void onReceiveLocation(BDLocation bdLocation) {
            String cityname = bdLocation.getCity();
            if (cityname == null) {
                Log.e("cityname", "定位失败");
                return;
            }
            initData(cityname);

        }
    }

    private void initData(String cityname) {
        HttpApi.getJsonData(cityname, new OnHttpRequestCallBack<StatusBean>() {

            @Override
            public void onSuccess(StatusBean result) {
                statusBean = result;
                Log.e("statusBean", statusBean.toString());
                if (statusBean != null) {
                    RealtimeBean realtime = statusBean.getResult().getData()
                            .getRealtime();

                    RemoteViews rv = new RemoteViews(getPackageName(),
                            R.layout.widget);
                    String date = realtime.getDate();
                    String[] arr = date.split("-");
                    String dayString = arr[1] + "/" + arr[2];
                    Log.e("dayString", dayString);

                    rv.setTextViewText(R.id.tv_day, dayString);
                    String weekString = getWeek(realtime.getWeek());
                    Log.e("weekString", weekString);

                    rv.setTextViewText(R.id.tv_week, weekString);
                    String weatherString = realtime.getWeather().getInfo()
                            + "  " + realtime.getWeather().getTemperature()
                            + "°";
                    Log.e("weatherString", weatherString);

                    rv.setTextViewText(R.id.tv_weather, weatherString);
                    // String imageName = "pic" +
                    // realtime.getWeather().getImg();

                    int[] picId = { R.drawable.pic00, R.drawable.pic01,
                            R.drawable.pic02, R.drawable.pic03,
                            R.drawable.pic04, R.drawable.pic05,
                            R.drawable.pic06, R.drawable.pic07,
                            R.drawable.pic08, R.drawable.pic09,
                            R.drawable.pic10, R.drawable.pic11,
                            R.drawable.pic12, R.drawable.pic13,
                            R.drawable.pic14, R.drawable.pic15,
                            R.drawable.pic16, R.drawable.pic17,
                            R.drawable.pic18, R.drawable.pic19,
                            R.drawable.pic20, R.drawable.pic21,
                            R.drawable.pic22, R.drawable.pic23,
                            R.drawable.pic24, R.drawable.pic25,
                            R.drawable.pic26, R.drawable.pic27,
                            R.drawable.pic28, R.drawable.pic29,
                            R.drawable.pic30, R.drawable.pic31,
                            R.drawable.pic53, R.drawable.undefined };
                    int imgInfo = Integer.parseInt(realtime.getWeather()
                            .getImg());

                    Log.e("imgInfo", "" + imgInfo);

                    int imgId = picId[imgInfo];
                    if (imgInfo == 53) {
                        imgId = picId[picId.length - 2];
                    }
                    if (imgInfo < 0 || imgInfo > 53) {
                        imgId = picId[picId.length - 1];
                    }

                    rv.setImageViewResource(R.id.iv_pic, imgId);
                    AppWidgetManager manager = AppWidgetManager
                            .getInstance(getApplicationContext());
                    ComponentName cn = new ComponentName(
                            getApplicationContext(), WidgetProvider.class);
                    manager.updateAppWidget(cn, rv);
                }

            }

            @Override
            public void onFailure(HttpException exception, String errorString) {

            }
        });
    }

    public int getResource(String imageName) {
        Context ctx = getBaseContext();
        int resId = getResources().getIdentifier(imageName, "drawable",
                ctx.getPackageName());
        return resId;
    }

    private String getWeek(int weekNum) {
        String weekString = "";

        switch (weekNum) {
        case 1:
            weekString = "周一";
            break;
        case 2:
            weekString = "周二";
            break;
        case 3:
            weekString = "周三";
            break;
        case 4:
            weekString = "周四";
            break;
        case 5:
            weekString = "周五";
            break;
        case 6:
            weekString = "周六";
            break;
        case 7:
            weekString = "周日";
            break;
        default:
            break;
        }
        return weekString;
    }

    private void initLocation() {
        LocationClientOption option = new LocationClientOption();
        option.setLocationMode(LocationMode.Battery_Saving);// 可选,默认高精度,设置定位模式,高精度,低功耗,仅设备
        option.setCoorType("bd09ll");// 可选,默认gcj02,设置返回的定位结果坐标系
        int span = 1000 * 3600;
        option.setScanSpan(span);// 可选,默认0,即仅定位一次,设置发起定位请求的间隔需要大于等于1000ms才是有效的
        option.setIsNeedAddress(true);// 可选,设置是否需要地址信息,默认不需要
        option.setOpenGps(true);// 可选,默认false,设置是否使用gps
        option.setLocationNotify(false);// 可选,默认false,设置是否当gps有效时按照1S1次频率输出GPS结果
        option.setIsNeedLocationDescribe(false);// 可选,默认false,设置是否需要位置语义化结果,可以在BDLocation.getLocationDescribe里得到,结果类似于“在北京天安门附近”
        option.setIsNeedLocationPoiList(false);// 可选,默认false,设置是否需要POI结果,可以在BDLocation.getPoiList里得到
        option.setIgnoreKillProcess(false);// 可选,默认true,定位SDK内部是一个SERVICE,并放到了独立进程,设置是否在stop的时候杀死这个进程,默认不杀死
        option.SetIgnoreCacheException(false);// 可选,默认false,设置是否收集CRASH信息,默认收集
        option.setEnableSimulateGps(false);// 可选,默认false,设置是否需要过滤gps仿真结果,默认需要
        mLocationClient.setLocOption(option);
    }

}
和WidgetProvider
public class WidgetProvider extends AppWidgetProvider {

    @Override
    public void onDeleted(Context context, int[] appWidgetIds) {
        // TODO Auto-generated method stub
        super.onDeleted(context, appWidgetIds);
        // widget被从屏幕移除
        context.stopService(new Intent(context, WeatherService.class));

    }

    @Override
    public void onDisabled(Context context) {
        // TODO Auto-generated method stub
        super.onDisabled(context);
        // 最后一个widget被从屏幕移除时执行
    }

    @Override
    public void onEnabled(Context context) {
        // TODO Auto-generated method stub
        super.onEnabled(context);
        // 第一个widget添加到屏幕上执行
        context.startService(new Intent(context, WeatherService.class));

    }

    @Override
    public void onUpdate(Context context, AppWidgetManager appWidgetManager,
            int[] appWidgetIds) {
        // TODO Auto-generated method stub
        super.onUpdate(context, appWidgetManager, appWidgetIds);
        // 刷新widget
        // remoteView 和 AppWidgetManager
    }

    @Override
    public void onReceive(Context context, Intent intent) {
        // TODO Auto-generated method stub
        super.onReceive(context, intent);
    }
}
ok,大功告成。


 2216
2216

 被折叠的 条评论
为什么被折叠?
被折叠的 条评论
为什么被折叠?
 到【灌水乐园】发言


