


本文作为阅读郭霖老师《第一行代码Android》的一次笔记!
Android为什么引入碎片Fragment?
现在形形色色的Android设备,屏幕尺寸各有不同,同样的布局,可能在不同的设备上有着不同的效果,比如在手机上显示很完美,到了大屏的平板上也许就拉伸的很难看了,所以Android引入碎片这个概念,就是让一个APP能够兼容不同屏幕大小的Android设备,一个apk可以在各种设备上完美的使用,听起来很nice了。在布局中,Fragement实际上是Activity的一部分,目的就是让程序更加合理和充分的利用屏幕的空间,也可以动态的去选择不同的碎片来适应整个屏幕, 听起来是不是很省心省力, 下面就来体验一下.
1. 碎片的简单用法
这里主要是体验一下如何使用碎片了,首先碎片要对应一个布局,布局用来干什么, 应该是来确定这个碎片要放什么,如何摆放,碎片可以理解成一个装修房子的设计图,我的主屏幕当然是房子了,我可以划定一块区域专门用来放碎片,比如主卧,我可以设计好几种不同的装修风格,当然我也可以把整个房子全部弄成碎片...
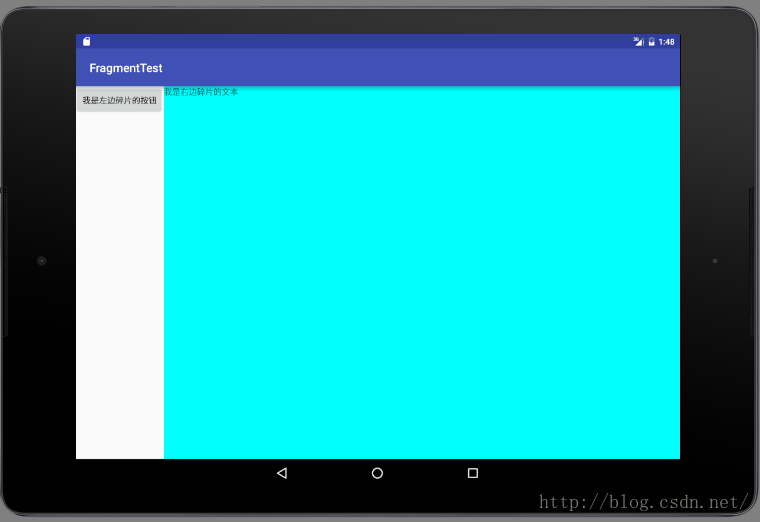
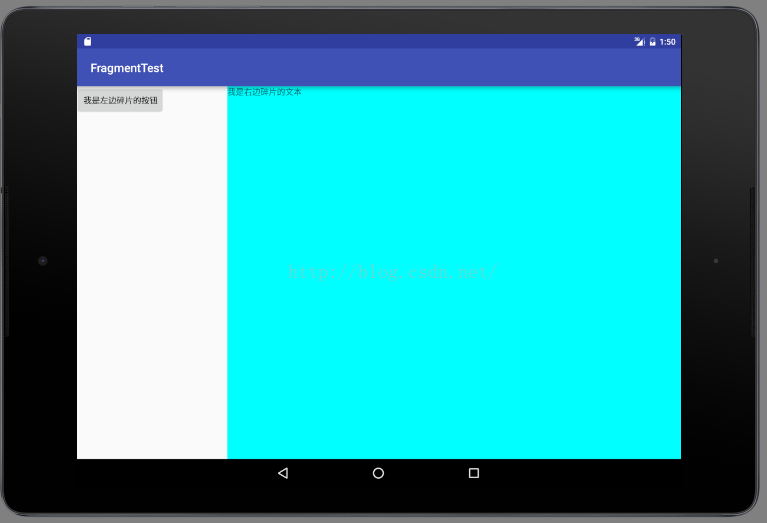
那么,这里我们将一个屏幕分成2个碎片,一个左碎片,一个右碎片,他们的布局文件为 左碎片一个Button,右碎片一个TextView
left_fragment.xml
<?xml version="1.0" encoding="utf-8"?>
<LinearLayout xmlns:android="http://schemas.android.com/apk/res/android"
    android:layout_width="match_parent"
    android:layout_height="match_parent">

    <Button
        android:id="@+id/left_frag_button"
        android:layout_width="wrap_content"
        android:layout_height="wrap_content"
        android:text="我是左边碎片的按钮"/>
</LinearLayout><?xml version="1.0" encoding="utf-8"?>
<LinearLayout xmlns:android="http://schemas.android.com/apk/res/android"
android:layout_width="match_parent"
android:layout_height="match_parent">
<TextView
android:id="@+id/right_frag_textview"
android:layout_width="match_parent"
android:layout_height="match_parent"
android:background="#00ffff"
android:text="我是右边碎片的文本"/>
</LinearLayout>有了房间的装修图,进一步需要按照装修图进行装修,将其变成现实... 这里需要写一个Fragment的子类,并且重写onCreateView函数,在Activity引用Fragment的时候会调用这个函数进行加载,在这个函数里我们就会把对应的碎片布局加载进来变成现实哈
LeftFragment.java
public class LeftFragment extends Fragment {

    @Override
    public View onCreateView(LayoutInflater inflater, ViewGroup container, Bundle savedInstanceState) {
        View view = inflater.inflate(R.layout.left_fragment,container,false);
        return view;
    }
}
RightFragment.java
public class RightFragment extends Fragment {
    @Nullable
    @Override
    public View onCreateView(LayoutInflater inflater, ViewGroup container, Bundle savedInstanceState) {
        View view = inflater.inflate(R.layout.right_fragment,container,false);
        return view;
    }
}
Activity.xml
<?xml version="1.0" encoding="utf-8"?>
<LinearLayout xmlns:android="http://schemas.android.com/apk/res/android"
    xmlns:tools="http://schemas.android.com/tools"
    android:layout_width="match_parent"
    android:layout_height="match_parent" >

    <fragment class="com.example.androidstudy.fragmenttest.LeftFragment"
        android:id="@+id/left_fragment"
        android:layout_weight="1"
        android:layout_width="0px"
        android:layout_height="match_parent" />
    <FrameLayout
        android:id="@+id/right_layout"
        android:layout_width="match_parent"
        android:layout_height="match_parent">
        <fragment class="com.example.androidstudy.fragmenttest.RightFragment"
            android:id="@+id/right_fragment"
            android:layout_width="match_parent"
            android:layout_height="match_parent" />
    </FrameLayout>


</LinearLayout>其实这样已经完成了碎片的使用,看图:
2.动态加载碎片
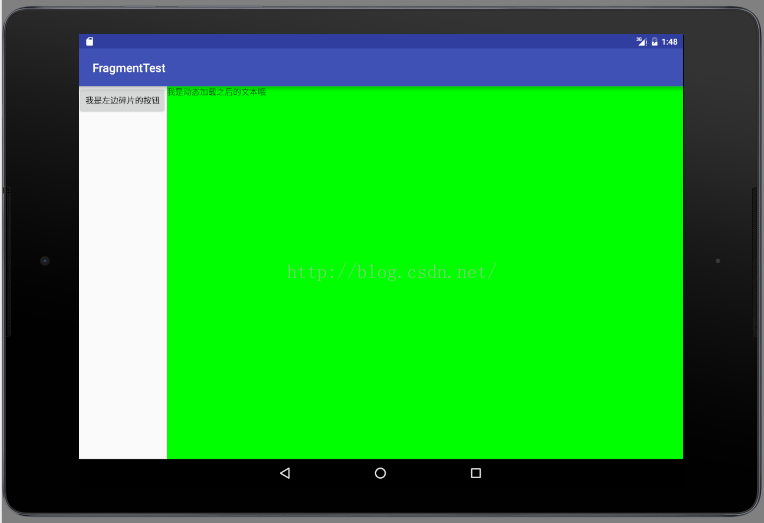
上面简单的把碎片显示出来了,这根本没有达到我们的目的.那如何在运行时动态的加载呢? 比如说我的房间我住了几年不喜欢了,想换一种装修风格,怎么办,拆了重新换,虽然在现实生活中很难,但是在Android的世界里,想换就换,比如说这里在有一个其他的Fragment布局,我想点一下按钮,就换到另外一个Fragment,先写一个Another的布局
another_right_fragment.xml
<?xml version="1.0" encoding="utf-8"?>
<LinearLayout xmlns:android="http://schemas.android.com/apk/res/android"
    android:layout_width="match_parent"
    android:layout_height="match_parent"
    android:background="#00ff00">

    <TextView
        android:id="@+id/right_frag_textview"
        android:layout_width="wrap_content"
        android:layout_height="wrap_content"
        android:text="我是动态加载之后的文本哦"
        />

</LinearLayout>public class AnotherRightFragment extends Fragment {
@Override
public View onCreateView(LayoutInflater inflater, ViewGroup container, Bundle savedInstanceState) {
View view = inflater.inflate(R.layout.another_right_fragment, container,false);
return view;
}
}在主函数中实现点击按钮,进行切换碎片
public class MainActivity extends AppCompatActivity implements View.OnClickListener {

    @Override
    protected void onCreate(Bundle savedInstanceState) {
        super.onCreate(savedInstanceState);
        setContentView(R.layout.activity_main);
        Button b = (Button) findViewById(R.id.left_frag_button);
        b.setOnClickListener(this);
    }

    public void onClick(View v){

        switch (v.getId()){
            case R.id.left_frag_button:
            //1.创建待添加的碎片实例
            AnotherRightFragment fragment = new AnotherRightFragment();
            //2.获取到FragmentManager,在活动中可以直接调用getFragmentManager()方法得到
            FragmentManager fragmentManager = getFragmentManager();
            //3.开启一个事务,通过调用beginTransaction()方法开启
            FragmentTransaction transaction = fragmentManager.beginTransaction();
            //4.向容器内添加碎片,一般使用replace()方法实现,需要传入容器的id和待添加的碎片实例
            transaction.replace(R.id.right_layout, fragment);
            //5.提交事务,调用commit()方法来完成
            transaction.commit();
            default:
                break;
        }

    }

}
3.在碎片中模拟返回栈
从上面的动态加载碎片功能中,我们按下返回键的时候就退出了,并没有之前Activity 栈的感觉,那么能不能实现那样的效果呢? 即我们在按返回键的时候就直接返回到上一个fragment,这个其实是比较容易实现的,一个API 就搞定了,就是FragmentTransaction中的addTobackStack方法, 这个可以自己体验一下!
public class MainActivity extends AppCompatActivity implements View.OnClickListener {

    @Override
    protected void onCreate(Bundle savedInstanceState) {
        super.onCreate(savedInstanceState);
        setContentView(R.layout.activity_main);
        Button b = (Button) findViewById(R.id.left_frag_button);
        b.setOnClickListener(this);
    }

    public void onClick(View v){

        switch (v.getId()){
            case R.id.left_frag_button:
                AnotherRightFragment another = new AnotherRightFragment();
                FragmentManager manager = getFragmentManager();
                FragmentTransaction trans = manager.beginTransaction();
                trans.replace(R.id.right_layout,another);
                trans.addToBackStack(null);
                trans.commit();
                break;
            default:
                break;
        }

    }

}
4.动态加载布局的技巧
这个地方其实实际的功能就是我们设计2套方案,让系统自己去选,选择一个适应的方案,我们在设计一个显示单页的layout,一个显示双页的layout,在使用大屏的平板设备时自动选择双页显示,在使用手机时就选择单页显示!要完成这个功能就需要使用到限定符了,其实这就是一个界限来,来划分屏幕的大小分辨率等!
这里根据屏幕大小的特征限定符,新建一个large的layout,方法如下图
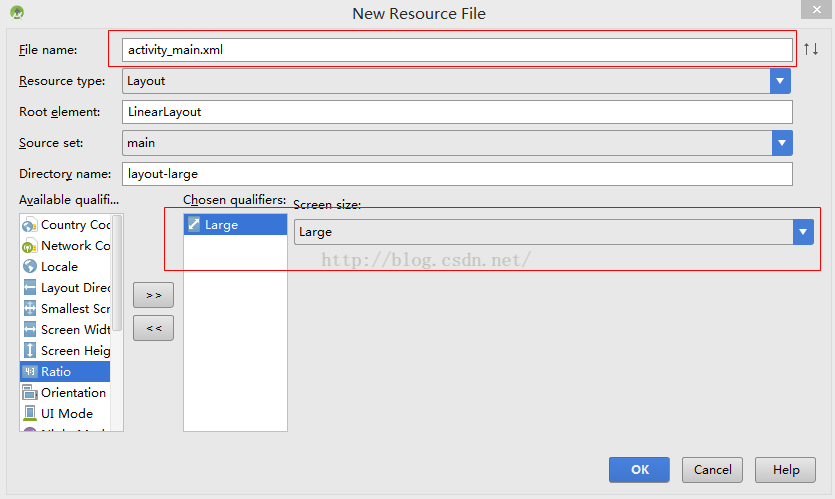
新建之后会在activity_main中出现2个xml文件,其中一个后面会有large的标示,代表这个是提供给超大屏幕设备的资源。2个xml文件的内容如下
activity_main.xml
<?xml version="1.0" encoding="utf-8"?>
<LinearLayout xmlns:android="http://schemas.android.com/apk/res/android"
    xmlns:tools="http://schemas.android.com/tools"
    android:layout_width="match_parent"
    android:layout_height="match_parent" >

    <fragment class="com.example.androidstudy.fragmenttest.LeftFragment"
        android:id="@+id/left_fragment"
        android:layout_weight="1"
        android:layout_width="0px"
        android:layout_height="match_parent" />


</LinearLayout>
activity_main.xml(large)
<?xml version="1.0" encoding="utf-8"?>
<LinearLayout xmlns:android="http://schemas.android.com/apk/res/android"
android:orientation="horizontal"
android:layout_width="match_parent"
android:layout_height="match_parent">
<fragment class="com.example.androidstudy.fragmenttest.LeftFragment"
android:id="@+id/left_fragment"
android:layout_weight="1"
android:layout_width="0dp"
android:layout_height="match_parent" />
<fragment class="com.example.androidstudy.fragmenttest.RightFragment"
android:id="@+id/right_fragment"
android:layout_width="0dp"
android:layout_weight="3"
android:layout_height="match_parent" />
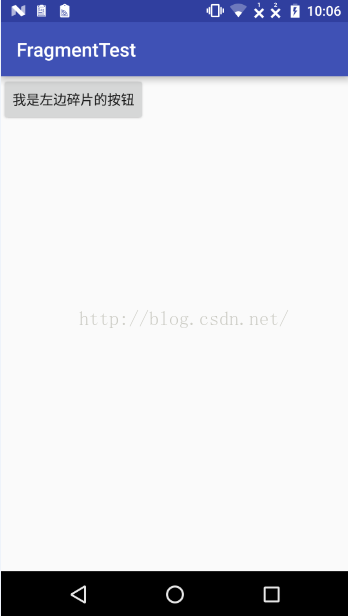
</LinearLayout>OK, 分别在手机和平板上运行一下,看看效果,手机的效果如下,加载了普通的xml
平板的效果如下,加载了large的xml
总结:
以上内容主要介绍了Fragment的使用,从简单的尝试到动态加载来适应不同的设备。下面还会有一篇文章专门介绍一下碎片的生命周期,以及碎片与Activity之间的通讯,以及一个小的实例。


 672
672

 被折叠的 条评论
为什么被折叠?
被折叠的 条评论
为什么被折叠?
 到【灌水乐园】发言


