


阐述
已经完成了基本开发环境和AntDesign的安装。
这节课用Ant Design制作一下TodoList的界面。
本文不会对Ant Design深入讲解,只是为了让课程的界面好看一点,如果你对它有强烈的学习需要或愿望,可以看一下Ant Design官方文档,文档都是中文,没有什么难度。先看一下实现的效果图。

引入CSS样式
在使用Ant Design时,第一件事就是先引入CSS样式,有了样式才可以让UI组件显示正常。
可以直接在 /src/TodoList.js 文件中直接用 import 引入。
import 'antd/dist/antd.css'
编写Input框
引入CSS样式之后,可以快乐的使用 antd 里的 <input> 框了,在使用的时候,你需要先引入Input组件。
全部代码如下:
import React, { Component } from 'react';
import 'antd/dist/antd.css'
import { Input } from 'antd'
class TodoList extends Component {
render() {
return (
<div>
<div>
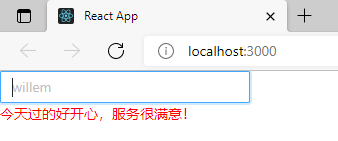
<Input placeholder='willem' style={{ width:'250px'}}/>
</div>
</div>
);
}
}
export default TodoList;
在Input组件里,我们设置了style,注意设置这个时不带单引号或者双引号的。
写完后就可以简单的看一下效果了。
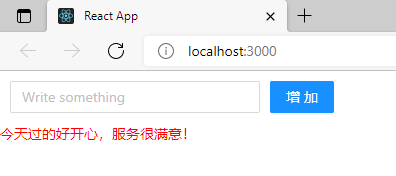
编写Button按钮
Ant Design 也提供了丰富好看的按钮组件,直接使用最简单的 Primary 按钮。使用按钮组件前也需要先引入,为了让组件更好看,还加入了一些 Margin 样式,代码如下:
import React, { Component } from 'react';
import 'antd/dist/antd.css'
import { Input , Button } from 'antd'

class TodoList extends Component {
    render() {
        return (
            <div style={{margin:'10px'}}>
                <div>
                    <Input placeholder='Write something' style={{ width:'250px', marginRight:'10px'}}/>
                    <Button type="primary">增加</Button>
                </div>
            </div>
         );
    }
}
export default TodoList;
List组件制作列表
同样用 Ant Desgin 制作 todoList 的列表,在制作前,我们先在 class 外部声明一个 data 数组,数组内容可以随便写。
const data=[
    '早8点开晨会,分配今天的开发工作',
    '早9点和项目经理作开发需求讨论会',
    '晚5:30对今日代码进行沟通会'
]
然后引入 List 组件,代码如下:
import { Input , Button , List } from 'antd'
最后就是使用这个 List 组件了。
<div style={{margin:'10px',width:'300px'}}>
    <List
        bordered
        dataSource={data}
        renderItem={item=>(<List.Item>{item}</List.Item>)}
    />
</div>

为了方便学习,我给出了全部代码,如果你作起来有难度,可以直接复制下面的代码。
TodoList.js
import React, { Component } from 'react';
import 'antd/dist/antd.css'
import { Input , Button , List } from 'antd'

const data=[
    '早8点开晨会,分配今天的开发工作',
    '早9点和项目经理作开发需求讨论会',
    '晚5:30对今日代码进行沟通会'
]

class TodoList extends Component {
    render() {
        return (
            <div style={{margin:'10px',width:'300px'}}>
                <List
                    bordered
                    dataSource={data}
                    renderItem={item=>(<List.Item>{item}</List.Item>)}
                />
            </div>
         );
    }
}
export default TodoList;
总结
这节课主要用Ant Design制作了todoList的界面,使用了 <Input>,<Button>和<List>组件,因为这个教程是讲Redux的,所以这些组件的使用方法并没有展开讲,主要是制作一个UI界面,为以后的课程作铺垫。
如果你对Ant Design非常感兴趣,你可以去官方网站阅读文档。
demo

TodoList.js
import React, { Component } from 'react';
import 'antd/dist/antd.css'
import { Input , Button , List } from 'antd'

const data=[
    '早8点开晨会,分配今天的开发工作',
    '早9点和项目经理作开发需求讨论会',
    '晚5:30对今日代码进行沟通会'
]

class TodoList extends Component {
    render() {
        return (
            <div style={{margin:'10px',width:'300px'}}>
                <div style={{margin:'10px'}}>
                    <div>
                        <Input placeholder='Write something' style={{ width:'150px', marginRight:'10px'}}/>
                        <Button type="primary">增加</Button>
                    </div>
                </div>
                <List
                    bordered
                    dataSource={data}
                    renderItem={item=>(<List.Item>{item}</List.Item>)}
                />
            </div>
         );
    }
}
export default TodoList;
index.js
import React from 'react';
import ReactDOM from 'react-dom'
import TodoList from './TodoList'

ReactDOM.render(<TodoList/>,document.getElementById('root'))
红色字体部分:


 312
312


 被折叠的 条评论
为什么被折叠?
被折叠的 条评论
为什么被折叠?
 到【灌水乐园】发言


