


Extjs5.1正式版已经出来一段时间了,为了与时俱进,从这篇文章开始,使用Extjs5.1,所以标题也变成“Extjs5.1××××××”。
这篇文章讲Grid组件,先搭建好环境。
我把Extjs5.1需要用到的库文件整理到ext文件中,如果想按照这篇文章一步一步来做这个例子的话,点击这里下载,然后根据下面的步骤搭建环境。如果不想一步一步做的话,可以不用下载,文章最后我会提供完整的源码下载。
新建一个项目,名称就叫ExtGridDemo吧,然后把下载的ext包复制到项目里面,同时创建其他文件及文件夹(MVVM项目结构)

index.html
<!DOCTYPE HTML>
<html manifest="">
<head>
    <meta http-equiv="X-UA-Compatible" content="IE=edge">
    <meta charset="UTF-8">

    <title>MyApp</title>

    <link rel="stylesheet" type="text/css" href="ext/ext-theme-crisp-all.css">
    <script type ="text/javascript" src="ext/bootstrap.js"></script>
    <script type ="text/javascript" src="ext/ext-theme-crisp.js"></script>
    <script type ="text/javascript" src="app.js"></script>

</head>
<body></body>
</html>
app.js
Ext.application({
    name: 'MyApp',

    extend: 'MyApp.Application',

    autoCreateViewport: 'MyApp.view.Main'
});
app/Application.js
Ext.define('MyApp.Application', {
    extend: 'Ext.app.Application',

    name: 'MyApp'
});
app/view/Main.js
Ext.define('MyApp.view.Main', {
    extend: 'Ext.Container',
    layout:'center',
    style: 'background:#E6E6E6'
});
浏览器中打开index.html,里面暂时没有任何东西,只有一个背景色

接下来我们在view中创建MyGrid.js文件。

MyGrid.js
Ext.define('MyApp.view.MyGrid', {
    extend: 'Ext.grid.Panel',
    xtype: 'my-grid',
    title: 'Grid Demo',
    columnLines: true,
    width:800,
    initComponent:function(){
        var me = this;
        me.columns = [
            {
                text: '姓名',
                flex: 1,
                align: 'center',
                dataIndex: 'name'
            }, {
                text: '性别',
                flex: 1,
                align: 'center',
                dataIndex: 'sex'
            }, {
                text: '邮箱',
                flex: 1,
                align: 'center',
                dataIndex: 'email'
            }
        ]
        me.callParent();
    }
});
同时在Main.js中引入MyGrid.js并使用
Ext.define('MyApp.view.Main', {
    extend: 'Ext.Container',
    requires: ['MyApp.view.MyGrid'],
    layout:'center',
    style: 'background:#E6E6E6',
    items:{
        xtype:'my-grid'
    }
});
刷新浏览器页面,效果

接下来为grid添加数据
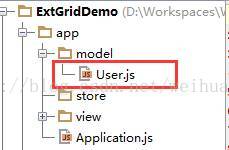
首先创建数据模型,model包中创建User.js
User.js
Ext.define('MyApp.model.User', {
    extend: 'Ext.data.Model',
    fields: [
        {name: 'name', type: 'string'},
        {name: 'sex',  type: 'string'},
        {name: 'email',  type: 'string'}
    ]
});
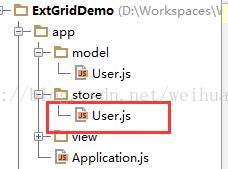
再创建数据仓库,store包中创建User.js
User.js
Ext.define('MyApp.store.User', {
    extend: 'Ext.data.Store',
    alias: 'store.user',//设置store别名
    model: 'MyApp.model.User',
    autoLoad: true,
    proxy: {
        type: 'ajax',
        url: 'data/users.json',
        reader: {
            type: 'json',
            rootProperty: 'users',
            successProperty: 'success'
        }
    }
});<strong>
</strong>
然后在项目根目录下建立data包,用于存放json数据。由于我们这里没涉及到后台,所以用到的json数据不从后台读取,这里从我们的data包里面读取。data包下建立模拟数据。
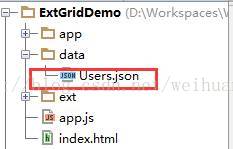
Users.json:
{
  success: true,
  users: [
    {id: 1, name: '张三',   sex:'男', email: 'abc@qq.com'},
    {id: 2, name: '李四',   sex:'男', email: 'abc@qq.com'},
    {id: 3, name: '王五',   sex:'男', email: 'abc@qq.com'},
    {id: 4, name: '赵六',   sex:'男', email: 'abc@qq.com'},
    {id: 5, name: '小七',   sex:'女', email: 'abc@qq.com'},
    {id: 6, name: '王八',   sex:'男', email: 'abc@qq.com'},
  ]
}
接下来把store加载到grid中,修改MyGrid.js
Ext.define('MyApp.view.MyGrid', {
    extend: 'Ext.grid.Panel',
    xtype: 'my-grid',
    requires: ['MyApp.store.User'],//引入store
    title: 'Grid Demo',
    columnLines: true,
    width:800,
    store:{
        type: 'user'//通过别名使用store
    },
    initComponent:function(){
        var me = this;
        me.columns = [
            {
                text: '姓名',
                flex: 1,
                align: 'center',
                dataIndex: 'name'
            }, {
                text: '性别',
                flex: 1,
                align: 'center',
                dataIndex: 'sex'
            }, {
                text: '邮箱',
                flex: 1,
                align: 'center',
                dataIndex: 'email'
            }
        ]
        me.callParent();
    }
});
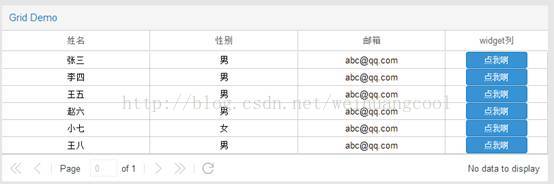
效果图

在Extjs5系列中,grid有个比较好用的功能,就是能在列中加入其他类型的组件,这里我们举个简单的例子,为grid添加一个button列。
修改Main.js:
Ext.define('MyApp.view.MyGrid', {
    extend: 'Ext.grid.Panel',
    xtype: 'my-grid',
    requires: ['MyApp.store.User'],//引入store
    title: 'Grid Demo',
    columnLines: true,
    width:800,
    store:{
        type: 'user'//通过别名使用store
    },
    initComponent:function(){
        var me = this;
        me.columns = [
            {
                text: '姓名',
                flex: 1,
                align: 'center',
                dataIndex: 'name'
            }, {
                text: '性别',
                flex: 1,
                align: 'center',
                dataIndex: 'sex'
            }, {
                text: '邮箱',
                flex: 1,
                align: 'center',
                dataIndex: 'email'
            },{
                xtype: 'widgetcolumn',
                text:'widget列',
                width:150,
                align:'center',
                widget: {
                    width: 90,
                    xtype: 'button',
                    text:'点我啊',
                    handler: function(btn) {
                        var rec = btn.getWidgetRecord();
                        Ext.Msg.alert("Button clicked", "Hey! " + rec.get('name'));
                    }
                }
            }
        ]
        me.callParent();
    }
});
效果

接下来为grid添加分页条,修改MyGrid.js,在initcompoment中添加以下代码
me.dockedItems = [{
    xtype: 'pagingtoolbar',
    dock: 'bottom',
    displayInfo: true
}];
效果
虽然分页有了,但是并没有和我们grid的store绑定,怎么绑定呢,pagingtoolbar中也有个属性store,把这个store配置成和grid一样的store就行了,但是问题来了,grid的stroe我们是这么配的:
store:{
    type: 'user'//通过别名使用store
},
那么pagingtoolbar是不是也是这么配的,答案是否定的,因为这么配的话,相当于grid的store和pagingtoolbar的store是两个不同的实例,操作pagingtoolbar的store,并不会影响到grid的store,所以这里我们应该先创建一个store实例,然后分别配给pagingtoolbar和grid。
先把我们之前配置store的代码去掉,在initComment中创建一个store实例
var store = Ext.create('MyApp.store.User');然后配给grid和pagingtoolbar,最终MyGrid.js代码
Ext.define('MyApp.view.MyGrid', {
    extend: 'Ext.grid.Panel',
    xtype: 'my-grid',
    requires: ['MyApp.store.User'],//引入store
    title: 'Grid Demo',
    columnLines: true,
    width:800,
    initComponent:function(){
        var me = this;
        var store = Ext.create('MyApp.store.User');//创建store实例
        this.store = store;
        me.columns = [
            {
                text: '姓名',
                flex: 1,
                align: 'center',
                dataIndex: 'name'
            }, {
                text: '性别',
                flex: 1,
                align: 'center',
                dataIndex: 'sex'
            }, {
                text: '邮箱',
                flex: 1,
                align: 'center',
                dataIndex: 'email'
            },{
                xtype: 'widgetcolumn',
                text:'widget列',
                width:150,
                align:'center',
                widget: {
                    width: 90,
                    xtype: 'button',
                    text:'点我啊',
                    handler: function(btn) {
                        var rec = btn.getWidgetRecord();
                        Ext.Msg.alert("Button clicked", "Hey! " + rec.get('name'));
                    }
                }
            }
        ];
        me.dockedItems = [{
            xtype: 'pagingtoolbar',
            dock: 'bottom',
            store:store,
            displayInfo: true
        }];
        me.callParent();
    }
});
同时,使用分页的话,后台返回的json数据格式要加多个total参数,也就是总条目数,这样pagingtoolbar的页数和总条数才会显示正确,例如后台有100条记录,我们每页显示6条,那每次请求返回的json数据格式应该如下:
{
  success: true,
  total: 100,
  users: [
    {id: 1, name: '张三',   sex:'男', email: 'abc@qq.com'},
    {id: 2, name: '李四',   sex:'男', email: 'abc@qq.com'},
    {id: 3, name: '王五',   sex:'男', email: 'abc@qq.com'},
    {id: 4, name: '赵六',   sex:'男', email: 'abc@qq.com'},
    {id: 5, name: '小七',   sex:'女', email: 'abc@qq.com'},
    {id: 6, name: '王八',   sex:'男', email: 'abc@qq.com'},
  ]
}
我们把data中的json数据改成上面的格式之后,效果
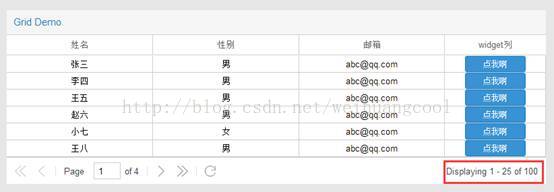
点一下翻页按钮,看下浏览器控制台中的http请求

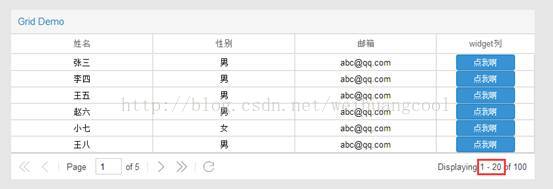
发现请求后面自动带了limit参数,也就是,默认每页显示25跳,所以我们这边假设的总条数是100条,那么grid会分成4页。这个limit是可以改的,同时总条数的字段名(total)也可以改,修改一下store/User.js
Ext.define('MyApp.store.User', {
    extend: 'Ext.data.Store',
    alias: 'store.user',//设置store别名
    model: 'MyApp.model.User',
    autoLoad: true,
    pageSize:20,//limit
    proxy: {
        type: 'ajax',
        url: 'data/users.json',
        reader: {
            type: 'json',
            rootProperty: 'users',//数据列表对应字段
            totalProperty : 'total',//总条数对应字段
            successProperty: 'success'//返回成功对应字段
        }
    }
});
效果
暂时讲到这。
附上源码。


 1247
1247


 被折叠的 条评论
为什么被折叠?
被折叠的 条评论
为什么被折叠?
 到【灌水乐园】发言


