绘图,SWIFT,程序化UI,UIBEZIERPATH(DRAWING, SWIFT, PROGRAMMATIC UI, UIBEZIERPATH)
Have you ever visited Paris? If you have, did you happen to stop at the Louvre? If so, you probably know that there’s a fantastic painting designed by the one and only Leonardo da Vinci called “The Mona Lisa.” Now we can’t help but wonder what was going on in his mind when Leonardo was creating this masterpiece.
等皆你曾经访问了巴黎? 如果有,您是否碰巧在卢浮宫停了下来? 如果是这样,您可能知道那是一幅唯一的由莱昂纳多·达·芬奇( Leonardo da Vinci)设计的名为“蒙娜·丽莎”的画。 现在我们不禁想知道莱昂纳多创作这部杰作时他的想法如何。
As we look into designing applications for the AppStore, one thing we want to achieve is an excellent user interface. Creating unique styles in your application makes for a special moment, not only as a team but for consumer’s face also.
在研究为AppStore设计应用程序时,我们要实现的一件事就是出色的用户界面。 在您的应用程序中创建独特的样式不仅对于团队而言而且对于消费者的面貌都是一个特殊的时刻。
什么是UIBezierPath? (What is UIBezierPath?)
Today, we are going to work withUIBezierPath. Let’s see how UIBezierPath could make your app better. UIBezierPathis a property forCGPathRef. Paths are vector-based shapes that are built using line and curve segments. Each segment consists of one or more points in a coordinate system. Here are some examples of each segment you can use:
今天,我们将使用UIBezierPath 。 让我们看看UIBezierPath如何使您的应用程序更好。 UIBezierPath是一个属性CGPathRef 。 路径是使用线段和曲线段构建的基于矢量的形状。 每个线段由一个坐标系统中的一个或多个点组成。 以下是您可以使用的每个细分的一些示例:
Line segments:• Rectangles• Squares• Polygons
线段:•矩形•正方形•多边形
Curve segments:• Arcs• Circles• Complex Curved Shapes
曲线段:•弧•圆•复杂的弯曲形状
什么是边界和框架?(What are bounds & frames?)
Before we head into the example below, we need to discuss what the significant difference between them is. All UIView subclasses have two properties, “frame” and “bounds,” and both seem similar, and they return a CGRect.
在进入下面的示例之前,我们需要讨论它们之间的显着区别。 所有UIView子类都有两个属性“ frame”和“ bounds”,它们看起来都相似,并且它们返回CGRect。
Bounds: — Views bounds refer to its coordinates relative to its own space (as if the rest of your view hierarchy didn’t exist).
边界:—视图边界是指其相对于其自身空间的坐标(就像视图层次结构的其余部分不存在一样)。
Frame: — Views frame refers to its coordinates relative to its parent’s space.
框架:—视图框架是指其相对于父空间的坐标。
A few things: 1. If we create a view at X:0, Y:0, width: 150, height: 150. The frame and bounds are the same. 2. If we move the view to X:100, the frame will reflect that change, but the bounds will not. — Bounds are relative to the views own space; internally, the view has not changed. 3. If we transform the view, rotating or scaling it up. The frame will change to reflect that, but the bounds still won’t.
一些事情:1.如果我们在X:0,Y:0,宽度:150,高度:150处创建视图。框架和边界是相同的。 2.如果将视图移动到X:100,则框架将反映该更改,但边界将不会。 —边界是相对于视图自身空间的; 在内部,视图没有改变。 3.如果我们变换视图,则将其旋转或放大。 框架将发生变化以反映这一点,但界限仍然不会改变。
Best practice will be when changing the width or height of either frame and bounds; the other value is updated to match.
最佳做法是更改边框和边界的宽度或高度; 另一个值将更新为匹配。
Better to modify bounds, center and transform and let UIKit calculate the frame for us.
更好地修改边界,居中和变换,让UIKit为我们计算框架。
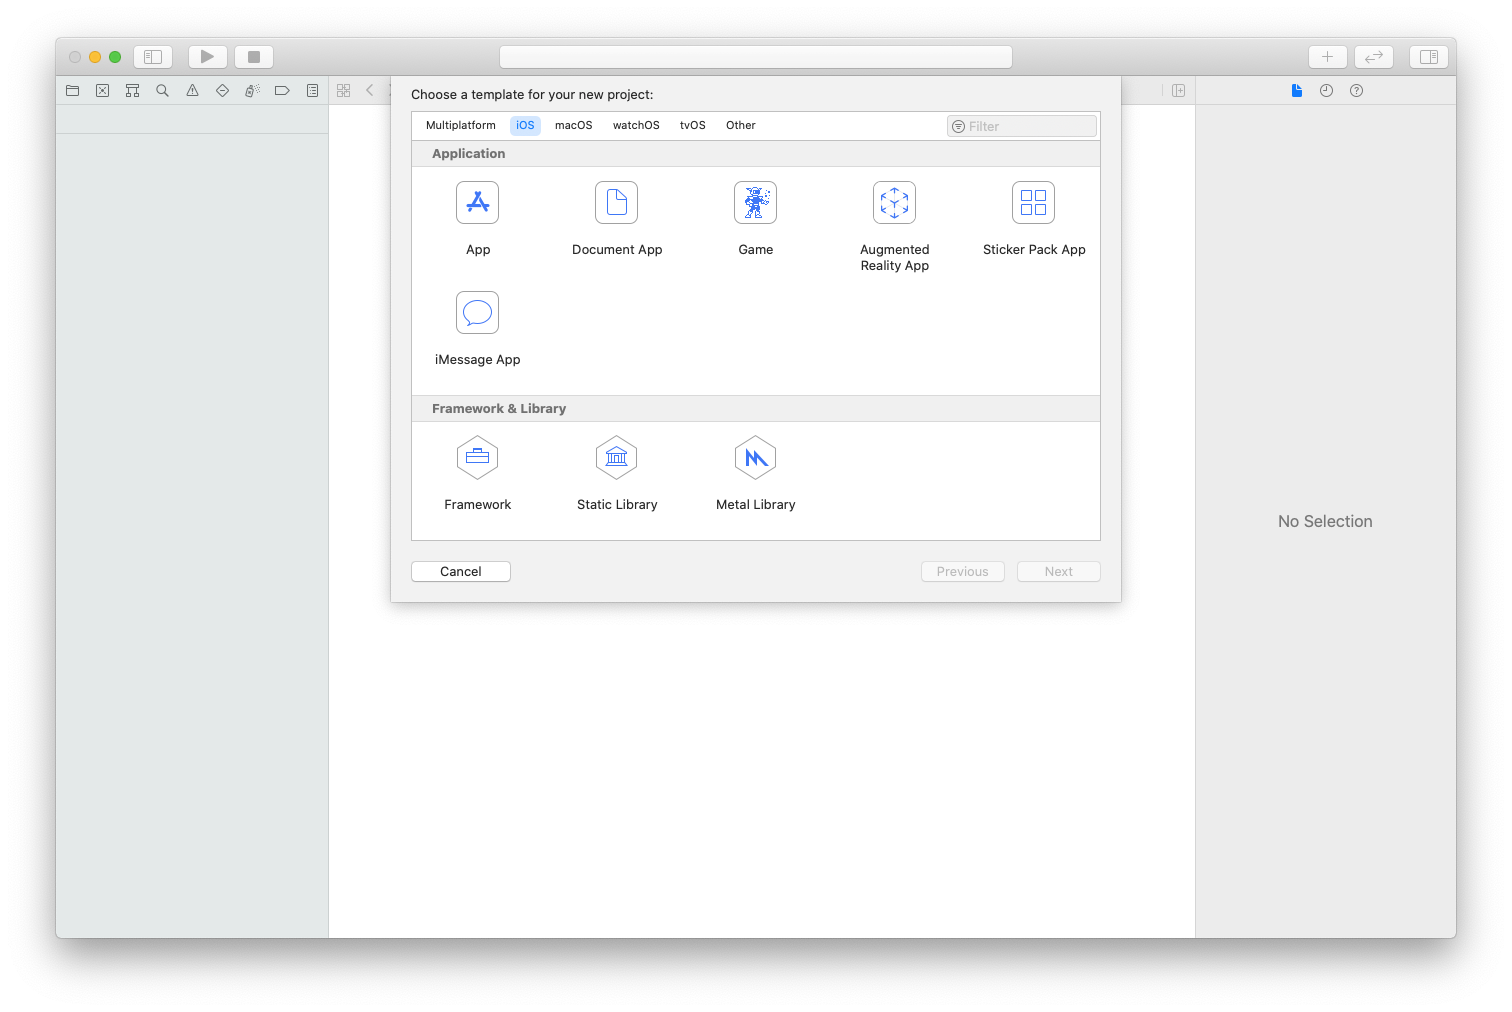
Today we will talk about line segments; let’s go ahead and start with a basic single view application and call it “CustomDraw.” Your screen might look slightly different if you’re not running the newest Xcode(12.0).
今天我们将讨论线段; 让我们继续,从一个基本的单视图应用程序开始,将其称为“ CustomDraw”。 如果您没有运行最新的Xcode(12.0),则屏幕看起来可能会略有不同。

From here, I usually set my projects up programmatically. Suppose you are unaware of how to do that, you can check out my article here. For this demonstration, we are working programmatically and will do everything in a separate UIView file and call it within our ViewController. Let’s set up our ViewController to take our UIView file.
从这里开始,我通常以编程方式设置项目。 假设您不知道该怎么做,可以在这里查看我的文章。 对于此演示,我们正在以编程方式进行工作,并将所有工作都放在一个单独的UIView文件中,并在我们的ViewController中调用它。 让我们设置ViewController来获取UIView文件。
This all we have to do with our ViewController.
这与我们的ViewController有关。
Next, start with our first step in creating our rectangle drawing and create a new cocoa touch class that subclasses to UIView and name it ShapesView, and add our single path object.
接下来,从创建矩形图形的第一步开始,创建一个新的可可触摸类,该类可继承到UIView并将其命名为ShapesView,并添加单个路径对象。
As we can see, we have set up the views with a single path object. We can now create a function named “drawRectangle.” Everything we put into this view will be for creating our rectangle drawing. When configuring our rectangle, we want to default to a few things — defining our color, lineWidth, etc. Let’s start with our color and lineWidth and add our first point and line.
如我们所见,我们已经使用单个路径对象设置了视图。 现在,我们可以创建一个名为“ drawRectangle”的函数。 我们放入该视图的所有内容都是用于创建矩形图。 在配置矩形时,我们想默认使用一些东西-定义颜色,线宽等。让我们从颜色和线宽开始,并添加第一个点和线。
Now you might be saying to yourself, “I know I didn’t miss a step yet, what is Aaron talking about this init and required init wasn’t even discussed!” If you don’t have these things in the file and run the project, your view will be a black screen with your drawing. The above step allows us to have a transparent background to see our gorgeous teal line on gray color background.
现在您可能对自己说:“我知道我还没有错过任何一个步骤,Aaron在谈论此init和必需的init甚至都没有讨论!” 如果文件中没有这些东西并运行项目,则视图将是带有绘图的黑屏。 上面的步骤使我们拥有透明的背景,可以在灰色背景上看到华丽的蓝绿色线条。
Let’s go ahead and finish our rectangle. We would need to add three more lines and finish off with a close method. Now, we can define the magic numbers at the top for easier maintenance. For this demonstration, we are going to add them to our CGPoint.
让我们继续完成矩形。 我们将需要再添加三行并以close方法结束。 现在,我们可以在顶部定义幻数,以便于维护。 对于此演示,我们将它们添加到CGPoint 。
As we can see, we were able to add our two last addLine methods, as well as the close path method. The close path finishes off the drawing for us by connecting it to the first point made on line 15. Lastly, we threw in a fill color to fill in our rectangle, and we are finished!
如我们所见,我们能够添加最后两个addLine方法以及close path方法。 闭合路径通过将其连接到线15上的第一个点为我们完成了绘制。最后,我们添加了填充色来填充矩形,然后完成!
画你的杰作 (Paint your masterpiece)
This example was to showcase the endless possibilities with a little dedication to customizable drawing. Deciding what to draw is hard, but with commitment, you too can be the next Leonardo da Vinci of the iPhone world.
这个例子展示了无尽的可能性,并且对可定制的绘图也有所投入。 决定要绘制什么很难,但是只要有决心,您也可以成为iPhone世界中的下一个达芬奇。
Try to be your own Artist and start small like a circle; multiple circles around a UILabel can bring your boring background to life.
尝试成为自己的艺术家,像圈子一样从小做起; UILabel周围的多个圆圈可以使您无聊的背景栩栩如生。
翻译自: https://medium.com/swlh/line-segments-with-uibezierpath-ac793982740b


 454
454


 被折叠的 条评论
为什么被折叠?


