


构建一个NPM发布生成器 (Build an NPM Publish Builder)
Our goal is to write a builder that publishes our libraries for us. The builder should only publish if the version number changed. It will perform these actions:
我们的目标是编写一个可以为我们发布库的生成器。 仅当版本号更改时,构建器才应发布。 它将执行以下操作:
Execute the regular build target, which would regularly build
my-lib.执行常规构建目标,该目标将定期构建
my-lib。Retrieve the local version from the
package.jsonof the previous build.从上一版本的
package.json中检索本地版本。- Check if the version number increased. We can invoke the npm CLI to check the package version. 检查版本号是否增加。 我们可以调用npm CLI来检查软件包版本。
- Publish the package by again invoking the npm CLI. 通过再次调用npm CLI发布程序包。
1.设置工作区,插件和构建器 (1. Setup the Workspace, Plugin & Builder)
While it’s certainly not that straight forward in an Angular repository, it’s very easy to create a custom builder, if you’re using the tools provided by Nx. First, if you don’t already have, create a repository using Nx:
尽管在Angular存储库中肯定不是那么简单,但是如果您使用的是Nx提供的工具,则创建自定义生成器非常容易。 首先,如果您还没有,请使用Nx创建存储库:
npx create-nx-workspace my-workspaceChoose whatever options suit your needs. We’ll use the OSS option — the configuration for open source workspaces.
选择适合您需求的任何选项。 我们将使用OSS选项-开源工作区的配置。
Next, create a new plugin using another schematic. The plugin will create an example builder we can work with:
接下来,使用另一个原理图创建一个新插件。 该插件将创建一个示例构建器,我们可以使用它:
cd my-workspacenpm i @nrwl/nx-pluginnx g @nrwl/nx-plugin:plugin my-plugin --importPath=my-pluginThe first my-plugin is the name of the plugin inside your workspace. The --importPath=my-plugin indicates under which name you’ll publish your plugin. This could be @user/plugin-name or anything that is a valid package name.
第一个my-plugin是工作空间内的插件名称。 --importPath=my-plugin指示您将以哪个名称发布插件。 这可以是@user/plugin-name或任何有效的软件包名称。
Make sure that the name is still free to take if you’re planning to release to a public registry like npm.
如果您打算发布到npm之类的公共注册表,请确保该名称仍然可以自由使用。
2.配置构建器输入 (2. Configure the Builder Inputs)
Let’s have a look at the files we just generated. The my-plugin folder inside packages contains our newly generated plugin. We’re mainly working on the builder here — so you can safely forget about the schematics folder.
让我们看一下我们刚刚生成的文件。 packages中的my-plugin文件夹包含我们新生成的插件。 我们主要在这里从事构建器的工作-因此您可以放心地忽略了diagrams文件夹。
The build/schema.d.ts file includes an interface that defines the input of our builder. We want to have two inputs in this case:
build/schema.d.ts文件包含一个定义构建器输入的接口。 在这种情况下,我们希望有两个输入:
buildTarget— Tells us the build target that we need to execute before we publish the package. The output of this build target will be published.buildTarget—告诉我们在发布程序包之前需要执行的构建目标。 该构建目标的输出将被发布。failOnDuplicate— Indicates whether the build should fail if the version already exists.failOnDuplicate—指示如果版本已经存在,构建是否应该失败。
The schema.d.ts file now looks like this:
现在, schema.d.ts文件如下所示:
import { JsonObject } from '@angular-devkit/core';


export interface PublishBuilderSchema extends JsonObject {
  buildTarget: string;
  failOnDuplicate?: boolean;
}
In addition to the schema.d.ts file a schema.json was generated. This one is used as a JSON schema to validate the input. We’ll add some simple information which matches up with our previous information:
除了schema.d.ts文件schema.json还生成了一个schema.json 。 该代码用作JSON模式以验证输入。 我们将添加一些简单的信息,这些信息与我们之前的信息相匹配:
{
  "$schema": "https://json-schema.org/draft-07/schema",
  "$id": "https://json-schema.org/draft-07/schema",
  "title": "Publish builder",
  "description": "",
  "type": "object",
  "properties": {
    "buildTarget": {
      "type": "string",
      "description": "The build target whose output will be published."
    },
    "failOnDuplicate": {
      "type": "boolean",
      "description": "Whether the publish step should fail if the package version already exists."
    }
  },
  "required": []
}
3.实施构建器 (3. Implement the Builder)
Now we can start implementing the builder. The actual implementation happens inside the builder.ts file. We’ll use some dependencies from both node and @angular/devkit . Sometimes the IDE doesn’t remember them so I listed all of them here for you:
现在我们可以开始实施构建器了。 实际的实现发生在builder.ts文件中。 我们将使用来自node和@angular/devkit一些依赖项。 有时,IDE不会记住它们,因此我在这里为您列出了所有它们:
import {
  BuilderContext,
  BuilderOutput,
  createBuilder,
  targetFromTargetString,
} from '@angular-devkit/architect';
import * as childProcess from 'child_process';
import * as fs from 'fs';
import { resolve } from 'path';
import { PublishBuilderSchema } from './schema';
执行输入构建目标 (Execute the Input Build Target)
First, the builder needs to execute the previous build target. We can receive the target string from the options object which provides all of our input attributes.
首先,构建器需要执行先前的构建目标。 我们可以从提供所有输入属性的options对象中接收目标字符串。
To receive the actual target information we can execute the targetFromTargetString function. After that, we execute the target. We can simply call scheduleTaget(target) on our context object.
要接收实际的目标信息,我们可以执行targetFromTargetString函数。 之后,我们执行目标。 我们可以简单地在上下文对象上调用scheduleTaget(target) 。
export async function runBuilder(
  options: PublishBuilderSchema,
  context: BuilderContext
): Promise<BuilderOutput> {
  const target = targetFromTargetString(options.buildTarget);


  await context.scheduleTarget(target);


  const targetOptions = await context.getTargetOptions(target);


  const outputPath = targetOptions.outputPath as string;

  return {success: true}
}
While we are interacting with the target we can already save the outputPath . In the next step, we’ll build the path to the package.json from this.
在与目标交互时,我们已经可以保存outputPath 。 在下一步中,我们将从package.json构建package.json的路径。
检查版本是否已经存在 (Check if Version Already Exists)
Now it’s time to create a helper function to retrieve the local package information. The path to a package.json file is resolved and parsed to a JSON by this:
现在是时候创建一个帮助函数来检索本地包信息了。 package.json文件的路径通过以下方式解析并解析为JSON:
function getLocalPackage(
  packageJsonPath: string
): { name: string; version: string } {
  const packageSource = fs.readFileSync(packageJsonPath).toString();
  return JSON.parse(packageSource);
}
We require a function to check if the version already exists on npm. The command npm show my-package@my-version version retrieves a specific version of the package. Now compare that one to our input variable:
我们需要一个函数来检查版本是否已存在于npm上。 命令npm show my-package@my-version version检索软件包的特定版本。 现在将其与我们的输入变量进行比较:
function versionAlreadyExists(packageName: string, version: string) {
  const output = childProcess.execSync(`npm show ${packageName}@${version} version`);
  const registryVersion = output.toString().trim();


  return registryVersion === version;
}
With both of the helper functions in place, we can now integrate them into our build function. Pass the name and version right into our validation function:
有了这两个辅助功能,我们现在可以将它们集成到我们的构建功能中。 将名称和版本直接传递到我们的验证函数中:
const localPackage = getLocalPackage(packageJsonPath);


if (versionAlreadyExists(localPackage.name, localPackage.version)) {
  context.logger.warn(
    `Did not publish package ${localPackage.name}@${localPackage.version}. It already exists in the selected registry.`
  );
  return { success: !options.failOnDuplicate };
}
If the validation fails we log a warning to the console. The outcome of the builder then depends on the failOnDuplicate input.
如果验证失败,我们会将警告记录到控制台。 然后,构建器的结果取决于failOnDuplicate输入。
发布包 (Publish the Package)
Publishing the package is really straight forward. Simply run npm publish inside the output directory.
发布软件包确实很简单。 只需在输出目录中运行npm publish 。
function publishPackage(path: string): void {
  childProcess.execSync(`npm publish ${path}`);
}
Now finish up your custom builder by calling the publish function from the build function. Remember to wrap it in a try-catch block to handle errors that can occur during publishing.
现在,通过从build函数调用publish函数来完成自定义生成器。 请记住将其包装在try-catch块中,以处理发布期间可能发生的错误。
try {
  publishPackage(outputPath);


  context.logger.info(
    `Successfully published ${localPackage.name}@${localPackage.version}.`
  );


  return { success: true };
} catch (_) {
  context.logger.error(
    `Couldn't publish ${localPackage.name}@${localPackage.version}.`
  );


  return { success: false };
}
4.在本地注册表中尝试您的软件包 (4. Try Your Package in a Local Registry)
Now we can try out our own builder. We’ll try to add a publish target to the plugin we built so that we can publish it using itself. Crazy!
现在,我们可以尝试使用自己的构建器。 我们将尝试向我们构建的插件添加一个发布目标,以便我们可以使用自身发布它。 疯!
First, install Verdaccio to create a local package registry — just for trying out. Install it and launch it in a second terminal window:
首先,安装Verdaccio以创建本地程序包注册表-仅用于尝试。 安装它并在第二个终端窗口中启动它:
npm i -g verdaccio
verdaccio
After Verdaccio is running, configure your local workspace to use it as its primary registry: npm set registry http://localhost:4873
Verdaccio运行后,配置您的本地工作空间以将其用作其主要注册表: npm set registry http://localhost:4873
Build & publish your plugin:
构建并发布您的插件:
nx run my-plugin:build
npm publish ./dist/packages/my-plugin/
The last step before using our builder is to add it to our workspace.json. Add your own target called publish right above your build target.
使用构建器之前的最后一步是将其添加到我们的workspace.json 。 在构建目标上方添加自己的目标,称为publish 。
"publish": {
  "builder": "@my-workspace/my-plugin:publish",
  "options": {
    "buildTarget": "my-plugin:build"
  }
},
"build": {
Now install and execute it!
现在安装并执行它!
npm i @my-workspace/my-pluginnx run my-plugin:publish
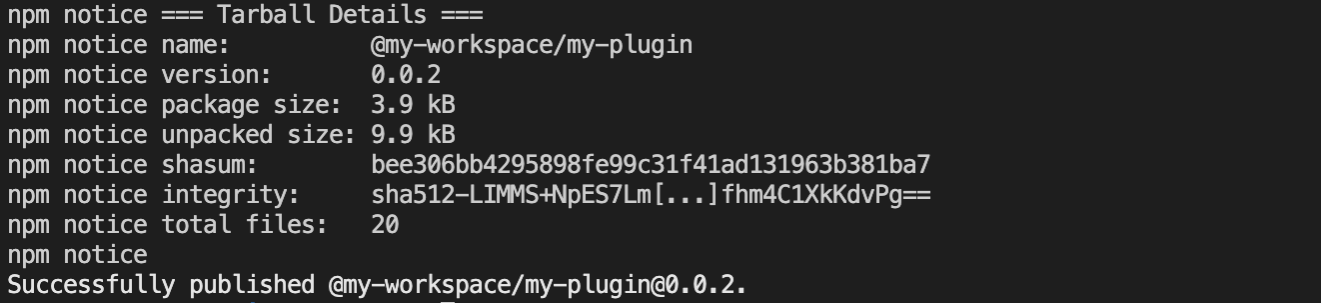
The output shows out that the package was already published before. Great! We now know that our version check is working. Just bump the version inside the package.json and publish again:
输出显示该软件包之前已经发布过。 大! 现在我们知道我们的版本检查正在运行。 只需将版本package.json在package.json然后再次发布:
Congratulations, you just wrote a complete custom builder inside Angular. Using Nx you can also build builders for Node, Express, Nest.js and many other frameworks.
恭喜,您刚刚在Angular中编写了一个完整的自定义生成器。 使用Nx,您还可以为Node,Express,Nest.js和许多其他框架构建构建器。
Now go out there and build something!
现在去那里建造东西!
Thanks for taking the time to learn about custom builders with Angular & Nx. If you have any open questions feel free to message me on Twitter @niklaspor or leave a comment.
感谢您抽出宝贵的时间来学习Angular&Nx的自定义生成器。 如果您有任何开放性问题,请随时在Twitter @niklaspor上给我发消息或发表评论。
Have a great day.- Niklas
祝你有美好的一天-尼克拉斯
Almost forgot – Code is available here.
差点忘了-代码可 在此处获得 。


 122
122

 被折叠的 条评论
为什么被折叠?
被折叠的 条评论
为什么被折叠?
 到【灌水乐园】发言


