


 本文介绍了如何通过merge、include和ViewStub优化Android应用的UI布局,提高代码复用性和效率。merge标签能消除多余的视图组,include实现布局片段的重复使用,ViewStub则用于按需加载布局,减少资源消耗。同时,文章还提到了使用代码折叠(regions)来提升代码可读性。
android刷新布局ui
Hello! Hope you’re good and I can help you with some small UI improvements. In this article you'll learn about merge, include and ViewStub, which will help you to have a better layout structure.
你好! 希望您一切都好,我可以在UI方面进行一些小的改进。 在本文中,您将学习merge , include和ViewStub ,这将帮助您拥有更好的布局结构。
Everyone know, or at least should know, the importance of reusing code instead of copy and paste the same snippet all over the project, but almost nobody do the same with UI code, the XML one. But why?
每个人都知道,或者至少应该知道,在整个项目中重用代码而不是复制并粘贴相同的代码片段非常重要,但是几乎没有人对UI代码(XML代码)做同样的事情。 但为什么?
Well, since you're here there is a chance that you want to make a better UI code or at least have curiosity for it. So lemme guide your first steps.
好吧,既然您在这里,就有机会想要制作一个更好的UI代码,或者至少对此有所好奇。 因此,lemme指导您的第一步。
The code below will be our base to everything that we'll do here.
下面的代码将成为我们在此所做的一切的基础。
包括 (Include)
Include is the key for code reusability in Android. With include tag you can embed layout pieces inside your current layout. Everything starts here.
包含是Android中代码可重用性的关键。 使用include标签,您可以将布局片段嵌入当前布局中。 一切都从这里开始。
Imagine that we want to add that View that we called as toolbar in the code above to others layout files and we don't want to copy and paste it for every file.
想象一下,我们想将上面代码中称为工具栏的View添加到其他布局文件中,而我们不想为每个文件复制并粘贴它。
The first thing that we can do is to extract that code to another file and it would be like this:
我们可以做的第一件事是将代码提取到另一个文件中,就像这样:
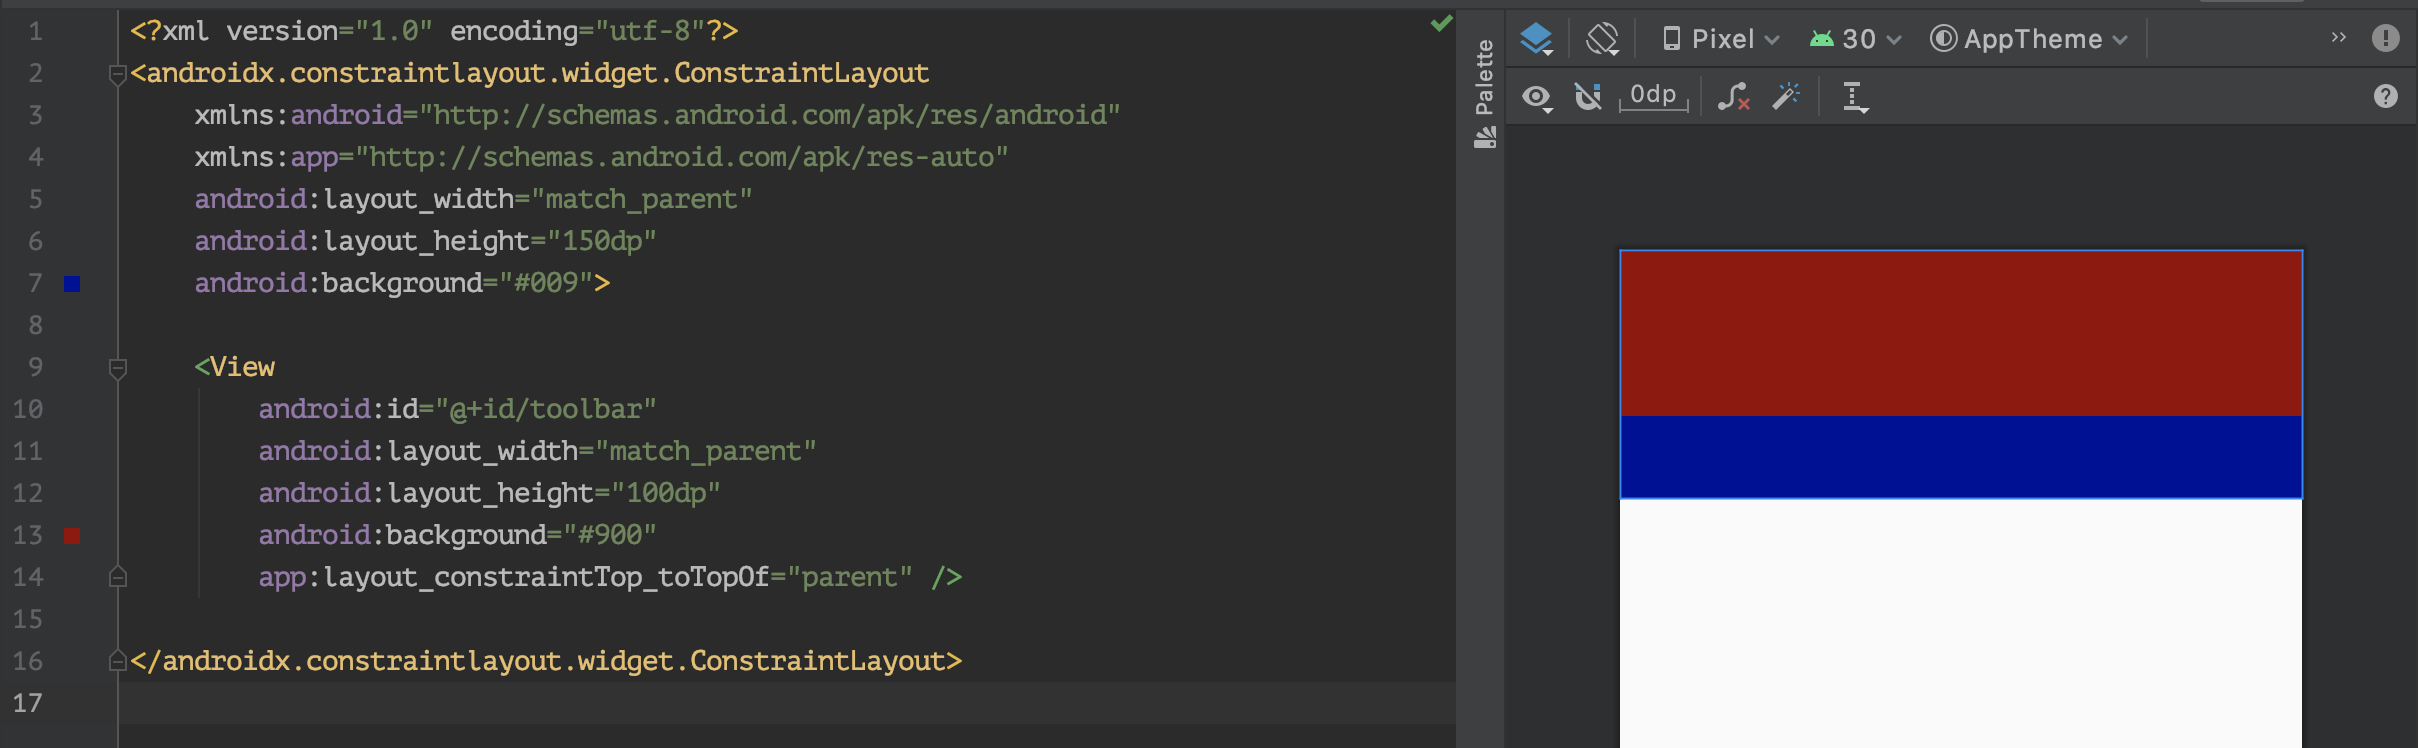
Note that I've added a layout_height bigger than the View height and a blue background to the ConstraintLayout.
请注意,我在ConstraintLayout添加了一个比View高度大的layout_height和一个蓝色background 。
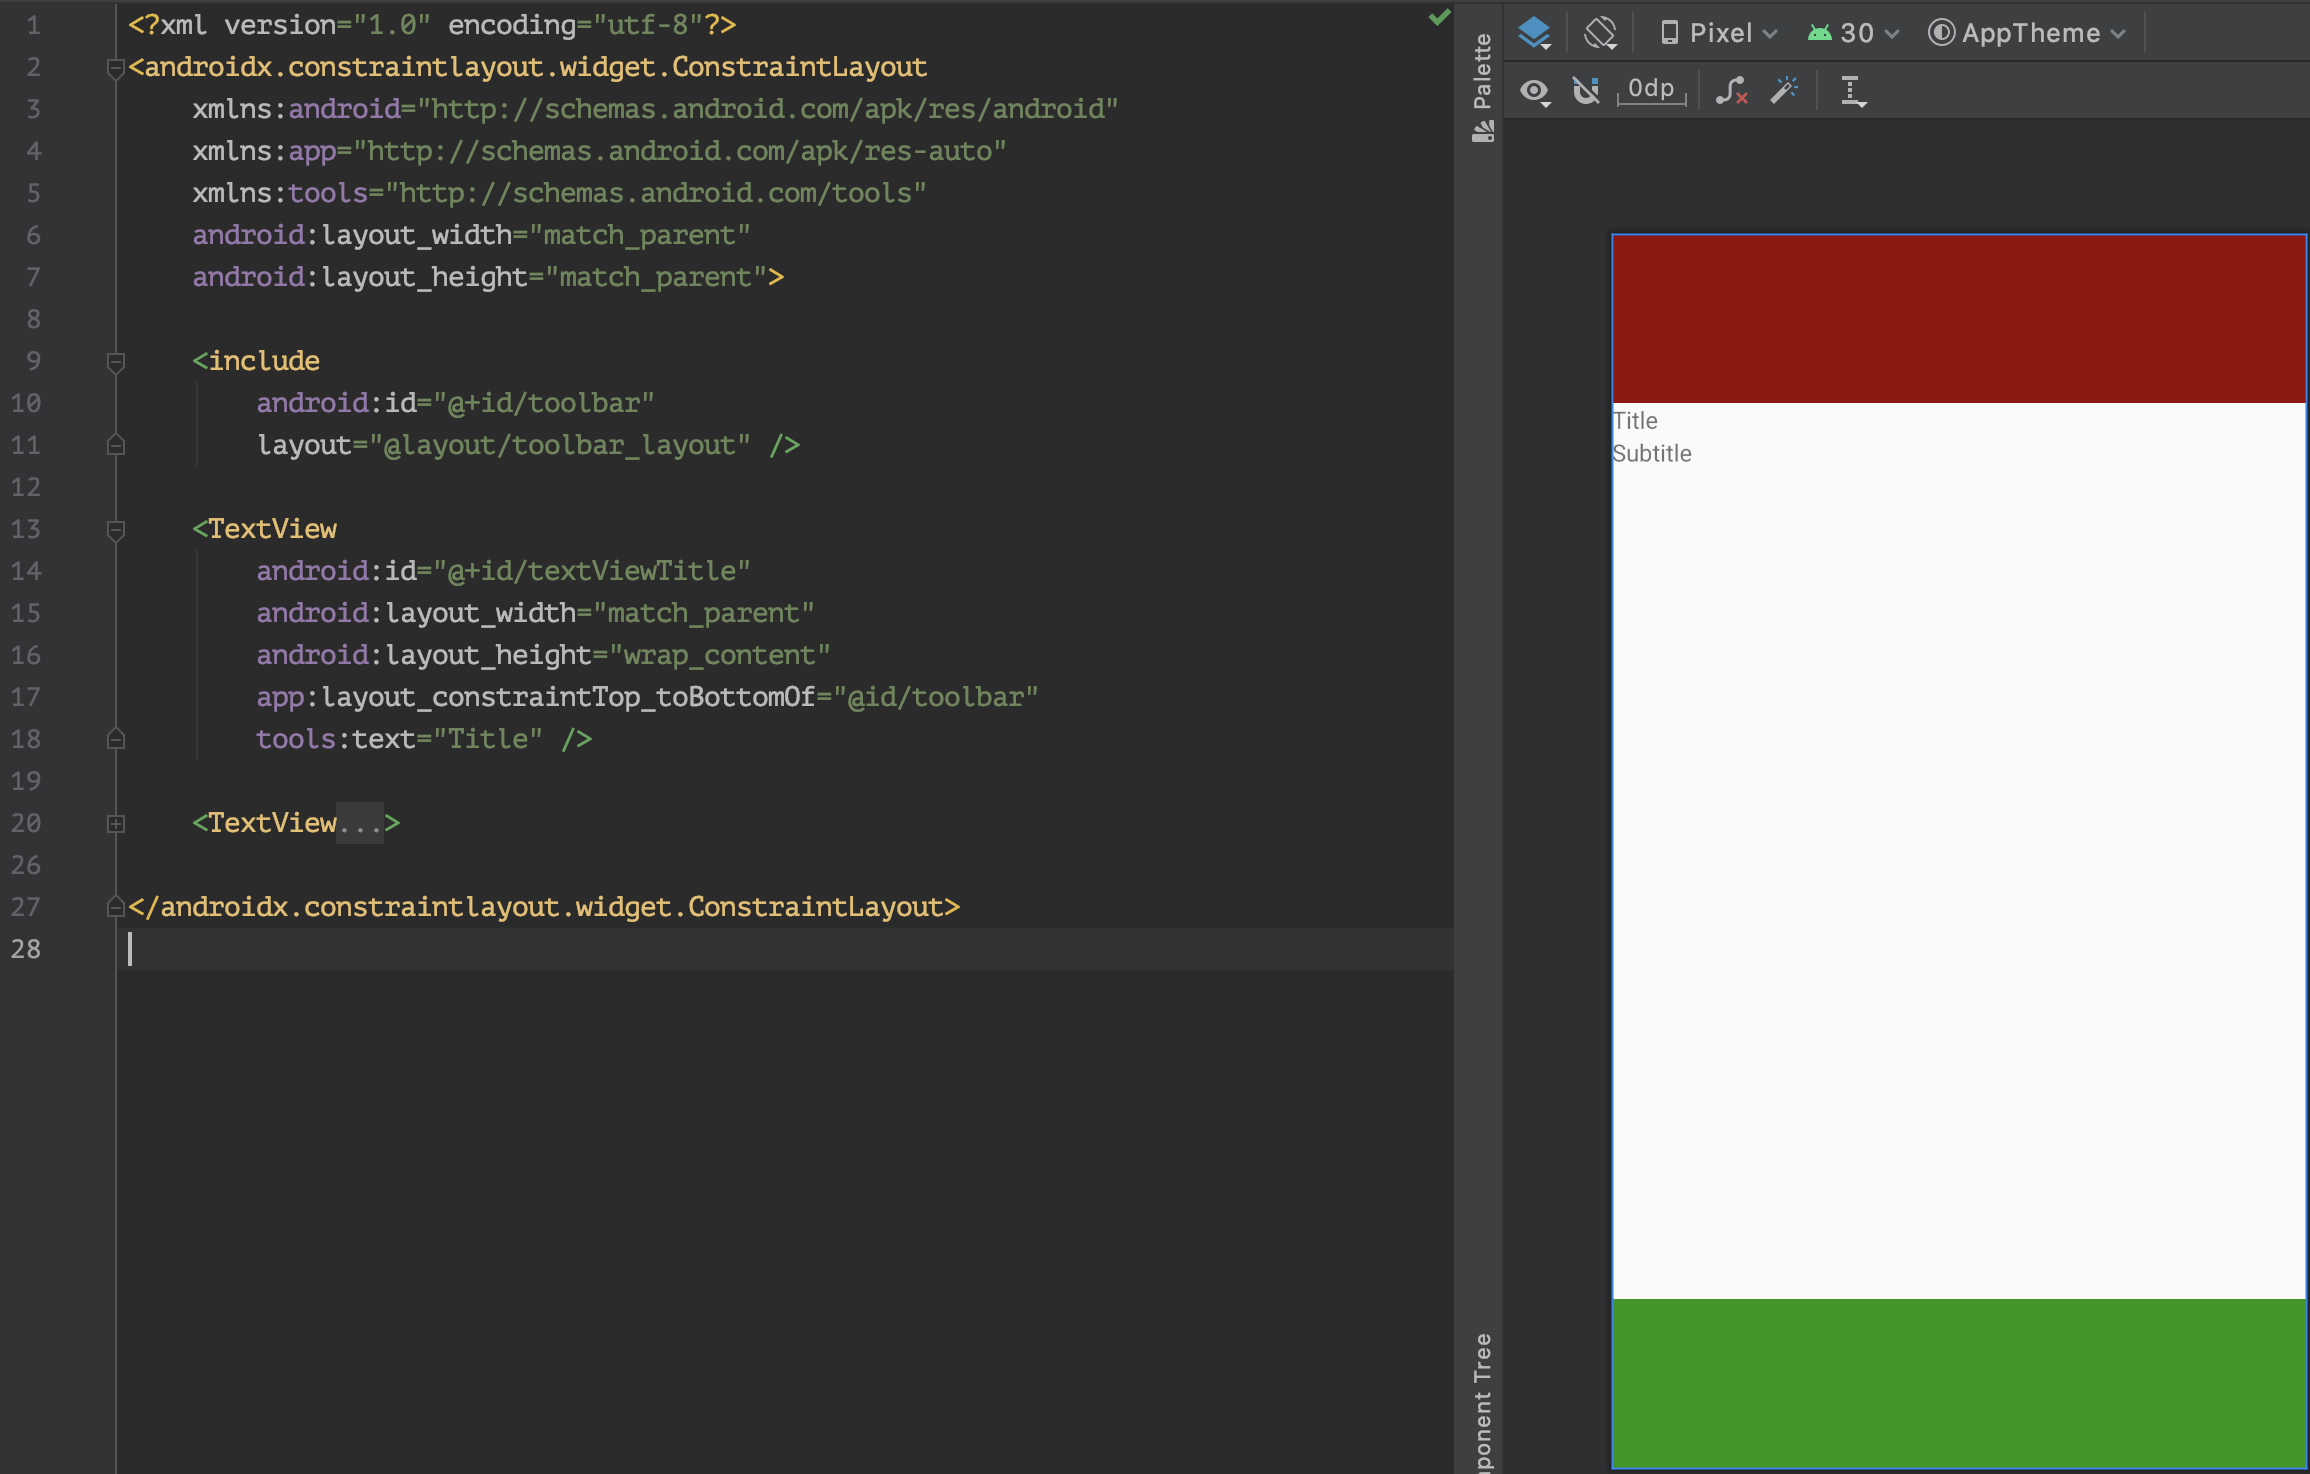
Now we need to include our toolbar layout in all files that has a toolbar. Our code and design will looks like this:
现在,我们需要在include工具栏的所有文件中include工具栏布局。 我们的代码和设计将如下所示:
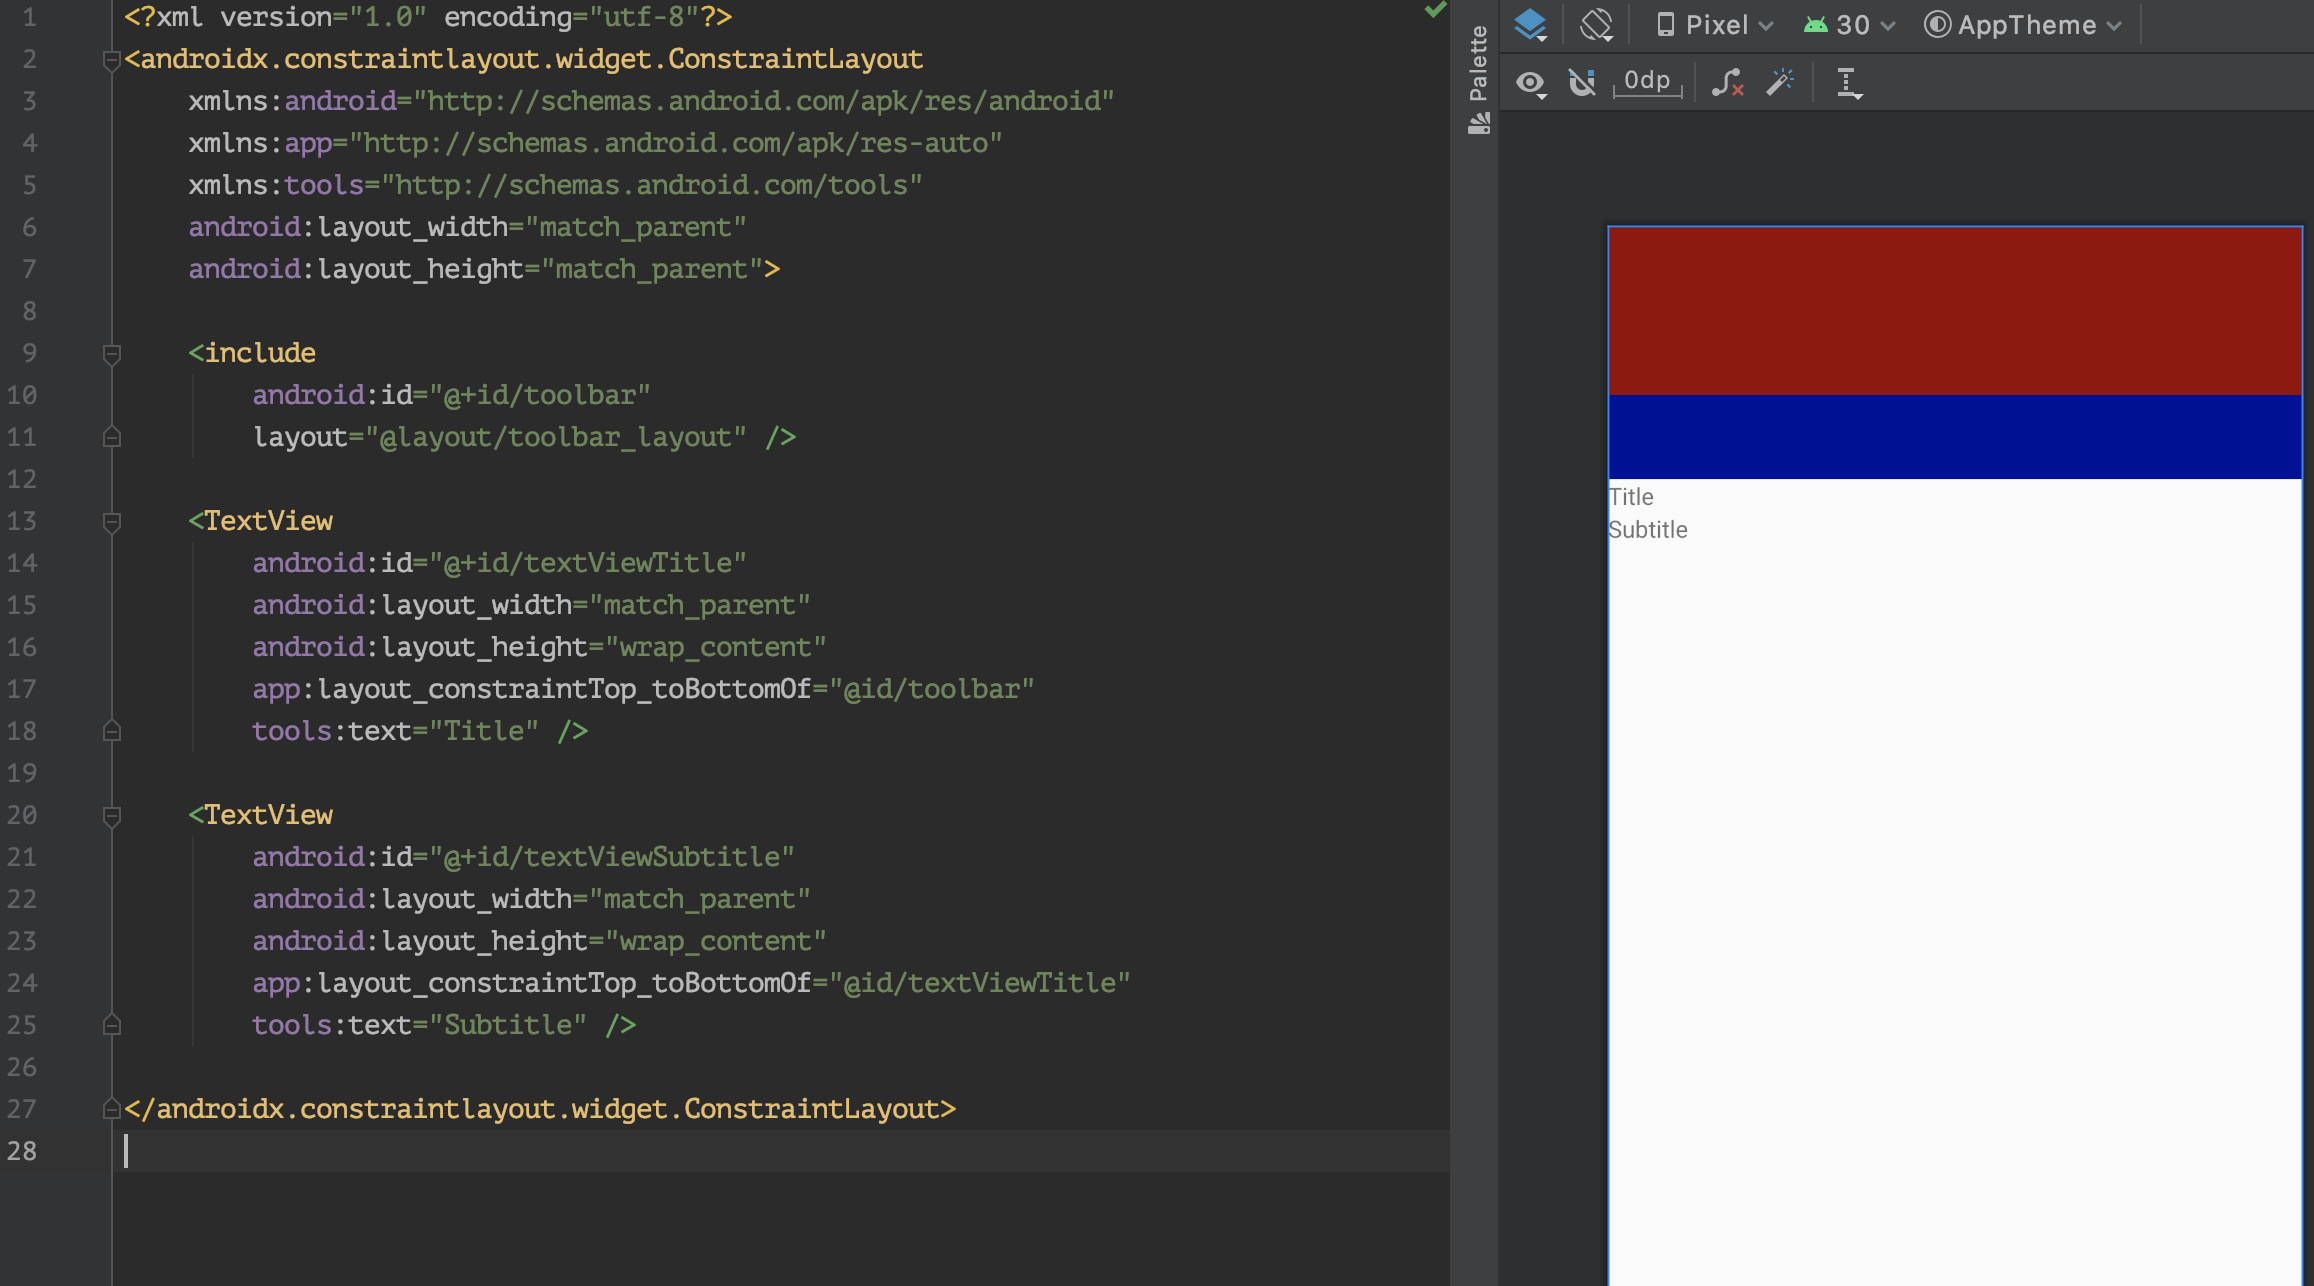
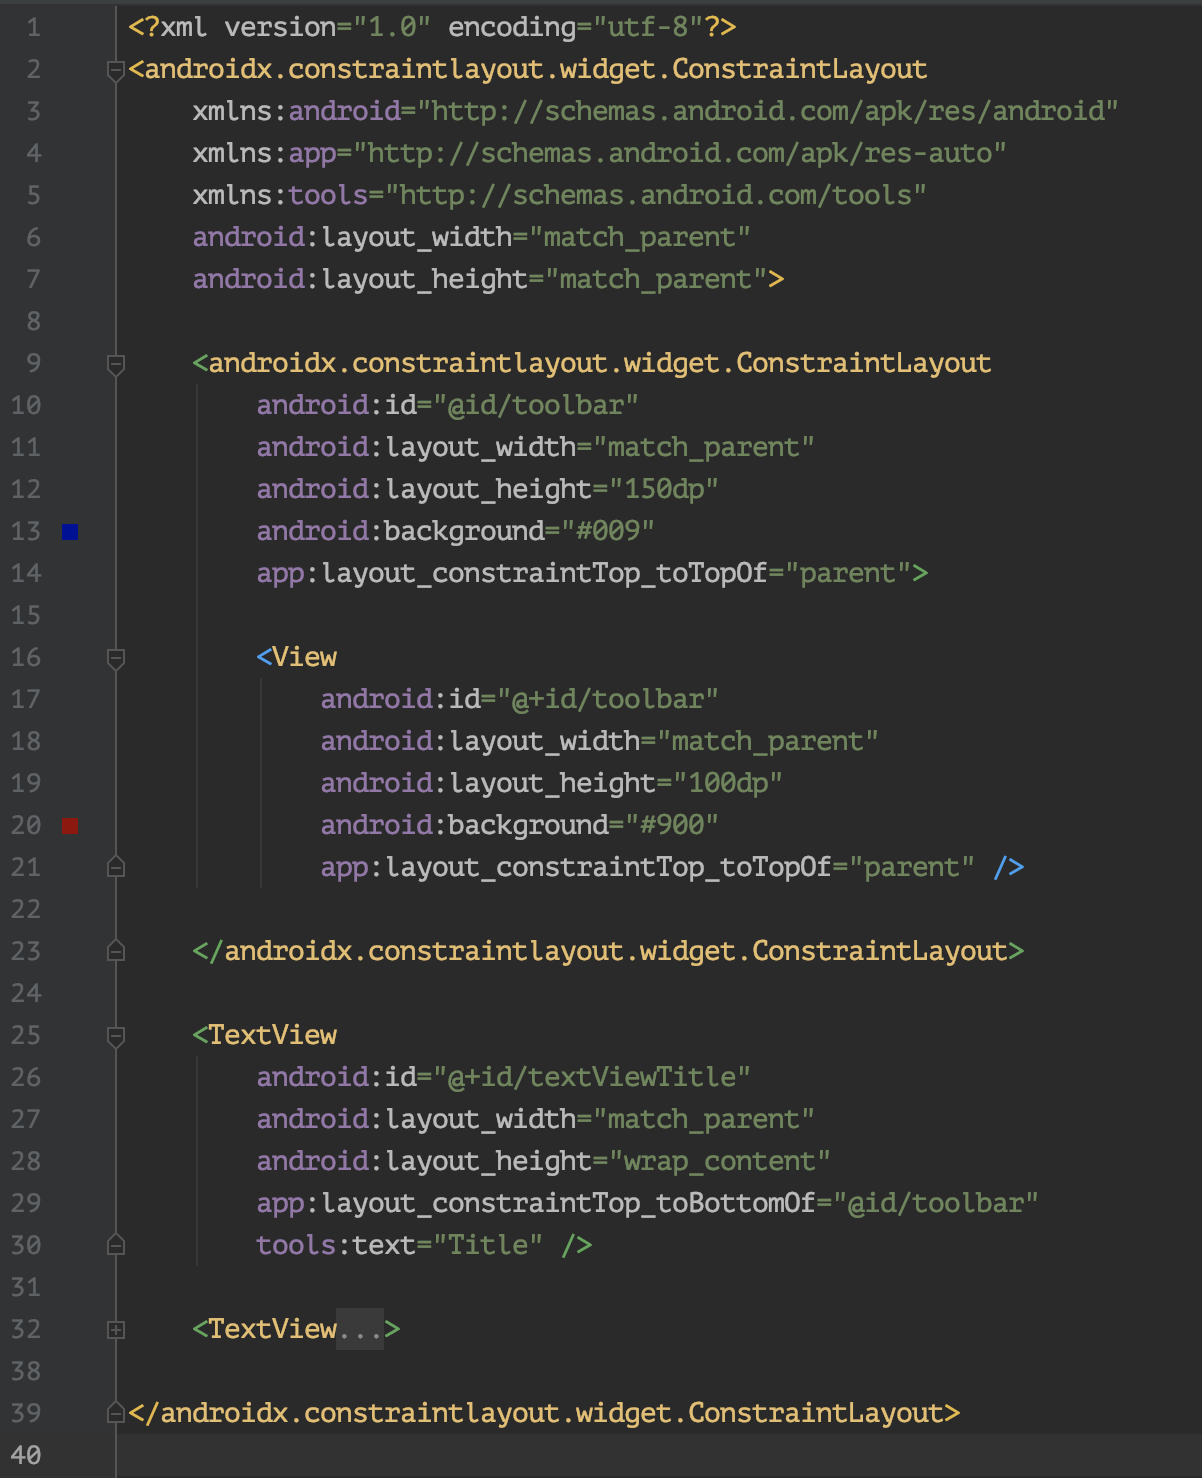
When using include we just add everything how it was in the included layout, so if instead of using layout_height="150dp" we use it match_parent everything will be blue. The code below shows exactly how include behaves.
当使用include我们只需添加所有内容,就包括在包含的布局中,因此如果不使用layout_height="150dp"而是使用match_parent所有内容layout_height="150dp"蓝色。 以下代码准确显示了include行为方式。
Okay, in this case we're just reusing one component and all the layout becomes one level more complex. Is it that worthy to do something like that for just one component?
好的,在这种情况下,我们仅重用了一个组件,所有布局都变得更复杂了一层。 仅对一个组件执行这样的操作值得吗?
合并 (Merge)
The merge tag helps to eliminate redundant view groups of our view hierarchy. I've added one more View to our toolbar_layout.xml just to show that we can use more than one component. Change the parent component to use merge tag instead of ConstraintLayout and keep the include.
merge标签有助于消除视图层次结构中的多余视图组。 我向我们的toolbar_layout.xml添加了另一个View ,只是为了表明我们可以使用多个组件。 将父组件更改为使用merge标记代替ConstraintLayout并保留include 。
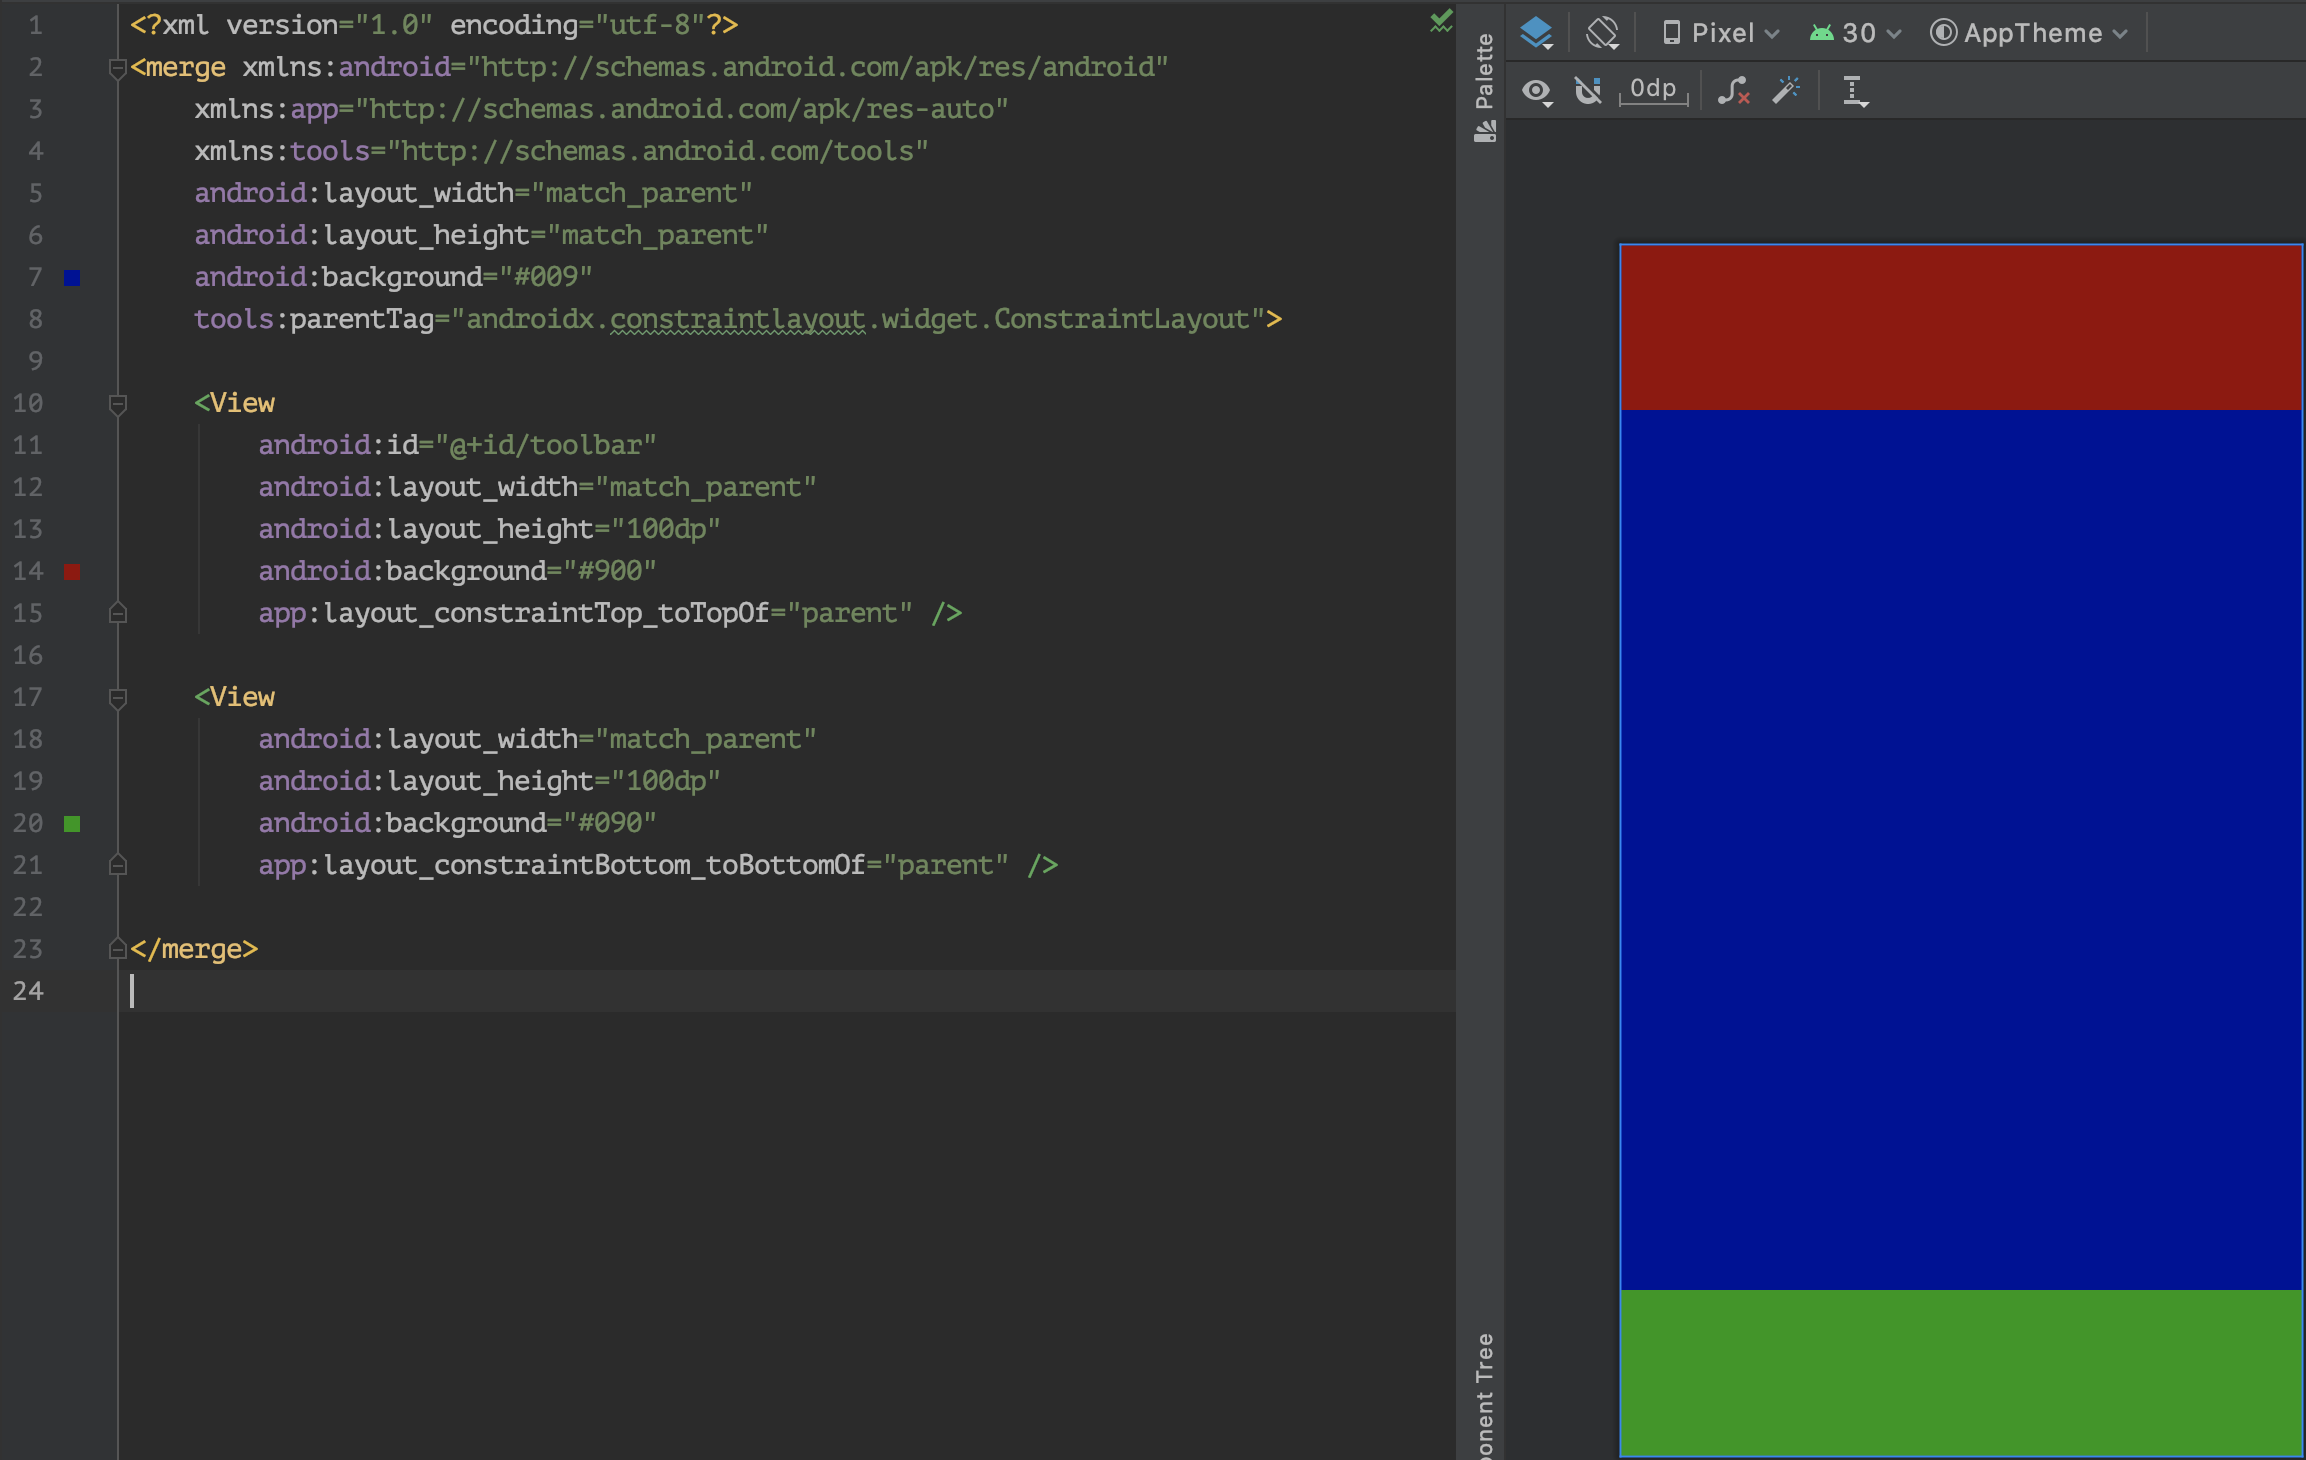
Note that the merge tag has an attribute called parentTag which is a View type. It's used just to have a preview on how our layout will looks like when merged. And this is the result:
请注意, merge标记具有名为parentTag的属性,该属性是一种View类型。 它仅用于预览合并后的布局外观。 结果如下:
This way we don't need to use a ConstraintLayout as base and everything is included as it was always there! It almost looks like a magic trick, doesn't it?
这样,我们就不需要使用ConstraintLayout作为基础,并且所有内容都包含在内,因为它始终存在! 几乎看起来像是魔术,不是吗?
ViewStub (ViewStub)
Imagine that we have a screen with a piece of layout that only is shown if a specific scenario occurs, otherwise it will never be shown. If you let that piece of code there, but with visibility as invisible or gone the view will be rendered but will not be visible.
想象一下,我们有一个带有一部分布局的屏幕,只有在发生特定情况时才显示该屏幕,否则它将永远不会显示。 如果将那段代码放在那里,但是可见性invisible或gone ,则将呈现视图,但将不可见。
ViewStub tag is used to inflate a layout, so unless you call inflate method, the view won't be added to the View hierarchy.
ViewStub标记用于使布局膨胀,因此,除非调用inflate方法,否则不会将视图添加到View层次结构中。
After the view is inflated, ViewStub will not be accessible anymore and the view group will have a inflated id. Also ViewStub is not compatible with merge tag, sadly.
视图膨胀后,将无法再使用ViewStub ,并且视图组的ID将膨胀。 而且, ViewStub是ViewStub与merge标签不兼容。
Below you can see the stub_layout.xml, it's inclusion as ViewStub on the base_layout.xml and how to work with it on our MainActivity.kt.
下面你可以看到stub_layout.xml ,它列为ViewStub在base_layout.xml以及如何在我们与它的工作MainActivity.kt 。

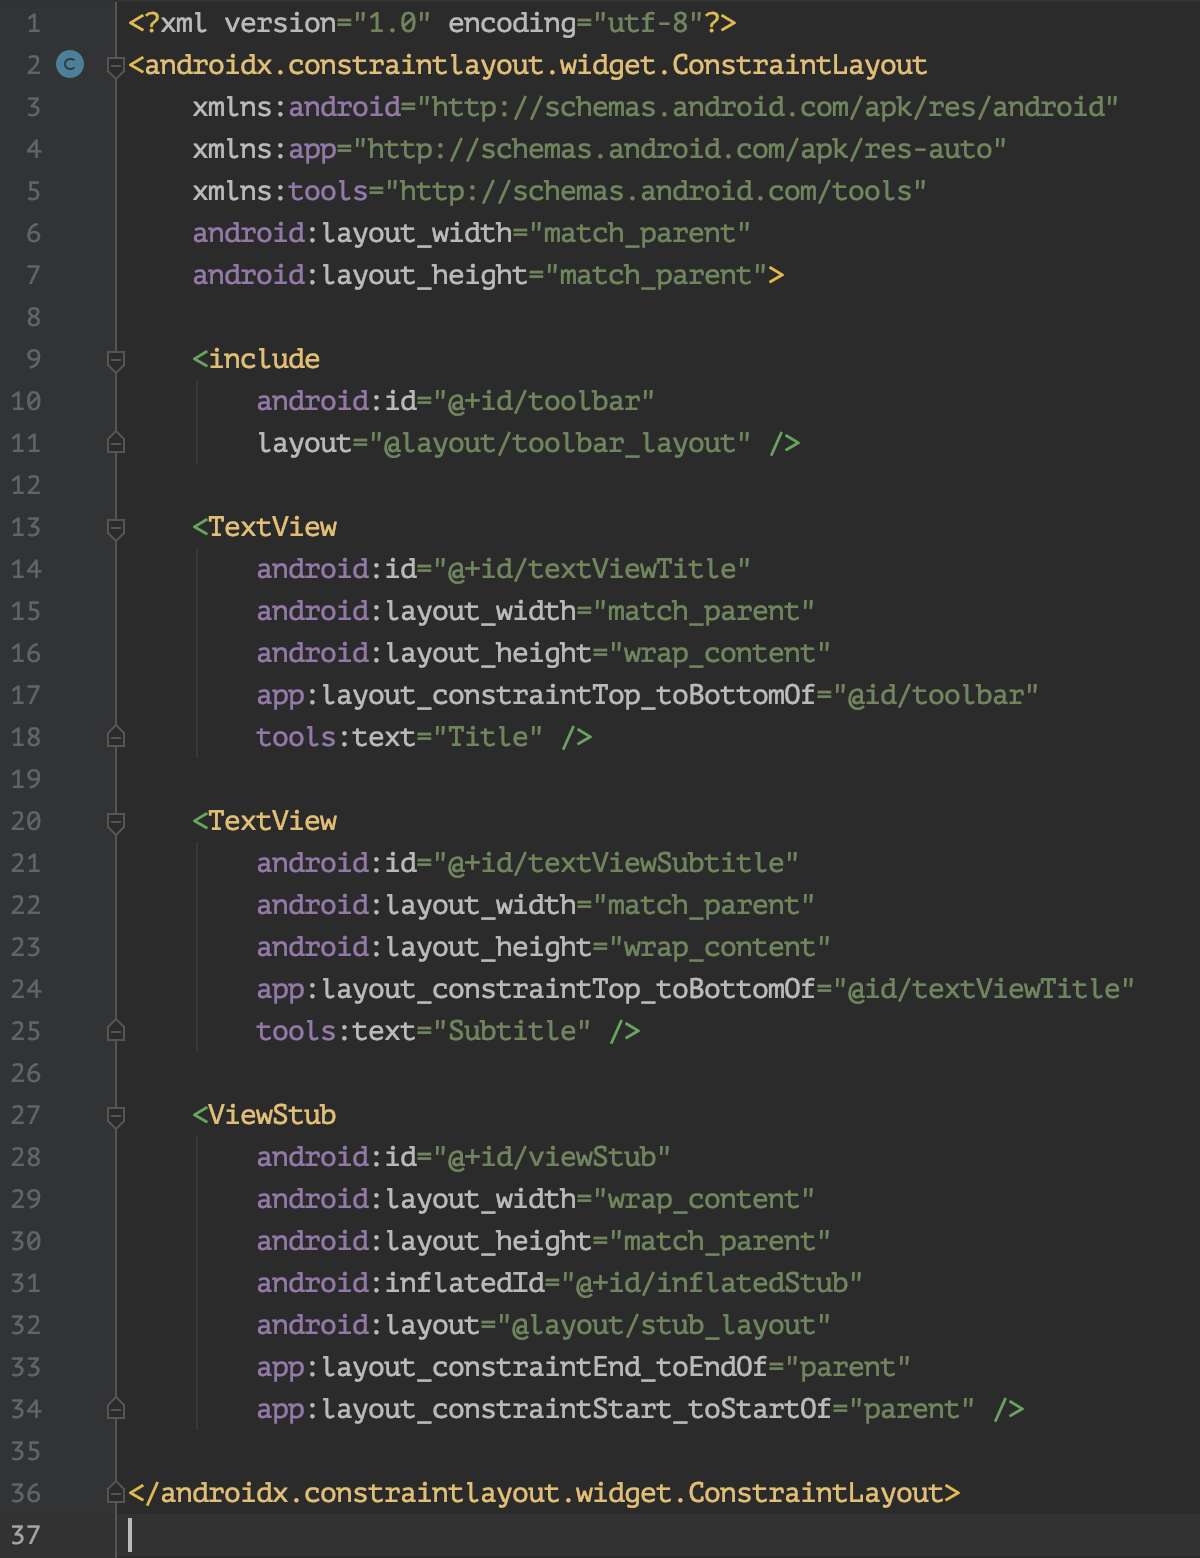

As you can see, the ViewStub has an android:id to be referenced before inflated, android:inflatedId to be referenced after inflated and android:layout to define which layout should be inflated.
如您所见, ViewStub具有膨胀前要引用的android:id , android:inflatedId后要引用的android:layout inflatedId和android:layout来定义应ViewStub布局。
最后但并非最不重要的-奖金时间到了! (Last but not least — IT'S BONUS TIME !)
Have you ever thought that should be great if you could fold/find your code more easily? Well, your problem is over! Just use regions!
您是否曾经想过,如果可以更轻松地折叠/查找代码,那应该很棒吗? 好吧,你的问题已经解决了! 只需使用区域!
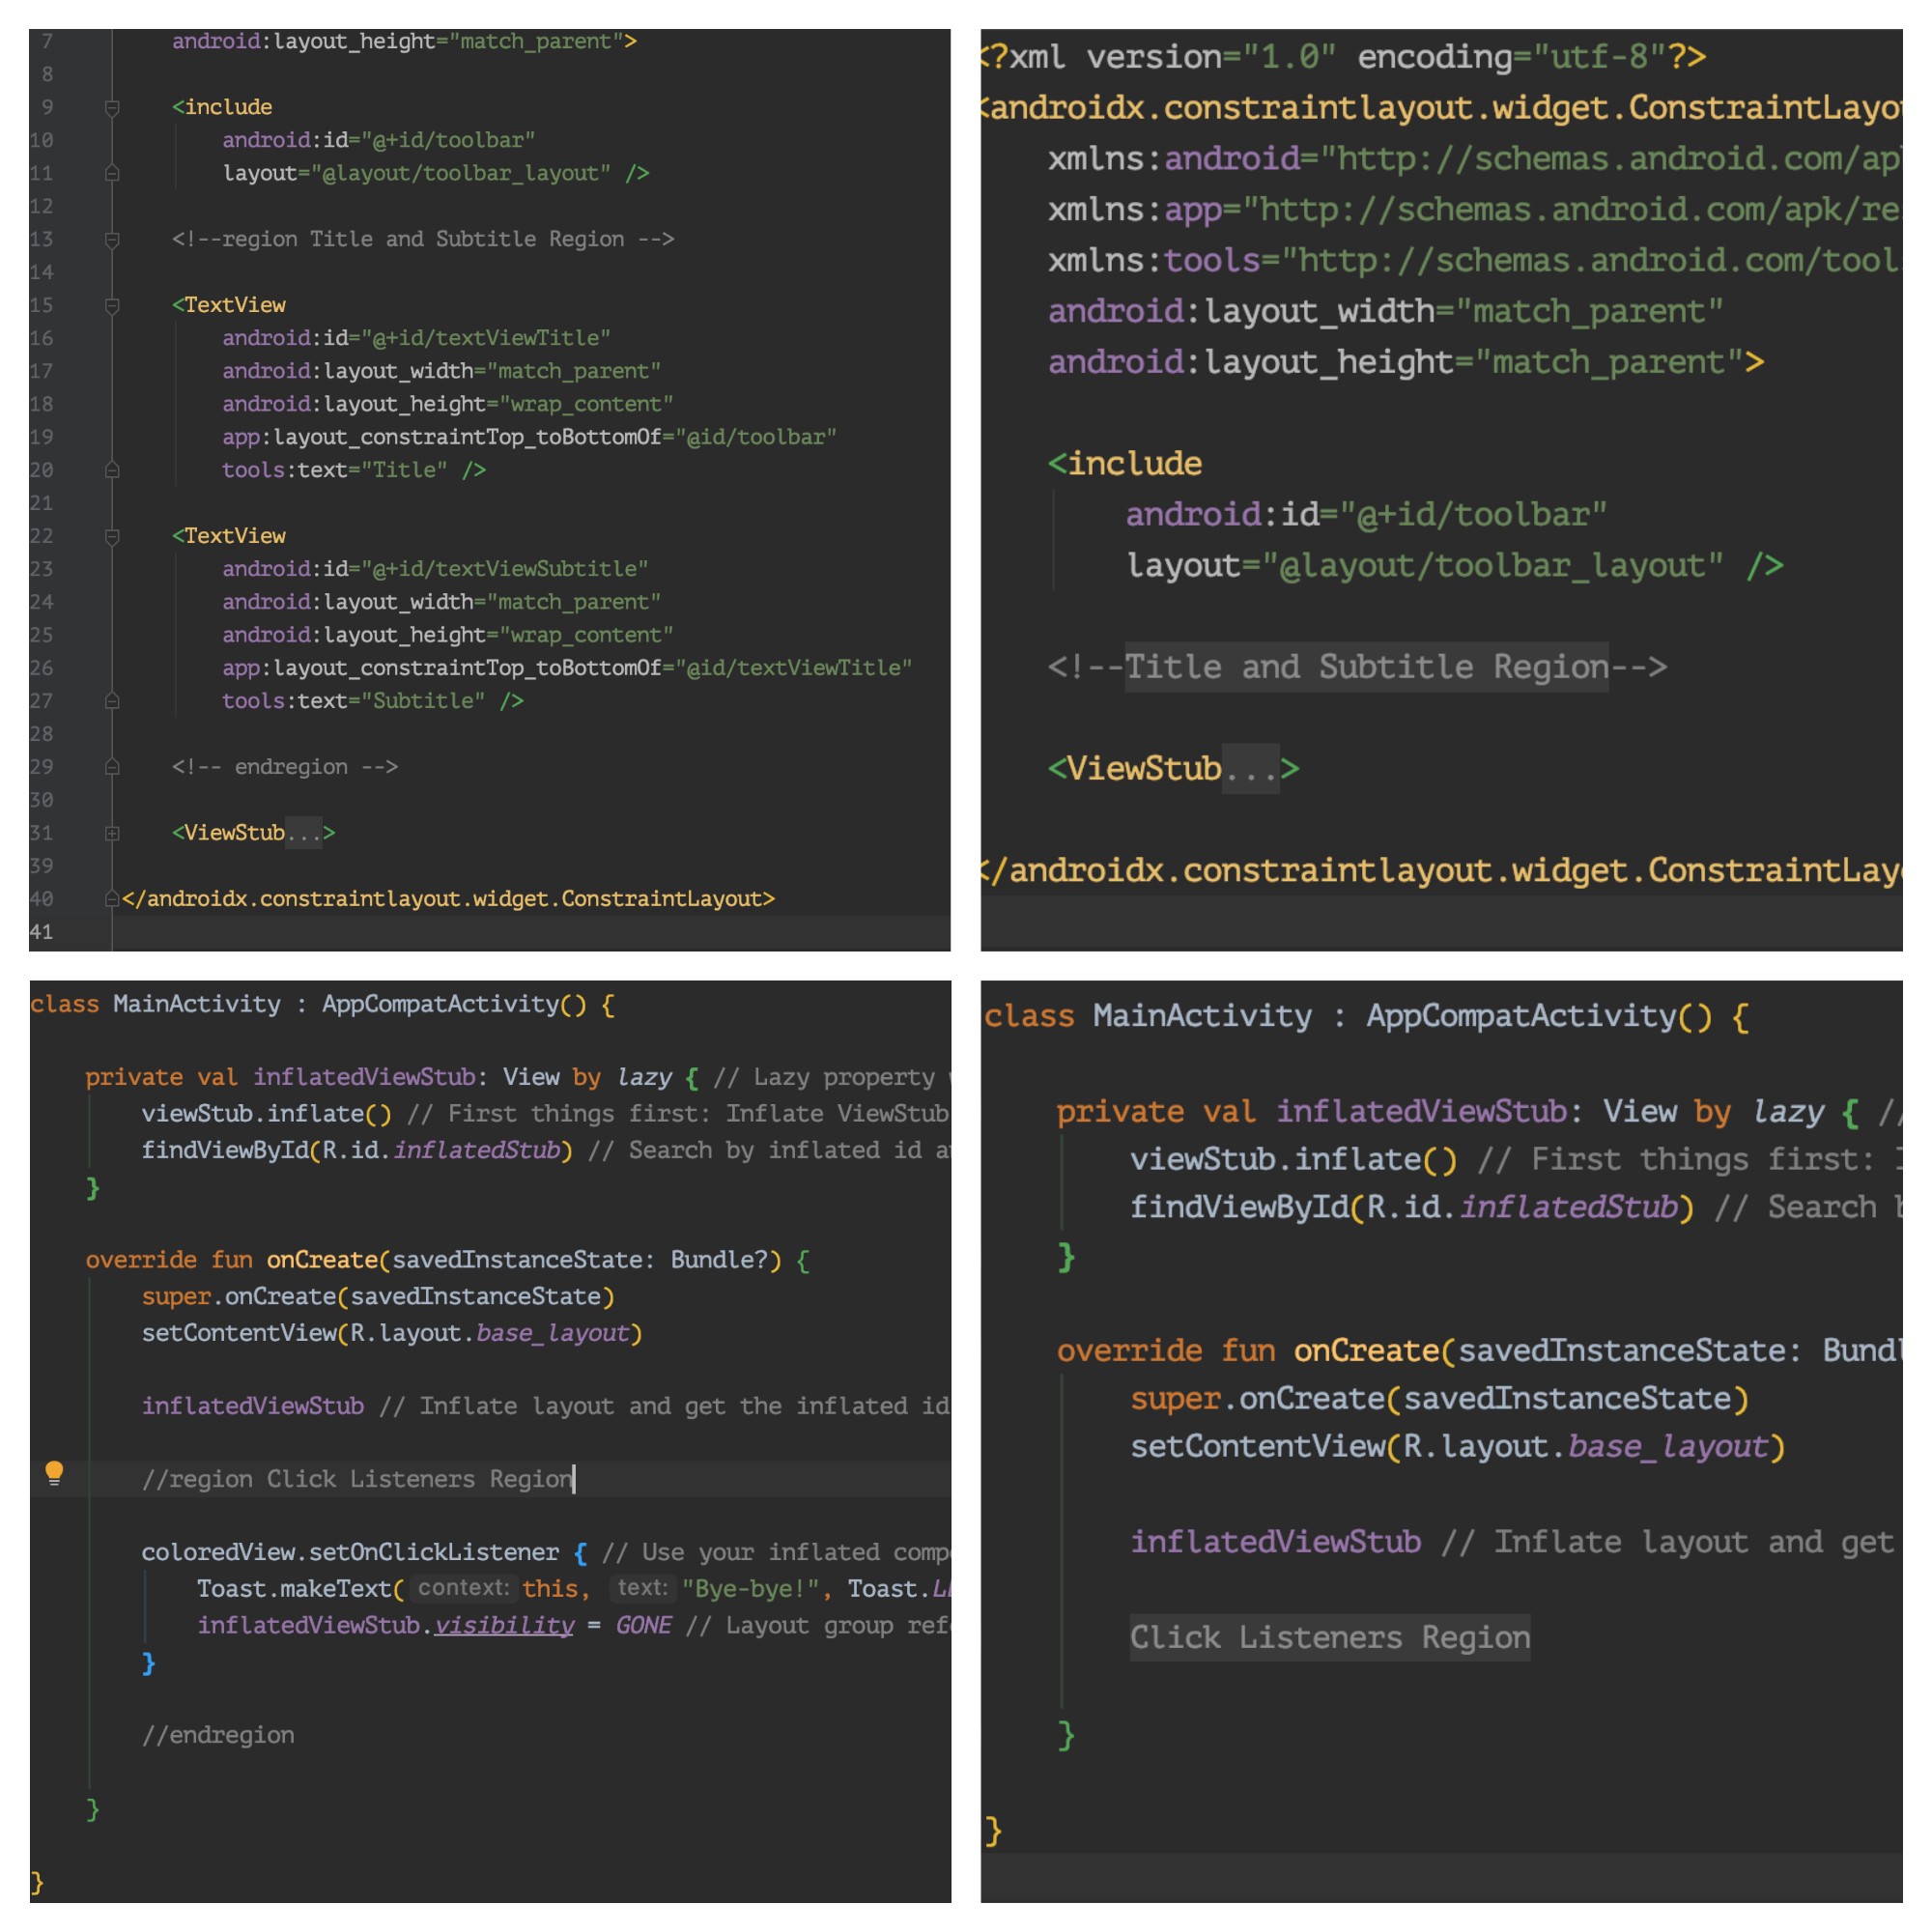
To use regions in Java/Kotlin files you just need to open a comment with //region region name and close your region with //endregion.
要在Java / Kotlin文件中使用区域,您只需要使用//region region name打开注释,并使用//endregion关闭区域。
And to use it on XML files the idea is the same, but with XML comment tag <!--region region name--> and close your region with <!--endregion-->
要在XML文件上使用它,想法是相同的,但是使用XML注释标记<!--region region name--> <!--endregion--> <!--region region name-->并使用<!--endregion-->关闭您的区域
Make sure to always close the regions with endregion written together.
确保始终关闭endregion区域一起书写的区域。
Well that’s it! I hope you have enjoyed it and I may have taught you something useful. Now have good luck on your Android journey!
就是这样! 我希望您喜欢它,并且我可能已经教给您一些有用的东西。 现在祝您在Android旅途中一切顺利!
android刷新布局ui


 被折叠的 条评论
为什么被折叠?
被折叠的 条评论
为什么被折叠?
 到【灌水乐园】发言


