


 本文介绍了在Sagemaker上建立系统模型的五个关键步骤,涵盖了从数据预处理到模型部署的全过程。
系统模型建立的几个步骤
AWS (or Amazon) SageMaker is a fully managed service that provides the ability to build, train, tune, deploy, and manage large-scale machine learning (ML) models quickly.
AWS(或Amazon)SageMaker是一项完全托管的服务,提供了快速构建,训练,调优,部署和管理大型机器学习(ML)模型的功能。
Sagemaker provides tools to make each of the following steps as shown in the below image, simpler.
Sagemaker提供了简化以下每个步骤的工具,如下图所示。
In this article, we will be looking at each of the above steps. For better understanding, let us divide this project into two articles:
在本文中,我们将研究上述每个步骤。 为了更好地理解,让我们将该项目分为两篇文章:
- Build a model in SageMaker in 5 steps using high-level API 使用高级API通过5个步骤在SageMaker中构建模型
- Deploy a Model in SageMaker in 5 steps通过5个步骤在SageMaker中部署模型
For further understanding of how low-level API works, please refer to the articles mentioned below. If you are a beginner, start with the articles for high-level API before you move onto the article on low-level API.
要进一步了解底层API的工作原理,请参阅下面提到的文章。 如果您是初学者,请先阅读有关高级API的文章,然后再转到有关低级API的文章。
3. Build a model in SageMaker in 5 steps using low-Level API
3.使用低级API在SageMaker中通过5个步骤构建模型
Before we get started, for beginners with no AWS account, create 12 months of free tier access AWS account.
在开始之前,对于没有AWS账户的初学者,请创建12个月的免费套餐访问AWS账户。
This project’s focus is not on the model itself, instead of on the steps involved in modeling on SageMaker. Let us get onto building a model in AWS SageMaker in 5 simple steps. If you would like to follow along, please find the codes for the project in the GitHub Repository.
该项目的重点不是模型本身,而是在SageMaker上进行建模所涉及的步骤。 让我们通过5个简单的步骤开始在AWS SageMaker中构建模型。 如果您想继续,请在GitHub Repository中找到该项目的代码。
1.创建一个SageMaker实例 (1. Create a SageMaker Instance)
An Amazon SageMaker notebook instance is an ML compute instance running the Jupyter Notebook App. An instance is nothing but a virtual machine where we can choose properties like processors, GPU, RAM, and others, based on the project requirements.
Amazon SageMaker笔记本实例是运行Jupyter Notebook应用程序的ML计算实例。 实例不过是一台虚拟机,我们可以根据项目需求选择处理器,GPU,RAM等属性。
To create a notebook instance, follow the instructions given for SageMaker console. Once the instance is created, start the instance.
要创建笔记本实例,请遵循针对SageMaker控制台的说明。 创建实例后,启动实例。
Important notes to avoid incurring big bills:
避免产生大笔账单的重要注意事项:
- Shutdown the instance when not in use 不使用时关闭实例
- Use a small instance_type like ml.t2.medium使用像ml.t2.medium这样的小instance_type
启动SageMaker会话 (Inititate a SageMaker Session)
SageMaker session is an object that represents the SageMaker session that we are currently operating within. It manages interactions with the Amazon SageMaker APIs and any other AWS services needed. This class provides convenient methods for manipulating entities and resources that Amazon SageMaker uses, such as training jobs, endpoints, and input datasets in S3. We will discuss them in detail later.
SageMaker会话是一个对象,代表我们当前正在其中运行的SageMaker会话。 它管理与Amazon SageMaker API和所需的任何其他AWS服务的交互。 此类提供了方便的方法来操纵Amazon SageMaker使用的实体和资源,例如训练作业,终端节点和S3中的输入数据集。 稍后我们将详细讨论它们。
Once in the jupyter notebook, import SageMaker, the rest of the libraries can be imported as and when required.
一旦进入jupyter笔记本,导入SageMaker,其余的库可以在需要时导入。
import sagemaker
session = sagemaker.Session()
获得执行角色 (Get execution role)
Get the notebook instance’s execution role, which is the IAM role that we created for our SageMaker notebook instance.
获取笔记本实例的执行角色,这是我们为SageMaker笔记本实例创建的IAM角色。
from sagemaker import get_execution_role
role = get_execution_role()
设置s3存储桶和文件夹 (Set s3 bucket and folders)
Then extract the default bucket assigned to this session, using session method(sagemaker.Session().default_bucket()) or provide an existing bucket name. Let us also create a folder name in the s3 bucket to store all the data and models.
然后,使用会话方法(sagemaker.Session()。default_bucket())提取分配给该会话的默认存储桶,或提供一个现有的存储桶名称。 让我们还在s3存储桶中创建一个文件夹名称,以存储所有数据和模型。
s3_bucket = sagemaker.Session().default_bucket()
s3_prefix = 'spam-data' #prefix used for data stored within the bucket
s3_path = 's3://{}/{}/'.format(s3_bucket, s3_prefix)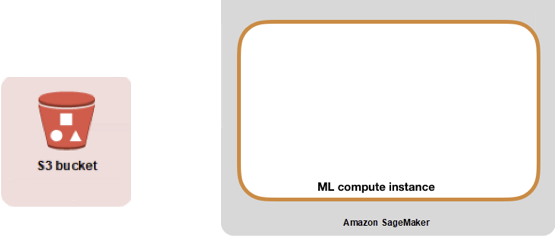
2.准备数据 (2. Prepare the data)
We will begin by uploading data to SageMaker; this can be done in two ways, upload it to a local directory or s3.
我们将从将数据上传到SageMaker开始。 这可以通过两种方式完成,将其上传到本地目录或s3。
将数据上传到s3 (Upload data to s3)
To upload the data to s3, create an s3 bucket. Follow this blog to create a bucket, then upload the data to the bucket, note down the bucket, and file name of the data.
要将数据上传到s3,请创建一个s3存储桶。 按照此博客创建存储桶,然后将数据上传到存储桶,记下存储桶以及数据的文件名。
bucket='spam-classification-data'
data_key = 'SMSSpamCollection.txt'
data_location = 's3://{}/{}'.format(bucket, data_key)data = pd.read_csv(data_location, sep="\t", header=None, names = ['labels', 'messages'])
预处理并将数据集拆分为训练和测试 (Preprocess & split dataset into training and testing)
Next, convert the textual data into numerical values. We will use sklearn to preprocess the data.
接下来,将文本数据转换为数值。 我们将使用sklearn预处理数据。
- Import all the requisite packages from sklearn library. 从sklearn库导入所有必需的软件包。
- Build a Tfidf pipeline to preprocess data. 建立一个Tfidf管道来预处理数据。
- Convert the label column to numerical values (0 and 1). 将标签列转换为数值(0和1)。
from sklearn.feature_extraction.text import CountVectorizer
from sklearn.feature_extraction.text import TfidfTransformer
from sklearn.preprocessing import label_binarize
from sklearn.pipeline import Pipeline


# Convert messages into tfidf
tf_idf = Pipeline([('cv',CountVectorizer()), ('tfidf_transformer',TfidfTransformer(smooth_idf=True,use_idf=True))])
tf_idf_vector  = pd.DataFrame(tf_idf.fit_transform(data['messages']).todense())
data['labels'] = label_binarize(data['labels'], classes=['ham', 'spam'])


# Split the dataset into train, test and validation
X_train, X_test, y_train, y_test = train_test_split(tf_idf_vector, data['labels'], test_size=0.3, random_state=2020)
X_train, X_val, y_train, y_val = train_test_split(X_train, y_train, test_size=0.3, random_state=2020)
The next step involves training the data. To use the AWS algorithm like XGBoost, upload the train and test data into s3 since SageMaker assumes the data is stored in s3.
下一步涉及训练数据。 要使用像XGBoost这样的AWS算法,由于SageMaker假定数据存储在s3中,因此将火车和测试数据上传到s3中。
Sagemaker will create a virtual machine with the desired properties like memory, RAM, GPU, and others to train and deploy a model. This virtual machine will load an image in the form of a docker container that includes training and inference code to use XGBoost.
Sagemaker将创建具有所需属性(例如内存,RAM,GPU等)的虚拟机,以训练和部署模型。 该虚拟机将以docker容器的形式加载映像,其中包含使用XGBoost的训练和推理代码。
将火车和测试数据上传到S3 (Upload train and test data to S3)
To upload the data to s3, create a folder in the local directory and save the data in the folder.
要将数据上传到s3,请在本地目录中创建一个文件夹,然后将数据保存在该文件夹中。
Create folder: To create a folder or to ensure that a folder exists, run the following command.
创建文件夹:要创建文件夹或确保文件夹存在,请运行以下命令。
import os
data_dir = 'data'
if not os.path.exists(data_dir):
    os.makedirs(data_dir)
Save to local directory: Ensure that the header and index are false since that is the format required by the AWS training code.
保存到本地目录:确保标头和索引为false,因为这是AWS培训代码所需的格式。
X_test.to_csv(os.path.join(data_dir, 'test_data.csv'), header=False, index=False)pd.concat([y_train, X_train], axis=1).to_csv(os.path.join(data_dir, 'train_data.csv'), header=False, index=False)pd.concat([y_val, X_val], axis=1).to_csv(os.path.join(data_dir, 'val_data.csv'), header=False, index=False)Upload to s3: We will use the method (upload_data) from the current session object to upload the data to s3. This method will upload data to the default bucket or drive. We can specify the folder name, which is given by key_prefix. The output of this method is a URI that points to that data is S3.
上传到s3:我们将使用当前会话对象中的方法(upload_data)将数据上传到s3。 此方法会将数据上传到默认存储桶或驱动器。 我们可以指定文件夹名称,该名称由key_prefix给出。 此方法的输出是一个URI,指向该数据为S3。
test_path = session.upload_data(os.path.join(data_dir, 'test_data.csv'), key_prefix = s3_prefix)train_path = session.upload_data(os.path.join(data_dir, 'train_data.csv'), key_prefix = s3_prefix)val_path = session.upload_data(os.path.join(data_dir, 'val_data.csv'), key_prefix = s3_prefix)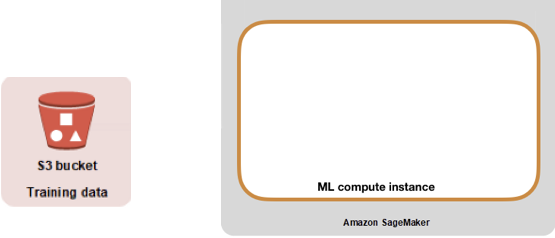
The data is now processed and uploaded on s3, its time to train the data to create a model. We are using the XGBoost algorithm from AWS. SageMaker will launch a virtual machine and load a docker container containing the training and inference codes to run a model. In the next section, we will get the XGBoost image to create a model.
现在,数据已在s3上处理并上传,这是训练数据以创建模型的时间。 我们正在使用AWS的XGBoost算法。 SageMaker将启动虚拟机并加载包含训练和推理代码的docker容器以运行模型。 在下一部分中,我们将获得XGBoost图像以创建模型。
3.获取SageMaker算法图像 (3. Get the SageMaker algorithm image)
估算器(Estimators)
Estimators are a high-level interface for SageMaker training to handle end-to-end Amazon SageMaker training and deployment tasks.
估计器是SageMaker培训的高级界面,可处理端到端Amazon SageMaker培训和部署任务。
Estimator object requires three main objects:
估计器对象需要三个主要对象:
sagemaker_session: We will use the session object that we created in the first section.
sagemaker_session :我们将使用在第一部分中创建的会话对象。
role: We will use the execution role object that we created in the first section.
role :我们将使用在第一部分中创建的执行角色对象。
model_uri: Next, configure the container image for the region that we are running in. In local mode, this should point to the path in which the model is located and not the file itself, as local Docker containers will try to mount the URI as a volume. model_uri requires two inputs the name of the estimator model, in our case XGBoost, and the region name that can be extracted using the session method (session.boto_region_name) or using boto3 (boto3.Session().region_name).
model_uri :接下来,为我们正在运行的区域配置容器映像。在本地模式下,这应该指向模型所在的路径,而不是文件本身,因为本地Docker容器将尝试将URI挂载为一卷。 model_uri需要两个输入,即估算器模型的名称(在我们的示例中为XGBoost)和可以使用会话方法(session.boto_region_name)或使用boto3(boto3.Session()。region_name)提取的区域名称。
from sagemaker.amazon.amazon_estimator import get_image_uri
container = get_image_uri(session.boto_region_name, 'xgboost')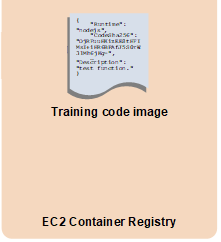
设置模型输出路径 (Set the model output path)
To construct an estimator object, we will need to provide an s3 path for the estimator object to save the model. Let us append the name of the model output folder (model_output) to the s3 path (s3_path) that we created in the first section to build a path to save model outputs (artifacts).
要构造一个估计器对象,我们将需要为估计器对象提供s3路径以保存模型。 让我们将模型输出文件夹的名称(model_output)附加到我们在第一部分中创建的s3路径(s3_path)上,以构建用于保存模型输出(工件)的路径。
output_path = s3_path + 'model_output'定义超参数 (Define hyperparamaters)
Next, we will build a dictionary of the parameters that we would like to define, then feed this dictionary into the estimator object using the set_hyperparameter method in the estimator object. For a detailed understanding of parameters in XGBoost models, refer to this link.
接下来,我们将构建一个要定义的参数的字典,然后使用estimator对象中的set_hyperparameter方法将此字典输入到estimator对象中。 要详细了解XGBoost模型中的参数,请参阅此链接。
hyperparameters ={
"max_depth": 5,
"eta": 0.2,
"gamma": 2,
"min_child_weight": 5,
"subsample": 0.8,
"objective": "binary:logistic",
"early_stopping_rounds": 25,
"num_round": 150,
}
We now have the objects and output path required to create an estimator object. For a detailed understanding of other parameters in an estimator object, please refer to this link. We will only be using a few high-level parameters in this project.
现在,我们有了创建估算器对象所需的对象和输出路径。 要详细了解估算器对象中的其他参数,请参阅此链接。 在此项目中,我们将仅使用一些高级参数。
## get estimatorclassifier = sagemaker.estimator.Estimator(
            container,
            role,
            train_instance_count=1,
            train_instance_type='ml.m4.xlarge',
            output_path=output_path,
            sagemaker_session=session)## set hyperparametersclassifier.set_hyperparameters(**hyperparameters)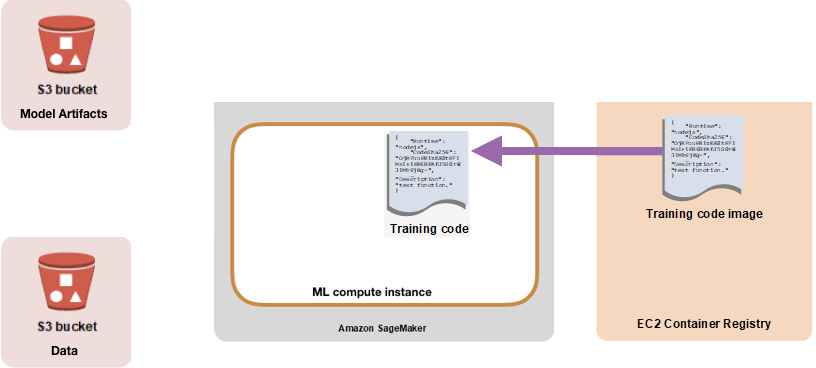
4.拟合模型 (4. Fit the model)
With the estimator object set up, SageMaker can now fit the model. We will need to specify the location of the data, where we will provide the URI that points to that data in S3 in the sagemaker.s3_input object.
通过设置估算器对象,SageMaker现在可以拟合模型。 我们将需要指定数据的位置,我们将在sagemaker.s3_input对象中的S3中提供指向该数据的URI。
s3_train = sagemaker.s3_input(s3_data=train_path, content_type='csv')
s3_val = sagemaker.s3_input(s3_data=val_path, content_type='csv')classifier.fit({
               'train':s3_train,
               'validation':s3_val,
               })
5.测试模型 (5. Test the Model)
批量转换(Batch Transform)
To test the model that we created, we will use SageMaker’s Batch Transform functionality, which will split the test data into batches, send it to the model, and merge the results.
为了测试我们创建的模型,我们将使用SageMaker的Batch Transform功能,该功能将测试数据拆分为多个批次,发送给模型,然后合并结果。
Transformer object: To start with, build a transformer object to fit the model that we created.
变形器对象:首先,构建一个变形器对象以适合我们创建的模型。
classifier_transformer = classifier.transformer(instance_count=1, instance_type='ml.m4.xlarge')Batch transform job: SageMaker will begin a batch transform job using our trained model and apply it to the test data stored in s3. We will need to provide pieces of information like data location, data type (to serialize data), and split type (to split data into batches). SageMaker will run the batch transform job in the background. To get some output on the job performance, use the wait method in the transformer object.
批量转换作业:SageMaker将使用我们训练有素的模型开始批量转换作业,并将其应用于s3中存储的测试数据。 我们将需要提供一些信息,例如数据位置,数据类型(以序列化数据)和拆分类型(以将数据拆分为批次)。 SageMaker将在后台运行批处理转换作业。 要获得有关作业性能的一些输出,请在转换器对象中使用wait方法。
classifier_transformer.transform(test_path, content_type='text/csv', split_type='Line')classifier_transformer.wait()得到结果 (Get the results)
To view the result of the batch transform job, run the method output_path in classifier_transformer object. The batch transform job saves the output in an S3bucket. To load the output data to a local directory, run the below command.
要查看批处理转换作业的结果,请在classifier_transformer对象中运行方法output_path。 批处理转换作业将输出保存在S3bucket中。 要将输出数据加载到本地目录,请运行以下命令。
!aws s3 cp --recursive $classifier_transformer.output_path $data_dirNow, load the predictions and calculate accuracy score.
现在,加载预测并计算准确性得分。
from sklearn.metrics import accuracy_scorepredictions = pd.read_csv(os.path.join(data_dir, 'test_data.csv.out'), header=None)predictions = [round(val) for val in predictions.squeeze().values]accuracy_score(y_test, predictions)部署模型 (Deploy the model)
To deploy the model please refer to this article.
要部署模型,请参考本文。
Find the codes for the project in the GitHub Repository.
在GitHub Repository中找到该项目的代码。
For execution of this project using low-level API, refer to this post.
有关使用低级API执行此项目的信息,请参阅此文章。
翻译自: https://medium.com/@snehal.1409/build-a-model-in-sagemaker-in-5-steps-9cf6fa7c97b8
系统模型建立的几个步骤


 被折叠的 条评论
为什么被折叠?
被折叠的 条评论
为什么被折叠?
 到【灌水乐园】发言


