


github中如何下载代码
Create and Setup Python Development Environment
创建和设置Python开发环境
介绍(Introduction)
GitHub Codespaces is nothing but Visual Studio Code running on Linux hosted in Azure using your GitHub account. This means you can open your Project code directly from GitHub repository page in your favorite development environment (VSCode IDE) with all necessary dependencies to start working/testing/running. This is cool because there is nothing to install or mess with your local computer configuration as it completely runs in the browser.
GitHub Codespaces就是使用您的GitHub帐户在Azure托管的Linux上运行的Visual Studio Code。 这意味着您可以直接在最喜欢的开发环境(VSCode IDE)中从GitHub存储库页面打开Project代码,并具有所有必要的依赖关系,以开始工作/测试/运行。 这很酷,因为它完全可以在浏览器中运行,因此无需安装或与您的本地计算机配置混淆。
If you like to start with Visual Studio Codespaces instead, see my previous article. Most of the customization described in this article works on both Visual Studio Codespaces and GitHub Codespaces since they are basically the same service.
如果您想从Visual Studio Codespaces开始,请参阅我的上一篇文章。 本文中描述的大多数自定义项都可以在Visual Studio Codespace和GitHub Codespace上使用,因为它们基本上是相同的服务。
从哪儿开始 (Where to Start)
I assume you already have a GitHub account, if not register for free account here. GitHub Codespaces is available in beta, so first you need to request access to Codespaces. Once you get an access to Codespaces, you can open any repository in Codespaces. Let’s see how to create and configure your first Codespaces below.
我假设您已经有一个GitHub帐户,如果尚未在此处注册免费帐户。 GitHub Codespaces提供beta版,因此首先您需要请求访问Codespaces 。 一旦获得对代码空间的访问权,就可以在代码空间中打开任何存储库。 让我们看看下面如何创建和配置您的第一个代码空间。
用户特定的自定义 (User Specific Customization)
Create public repository named “dotfiles” in your GitHub account and place all your common customization files independent of any project/environment in that repository. Common examples would be .bashrc, .gitignore and .editorconfig. Note that this method will apply the customization for all the Codespaces environments in your GitHub user account for any of your project that you open in Codespaces. You can see some of my example files in here.
在您的GitHub帐户中创建名为“ dotfiles”的公共存储库,并将所有常见的自定义文件放置在该存储库中,而与任何项目/环境无关。 常见的示例是.bashrc,.gitignore和.editorconfig。 请注意,此方法将对您在Codespaces中打开的任何项目的GitHub用户帐户中的所有Codespaces环境应用自定义。 您可以在此处看到一些示例文件。
专项定制 (Project Specific Customization)
Create a new repository for your project, let’s call it as “my_project”. This repository should be Public for Codespaces to work as of now. You can also select to add README file and license file of your choice. Once it’s created, it will take you to the Code page of that repository.
为您的项目创建一个新的存储库,我们将其称为“ my_project”。 该存储库应该是公共的,以便Codespace从现在开始工作。 您也可以选择添加自述文件和许可证文件。 创建完成后,它将带您到该存储库的“代码”页面。
Click the Add file -> Create new file button in your repository main folder. In the file name box enter “.devcontainer/devcontainer.json”. This file will be used to apply the customization of the Codespaces environment for any user who uses this particular project. More details of customizing the Codespaces can be found here.
单击存储库主文件夹中的添加文件->创建新文件按钮。 在文件名框中,输入“ .devcontainer / devcontainer.json”。 该文件将用于为使用此特定项目的任何用户应用代码空间环境的自定义。 有关自定义代码空间的更多详细信息,请参见此处。
{
  "name": "Machine Learning in Python",
  //"dockerFile": "Dockerfile",

  "appPort": [3000],
  //"forwardPorts": [8080, 8081],  // Set *default* container specific settings.json values
  "settings": {
    "terminal.integrated.shell.linux": "/bin/bash",
  },  // Add the IDs of extensions you want to install
  "extensions": [
    "ms-python.python",
  ],  // Commands to run after the container is created.
  // "postCreateCommand": "python --version",  // Uncomment to connect as a non-root user.
  //"remoteUser": "vscode",
}
特定于容器的定制 (Container Specific Customization)
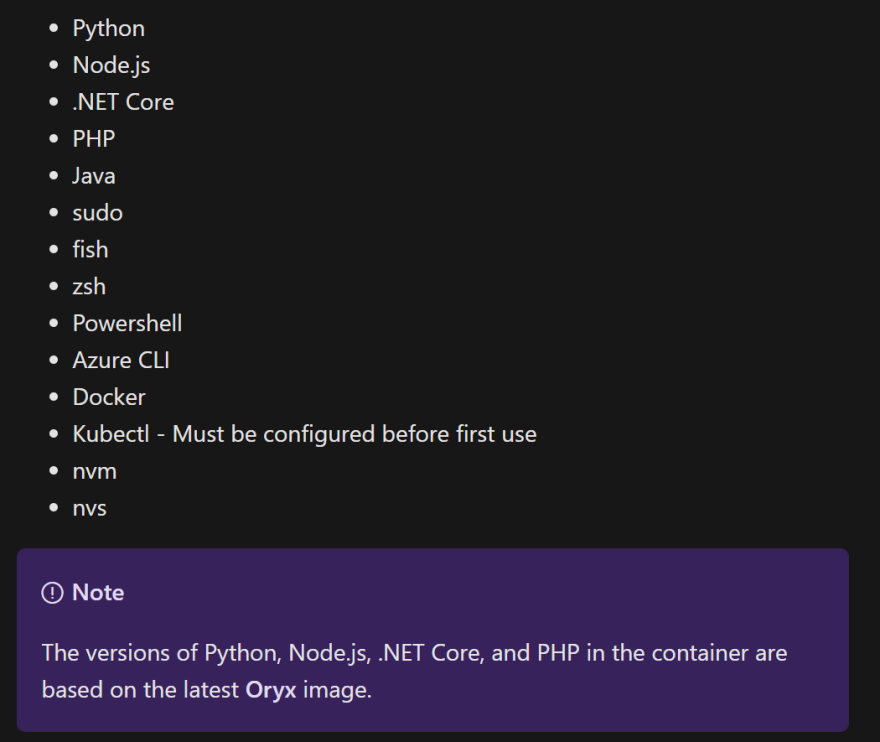
This step is optional. GitHub creates a codespace with a base Linux image if we don’t specify any Dockerfile in “devcontainer.json” file. The base Linux image includes tools for following frameworks or SDK.
此步骤是可选的。 如果我们在“ devcontainer.json”文件中未指定任何Dockerfile,则GitHub将使用基本的Linux映像创建一个代码空间。 基本的Linux映像包括用于以下框架或SDK的工具。
If you want to build custom container, click the Add file -> Create new file button in your repository main folder. In the file name box enter “.devcontainer/Dockerfile”. Your custom container can contain anything you want. This is very useful if you are using a framework or SDK that is not present in the standard image, or if you have to install a specific package. What I’d recommend is to use the standard CodeSpaces image as base image and then build on top of that as shown below. If you would like to start with different framework other than standard image, check the pre-built container configuration for Visual Studio Code that is available in the vscode-dev-containers repository.
如果要构建自定义容器,请在存储库主文件夹中单击添加文件->创建新文件按钮。 在文件名框中,输入“ .devcontainer / Dockerfile”。 您的自定义容器可以包含您想要的任何内容。 如果您使用的是标准映像中没有的框架或SDK,或者必须安装特定的软件包,这将非常有用。 我建议使用标准CodeSpaces图像作为基础图像,然后在此基础上构建,如下所示。 如果要从标准映像以外的其他框架开始,请检查vscode-dev-containers存储库中可用的Visual Studio Code的预先构建的容器配置。
FROM mcr.microsoft.com/vscode/devcontainers/universal:linux# [Optional] Uncomment this section to install additional OS packages.
# RUN apt-get update && export DEBIAN_FRONTEND=noninteractive \
#     && apt-get -y install --no-install-recommends <your-package-list-here>
开放代码空间 (Open Codespaces)
We have everything setup and ready to start Codespaces. From your repository main page, click the green “Code” button, “Open with Codespaces” and “New codespace”. It will take few seconds and you will see your Codespace in the browser.
我们已完成所有设置并准备启动代码空间。 在存储库主页上,单击绿色的“代码”按钮,“使用代码空间打开”和“新代码空间”。 这将花费几秒钟,您将在浏览器中看到您的代码空间。

设置Python环境 (Setup Python Environment)
In order to get Python in Linux, I suggest to install Anaconda Individual Edition. Anaconda Individual Edition is a free, easy-to-install package manager, environment manager, and Python distribution with a collection of 1,500+ open source packages with free community support. Anaconda is platform-agnostic, so you can use it whether you are on Windows, macOS, or Linux.
为了在Linux中获得Python,我建议安装Anaconda个人版。 Anaconda个人版是一个免费,易于安装的软件包管理器,环境管理器和Python发行版,其中包含1,500多个带有免费社区支持的开源软件包。 Anaconda与平台无关,因此无论您在Windows,macOS还是Linux上,都可以使用它。
To install Anaconda, open a new terminal (Ctrl+Shift+`) in your Codespace browser window and enter below commands. Detailed instructions can be found here.
要安装Anaconda,请在您的Codespace浏览器窗口中打开一个新的终端(Ctrl + Shift +`),然后输入以下命令。 详细说明可在此处找到。
# Download Anaconda script
wget https://repo.anaconda.com/archive/Anaconda3-2020.07-Linux-x86_64.sh# Verify the downloaded file
sha256sum https://repo.anaconda.com/archive/Anaconda3-2020.07-Linux-x86_64.sh# Install
bash https://repo.anaconda.com/archive/Anaconda3-2020.07-Linux-x86_64.sh# Follow the instructions such as Accept License, Select Path, yes to initialize condasource ~/.bashrc# Verify Installation
conda list
Instead of selecting standard Linux image and installing Anaconda, you can also using the Anaconda Python container for Visual Studio Code.
除了选择标准Linux映像并安装Anaconda外,您还可以将Anaconda Python容器用于Visual Studio Code。
This completes our Python Development Environment setup in GitHub Codespaces.
这就完成了我们在GitHub Codespaces中的Python开发环境设置。
结论 (Conclusion)
GitHub Codespaces is a great cloud-based environment for developers, we can quickly open the project code in a predefined environment, build and test it. With GitHub Codespaces when it launches, the difficulties of creating and maintaining development environment for software development are further reduced.
GitHub Codespaces对于开发人员来说是一个很棒的基于云的环境,我们可以在预定义的环境中快速打开项目代码,进行构建和测试。 随着GitHub Codespaces的启动,创建和维护用于软件开发的开发环境的难度进一步降低。
参考和链接: (References & Links:)
翻译自: https://levelup.gitconnected.com/codespaces-in-github-6457533fc7f1
github中如何下载代码


 2130
2130

 被折叠的 条评论
为什么被折叠?
被折叠的 条评论
为什么被折叠?
 到【灌水乐园】发言


