


How to Simplify Data Science Development Environments in Windows by using Docker on Windows Subsystem for Linux 2.
如何在Linux子系统的Windows子系统上使用Docker简化Windows中的数据科学开发环境。
Problems with Python Environments
Python环境问题
Python and its extensive library of packages provide an amazing array of libraries and applications covering every use case imaginable for your data science and machine learning development workflow.
Python及其广泛的软件包库提供了一系列令人惊叹的库和应用程序,涵盖了数据科学和机器学习开发工作流程可以想象的每个用例。
Like everyone else, you will most likely be using Anaconda distribution of Python, which packages Python with most commonly used packages for your data science and machine learning development workflow. To manage its extensive library of packages — over 7,500 data science and machine learning packages at last count, it comes with Conda package manager that automates the process of installing, updating, and removing packages.
像其他所有人一样,您很可能会使用Python的Anaconda发行版,该发行版将Python与最常用的软件包打包在一起用于您的数据科学和机器学习开发工作流程。 为了管理其广泛的软件包库-多达7,500个数据科学和机器学习软件包,它带有Conda软件包管理器,可自动执行软件包的安装,更新和删除过程。
When installing a new Python package, Conda will first resolve the dependencies, check if they are already installed on the system, and, if not, install them. Once all dependencies have been satisfied, which may require new installation of packages, upgrades of existing packages or downgrades of existing packages; then it will proceed to install the requested package(s). This all happens globally, by default, installing everything onto the machine in a single, operating system-dependent location.
安装新的Python软件包时,Conda将首先解析依赖关系,检查它们是否已安装在系统上,如果没有,则安装它们。 一旦满足所有依赖性,可能需要重新安装软件包,升级现有软件包或降级现有软件包; 然后它将继续安装请求的软件包。 默认情况下,所有这些都是全局发生的,将所有内容都安装在与操作系统相关的单个位置中。
The problem is that most of Python packages have dependencies to other Python packages, sometimes specific version of Python packages. When it comes to installing and using these Python packages, you will often find yourself running into issues with missing permissions, incompatible library dependencies, and installations that just break in surprising ways.
问题在于大多数Python软件包都依赖于其他Python软件包,有时是特定版本的Python软件包。 在安装和使用这些Python软件包时,您常常会发现自己遇到了以下问题:缺少权限,不兼容的库依赖项以及以令人惊讶的方式中断的安装。
Conda tries to resolve these issues by using environments where you can create, export, list, remove, and update environments that have different versions of Python and/or packages installed in them where you can switch or move between environments. In light of this, you spend countless hours creating and managing environments to reduce chance of your code breaking due to environment issues.
Conda尝试通过使用以下环境来解决这些问题:可以在其中创建,导出,列出,删除和更新其中安装了不同版本的Python和/或软件包的环境,您可以在这些环境之间进行切换或移动。 鉴于此,您花费了无数时间来创建和管理环境,以减少由于环境问题而导致代码破坏的机会。
But in many instances, by using two most dangerous Conda commands (“conda update conda” and “conda update anaconda”), you can make all your environment(s) unusable.
但是在许多情况下,通过使用两个最危险的Conda命令(“ conda update conda”和“ conda update anaconda”),您可以使所有环境无法使用。
Using Docker in Data Science
在数据科学中使用Docker
There is a better way to manage data science and machine learning development environments using Docker where it enables developers to easily create environments, manage environments, distribute environments without worries about error(s) in one environment breaking other environments.
有一种使用Docker管理数据科学和机器学习开发环境的更好的方法,它使开发人员可以轻松创建环境,管理环境,分发环境,而无需担心一个环境破坏其他环境的错误。
Docker containers do this by enabling developers to isolate code into a single Docker container. This makes it easier to modify and update the program. Docker makes it possible to set up local development environments that are exactly like a your co-workers’ environments; run multiple development environments from the same machine with unique software, operating systems, and configurations; and allow anyone to work on the same project with the exact same settings, regardless of the their machine configuration.
Docker容器通过使开发人员能够将代码隔离到单个Docker容器中来实现此目的。 这样可以更轻松地修改和更新程序。 Docker使建立与您的同事环境完全一样的本地开发环境成为可能。 在具有相同软件,操作系统和配置的同一台计算机上运行多个开发环境; 并允许任何人使用完全相同的设置来从事同一项目,无论他们的计算机配置如何。
Benefits of Docker in Data Science
Docker在数据科学中的优势
There are some important benefits of using Docker container for building a model.
使用Docker容器构建模型有一些重要的好处。
- Maintain production machine learning models development environment 维护生产机器学习模型的开发环境
Some of the models we develop needs to be maintained for many years, which requires periodic performance assessment of the model as well as model re-calibration, if needed. By using Docker container, you will be able to preserve the exact development environment used to develop the model, which can be used to perform those tasks.
我们开发的某些模型需要保持多年,这需要定期评估模型的性能,并在需要时进行模型重新校准。 通过使用Docker容器,您将能够保留用于开发模型的确切开发环境,该环境可用于执行那些任务。
2. Sync development environments with co-workers
2.与同事同步开发环境
Model development is a usually team effort, depending on efforts need to develop the model(s). By using Docker container, you will be able to enforce every team members have same development environment as well as easily share team’s development environment with a new team member(s). There is nothing worse than it works on my machine, but other people cannot replicate same results due to the environment issues.
模型开发通常是团队的工作,具体取决于开发模型的工作量。 通过使用Docker容器,您将能够强制每个团队成员拥有相同的开发环境,并轻松与新的团队成员共享团队的开发环境。 没有什么比在我的计算机上工作更糟糕的了,但是由于环境问题,其他人无法复制相同的结果。
3. Have many developments environments as needed without cons of virtual environments
3.根据需要拥有许多开发环境,而没有虚拟环境
Problem with virtual environments is that they are virtual where changes to one environment may impact other environments. Docker containers are not virtual since they are self contained. You can have many developments environments as needed without any worry about one environment impacting other environments.
虚拟环境的问题在于它们是虚拟的,对一个环境的更改可能会影响其他环境。 Docker容器是独立的,因此不是虚拟的。 您可以根据需要拥有许多开发环境,而不必担心一个环境会影响其他环境。
Step-by-Step Instructions
分步说明
Install Docker
安装Docker
This article provide a step-by-step approach of installing Docker in Windows 10, utilizing Windows Subsystem for Linux 2 (WSL2). This approach provides best of all world, ease of use of Windows 10 and robustness of Linux where all python libraries/packages are available.
本文提供了使用Windows Linux的Windows 2子系统(WSL2)在Windows 10中安装Docker的分步方法。 这种方法可提供世界上最好的功能,Windows 10的易用性和Linux的健壮性(可使用所有python库/软件包)。
Step 1: Upgrade Windows 10 to most recent version of Windows 10. WSL2 requires Version 2004 or later. There are multiple tutorial available online on this topic.
步骤1:将Windows 10升级到Windows 10的最新版本。WSL2需要版本2004或更高版本。 在线上有多个关于此主题的教程。
Step 2: Install Windows Subsystem for Linux 2 (WSL 2). There are multiple tutorials available online on this topic.
步骤2:为Linux 2(WSL 2)安装Windows子系统。 在线有多个关于此主题的教程。
Step 3: Install and enable Linux Distribution for WSL 2. As of this writing, I recommend installing and using Ubuntu 20.04 LTS. There are multiple tutorials available online on this topic.
步骤3 :为WSL 2安装并启用Linux Distribution。在撰写本文时,我建议安装和使用Ubuntu 20.04 LTS。 在线有多个关于此主题的教程。
Step 4: Install Docker Desktop for Windows
步骤4 :为Windows安装Docker Desktop
Navigate to https://www.docker.com/products/docker-desktop on your browser as shown below to download Windows (stable) version of Docker Desktop.
如下所示导航至浏览器上的https://www.docker.com/products/docker-desktop ,以下载Windows(稳定)版本的Docker Desktop。
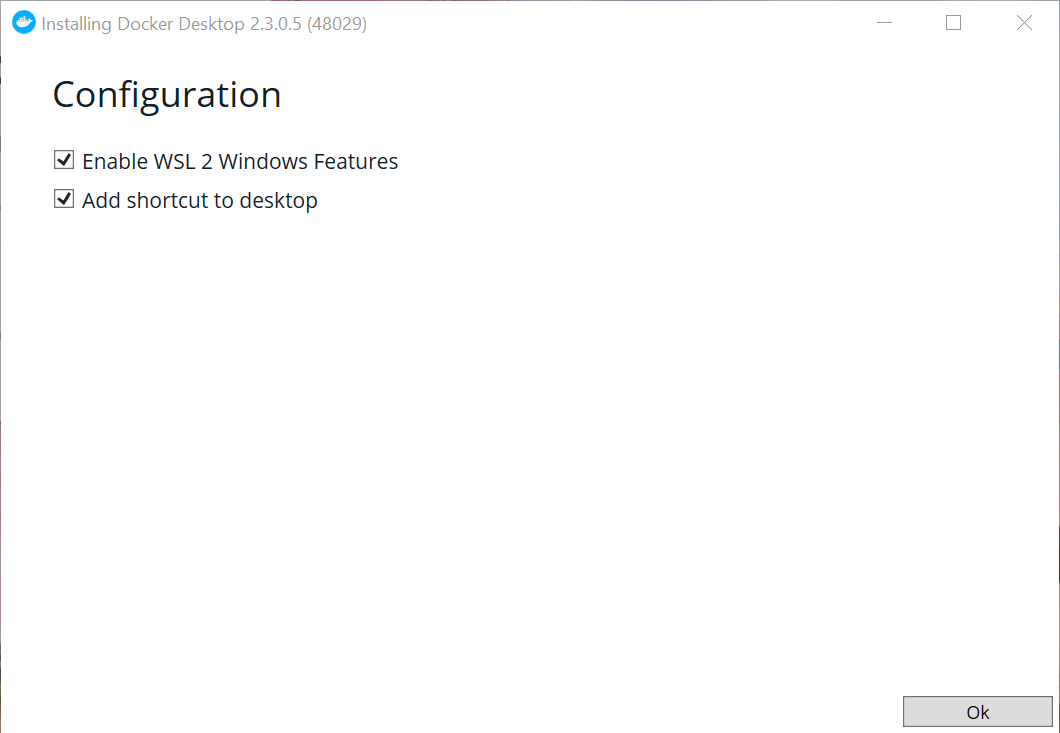
When download is completed, install Docker Desktop. When prompted for Configuration, ensure both boxes are checked: “Enable WSL 2 Windows Features” and “Add shortcut to desktop” as shown below.
下载完成后,安装Docker Desktop。 当提示您进行配置时,请确保选中两个框:“启用WSL 2 Windows功能”和“向桌面添加快捷方式”,如下所示。
When installation is completed, “Close and log out” of Docker Desktop as shown below.
安装完成后,如下所示“关闭并注销” Docker Desktop。

Restart your computer. You will find a little whale icon in your task bar. Docker starts when your computer start by default.
重启你的电脑。 您会在任务栏中找到一个小鲸鱼图标。 默认情况下,当您的计算机启动时,Docker将启动。
Step 5: Install Docker on WSL — Ubuntu 20.04 LTS
步骤5 :在WSL上安装Docker-Ubuntu 20.04 LTS
Find and open Ubuntu 20.04 LTS terminal from Windows Start menu. Enter following command in the terminal “sudo apt install docker”. When prompted for your password, enter password you have used to setup Ubuntu 20.04 LTS.
从Windows的“开始”菜单中找到并打开Ubuntu 20.04 LTS终端。 在终端“ sudo apt install docker”中输入以下命令。 当提示您输入密码时,输入用于设置Ubuntu 20.04 LTS的密码。
Start Using Docker Container
开始使用Docker容器
Step 1: Pull (Download) Docker Container of Anaconda Distribution
第1步:提取(下载)Anaconda分发版的Docker容器
Find and open Ubuntu 20.04 LTS terminal from Windows Start menu. Enter following command in the terminal “docker pull continuumio/anaconda3”. You will see multiple lines of progress bar, indicating anaconda3 is being downloaded. When completed, it will state “Downloaded newer image for continumio/anaconda3:latest”.
从Windows的“开始”菜单中找到并打开Ubuntu 20.04 LTS终端。 在终端“ docker pullcontinuumio / anaconda3”中输入以下命令。 您将看到多行进度条,表明anaconda3正在下载。 完成后,它将显示“ continuationm / anaconda3:latest下载的较新图像”。
Step 2: Run multiple versions of Anaconda Distribution
步骤2 :运行多个版本的Anaconda Distribution
Tensorflow
张量流
- Open Ubuntu 20.04 LTS terminal and create a directory named “tensorflow” (Command: mkdir tensorflow), which will create a directory entitled “/home/sungkim/tensorflow”.打开Ubuntu 20.04 LTS终端并创建一个名为“ tensorflow”的目录(命令:mkdir tensorflow),该目录将创建一个名为“ / home / sungkim / tensorflow”的目录。
2. From same Ubuntu 20.04 LTS terminal, enter “docker run --name tensorflow -v ~/tensorflow:/root -i -t -p 8888:8888 continuumio/anaconda3 /bin/bash”
2.在同一Ubuntu 20.04 LTS终端上,输入“ docker run --name tensorflow -v ~/tensorflow:/root -i -t -p 8888:8888 continuumio/anaconda3 /bin/bash ”
- where “ —name tensorflow” identifies the Docker container as “tensorflow” 其中“ -name tensorflow”将Docker容器标识为“ tensorflow”
- where -v allows you to access files on docker container by binding volume that links to /root directory from Docker container to the ~/tensorflow (/home/sungkim/tensorflow) directory on your Windows machine. -v允许您通过绑定从Docker容器链接到/ root目录的卷到Windows计算机上的〜/ tensorflow(/ home / sungkim / tensorflow)目录来访问docker容器上的文件。
- where “-i -t” keeps Docker container interactive 其中“ -i -t”使Docker容器保持交互式
- where “-p 8888:8888” forward container’s port 8888 to host’s port 8888. which is needed if you want to use jupyter notebook/lab from Windows其中,“-p 8888:8888”将容器的端口8888转发到主机的端口8888。如果要从Windows使用jupyter笔记本/实验室,则需要此端口
- where “continuumio/anaconda3” is name of Docker container image其中“ continuumio / anaconda3”是Docker容器映像的名称
- where “bin/bash” enforces use of bash shell in Docker Container since I like bash shell因为我喜欢bash shell,因此“ bin / bash”在Docker容器中强制使用bash shell
This should create and run/enter Docker container instance with Anaconda Distribution in same terminal that is named “tensorflow” where you can install python packages as well as run python programs as shown below.
这应该在名为“ tensorflow”的同一终端上使用Anaconda Distribution创建和运行/输入Docker容器实例,您可以在其中安装python软件包以及运行python程序,如下所示。

3. Enter “conda install -c anaconda tensorflow” to install tensorflow. When tensorflow installation is completed, enter “exit” to exit out of Docker container and back to Ubuntu 20.04 LTS terminal.
3.输入“ conda install -c anaconda tensorflow”以安装tensorflow。 tensorflow安装完成后,输入“ exit”退出Docker容器并返回Ubuntu 20.04 LTS终端。
4. Save changes to docker container by entering "docker commit -m="Anaconda3 with Tensorflow" tensorflow continuumio/anaconda3-tensorflow". This is needed so all your changes are save to new Docker container image as well as share the image with your co-workers so they will have same development as you.
4.通过输入"docker commit -m="Anaconda3 with Tensorflow" tensorflow continuumio/anaconda3-tensorflow".将更改保存到"docker commit -m="Anaconda3 with Tensorflow" tensorflow continuumio/anaconda3-tensorflow". 这是必需的,因此您的所有更改都将保存到新的Docker容器映像中,并与您的同事共享该映像,以便他们与您具有相同的开发。
5. Navigate to Docker Desktop and delete “tensorflow” docker container by click on “DELETE” icon next to it.
5.导航到Docker Desktop并通过单击旁边的“ DELETE”图标删除“ tensorflow” docker容器。
6. Run Docker container again by entering “docker run --name tensorflow -v ~/tensorflow:/root -i -t -p 8888:8888 continuumio/anaconda3-tensorflow /bin/bash”
6.通过输入“ docker run --name tensorflow -v ~/tensorflow:/root -i -t -p 8888:8888 continuumio/anaconda3-tensorflow /bin/bash ”,再次运行Docker容器。
Tensorflow-GPU
Tensorflow-GPU
- Open Ubuntu 20.04 LTS terminal and create a directory named “tensorflow-gpu” (Command: mkdir tensorflow-gpu), which will create a directory entitled “/home/sungkim/tensorflow-gpu”. 打开Ubuntu 20.04 LTS终端,并创建一个名为“ tensorflow-gpu”的目录(命令:mkdir tensorflow-gpu),这将创建一个名为“ / home / sungkim / tensorflow-gpu”的目录。
2. From same Ubuntu 20.04 LTS terminal, enter “docker run --name tensorflow-gpu -v ~/tensorflow-gpu:/root -i -t -p 8888:8888 continuumio/anaconda3 /bin/bash”
2.在同一Ubuntu 20.04 LTS终端上,输入“ docker run --name tensorflow-gpu -v ~/tensorflow-gpu:/root -i -t -p 8888:8888 continuumio/anaconda3 /bin/bash ”
This should create and run/enter Docker container instance with Anaconda Distribution in same terminal that is named “tensorflow-gpu” where you can install python packages as well as run python programs as shown below.
这应该在名为“ tensorflow-gpu”的同一终端中使用Anaconda Distribution创建和运行/输入Docker容器实例,您可以在其中安装python软件包以及运行python程序,如下所示。

3. Run “conda install -c anaconda tensorflow-gpu” to install tensorflow-gpu. When tensorflow-gpu installation is completed, enter “exit” to exit out of Docker container and back to Ubuntu 20.04 LTS terminal.
3.运行“ conda install -c anaconda tensorflow-gpu”以安装tensorflow-gpu。 在完成tensorflow-gpu安装后,输入“ exit”退出Docker容器并返回Ubuntu 20.04 LTS终端。
4. Save changes to docker container by entering "docker commit -m="Anaconda3 with Tensorflow GPU" tensorflow-gpu continuumio/anaconda3-tensorflow-gpu". This is needed so all your changes are save to new Docker container image as well as share the image with your co-workers so they will have same development as you.
4.通过输入"docker commit -m="Anaconda3 with Tensorflow GPU" tensorflow-gpu continuumio/anaconda3-tensorflow-gpu".将更改保存到Docker容器中"docker commit -m="Anaconda3 with Tensorflow GPU" tensorflow-gpu continuumio/anaconda3-tensorflow-gpu". 这是必需的,因此您的所有更改都将保存到新的Docker容器映像中,并与您的同事共享该映像,以便他们与您具有相同的开发。
5. Navigate to Docker Desktop and delete “tensorflow-gpu” docker container by click on “DELETE” icon next to it.
5.导航到Docker Desktop并通过单击旁边的“ DELETE”图标删除“ tensorflow-gpu” docker容器。
6. Run Docker container again by entering “docker run --name tensorflow-gpu -v ~/tensorflow-gpu:/root -i -t -p 8888:8888 continuumio/anaconda3-tensorflow-gpu /bin/bash”.
6.输入“ docker run --name tensorflow-gpu -v ~/tensorflow-gpu:/root -i -t -p 8888:8888 continuumio/anaconda3-tensorflow-gpu /bin/bash ”,再次运行Docker容器。
Pytorch
火炬
- Open Ubuntu 20.04 LTS terminal and create a directory named “pytorch” (Command: mkdir pytorch), which will create a directory entitled “/home/sungkim/pytorch”.打开Ubuntu 20.04 LTS终端并创建一个名为“ pytorch”的目录(命令:mkdir pytorch),该目录将创建一个名为“ / home / sungkim / pytorch”的目录。
2. Open another Ubuntu 20.04 LTS terminal, enter “docker run --name pytorch -v ~/pytorch:/root -i -t -p 8888:8888 continuumio/anaconda3 /bin/bash”
2.打开另一个Ubuntu 20.04 LTS终端,输入“ docker run --name pytorch -v ~/pytorch:/root -i -t -p 8888:8888 continuumio/anaconda3 /bin/bash ”
This should create and run/enter Docker container instance with Anaconda Distribution in same terminal that is named “pytorch” where you can install python packages as well as run python programs as shown below.
这应该在名为“ pytorch”的同一终端中使用Anaconda Distribution创建和运行/输入Docker容器实例,您可以在其中安装python软件包以及运行python程序,如下所示。

3. Run “conda install -c pytorch pytorch” to install pytorch. When pytorch installation is completed, enter “exit” to exit out of Docker container and back to Ubuntu 20.04 LTS terminal.
3.运行“ conda install -c pytorch pytorch”以安装pytorch。 pytorch安装完成后,输入“ exit”退出Docker容器并返回Ubuntu 20.04 LTS终端。
4. Save changes to docker container by entering "docker commit -m="Anaconda3 with Pytorch" pytorch continuumio/anaconda3-pytorch". This is needed so all your changes are save to new Docker container image as well as share the image with your co-workers so they will have same development as you.
4.输入"docker commit -m="Anaconda3 with Pytorch" pytorch continuumio/anaconda3-pytorch".将更改保存到"docker commit -m="Anaconda3 with Pytorch" pytorch continuumio/anaconda3-pytorch". 这是必需的,因此您的所有更改都将保存到新的Docker容器映像中,并与您的同事共享该映像,以便他们与您具有相同的开发。
5. Navigate to Docker Desktop and delete “pytorch” docker container by click on “DELETE” icon next to it.
5.导航到Docker桌面并通过单击旁边的“删除”图标来删除“ pytorch”泊坞窗容器。
6. Run Docker container again by entering “docker run --name pytorch -v ~/pytorch:/root -i -t -p 8888:8888 continuumio/anaconda3-pytorch /bin/bash”.
6.通过输入“ docker run --name pytorch -v ~/pytorch:/root -i -t -p 8888:8888 continuumio/anaconda3-pytorch /bin/bash ”,再次运行Docker容器。
When the above steps are completed, start Docker Desktop and you should be able to see three newly created Docker container as shown below.
完成上述步骤后,启动Docker Desktop,您应该能够看到三个新创建的Docker容器,如下所示。
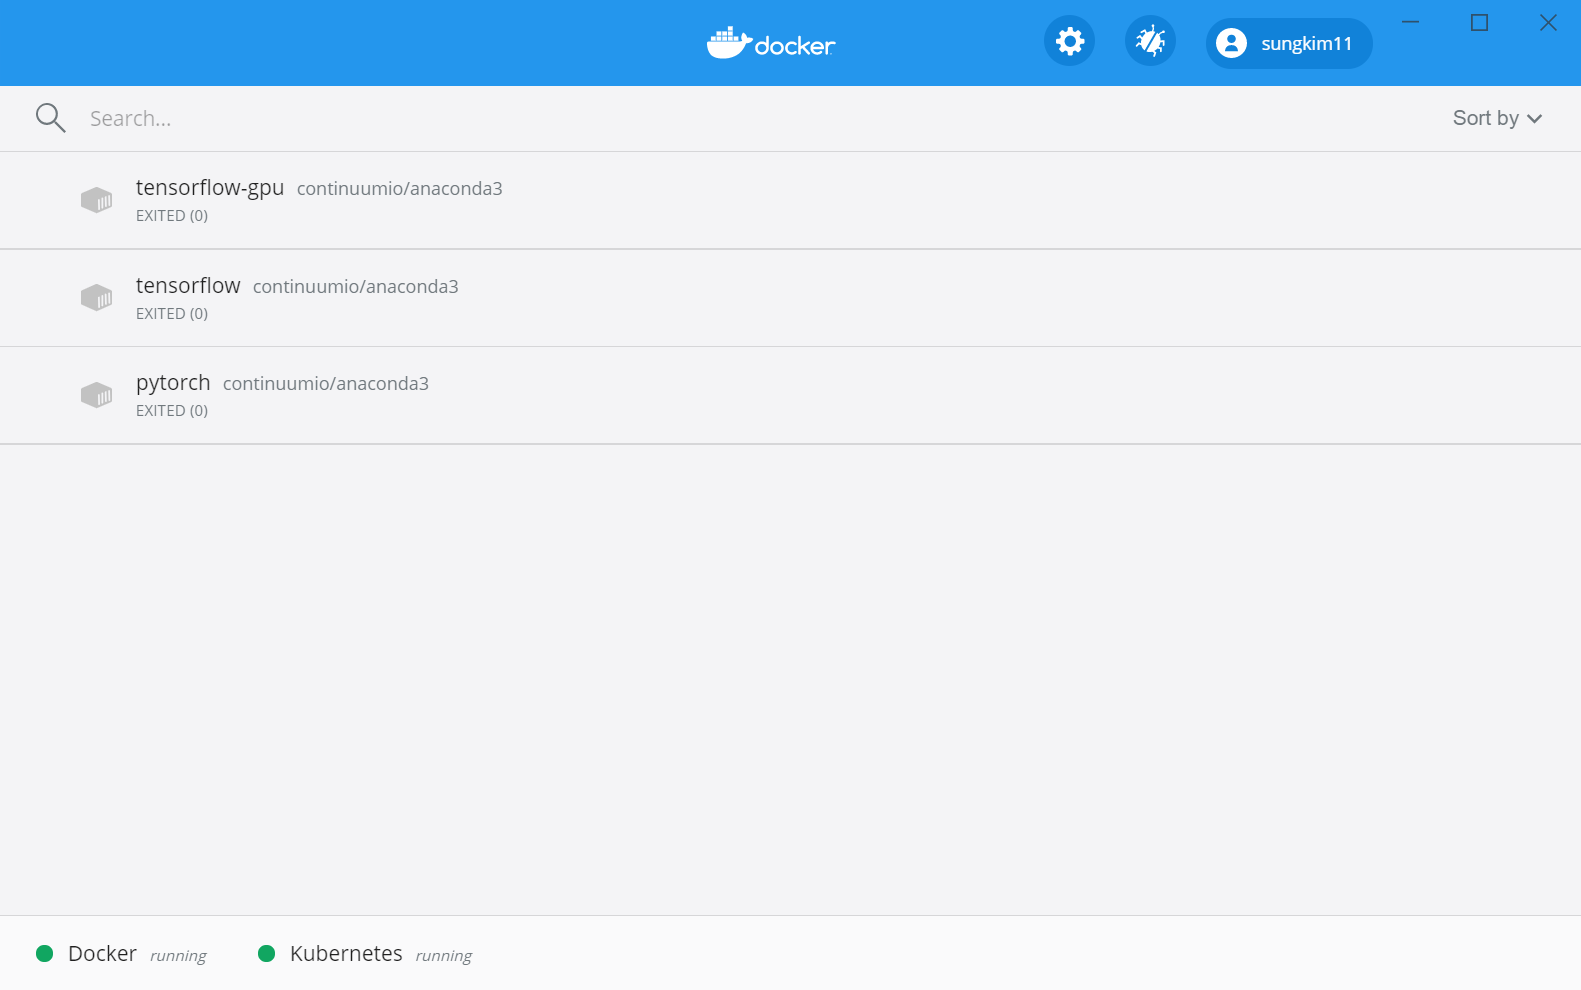
From Docker Desktop, you will be able to start said Docker container and enter Command Line Interface (CLI) as needed. Unlike Conda environments, if one Docker container is corrupted due to package versioning issues as well as Conda issues, other Docker container will not be impacted.
从Docker桌面,您将能够启动所述Docker容器并根据需要输入命令行界面(CLI)。 与Conda环境不同,如果一个Docker容器由于软件包版本问题以及Conda问题而损坏,那么其他Docker容器将不会受到影响。
Step 8: Setup Development Environment (Microsoft Visual Studio Code)
步骤8 :安装开发环境(Microsoft Visual Studio代码)
If you have not done already, download and install Microsoft Visual Studio Code, which is best FREE editor out there right now. Download is available on https://code.visualstudio.com/ and just follow the onscreen instruction to install Visual Studio code.
如果尚未下载并安装Microsoft Visual Studio Code,那是最好的免费编辑器。 可从https://code.visualstudio.com/下载,只需按照屏幕上的说明安装Visual Studio代码。
- Install following extensions (you can access extension option by pressing CTRL-SHIFT-X or selecting Extensions icon on left navigation window): 安装以下扩展(您可以通过按CTRL-SHIFT-X或选择左侧导航窗口中的扩展图标来访问扩展选项):
- Search and install “Python” (by Microsoft) 搜索并安装“ Python”(由Microsoft提供)
- Search and install “Anaconda Extension Pack” (by Microsoft) 搜索并安装“ Anaconda Extension Pack”(由Microsoft)
- Search and install “Docker” (by Microsoft) 搜索并安装“ Docker”(由Microsoft提供)
- Search and install “Remote — Containers” (by Microsoft) 搜索并安装“远程—容器”(由Microsoft)
- Search and install “Remote — WSL” (by Microsoft) 搜索并安装“ Remote — WSL”(由Microsoft)
2. After you have installed all above extensions, you should be able to see and access Docker icon on left navigation window where you can:
2.安装完上述所有扩展后,您应该能够在左侧导航窗口中查看和访问Docker图标,您可以在其中:
- Start Docker container 启动Docker容器
- View Logs查看日志
- Attach Visual Studio Code附加Visual Studio代码
- Attach Shell连接外壳
- Stop Docker Container停止Docker容器
- Restart Docker Container重新启动Docker容器
- and more…和更多…
as shown below.
如下所示。

3. Right-click on selected container name and select Start to start the docker container.
3.右键单击选定的容器名称,然后选择启动以启动Docker容器。
4. Right-click on selected container name and select Attach Visual Studio Code.
4.右键单击选定的容器名称,然后选择“附加Visual Studio代码”。
5. Create a new file and save the file as “hello.py” under /root directory with following code “print(‘Hello World!’)” in the file. This file also be available to you on Windows machine (e.g., /home/sungkim/tensorflow).
5.创建一个新文件,并将文件保存为/ root目录下的“ hello.py”,并在文件中使用以下代码“ print('Hello World!')”。 您也可以在Windows计算机上使用该文件(例如/ home / sungkim / tensorflow)。
6. Select “Run | Run without debugging” to execute python script.
6.选择“运行| 无需调试即可运行”以执行python脚本。
7. Start using Visual Studio Code
7.开始使用Visual Studio Code
Step 9: Setup Development Environment (Jupyter Lab)
步骤9 :设置开发环境(Jupyter Lab)
To use Jupyter Lab as your editor, following these steps below:
要将Jupyter Lab用作编辑器,请执行以下步骤:
- Start any Docker container and enter its terminal 启动任何Docker容器并进入其终端
- Create a directory named “notebooks” (command: “mkdir notebooks”). This should create /root/notebooks directory 创建一个名为“ notebooks”的目录(命令:“ mkdir notebooks”)。 这应该创建/ root / notebooks目录
Run this command to start Jupyter Lab instance =>
jupyter lab --notebook-dir=/root/notebooks --ip='*' --port=8888 --no-browser --allow-root运行此命令以启动Jupyter Lab实例=>
jupyter lab --notebook-dir=/root/notebooks --ip='*' --port=8888 --no-browser --allow-root- Start the browser on Windows 在Windows上启动浏览器
Enter “http://localhost:8888/”
输入“ http:// localhost:8888 / ”
- Copy and paste really long token from docker terminal to browser to login to Jupyter Lab. 将非常长的令牌从docker终端复制并粘贴到浏览器,以登录到Jupyter Lab。
- Create a python notebook. This file also be available to you on Windows machine (e.g., /home/sungkim/tensorflow/notebooks). 创建一个python笔记本。 您也可以在Windows计算机上使用此文件(例如/ home / sungkim / tensorflow / notebooks)。
- Start using Jupyter Lab! 开始使用Jupyter Lab!


 6321
6321


 被折叠的 条评论
为什么被折叠?
被折叠的 条评论
为什么被折叠?
 到【灌水乐园】发言


