


So far I have only used Heroku to deploy my web applications. Well, that changed today as I decided to branch out and try a different deployment service. I love Heroku, and it is so easy to use, but I hate how my applications go to sleep after 30 minutes of inactivity unless you pay a monthly fee. The sleeping application then takes 30 seconds to “wake-up” which feels like forever from a client’s perspective.
到目前为止,我仅使用Heroku来部署我的Web应用程序。 嗯,今天改变了,因为我决定扩展并尝试其他部署服务。 我爱Heroku,而且使用起来非常简单,但是我讨厌30分钟不使用我的应用程序后就进入睡眠状态,除非您每月支付费用。 然后,处于Hibernate状态的应用程序需要30秒钟才能“唤醒”,从客户端的角度来看,这感觉像是永远的。
I decided to try Netlify after witnessing many other developers use this service to host their applications. I saw some pretty good reviews about Netlify, and from what I read my applications won’t be going to sleep anymore! 😴 😊 Here is a link to an article I read titled, “13 reasons why you should be using Netlify”. In this article, I’m going to show you how to create a React app, deploy it to Netlify, add the project to Github, and lastly connect the Github repo to the Netlify app. This will allow for continuous deployment. Every time we push updates to Github, the Netlify app will update to the most current project or repo. Shall we begin?
在见证了许多其他开发人员使用此服务托管他们的应用程序之后,我决定尝试Netlify。 我看到了一些有关Netlify的不错的评论,而从我读到的内容来看,我的应用程序将不再处于睡眠状态! 这是我阅读的文章的链接,标题为“您应该使用Netlify的13个理由”。 在本文中,我将向您展示如何创建React应用,将其部署到Netlify,将项目添加到Github,最后将Github存储库连接到Netlify应用。 这将允许连续部署。 每次我们将更新推送到Github时,Netlify应用程序都会更新到最新项目或存储库。 让我们开始?
步骤1:创建React App,然后 (Step 1: Create React App and)
We will start off by creating a new react app. I will name my app “netlify-demo”. Below are the commands to create the React app. This step should be familiar and simple.
我们将从创建一个新的react应用开始。 我将我的应用命名为“ netlify-demo”。 以下是创建React应用的命令。 此步骤应熟悉且简单。
npm install -g create-react-app //This step can be skipped if needed
create-react-app netlify-demo
cd netlify-demo
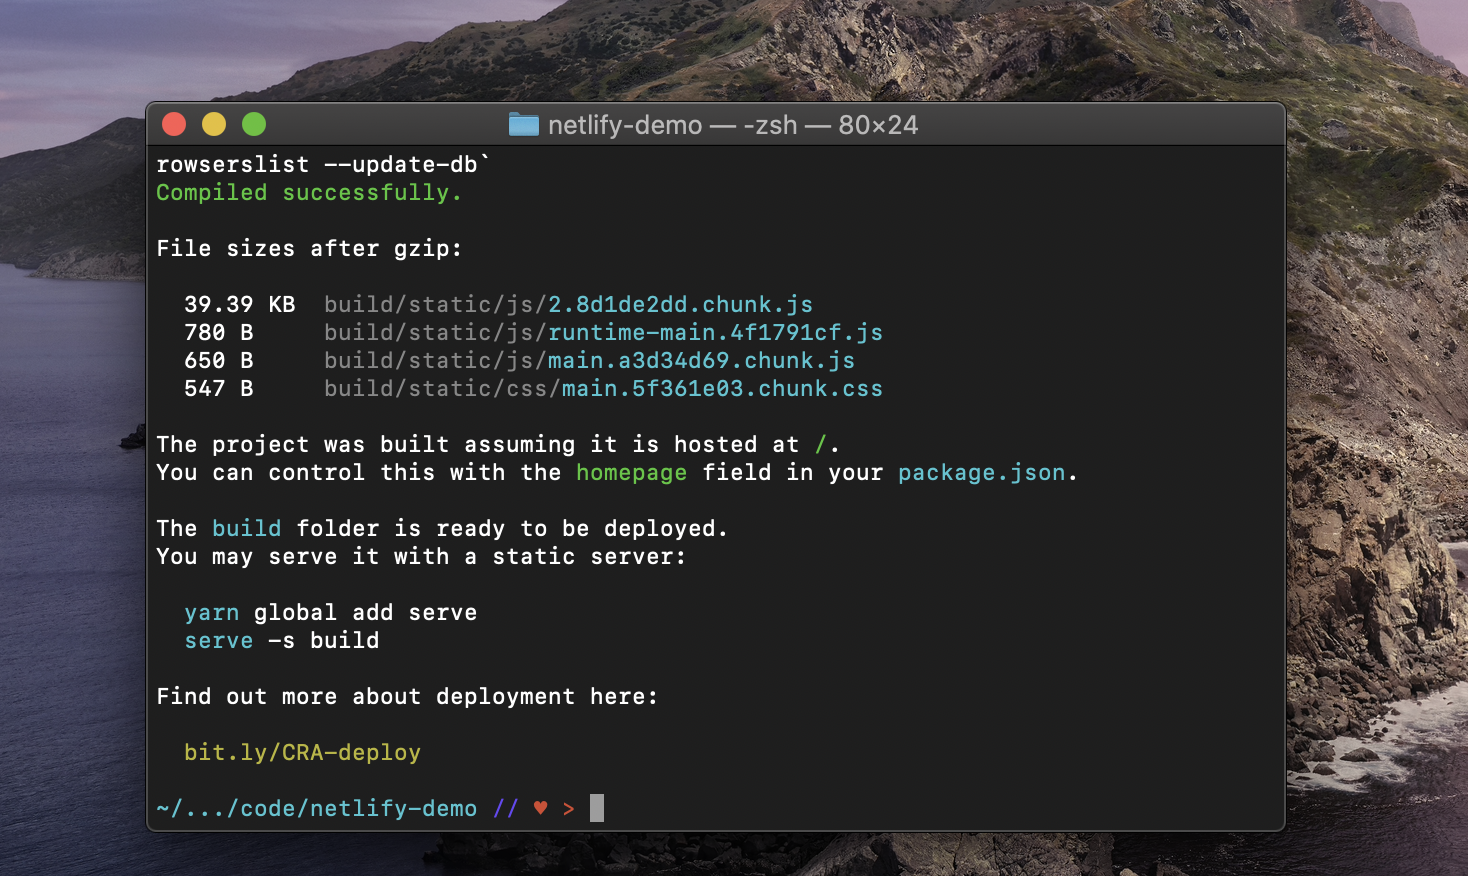
npm run buildHere is a screenshot of what your terminal should look like after entering the above commands.
这是输入上述命令后终端的外观的屏幕截图。
步骤2:安装Netlify CLI和部署 (Step 2: Install Netlify CLI and Deploy)
Time to install Netlify CLI to deploy our application to Netlify from the terminal. Below are the next commands we will need to execute.
是时候安装Netlify CLI,以便从终端将我们的应用程序部署到Netlify了。 以下是我们需要执行的下一个命令。
npm install netlify-cli -g
netlify deploy
After entering netlify deploy, you will be prompted with a question. Choose “Create & configure a new site”. Below is a screenshot.
输入netlify deploy之后,将提示您一个问题。 选择“创建并配置新站点”。 以下是屏幕截图。

Choose a name for the team. I’ll choose Gene Campbell’s III team which is the default option provided.
选择团队的名称。 我将选择Gene Campbell的III小组,这是提供的默认选项。

Next we will be prompted to enter a site name. This can be updated later. I’ll enter “netlify-demo-123”.
接下来,将提示我们输入站点名称。 以后可以更新。 我将输入“ netlify-demo-123”。

If the site name is available and within the parameters, you will be prompted with another question. We will have to enter a publish directory. Type in “./build”, and hit enter.
如果站点名称可用并且在参数内,则将提示您另一个问题。 我们将必须输入一个发布目录。 输入“ ./build”,然后按Enter。

This should complete the process, and you will be able to access your live app at the Website Draft URL.
这样就可以完成该过程,您将可以通过网站草稿URL访问实时应用程序。

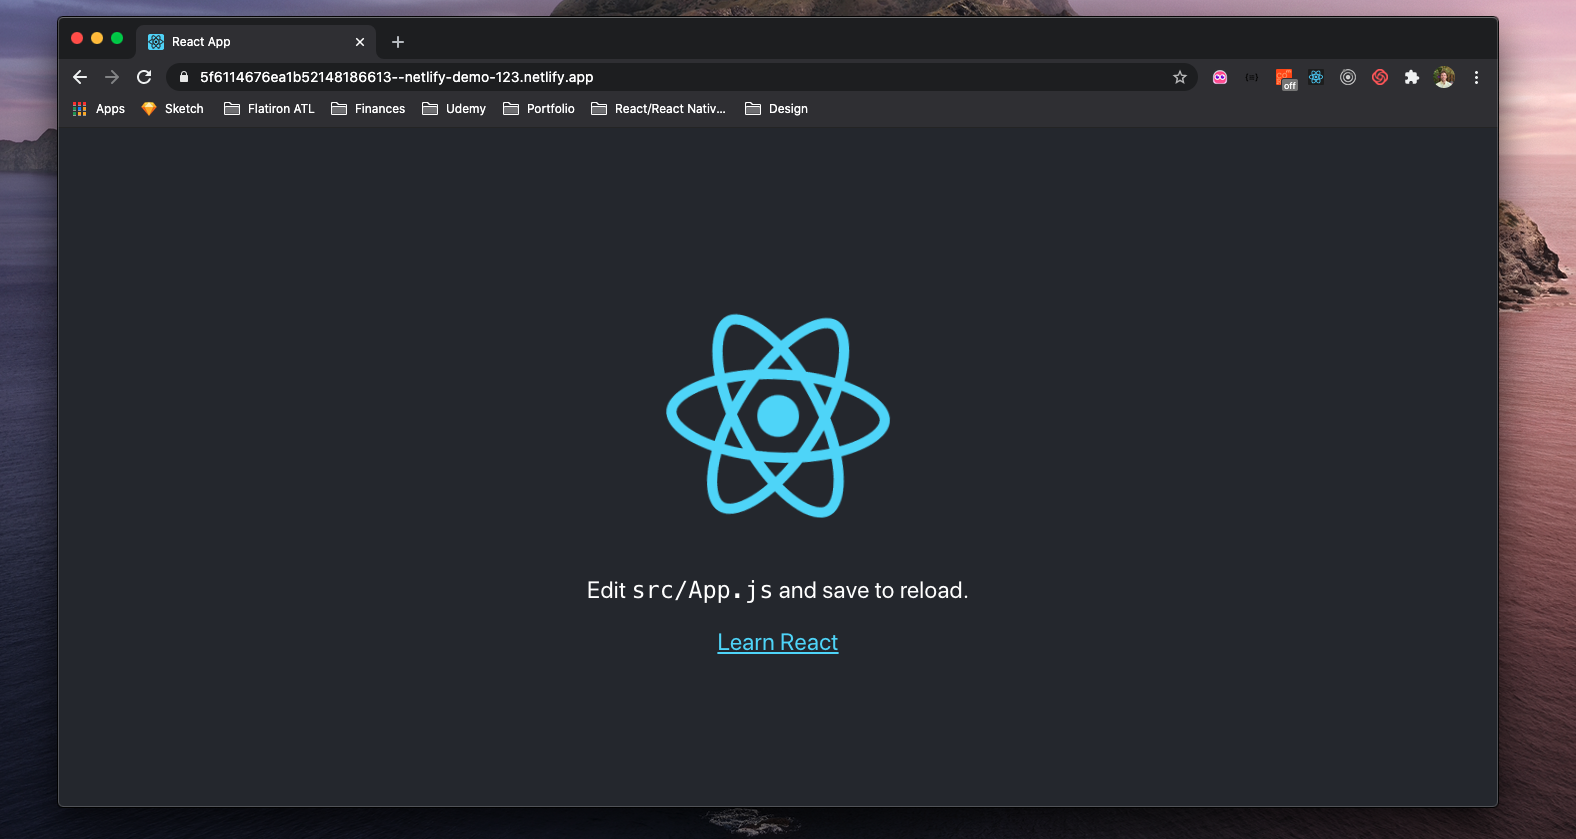
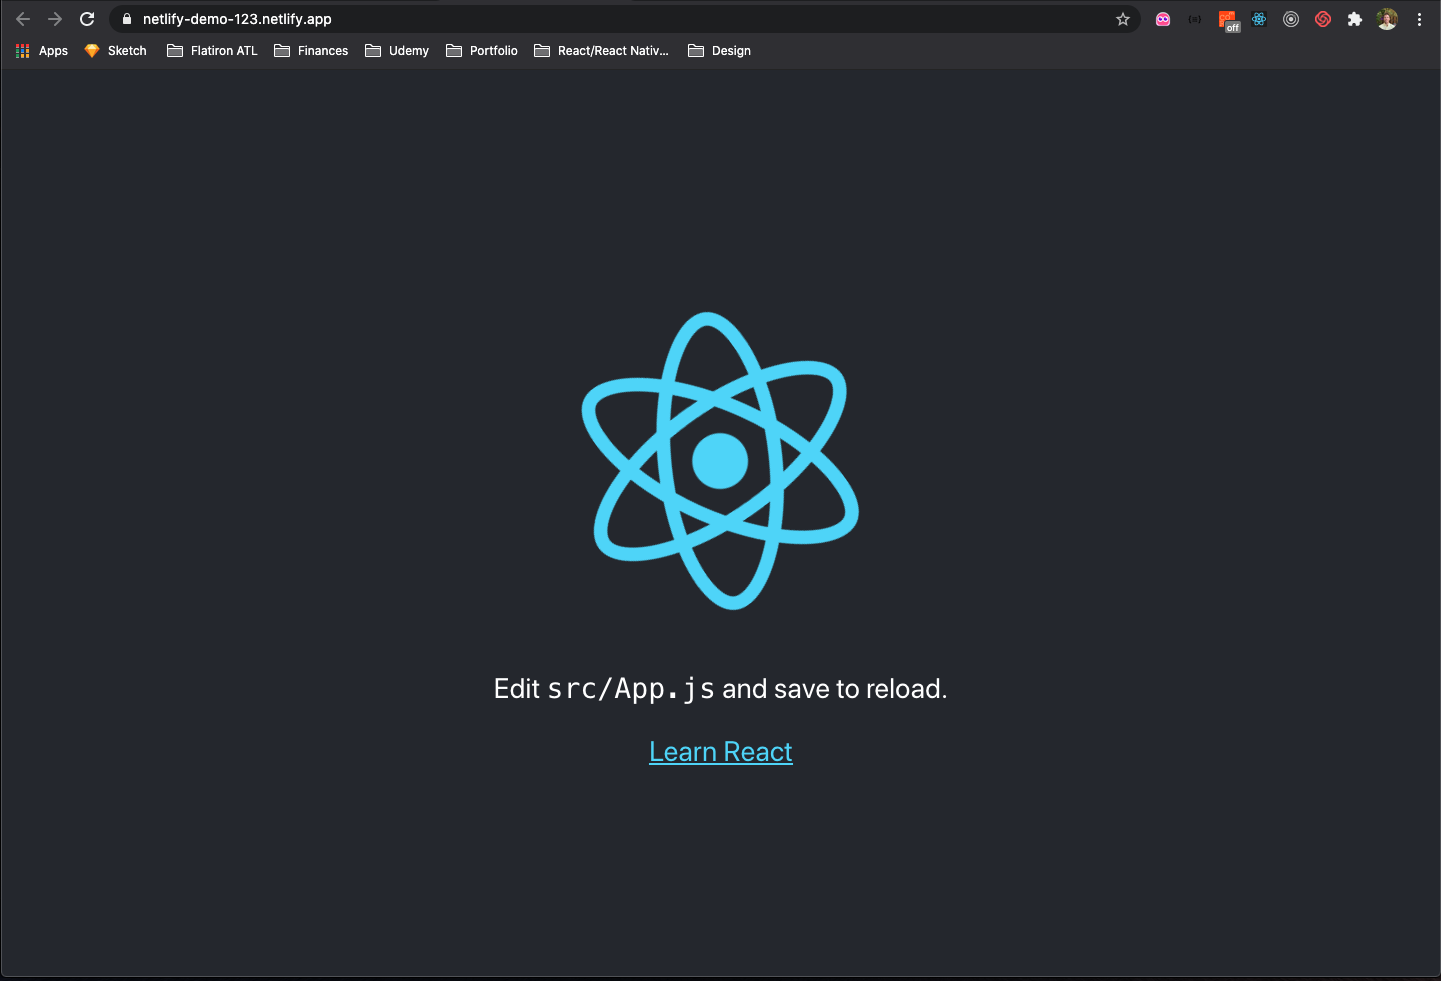
Copy and paste this url into your browser to see the app! Below is a screenshot of my app in the browser.
复制此网址并将其粘贴到您的浏览器中以查看该应用程序! 下面是浏览器中我的应用程序的屏幕截图。
We now have our app set up for deployment with Netlify! Next, we will create a repo on Github and push our project to Github.
现在,我们已经设置了要与Netlify一起部署的应用程序! 接下来,我们将在Github上创建一个仓库,并将我们的项目推送到Github。
第3步:创建Github存储库并推动当前项目 (Step 3: Create Github repo and push up current project)
I will now navigate over to Github’s website to access my account. I’ll create a new repo for the demo.
我现在将导航至Github的网站以访问我的帐户。 我将为该演示创建一个新的仓库。

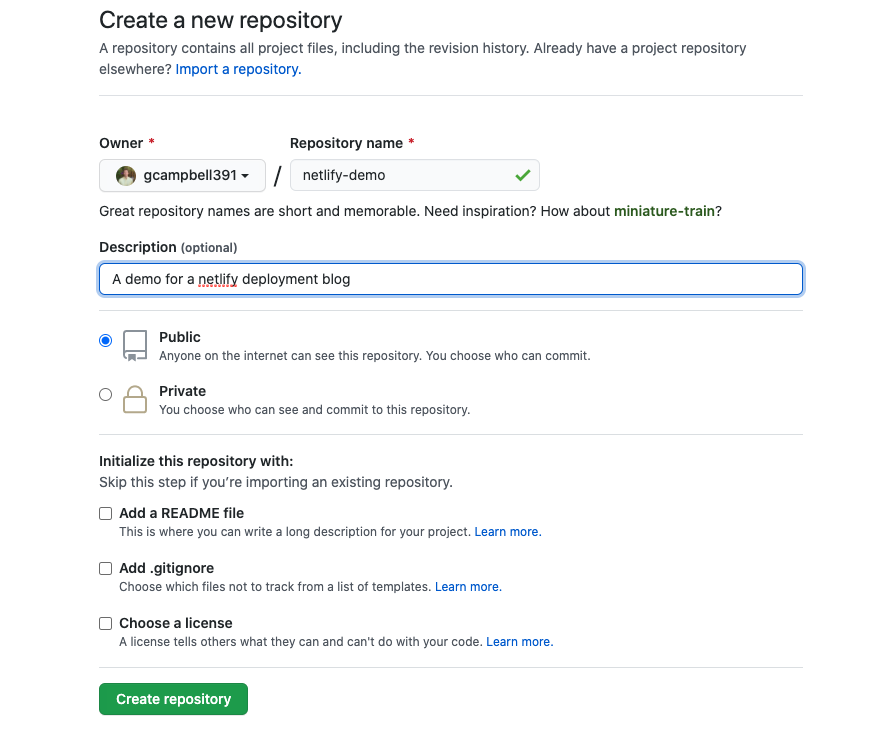
Complete the form to create the new repo.
完成表格以创建新的仓库。
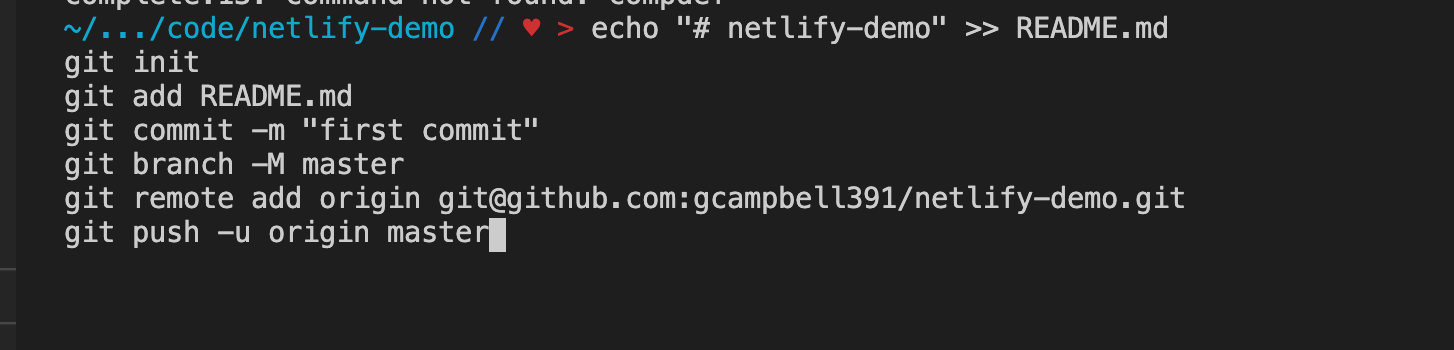
Next, just follow the instructions displayed. Copy and paste the first option.
接下来,只需按照显示的说明进行操作。 复制并粘贴第一个选项。

I will now open Visual Studio from the terminal using the shortcut below.
现在,我将使用以下快捷方式从终端打开Visual Studio。

Once Visual Studio opens up, open the terminal and paste in the commands from above(They can be entered in all at once).
Visual Studio打开后,打开终端并粘贴上面的命令(可以一次输入所有命令)。
If you run a git status after the commands are finishing running, you will notice the netlify folder isn’t committed yet. We will run the following commands below, and then we are finished with Github for now.
如果在命令完成运行后运行git状态,则会注意到netlify文件夹尚未提交。 我们将在下面运行以下命令,然后我们现在就结束了Github。
git add .
git commit -m'add netlify folder'
git push
Refresh the repo in the browser, and you should see all the updates.
在浏览器中刷新存储库,您应该看到所有更新。
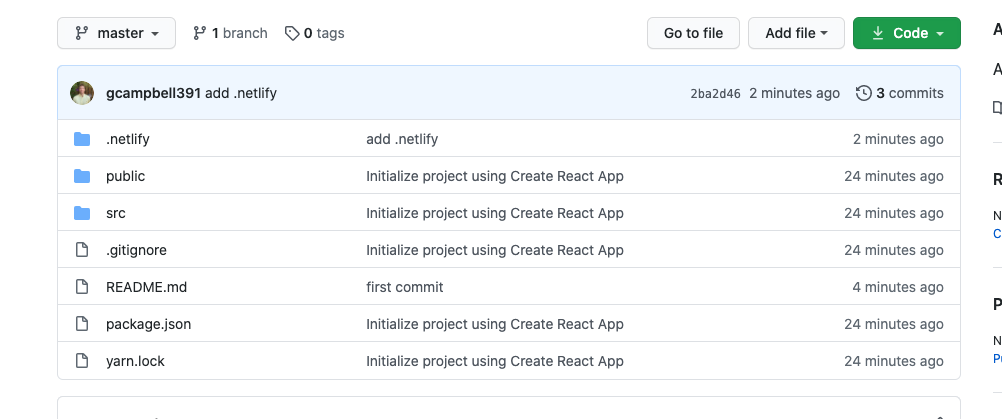
If so, we can move onto the final piece, connecting the repo with Netlify app.
如果是这样,我们可以进入最后一步,将仓库与Netlify应用程序连接起来。
步骤4:设置Netlify App的部署设置 (Step 4: Set up Deployment settings for Netlify App)
Head to Netlify’s website and access your personal dashboard. You should see your application listed in the sites section. Click the application. It should look like the image below.
转到Netlify的网站并访问您的个人仪表板。 您应该在站点部分中看到您的应用程序。 单击该应用程序。 它看起来应如下图所示。

We will click site settings to access the deployment settings. Select Build and Deploy. Your screen should look like the screenshot below.
我们将单击站点设置以访问部署设置。 选择“构建并部署”。 您的屏幕应类似于以下屏幕截图。
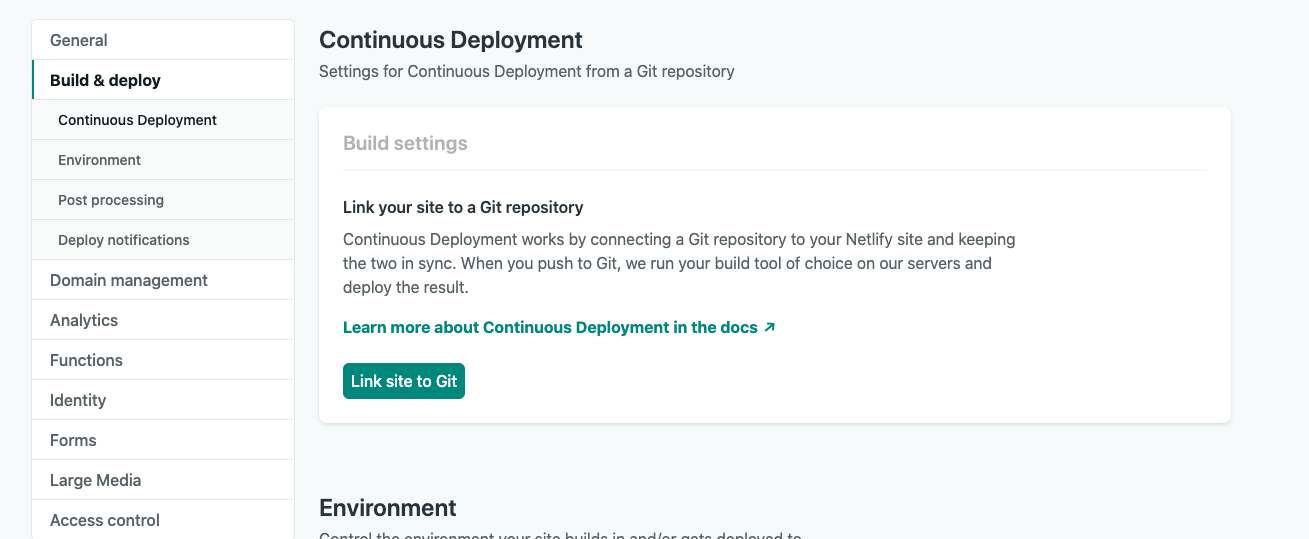
Next, select “Link site to Git”. Choose “Github”. Choose the correct repo in the list. You can use the search filter if you like. I definitely did!
接下来,选择“将站点链接到Git”。 选择“ Github”。 在列表中选择正确的仓库。 您可以根据需要使用搜索过滤器。 我绝对做到了!
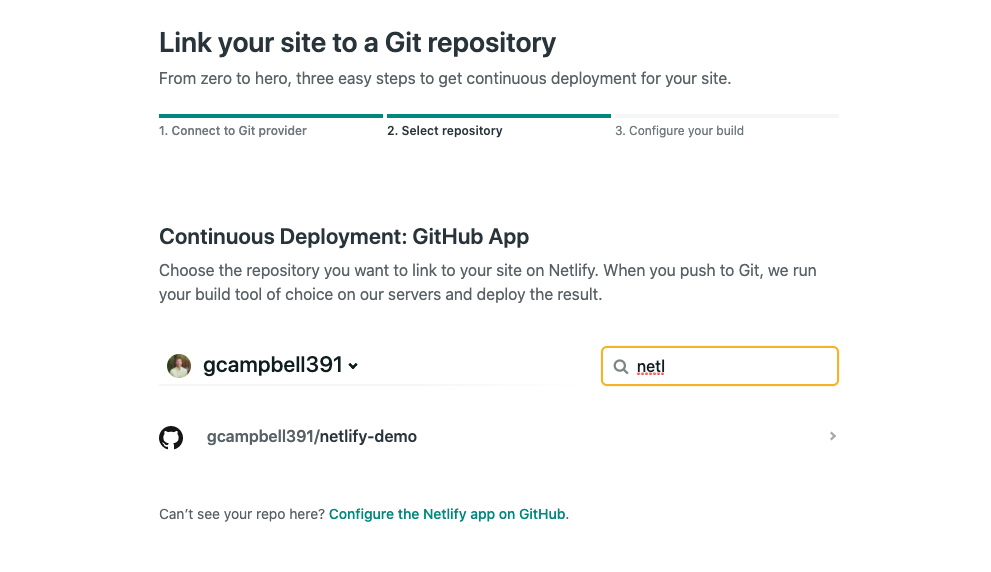
After you find the correct repo, click it. Below is a screenshot of how I configured my build.
找到正确的存储库后,单击它。 以下是我如何配置构建的屏幕截图。
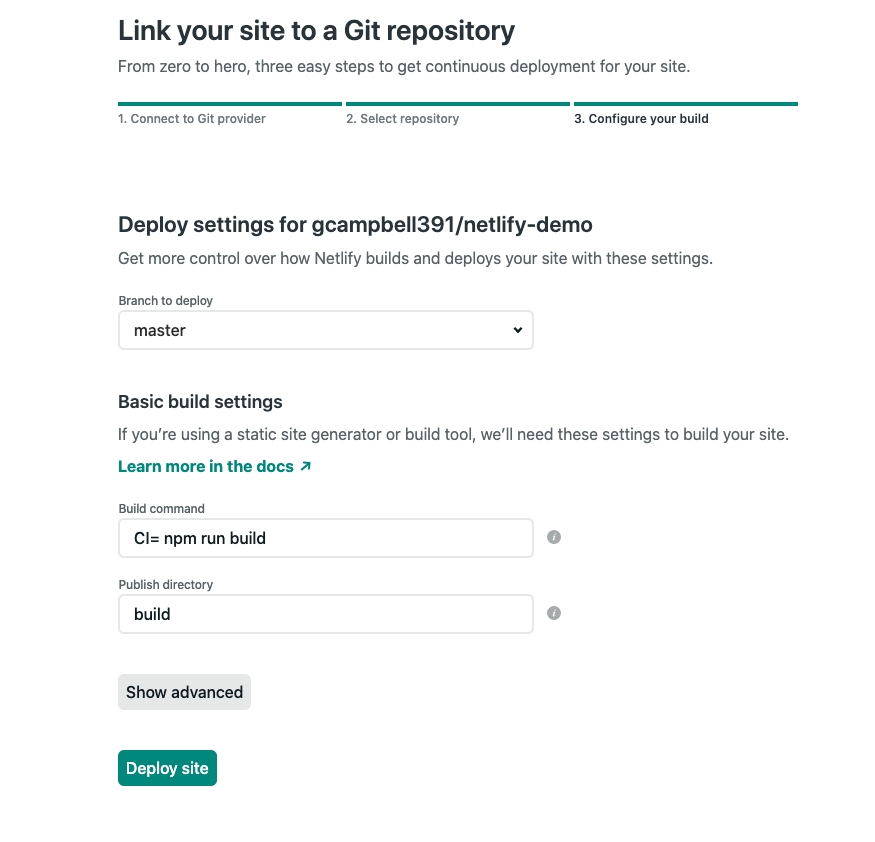
I choose master for the branch. I had trouble getting my react app to run without adding the following “CI=” to “npm run build” in the build command. Here is a link to the article that helped me find the issue and solution. Click “deploy site” if your form looks like mine above.
我选择分公司的主人。 我无法在没有在build命令中将以下“ CI =”添加到“ npm run build”的情况下运行我的react应用程序。 这里是文章的链接,该文章帮助我找到了问题和解决方案。 如果您的表单看起来像上面的我的表单,请单击“部署站点”。
You should now be brought back to the overview project screen.
现在,您应该回到概览项目屏幕。
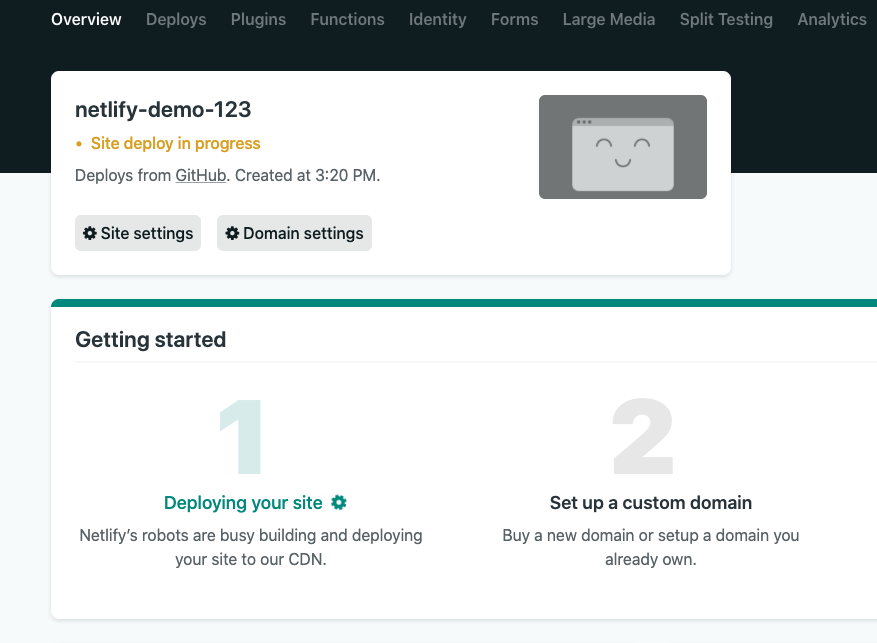
You will notice under the app name that site deploy is in progress. You can click the yellow text to view the actually terminal as the the site is being built and deployed. If deployment is successful, green text with a link to your web app should replace the yellow text under the app name.
您会在应用程序名称下注意到站点部署正在进行中。 您可以单击黄色文本以查看正在构建和部署站点的实际终端。 如果部署成功,带有Web应用程序链接的绿色文本应替换应用程序名称下的黄色文本。
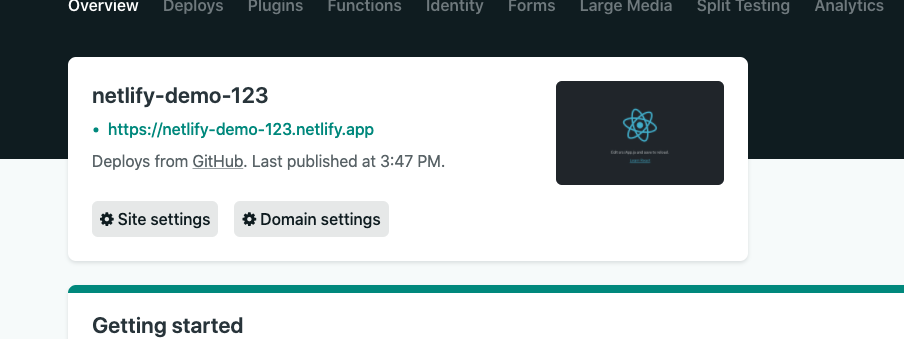
Click the link to access the web app.
点击链接以访问网络应用。
And just like that we have everything set up! Now every time we push up new git commits for this project, Netlify will pull and deploy the most current repo. For the last step, I’ll show an example of this.
就像这样,我们已完成所有设置! 现在,每次我们为该项目推送新的git commit时,Netlify都会提取并部署最新的仓库。 对于最后一步,我将显示一个示例。
步骤5:对项目进行一些更改,增加提交,然后查看结果 (Step 5: Make some changes to the project, push up the commits, and see the results)
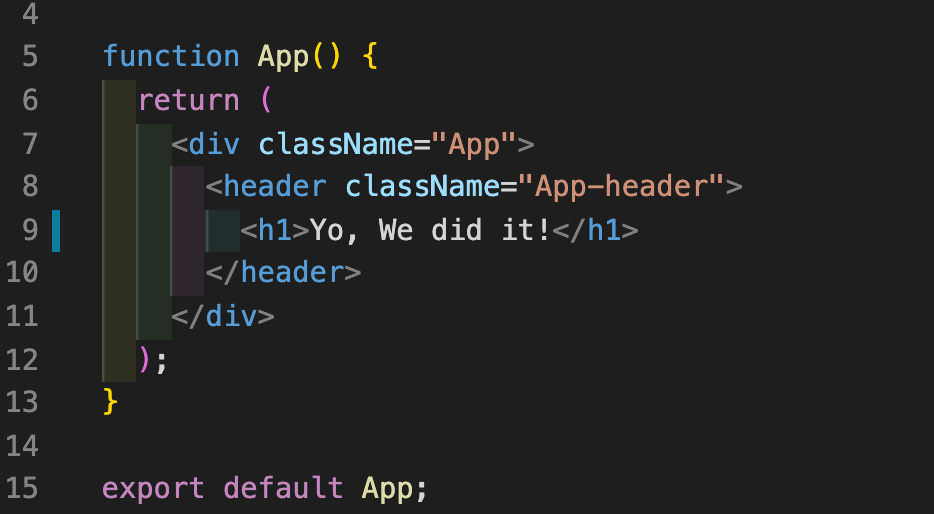
For a quick demonstration, I will delete everything inside the header tag on the App.js file. I will replace the deleted content with a h1 tag that reads “Yo, We did it!”. Below is a screenshot of my changes before I commit and push them to Github.
为了快速演示,我将删除App.js文件的header标记内的所有内容。 我将用已删除的内容替换为h1标签,内容为“ Yo,We做到了!”。 以下是我提交并推送到Github之前所做更改的屏幕截图。
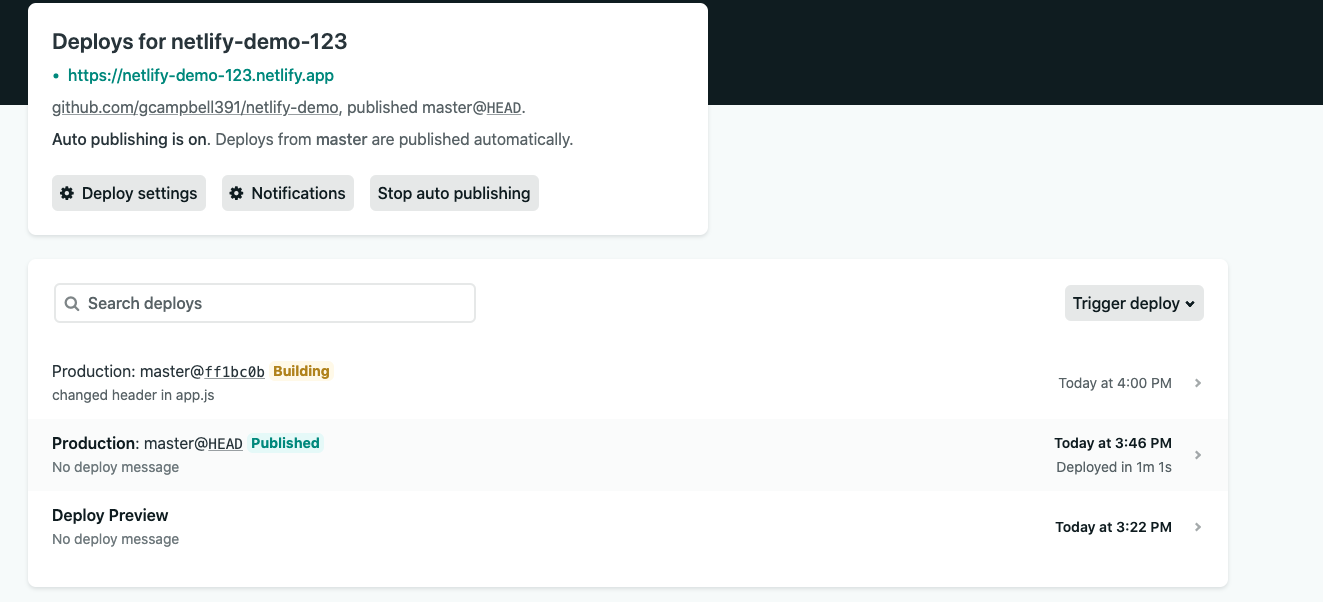
I will now add, commit, and push the updates to Github. After the commands finish running, navigate back to the Netlify website. Click the Deploys section in your dashboard, and you should see a new build being made. You can also see the my commit message associated with the update.
我现在将添加,提交并将更新推送到Github。 命令运行完成后,导航回到Netlify网站。 单击仪表板中的“部署”部分,您应该看到正在制作一个新的版本。 您还可以看到与更新关联的我的提交消息。
Once the build is complete, let’s refresh the live app link.
构建完成后,让我们刷新实时应用程序链接。
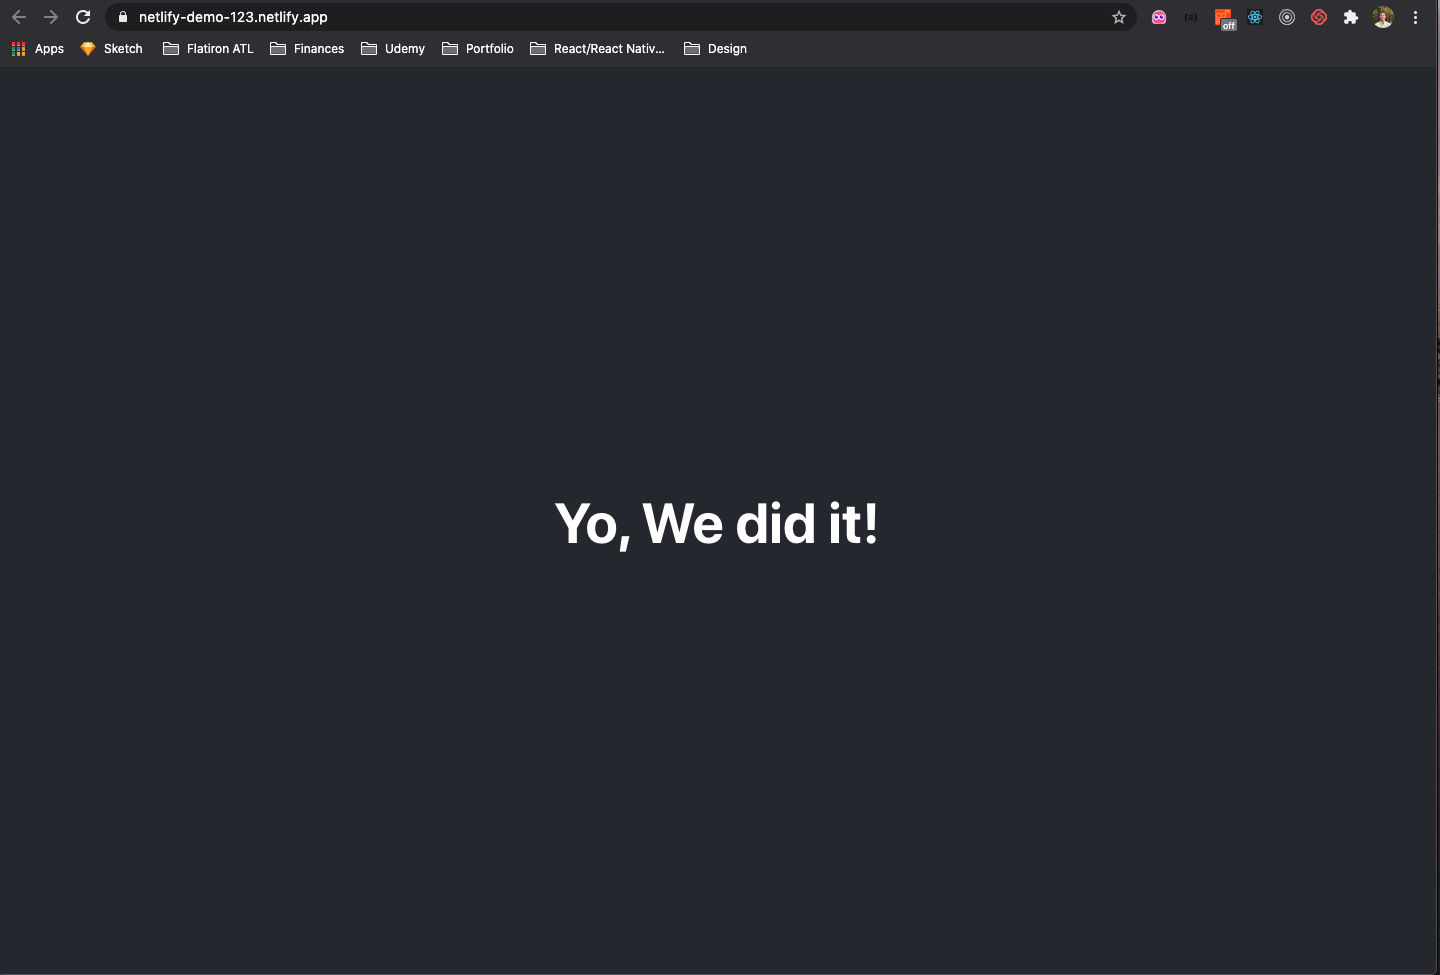
Wahoo! Our live application is now running on the most current version. If you ever want to make changes to the application in the future, just add, commit, and push your changes to Github. Netlify will handle the rest!
哇! 现在,我们的实时应用程序正在最新版本上运行。 如果您将来想对应用程序进行更改,只需将更改添加,提交并推送到Github。 Netlify将处理其余的工作!
I hope you found this article helpful, and easy to understand. If you have any questions please feel free to reach out to me on LinkedIn. You can also check out my portfolio site here. Have a great day!
希望本文对您有所帮助,并且易于理解。 如果您有任何疑问,请随时通过LinkedIn与我联系。 您也可以在这里查看我的投资组合网站。 祝你有美好的一天!


 1409
1409

 被折叠的 条评论
为什么被折叠?
被折叠的 条评论
为什么被折叠?
 到【灌水乐园】发言


