


为什么要使用Adobe Brackets? (Why Use Adobe Brackets ?)
Brackets ships with an out-of-the box live preview solution which is quite unique compared to the many other live-server solutions that you can install from the node package manager(npm). Unlike the others, it will highlight which section of CSS or HTML you are editing inside the live-preview browser.
托架附带了一个现成的实时预览解决方案,与您可以从节点包管理器(npm)安装的许多其他实时服务器解决方案相比,该解决方案非常独特。 与其他浏览器不同,它将突出显示正在实时预览浏览器中编辑CSS或HTML的哪个部分。
When you open a basic HTML, CSS and JS file and click the lightning icon on the side panel it will open a separate browser window. Make sure there are no errors in your code or else it will not work as expected.
当您打开基本HTML,CSS和JS文件并单击侧面板上的闪电图标时,它将打开一个单独的浏览器窗口。 确保您的代码中没有错误,否则它将无法正常工作。
Here is a screenshot of what of it looks like.
这是其外观的屏幕截图。
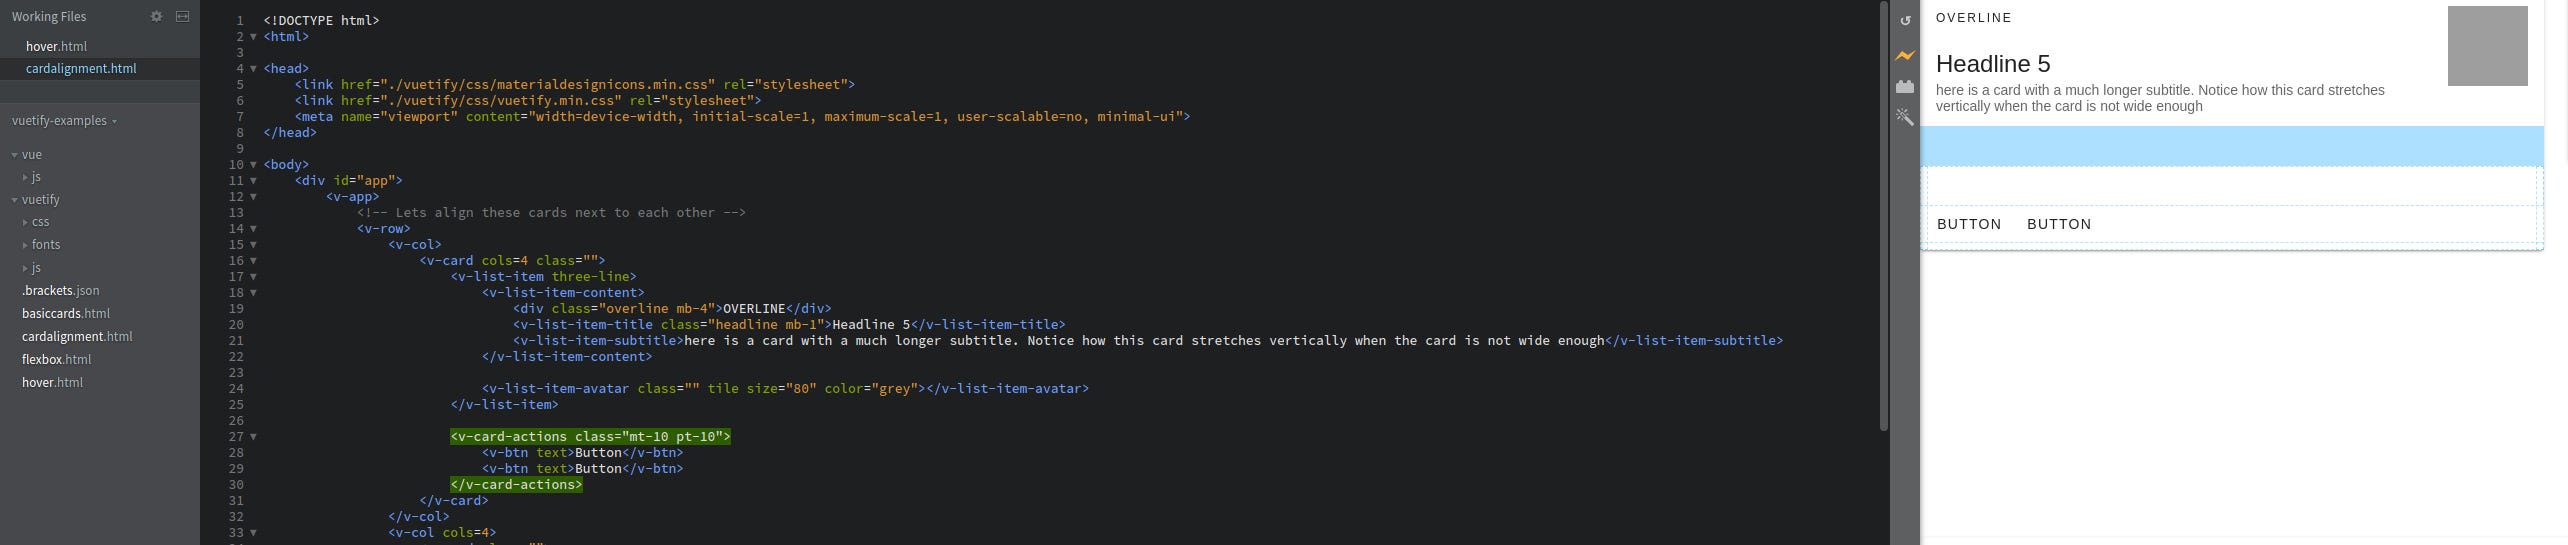
Notice how it highlights the margin(filled blue area) and padding(unfilled dotted areas) for you. I added some extra margin and padding so that you can see it easier.
请注意,它如何为您突出显示边距(蓝色实心区域)和填充(虚线实心区域)。 我添加了一些额外的边距和填充,以便您可以更轻松地看到它。
This feature alone is very useful for quick prototyping and learning new front-end frameworks like Vuetify or Bootstrap. I used this editor to help me debug some very nasty CSS written by other developers that did not care about well written CSS. You can download and read more about Brackets here
仅此功能对于快速原型设计和学习新的前端框架(如Vuetify或Bootstrap)非常有用。 我使用此编辑器来帮助调试其他开发人员编写的非常讨厌CSS,这些CSS不在乎编写良好CSS。 您可以在此处下载和阅读有关支架的更多信息
I had to install an extra plugin that can reload the browser with a keyboard shortcut because the live server requires a manual reload when working with the Vuetify framework in order to render things properly.
我必须安装一个额外的插件,该插件可以使用键盘快捷键重新加载浏览器,因为在使用Vuetify框架时,实时服务器需要手动重新加载才能正确呈现内容。
现在让我们解决那些讨厌的字体问题 (Now let us fix those nasty font issues)
According to this open Github issue in the Brackets repository a comment by cosmin-vi states:
根据Brackets存储库中这个公开的Github问题 , cosmin-vi发表了评论:
Ubuntu 18.04 (and hence Linux Mint 19) switched to
libfreetype6version 2.8.1 (libfreetype6_2.8.1-2ubuntu2, and has a bitmap font rendering bugUbuntu 18.04(以及Linux Mint 19)切换到
libfreetype6版本2.8.1(libfreetype6_2.8.1-2ubuntu2,并且具有位图字体渲染错误
The bug was fixed but is not available in Ubuntu 18.04 or Linux Mint 19 and to fix it you have to do the following:
该错误已修复,但在Ubuntu 18.04或Linux Mint 19中不可用,要修复此错误,您必须执行以下操作:
Download
libfreetype6_2.8-0.2based on your platform from:http://snapshot.debian.org/package/freetype/2.8-0.2/#libfreetype6_2.8-0.2e.g.http://snapshot.debian.org/archive/debian/20170630T215111Z/pool/main/f/freetype/libfreetype6_2.8-0.2_amd64.deb根据您的平台从以下位置下载
libfreetype6_2.8-0.2: http :libfreetype6_2.8-0.2例如http://snapshot.debian.org/archive/debian /20170630T215111Z/pool/main/f/freetype/libfreetype6_2.8-0.2_amd64.debOpen a terminal in the folder where you downloaded the file and run:
sudo apt-get updatesudo apt-get install ./libfreetype6_2.8-0.2_amd64.debsudo apt-mark hold libfreetype6(the last command is to marklibfreetype6so that it's not auto-updated by Linux back to the buggy version)在下载文件的文件夹中打开一个终端,然后运行:
sudo apt-get updatesudo apt-get install ./libfreetype6_2.8-0.2_amd64.debsudo apt-mark hold libfreetype6(最后一个命令是标记libfreetype6以便它不会被Linux自动更新回有错误的版本)
It will prompt to downgrade it. Press enter to select Y(the default)
它将提示降级。 按enter键选择Y(默认)

Now the font rendering issue should be fixed.
现在应该解决字体渲染问题。
额外 (Extra)
If you don’t care about Brackets anymore you should upgrade to the latest libtypefree6 for your distro by removing it and reinstalling it but the apt package manager may complain.
如果您不再关心Brackets,则应通过删除发行版并重新安装来升级到最新的libtypefree6 ,但apt软件包管理器可能会抱怨。

You can fix this with aptitude package manager instead. (Install it with apt package manager if you do not have it):
您可以改用aptitude软件包管理器解决此问题。 ( 如果没有 ,请使用 apt package manager 安装 它) :
sudo aptitude remove libfreetype6
sudo aptitude remove libfreetype6
It will ask you to keep the current version because other libraries also may depend on it. If you select no it will suggest to upgrade it instead. Which is what you want:
它将要求您保留当前版本,因为其他库也可能依赖它。 如果选择否,则建议升级它。 您想要的是:
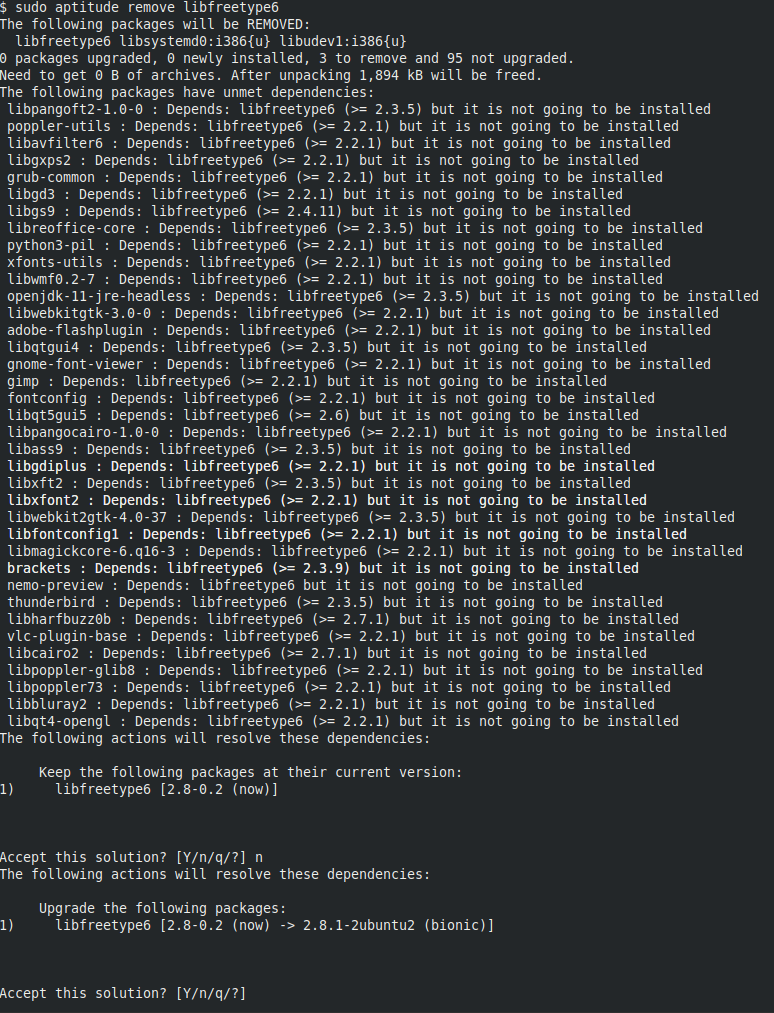
Type Y and enter and it will upgrade to the suggested version shown in the image above.
键入Y并enter ,它将升级到上图所示的建议版本。
结论 (Conclusion)
If this did not solve your problem make sure you visit the actual Github issue and see if you can find anything helpful or simply ask for help if you tried everything already.
如果这不能解决您的问题,请确保您访问了实际的Github问题 ,看看是否可以找到任何有用的信息,或者如果您已经尝试了所有方法,只需寻求帮助。


 1126
1126

 被折叠的 条评论
为什么被折叠?
被折叠的 条评论
为什么被折叠?
 到【灌水乐园】发言


