


I originally wrote about how to write a command-line utility in Node.js back in 2013, and at the time, I was writing the blog post as I learnt how to build a CLI in Node.js myself.
我最初是在2013年撰写关于如何在Node.js中编写命令行实用程序的文章,当时,我正在写博客文章,当时我自己学习了如何在Node.js中构建CLI。
Now it's 2020, and since that original post, I have written quite a few CLI tools so I felt it would be worthwhile to write a fresh post about how I would approach writing a CLI tool with Node.js in 2020.
现在是2020年,并且自那篇原始文章起,我已经写了很多CLI工具,所以我觉得有必要写一篇新文章,介绍我将如何在2020年使用Node.js编写CLI工具。
先决条件 (Pre-requisites)
Before we get started, this tutorial has a pre-requisite that you have Node.js installed. Rather than write how to do that here I have linked to tutorials on how to do this that can be found on treehouse’s blog.
在开始之前,本教程必须先安装Node.js。 我没有在这里写下如何执行此操作,而是链接到可在treehouse的博客上找到的有关如何执行此操作的教程。
Mac: https://blog.teamtreehouse.com/install-node-js-npm-macWindows: https://blog.teamtreehouse.com/install-node-js-npm-windows
Mac: https : //blog.teamtreehouse.com/install-node-js-npm-mac Windows: https : //blog.teamtreehouse.com/install-node-js-npm-windows
开始 (Getting Going)
With our pre-requisites installed, we now need to initialise our project. To do this you will want to create a folder somewhere on your system, for me I normally have a folder called Sites in my home directory.
安装了先决条件后,我们现在需要初始化项目。 为此,您将需要在系统上的某个位置创建一个文件夹,对我来说,通常我的主目录中有一个名为Sites的文件夹。
To get to this folder in the command line use:
要在命令行中访问此文件夹,请使用:
cd ~/SitesThe next step is to create a folder for the project, for this I would use mkdir.
下一步是为项目创建一个文件夹,为此,我将使用mkdir.
mkdir cli-project
cd cli-project
We then need to initialise the Node.js project using npm.
然后,我们需要使用npm初始化Node.js项目。
npm initHaving run this command we will then be asked a series of questions about our project by NPM, for this project we are going to name our command-line tool hello. Below are the answers I used for the questions it asked (the answers in brackets are the default answers which I hit enter to accept).
运行此命令后,NPM将向我们询问有关项目的一系列问题,对于该项目,我们将其命名为命令行工具hello 。 以下是我用于询问的问题的答案(方括号中的答案是我按Enter接受的默认答案)。
name: (cli-project)
version: (1.0.0)
description: Simple hello world CLI
entry point: (index.js)
test command:
git repository:
keywords:
author: Jonathan Fielding
license: (ISC) MIT
We will then be prompted with the JSON that NPM has generated:
然后,将提示我们NPM生成的JSON:
{
    "name": "cli-project",
    "version": "1.0.0",
    "description": "Simple hello world CLI",
    "main": "index.js",
    "scripts": {
        "test": "echo \"Error: no test specified\" && exit 1"
    },
    "author": "Jonathan Fielding",
    "license": "MIT"
}
To accept this simply hit enter.
要接受此命令,只需按Enter。
At this point, all we have in our directory is the package.json file generated by NPM init, so we will now create the JS file used by our command line.
至此,目录中只有NPM init生成的package.json文件,因此我们现在将创建命令行使用的JS文件。
As we specified above we will create a file called index.js in the root of our project. The aim of our JS script is to simply log ‘hello world’ to the command line when our hello CLI tool is run. To achieve this the first thing we need to do is tell our script how it should be executed, to configure this for Node.js the first line of our script should be:
如上文所述,我们将在项目的根目录中创建一个名为index.js的文件。 我们的JS脚本的目的是在运行hello CLI工具时简单地将“ hello world”登录到命令行。 为了实现这一目标,我们需要做的第一件事就是告诉脚本应该如何执行,为Node.js配置它,脚本的第一行应该是:
#! /usr/bin/env nodeHaving done this we can now write the rest of our script, as we just want to say hello world on the command line the full script is as follows.
完成此操作后,我们现在可以编写脚本的其余部分,因为我们只想在命令行上打个招呼世界,完整脚本如下。
#! /usr/bin/env node
console.log('hello world');
Having written our JavaScript we also want to define that command that we will use on the command line, in order to do this we need to open up the package.json file in our editor. We then need to add a new section to the config which is the bin object. This object needs to list any commands the user may want to enter, for this example we will add one command hello. We will need to point this to our main js file used for the utility which is index.js.
编写完JavaScript之后,我们还想定义将在命令行中使用的命令,为此,我们需要在编辑器中打开package.json文件。 然后,我们需要在配置中添加一个新部分,即bin对象。 该对象需要列出用户可能要输入的所有命令,在本示例中,我们将添加一个命令hello 。 我们需要将其指向用于实用程序的主要js文件,即index.js 。
"bin": {
    "hello" : "index.js"
}
We have told our package.json that whenever the user of our utility enters ‘hello’ on their CLI, it should run index.js.
我们已经告诉package.json,只要实用程序的用户在CLI上输入“ hello”,它就应该运行index.js 。
We now simply need to return to our console and run npm link which will install the CLI tool on our machine.
现在,我们只需要返回到控制台并运行npm link ,它将在计算机上安装CLI工具。
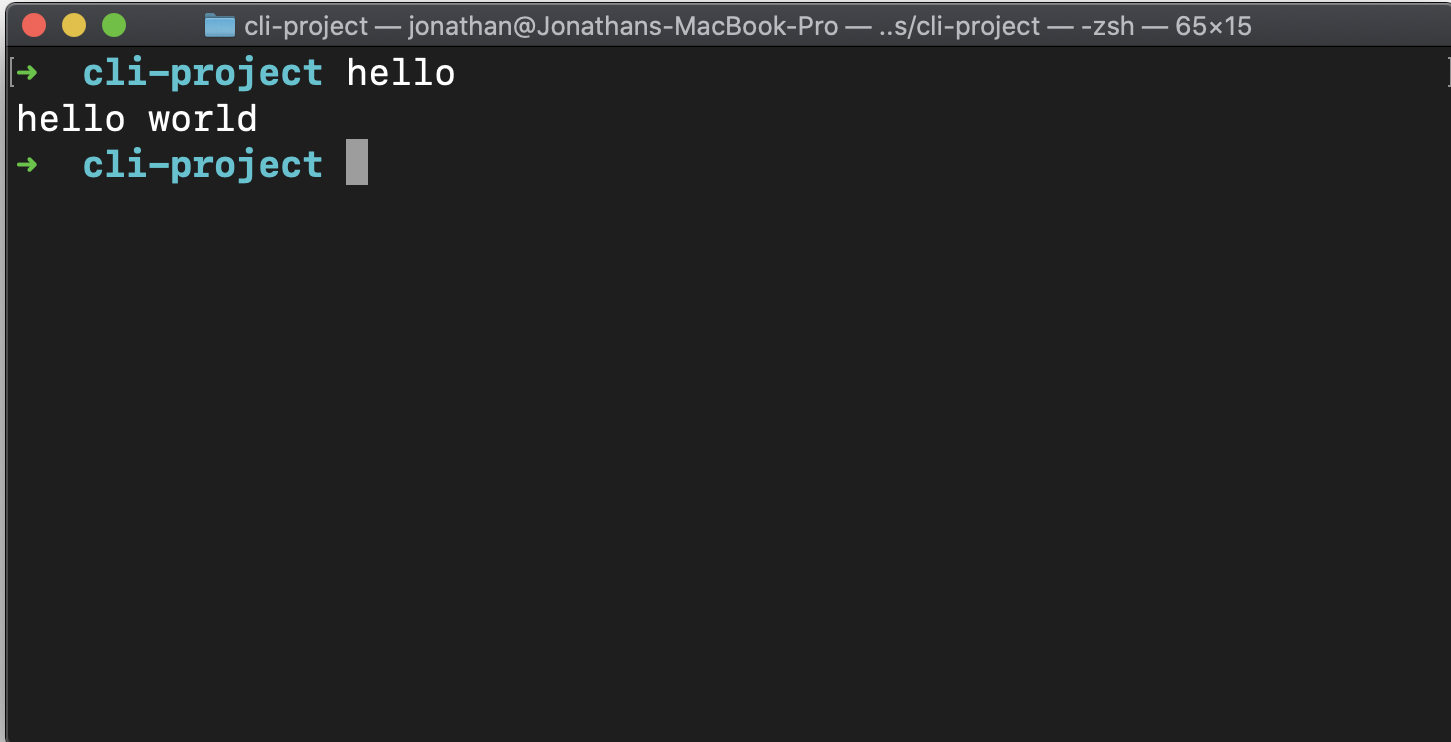
Once run test our running the hello command and you will see ‘hello world’ logged to the console.
运行测试后,运行hello命令,您将看到“ hello world”已登录到控制台。
下一步是什么 (What's next)
Having our command line say “hello world” when we type “hello” is great, but what if we want to make that message a tiny bit more personal. To do this we can allow the user to enter names of those we want to say hello to as additional arguments.
当我们键入“ hello”时,让命令行说“ hello world”是很棒的,但是如果我们想使该消息更加个性化该怎么办。 为此,我们可以允许用户输入我们想向他们打招呼的名称作为附加参数。
So if the user enters the command:
因此,如果用户输入命令:
hello --from jonathanIt should respond with:
它应该以以下方式回应:
hello jonathanTo enable us to do this we will need to read the arguments passed to our application. In Node.js the way in which you do this is to read the value ofprocess.argv.
为了使我们能够做到这一点,我们将需要读取传递给应用程序的参数。 在Node.js中,执行此操作的方法是读取process.argv的值。
To begin with, let's update our code in index.js to log the value of process.argv to the terminal.
首先,让我们更新index.js的代码以将process.argv的值记录到终端。
#! /usr/bin/env nodeconsole.log(process.argv)If we now type hello --from jonathan into our terminal, we will now see the following output.
如果现在在终端中输入hello --from jonathan ,现在将看到以下输出。
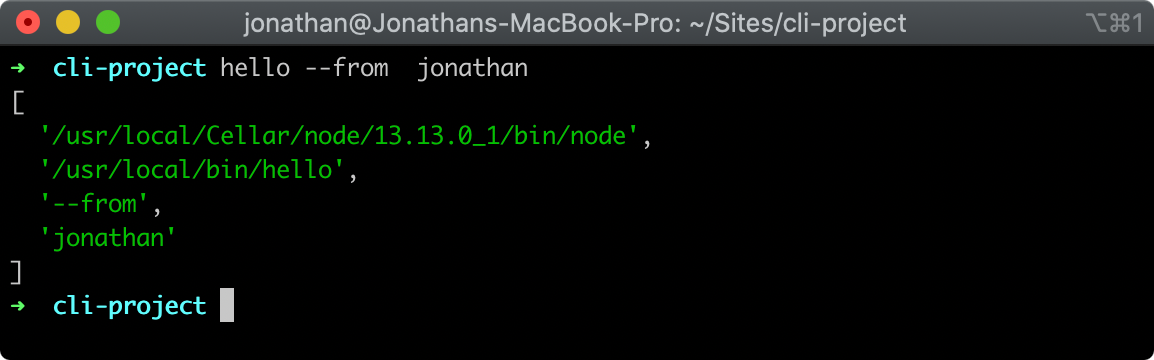
As you can see above, the command we entered resulted in an array with 4 values being logged to the console.
正如您在上面看到的,我们输入的命令导致一个数组,其中有4个值记录到控制台。
The first of the value’s of the array is the path to the node executable that ran our CLI.
数组的第一个值是运行CLI的node可执行文件的路径。
The second is the full system path to the script we ran. note: as we have linked the CLI tool to our system, the full system path is in our /usr/local/bin directory.
第二个是我们运行的脚本的完整系统路径。 注意:由于我们已将CLI工具链接到我们的系统,因此完整的系统路径位于我们的/ usr / local / bin目录中。
The rest of the remaining values of the array will be the user passed arguments. In this case --from and jonathan. For our CLI we are most interested in these remaining arguments.
数组的其余其余值将是用户传递的参数。 在这种情况下--from和jonathan 。 对于我们的CLI,我们对其余的参数最感兴趣。
When destructuring an array we can choose to name the values of the array. We can then use the spread operator to put the remaining values into its own array. A good blog post on destructing arrays can be found on dev.to written by Samantha Ming.
销毁数组时,我们可以选择命名数组的值。 然后,我们可以使用价差运算符将其余值放入其自己的数组中。 萨曼莎·明(Samantha Ming)在dev.to上找到了一篇有关销毁数组的优秀博客文章 。
Below we are destructuring the array, for our own use we are extracting the command (which in this case we set to --from) and the list of names.
在下面,我们将对数组进行解构,以供我们自己使用,我们将提取命令(在本例中,将其设置为--from )和名称列表。
#! /usr/bin/env nodeconst [ nodeExec, scriptPath, command, ...names ] = process.argv;console.log(names);Running our command hello --from jonathan now will result in only the names being output.
现在hello --from jonathan运行我们的命令hello --from jonathan将仅输出名称。

Having got our users to input into our CLI we will now build our message that we will display to our user.
让我们的用户输入我们的CLI,我们现在将构建将显示给用户的消息。
If the command is set to --from we will use the names that have been passed as arguments as the names of the people we will greet. If the command is not set to --from we will simply continue to log hello world to the console.
如果命令设置为--from我们将使用作为参数传递的名称作为我们将要问候的人员的名称。 如果命令未设置为--from我们将继续继续向控制台记录hello world 。
To output the message we will use a template string, with the values of the `names` array joined using .join(', ') so that the names are comma and space-separated.
为了输出消息,我们将使用模板字符串,并使用.join(', ')连接`names'数组的值,以便名称以逗号分隔并以空格分隔。
#! /usr/bin/env nodeconst [ nodeExec, scriptPath, command, ...names ] = process.argv;if (command === '--from') {
    console.log(`hello ${names.join(', ')}`);
} else {
    console.log('hello world')
}
Now if we test our CLI one last time we will see that if we simply enter hello we will get a response of hello world and if we enter hello --from jonathan the CLI will respond with hello Jonathan.
现在,如果我们上一次测试CLI,我们将看到,如果仅输入hello ,就会收到hello world的响应;如果输入hello --from jonathan ,CLI将以hello Jonathan响应。

综上所述 (In Summary)
So in summary, in this post we have gone through the steps involved in writing a Node.js CLI that output hello world. We then extended it to personalise the greeting based on arguments that had been specified.
因此,总而言之,在本文中,我们已经完成了编写输出hello world的Node.js CLI所涉及的步骤。 然后,我们将其扩展为根据指定的参数个性化问候语。
From here, writing a CLI in Node.js is very much like writing any Node.js application 🤗. I hope you found this tutorial helpful, I will be continuing to post more posts here on medium so please check them out on my profile https://medium.com/@JonthanFielding.
从这里开始,在Node.js中编写CLI就像编写任何Node.js应用程序一样。 希望本教程对您有所帮助,我将继续在此处以中等形式发布更多帖子,因此请在我的个人资料https://medium.com/@JonthanFielding中进行查看。
P.S. If you liked this post follow me on twitter https://twitter.com/jonthanfielding 😀
PS:如果您喜欢这篇文章,请在Twitter https://twitter.com/jonthanfielding上关注我me
翻译自: https://medium.com/javascript-in-plain-english/writing-a-cli-tool-with-node-js-acfe200e20fc


 1107
1107


 被折叠的 条评论
为什么被折叠?
被折叠的 条评论
为什么被折叠?
 到【灌水乐园】发言


