


 本文介绍如何在安卓应用中通过一行代码轻松切换API端点和本地JSON数据源,适用于开发和调试阶段。内容涵盖相关技术和实践方法。
api端点
As an Android app developer, there were many instances when I had to depend on a local JSON file to not block app development since the API endpoints were still in progress. It is easier to go with a JSON file since the JSON design is generally finalized at the very beginning of a sprint.
作为一个Android应用程序开发人员,在很多情况下,由于API端点仍在进行中,因此我不得不依赖本地JSON文件来阻止应用程序开发。 使用JSON文件更容易,因为JSON设计通常在冲刺的开始就完成了。
Once the API endpoints are ready, the challenging part is, integrating API endpoints quickly without spending a lot of time on it. This includes removing all the code that was required to use local JSON files in the first place. Or having an if/else loop to make sure that local JSON files are used only in debug version of the app.
一旦准备好API端点,最具挑战性的部分就是快速集成API端点,而无需花费大量时间。 这包括首先删除使用本地JSON文件所需的所有代码。 或者使用if / else循环来确保仅在应用程序的调试版本中使用本地JSON文件。
However, there needs to be a better, cleaner, and concise way of writing code for this implementation.
但是,需要一种更好,更简洁的简洁方法来编写此实现的代码。
Ideally, toggling between an API endpoint and Local JSON file should be as easy as commenting a single line of code. And this is what we would try to achieve by the end of this article!
理想情况下,在API终结点和本地JSON文件之间切换应该像注释一行代码一样容易。 这就是我们在本文末尾要实现的目标!
We will be using Retrofit in this example since it is the most widely used networking library today.
在本示例中,我们将使用Retrofit,因为它是当今使用最广泛的网络库。
入门 (Getting Started)
Let’s create an Interceptor which is responsible for intercepting HTTP requests and mocking a response from the user-specified local JSON file.
让我们创建一个拦截器,该拦截器负责拦截HTTP请求并模拟来自用户指定的本地JSON文件的响应。
This is how the MockRequestInterceptor class looks like:
这是MockRequestInterceptor类的样子:
class MockRequestInterceptor(private val context: Context) : Interceptor {


    companion object {
        private val JSON_MEDIA_TYPE = MediaType.parse("application/json")
        private const val MOCK = "mock"
    }


    override fun intercept(chain: Interceptor.Chain): Response {
        val request = chain.request()


        val header = request.header(MOCK)


        if (header != null) {
            val filename = request.url().pathSegments().last()
            return Response.Builder()
                .request(request)
                .protocol(Protocol.HTTP_1_1)
                .message("")
                .code(200)
                .body(ResponseBody.create(JSON_MEDIA_TYPE, context.readFileFromAssets("mocks/$filename.json")))
                .build()
        }


        return chain.proceed(request.newBuilder().removeHeader(MOCK).build())
    }
}
Here, we check whether the request has a ‘mock’ header included in it. If yes, we mock a user-specified local JSON file from the assets directory. If not, we hit the API endpoint without altering the incoming response.
在这里,我们检查请求中是否包含“ mock”标头。 如果是,则从资产目录中模拟用户指定的本地JSON文件。 如果没有,我们将在不更改传入响应的情况下达到API端点。
Want to read this story later? Save it in Journal.
想稍后再读这个故事吗? 将其保存在 Journal中 。
context.readFileFromAssets(“mocks/$filename.json”)You can define the path of the JSON file in the ‘readFileFromAssets’ function. In this example, the JSON file will be looked up in ‘assets/mocks’ directory. This is an extension function to read from the json file:
您可以在“ readFileFromAssets”函数中定义JSON文件的路径。 在此示例中,将在“ assets / mocks”目录中查找JSON文件。 这是从json文件读取的扩展功能:
fun Context.readFileFromAssets(filePath: String): String {
    return resources.assets.open(filePath).bufferedReader().use {
        it.readText()
    }}
Notice that the JSON filename is derived from the last path segment of the request URL. This business logic can be modified if needed, depending upon the use-case.
请注意,JSON文件名是从请求URL的最后一个路径段派生的。 如果需要,可以根据用例修改此业务逻辑。
val filename = request.url().pathSegments().last()创建一个“资产”文件夹 (Creating an ‘assets’ folder)
(Skip this section if you know how to create the ‘assets’ folder)
(如果您知道如何创建“资产”文件夹,请跳过本节)
This folder will not be created automatically with the project. We have to create it.
该文件夹不会随项目自动创建。 我们必须创建它。
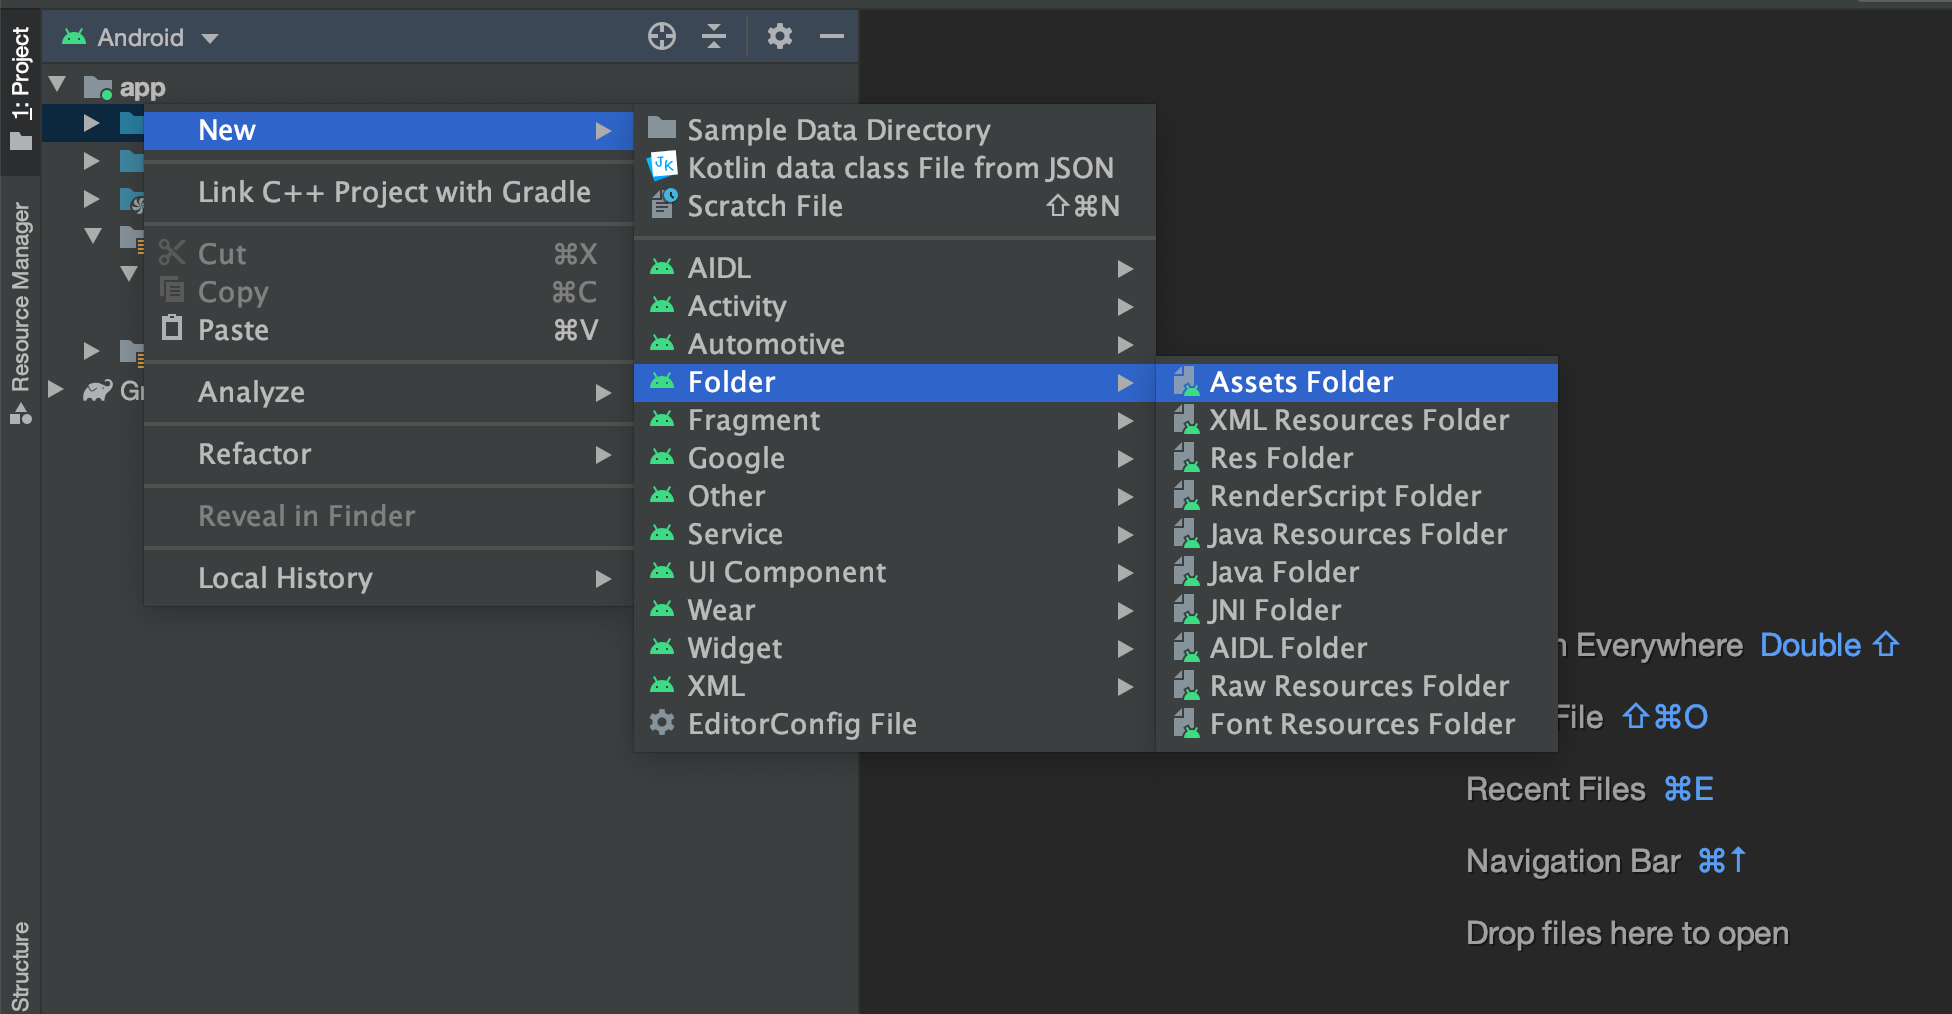
Right-click on app → New → Folder → Assets Folder.
右键单击应用程序→新建→文件夹→资产文件夹。
Refer this sample image:
请参考此示例图像:
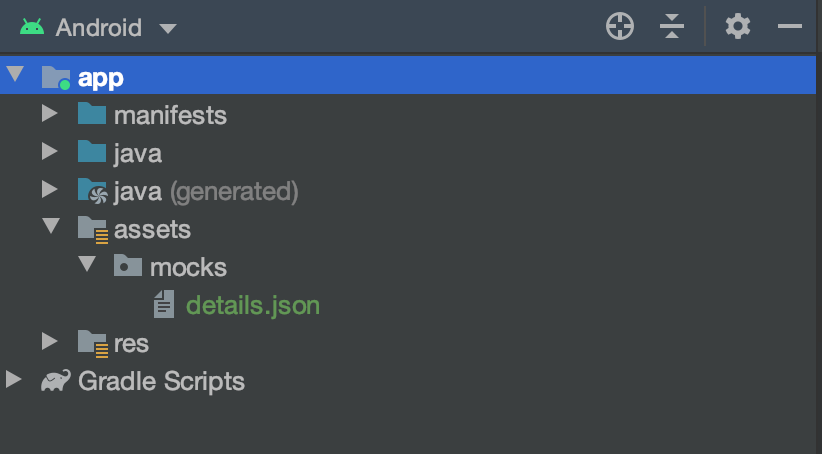
The final project hierarchy would look like this
最终的项目层次结构如下所示
在本地JSON和API端点之间切换 (Toggling between local JSON and API endpoint)
interface EmployeeAPI {


    @Headers("mock:true")
    @GET("/employee/details")
    fun getEmloyeeDetails(): Call<Payload<EmployeeDetail>>
}
The trigger point here for using a local JSON file is the “mock:true” header annotation.
使用本地JSON文件的触发点是“ mock:true”标头注释。
@Headers(“mock:true”)If this header is not included in the request, the response will not be mocked from the JSON file.
如果请求中不包含此标头,则不会从JSON文件中模拟响应。
Since the JSON filename is derived from the last path segment of request URL, which in this example is ‘details’. The JSON file will have to be named ‘details.json’. This logic is used for simplicity and can be modified in the MockRequestInterceptor depending upon the use-case.
由于JSON文件名来自请求URL的最后一个路径段,因此在此示例中为“详细信息”。 JSON文件必须命名为“ details.json”。 使用此逻辑是为了简化操作,可以根据用例在MockRequestInterceptor中进行修改。
Therefore, toggling between the two is as easy as commenting a single line of code.
因此,在两者之间切换就像注释一行代码一样容易。
After having done all this, don’t forget to add the interceptor while building the OkHttp client:
完成所有这些操作后,不要忘了在构建OkHttp客户端时添加拦截器 :
OkHttpClient.Builder()
    .connectTimeout(60L, TimeUnit.SECONDS)
    .readTimeout(60L, TimeUnit.SECONDS)
    .addInterceptor(MockRequestInterceptor(context))
    .build()
That’s all for this article. I’d love to hear your thoughts on this approach.
这就是本文的全部内容。 我很想听听您对这种方法的想法。
Happy Coding!
编码愉快!
📝 Save this story in Journal.
story将这个故事保存在Journal中 。
👩💻 Wake up every Sunday morning to the week’s most noteworthy stories in Tech waiting in your inbox. Read the Noteworthy in Tech newsletter.
every💻每个星期天早晨,您都可以在收件箱中等待本周最值得关注的Tech故事。 阅读Tech Newsletter中的“值得注意” 。
api端点


 3440
3440

 被折叠的 条评论
为什么被折叠?
被折叠的 条评论
为什么被折叠?
 到【灌水乐园】发言


