


结构化设计和模块化设计
At Lenskart, we’ve created various specialized workflows to ease our users’ browsing and purchase experience. Naturally, this has led to the development of many different mini-apps within the core app, right from the typical e-commerce buying flow and order tracking modules, to modules for AR (we have a story about this), Store Locator, Eye-checkup, Home trials, and many more.
在Lenskart,我们创建了各种专门的工作流程来简化用户的浏览和购买体验。 自然,这导致了核心应用程序中许多不同小型应用程序的开发,从典型的电子商务购买流程和订单跟踪模块,到用于AR的模块( 我们都有一个故事 ),Store Locator,Eye -体检,家庭试用等。
Back at the beginning of 2020, we realized that our code had grown too large, which presented several problems:
早在2020年初,我们意识到我们的代码变得太大了,这带来了几个问题:
- It took ages to compile 编译花了很长时间
- Parallel development became very difficult 并行开发变得非常困难
- We spent too much time resolving conflicts 我们花了太多时间解决冲突
- Every module did everything, there was no separation of concerns 每个模块都做了所有事情,没有分离的关注点
- Even small changes ended up having a cascading impact 即使是很小的变化也会产生连锁React
In short, making big changes to the code became the stuff of nightmares.
简而言之,对代码进行重大更改已成为噩梦。

故事时间:UiUtils (Storytime: UiUtils)
UiUtils, as the name suggests, was a common class, which contained utility functions related to UI. For example handling view visibility, keyboard visibility, showing custom colored text, etc.
UiUtils , UiUtils是一个通用类,其中包含与UI相关的实用程序功能。 例如,处理视图可见性,键盘可见性,显示自定义彩色文本等。
John wrote a generic function showView() in this class, which showed a particular view. After some time, Doe added an API call to the view click inside showView() and handled navigation inside the result of the same call. This didn’t break the existing functionality, and it was a utility code related to that view as well. But now UiUtils as a class did not only have UI related responsibility, but also some network related code, and some navigation-related code.
John在此类中写了一个泛型函数showView() ,它显示了一个特定的视图。 一段时间后,Doe在showView()内的视图click中添加了一个API调用,并在同一调用的结果内处理了导航。 这并没有破坏现有功能,它也是与该视图相关的实用程序代码。 但是现在, UiUtils作为一个类不仅具有与UI相关的职责,而且还具有一些与网络相关的代码以及一些与导航相关的代码。
This caused tight-coupling of UI layer with UiUtils. This added non-UI related dependencies to the UiUtils. And also blurred the boundary of separation of concerns between UI layer and Utility class.
这导致UI层与UiUtils紧密耦合。 这将非UI相关的依赖项添加到UiUtils 。 并且也模糊了UI层和Utility类之间关注点分离的边界。
With app being a single module, this problem was occurring in many places. A clear solution, with separation of concerns, was needed.
由于app是单个模块,因此在许多地方都发生了此问题。 需要有关注点分离的明确解决方案。
模块化架构? (Modular Architecture?)
We decided to divide our code into layers. These layers would be stacked on top of each other. Each layer would be a separate module. The layer at the top would contain the code which gets changed the most, and the layer at the bottom would contain the code which gets changed the least. Additionally, each layer had to satisfy the following conditions:
我们决定将代码分成几层。 这些层将彼此堆叠。 每层将是一个单独的模块。 顶部的层将包含更改最多的代码,而底部的层将包含更改最少的代码。 此外,每一层必须满足以下条件:
- It should be independently compilable and testable. 它应该是可独立编译和测试的。
- There should be a clear responsibility defined for each layer. 应该为每个层定义明确的职责。
- The dependency should only be on layers below it, not on the layer above it. 依赖项应仅位于其下的层上,而不应位于其上的层上。
Keeping the rules stated above in mind, we decided to divide our code as follows:
牢记上述规则,我们决定对代码进行如下划分:

basement: The
basementlayer at the bottom would contain the classes that won’t have any android dependencies, have usages throughout the code-base, and be fairly generic. This code would rarely be subjected to any change and hence the only time we would need to buildbasementis, when we would run a clean rebuild of the whole project.basement:最底层的
basement层将包含不会有任何android依赖项的类,在整个代码库中都有用法,并且是相当通用的。 该代码很少会进行任何更改,因此,我们唯一需要构建basement就是对整个项目进行干净的重建。networklayer: This layer would handle the request processing & response parsing. Again this layer should rarely if ever, require any changes.
networklayer :该层将处理请求处理和响应解析。 同样,该层很少需要更改。
datalayer: This layer would contain repositories, models, database implementations, and scheduler services related to caching. Sending/receiving any kind of data to/from remote servers would be the responsibility of this layer.
数据层:此层将包含与缓存相关的存储库,模型,数据库实现和调度程序服务。 该层负责向/从远程服务器发送/接收任何类型的数据。
thirdpartyutils: This module would contain code related to analytics and would most commonly be changed only when adding or modifying analytics events.
thirdpartyutils:此模块将包含与分析有关的代码,并且最通常仅在添加或修改分析事件时才进行更改。
baselayer: This module would contain all the common UI widgets, styles, themes, string files, configs related to the whole app, and common UI utils. Handling navigation across features in core would also be the responsibility of
baselayer. The most common cause of code changes to this module would be related to configs of a feature, or navigation in case of a new feature. Hence, this module would not have frequent changes.baselayer:此模块将包含所有常见的UI小部件,样式,主题,字符串文件,与整个应用程序相关的配置以及常见的UI utils。 在核心处理跨功能的导航也将是负责
baselayer。 对该模块进行代码更改的最常见原因将与功能的配置有关,或者与新功能有关的导航有关。 因此,该模块不会频繁更改。core: Core would contain all the feature modules. These feature modules would have all the activities, fragments, and adapters related to UI of that feature. Core would reside at the top, and would be most frequently changed, and worked on the module. This module could also be called the Presentation Layer of the app.
核心:核心将包含所有功能模块。 这些功能模块将具有与该功能的UI相关的所有活动,片段和适配器。 核心将位于顶部,并且最经常更改并在模块上工作。 此模块也可以称为应用程序的表示层 。
All of these modules would reside in separate git repositories. Test coverage could be focused on the most frequently changed modules first.
所有这些模块将驻留在单独的git存储库中。 测试覆盖率可以首先集中在最频繁更改的模块上。
旅程 (The Journey)
To achieve this layered architecture, we implemented it one layer at a time. The datalayer module was already built as a separate module.
为了实现这种分层体系结构,我们一次实现了一层。 数据datalayer模块已经作为单独的模块构建。
So, the first target was the basement. Identifying the classes with zero android dependencies, with usage throughout the project was fairly easy. Things like response parser using Gson, object-to-string converter, etc. We extracted these classes from core and put them in basement.
因此,第一个目标是basement 。 识别具有零Android依赖关系的类以及整个项目中的用法非常简单。 诸如使用Gson的响应解析器,对象到字符串转换器等之类的东西。我们从core提取了这些类,并将其放在了地basement 。
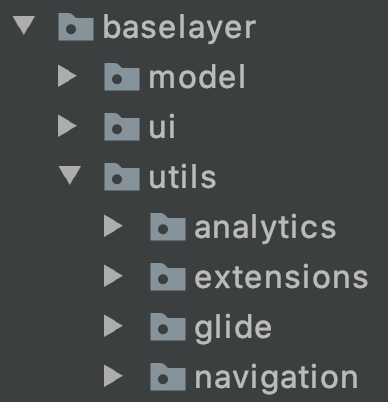
Same was the case for the thirdpartyutils, as it only contains analytics related code. We divided classes into packages named by different analytics services that we use. Below is what thirdpartyutils look like:
同样是为的情况下thirdpartyutils ,因为它仅包含分析相关的代码。 我们将类划分为由使用的不同分析服务命名的包。 以下是thirdpartyutils外观:

Making baselayer was the biggest challenge. The goal here was to move all the common UI related code to this module. But, since all the feature related packages were tightly coupled, this was a long task. The app has many custom widgets. Over time, these classes accumulated a lot of code, which was not specific to widgets. Things like navigation intents, business dependencies from other classes. So, baselayer was built in two steps:
制作基础baselayer是最大的挑战。 这里的目标是将所有与UI相关的通用代码移至该模块。 但是,由于所有与功能相关的软件包都紧密结合在一起,所以这是一个漫长的任务。 该应用程序具有许多自定义小部件。 随着时间的流逝,这些类积累了大量的代码,这些代码并非特定于小部件。 诸如导航意图,其他类的业务依赖之类的东西。 因此,基本baselayer是通过两个步骤构建的:
Move all the irrelevant code and dependencies out of custom widgets. This made them independent generic classes, which were moved to
baselayereasily.将所有无关的代码和依赖项移出定制小部件。 这使它们成为独立的泛型类,可以轻松地移至基本
baselayer。- Follow the same procedure for UI related util classes, and feature-related config classes. 对于与UI相关的util类和与功能相关的配置类,请遵循相同的步骤。
Removing inter-dependency among features also meant that we couldn’t use class-based intents for navigation because that required the import of activity being started. This also meant that we had to re-think our navigation implementation (that’s a story for another time 😉).
消除功能之间的相互依赖性还意味着我们不能使用基于类的意图进行导航,因为这需要开始导入活动。 这也意味着我们不得不重新考虑导航实现(这是另一个故事了)。
With this, we moved our navigation handling from core to baselayer. This also provided us with feature modules in core with zero dependencies on each other.
这样,我们将导航处理从core移到了baselayer 。 这也为我们提供了彼此之间零依赖的core功能模块。
After all of this, the output was layered architecture, that we had originally thought of.
毕竟,输出是我们最初想到的分层体系结构。
结果 (Result)
With this layered architecture, we achieved an increase in productivity in terms of faster build times and parallel development. The build time reduced by over 30%, with clean builds reduced to 7mins from over 12mins.
通过这种分层体系结构,我们在更快的构建时间和并行开发方面实现了生产率的提高。 构建时间减少了30%以上,干净的构建从12分钟以上减少到7分钟。
The build time reduced by over 30%
建立时间减少了30%以上
The most changed module — core — is at the top, and the ones that don’t frequently are on the lower layers. That means only core module is built most of the time, and the modules below it don’t have to be built that frequently.
更改最多的模块- core -位于顶部,不经常使用的模块位于较低层。 这意味着大部分时间仅构建core模块,而其core模块不必如此频繁地构建。
Having multiple modules, which are individually buildable also means, that multiple developers can work on different modules at the same time. For example, if a new feature is being developed, UI development in core and API development in datalayer can continue in parallel.
具有多个可单独构建的模块也意味着,多个开发人员可以同时处理不同的模块。 例如,如果一个新的功能正在开发,在UI开发core和API开发datalayer可以继续并行。
Parallel and collaborative development
并行与协作开发
Each module also provides an abstraction to the module above it. For example, networklayer implementation can be changed at any given time, without other modules knowing about it. Due to the simplicity of this abstraction, we were able to make massive performance gains through various network & rendering optimizations, but that’s a post for another time!
每个模块还为其上方的模块提供抽象。 例如, networklayer实现可以在任何给定的时间更改,而其他模块都不知道。 由于这种抽象的简单性,我们能够通过各种网络和渲染优化来获得巨大的性能提升,但这是另一篇文章!
未来范围 (Future Scope)
The core module can be divided into self-contained feature modules. An app module can be created above feature modules, with the responsibility of handling feature modules. Dynamic feature development can be done in parallel. CI/CD pipeline can be set up for each module separately.
core模块可以分为独立的功能模块。 可以在feature模块上方创建一个app模块,负责处理feature模块。 动态功能开发可以并行进行。 可以为每个模块分别设置CI / CD管道。
最后的想法 (Last Thoughts)
If you are in the beginning stages of developing your project, I would not suggest following this architecture line-by-line. Instead, keep the files in separate packages like above. So that once the code and the team grow large enough, it can be easily divided into modules.
如果您正处于开发项目的起步阶段,建议您不要逐行遵循此体系结构。 而是将文件保留在上述单独的程序包中。 这样,一旦代码和团队变得足够大,就可以轻松地将其划分为模块。
For developers, who are looking for pointers on how to divide code into modules, the starting point would be to define clear responsibilities of each module. Then it will be possible to identify and remove inter-dependencies from code, while making your way through the code layer by layer.
对于正在寻找有关如何将代码划分为模块的指针的开发人员,出发点是定义每个模块的明确职责。 然后,有可能在逐层遍历代码的同时,识别并消除代码之间的相互依赖性。
All things considered, this is rather an intermediate step in achieving modular architecture. There’s a lot more that’s to be done, including leveraging dynamic features & instant apps.
综合考虑,这只是实现模块化体系结构的中间步骤。 还有很多要做的事情,包括利用动态功能和即时应用程序。
For any thoughts/suggestions please let me know in the comments section below.
如有任何想法/建议,请在下面的评论部分中告知我。
翻译自: https://medium.com/lenskart-engineering/modularising-lenskart-consumer-app-architecture-aa82c9992fef
结构化设计和模块化设计


 被折叠的 条评论
为什么被折叠?
被折叠的 条评论
为什么被折叠?
 到【灌水乐园】发言


