


opengl上下文和状态机
Make your state in a React way
使您的状态以React的方式
Hi, we’re back to this freestyle language! Yeah, Javascript!
嗨,我们回到了这种自由式语言! 是的,JavaScript!
Okay, I’m gonna talk about Front-End right now, especially in React or maybe React Native for the mobile. I’m gonna tell you how to manage your state more efficient and easier to maintain. Let’s go then!
好的,我现在要谈论前端,特别是在React或移动设备的React Native中。 我要告诉您如何更有效地管理状态并更容易维护。 那我们走吧!
遵循本文的要求 (The requirement for following this article)
- Very basic JavaScript(ES6). 非常基本JavaScript(ES6)。
- Very basic ReactJS. 非常基本的ReactJS。
您必须遵循本文的工具 (Tools that you must have to follow this article)
1. NodeJS (1. NodeJS)
The important thing is NodeJS itself because the NodeJS comes with NPM, which in this case we gonna use it for installing ReactJS. You can download in here (https://nodejs.org/en). I recommending install the LTS version, I currently used v12.2.0 at the time to write this article.
重要的是NodeJS本身,因为NodeJS带有NPM ,在这种情况下,我们将使用它来安装ReactJS。 您可以在此处( https://nodejs.org/en )下载。 我建议安装LTS版本,目前我当时使用v12.2.0撰写本文。
2.文字编辑器 (2. Text Editor)
There’s a bunch Text editor out there, I prefer using VSCode which you can download here (https://code.visualstudio.com).It’s fine if you want to use text editors like Sublime Text or Atom, just choose tools that match for you.
有很多文本编辑器,我更喜欢使用VSCode ,您可以在这里下载( https://code.visualstudio.com )。如果您想使用Sublime Text或Atom之类的文本编辑器很好,只需选择与之匹配的工具即可您。
您是通过道具解析数据吗? (Are You Parsing Data Via Props?)
Are you still doing like parsing data to components using props? If you do, that’s fine. But, here’s the thing, if you have a bigger application and you still parsing that data through props, and you have a lot of data or maybe dozen of data. You will get exhausted from transferring the data through the components.
您是否还在像使用prop将数据解析为组件那样? 如果这样做,那很好。 但是,这就是问题,如果您有一个更大的应用程序,并且仍然通过props解析该数据,则您有很多数据甚至数十个数据。 您将无法通过组件传输数据。
Here’s the example:
这是示例:
That’s that one component, how about other components then?
那就是一个组件,那么其他组件呢?
“No I’m not exhausted using props!”, yes you’re not. But you will!
“ 不,我不会因为使用道具而筋疲力尽! ”,是的,您不是。 但是你将!
This article comes in handy to handle such things, so what are we gonna do to handle that? Yep! That’s right, we gonna use a Context that ReactJS provided and it’s so powerful!
这篇文章很容易处理这些事情,那么我们将如何处理呢? 是的 没错,我们将使用ReactJS提供的Context ,它是如此强大!
什么是背景? (What Is Context?)
According to the documentation, here’s the explanation:
根据文档,这是解释:
Context provides a way to pass data through the component tree without having to pass props down manually at every level.
上下文提供了一种通过组件树传递数据的方法,而不必在每个级别手动传递道具。
So just to let you know, Context is just like a global variable that you can access without pass down props to components.
因此,让您知道,Context就像一个全局变量,您无需将prop传递给组件就可以访问。
You can read more in the documentation here:
您可以在此处的文档中了解更多信息:
何时使用上下文? (When To Use Context?)
I think if you start dealing with React, you should use this context for your app. But, if you must analyze your app, is it going to big or not? If not, I recommend you to use this method.
我认为,如果您开始使用React,则应在您的应用程序中使用此上下文。 但是,如果您必须分析您的应用程序,它会变得很大吗? 如果没有,建议您使用此方法。
If you have a big app, you can’t use this Context. Because if you have a bigger application maybe you should use Redux for better state management. But you don’t have to worry about that. I will explain redux in the next article after this.
如果您有大型应用程序,则不能使用此上下文。 因为如果您拥有更大的应用程序,则应该使用Redux进行更好的状态管理。 但是您不必为此担心。 之后,我将在下一篇文章中解释redux。
So my point is, you should use context if you have a low to medium size app to make the application easy to maintain. And I will show you to make this Context easy to read and make other people understand the code.
所以我的意思是,如果您的应用程序较小,则应使用上下文,以使应用程序易于维护。 我将向您展示使该Context易于阅读并使其他人理解该代码。
开始吧! (Let’s Start!)
Okay, so what app that are we going to build? We’re gonna build a simple todo app with React and Context to make you simple and fully understand. And we’re gonna use fake rest API called JSON Typicode.
好的,那么我们要构建什么应用程序? 我们将使用React和Context构建一个简单的待办事项应用程序,以使您变得简单而全面。 我们将使用伪造的REST API,称为JSON Typicode 。
I assume you already install NodeJS.
我假设您已经安装了NodeJS。
1.安装React (1. Install React)
First, you need to React itself, to do that, you can simply run this in your CMD or Terminal.
首先,您需要自行React,为此,您只需在CMD或终端中运行它即可。
npm i -g create-react-appIt will install ReactJS globally in your local machine.
它将在本地机器上全局安装ReactJS。
2.创建React项目 (2. Create React Project)
After you finished installing ReactJS globally, you can simply run this command to make your project.
在全球范围内完成ReactJS的安装后,您只需运行此命令即可创建您的项目。
npx create-react-app name-of-your-projectAfter that, open the project in your text editor.
之后,在文本编辑器中打开项目。
3.创建上下文 (3. Creating Context)
Okay, finally we’re here, so I’m gonna make a context to dealing with our app and handling some state.
好的,最后我们到了,所以我要为处理我们的应用程序和处理某些状态提供背景信息。
Firstly I’m gonna make a folder called context inside the src folder, this folder will contain our context to manage the app.
首先,我要在src文件夹中创建一个名为context的文件夹,此文件夹将包含用于管理应用程序的上下文。
In this context folder, we’re gonna make a couple of files inside it. But, in this step, I’m just gonna make one file called TodoContext.js. It’s just a simple line of codes.
在此上下文文件夹中,我们将在其中创建几个文件。 但是,在这一步中,我只要做一个名为TodoContext.js的文件。 这只是简单的代码行。
Simple to make a context right? let’s move on then.
简单地说明背景对吗? 让我们继续前进。
4.创建类型 (4. Creating Types)
Here, we’re gonna make types, what are types actually? in this case, types used for defining our action for the app, something like, “Hey, I want to fetch the data from the API, call this type!”.
在这里,我们要创建类型,实际上是什么类型? 在这种情况下,用于定义应用程序操作的类型,例如“嘿,我想从API提取数据,请调用此类型!”。
If you don’t get it, here’s the code by the way. These types will be used for our application. By the way, the codes are self-explanatory.
如果您不明白,这里是代码。 这些类型将用于我们的应用程序。 顺便说一下,这些代码是不言自明的。
Still, in the context folder, we’re gonna make a file called TodoTypes.js.
尽管如此,在上下文文件夹中,我们将创建一个名为TodoTypes.js的文件。
5.创建减速器 (5. Creating Reducer)
So, what is reducer? Reducer in ReactJS means for determining changes of states in our application. If you want to mess around or changing the state, control all of your states here.
那么,什么是减速器? ReactJS中的Reducer意味着确定我们应用程序中状态的变化。 如果您想弄乱或更改状态,请在此处控制所有状态。
Here, I want to import the types too because we gonna be deal with a function that dispatching this reducer, we’re gonna make that after this.
在这里,我也想导入类型,因为我们将要处理一个分派此reducer的函数,我们将在此之后进行处理。
Still, in the context folder, I’m gonna make a file called TodoReducer.js. Here’s the code.
不过,在上下文文件夹中,我将创建一个名为TodoReducer.js的文件。 这是代码。
If you see that code above, you will see, the Reducer is used for mutating the state to new value right? The code is self-explanatory in there.
如果您看到上面的代码,您将看到,Reducer用于将状态更改为新值,对吗? 那里的代码是不言自明的。
6.创造状态 (6. Creating State)
Here the main thing in context. Still, in the context folder, I’m gonna make a file called TodoState.js. It’s gonna contain our states, functions, and value that component will use. This is where we creating that global variable look-alike with Context. Here’s the code.
这里是上下文的主要内容。 不过,在上下文文件夹中,我将创建一个名为TodoState.js的文件。 它将包含组件将使用的状态,函数和值。 这是我们使用Context创建全局变量的地方。 这是代码。
The code above is self-explanatory, the TodoState in there is for defining our state, any function that deals with the server, and some logic other logic in our application.
上面的代码是不言自明的,其中的TodoState用于定义我们的状态,处理服务器的任何函数以及应用程序中的某些其他逻辑。
If you want to add more function, add in this file, do not add the function in your component!
如果要添加更多功能,请添加此文件, 请勿在组件中添加功能!
So there’s that, we make a context, just keep in mind, the context has a State, Reducer, Type, and the Context itself.
就是这样,我们要创建一个上下文 ,只需记住,该上下文具有一个State,Reducer,Type和Context本身。
What exactly types do? When you want to change the state, you must call dispatch from line 28, and dispatch taking a two object inside it(type and payload), the dispatch itself came from useReducer() from react.
确切的类型是什么? 当您想更改状态时,必须从第28行调用dispatch,并在其中分配两个对象(类型和有效负载)的dispatch,该dispatch本身来自于react的useReducer() 。
How to use it in our application by the way? Let’s scroll!
怎样在我们的应用程序中使用它? 让我们滚动吧!
7.样式化组件 (7. Styling the component)
After you finish creating a pattern for the context, you gonna create a simple style, the file called style.css, Place it in your src folder, you can just copy-paste this style if you want, here’s the code.
在为上下文创建完模式之后,您将创建一个简单的样式,称为style.css文件, 将其放置在src文件夹中,如果需要,您可以仅复制粘贴此样式,这是代码。
8.制作表格 (8. Making Form)
After you write the style up there. You will make a form for creating a new todo. I’m gonna make a folder called components inside the src folder. I named the file TodoForm.js. And in that component, I want to implement our context too. Here’s the code
在那儿写样式之后。 您将创建一个用于创建新待办事项的表格。 我要在src文件夹中创建一个名为components的文件夹。 我将文件命名为TodoForm.js 。 在该组件中,我也想实现我们的上下文。 这是代码
The form above is ready to interact with the server, the code is easy to read tho.
上面的表单已准备就绪,可以与服务器进行交互,代码很容易阅读。
9.添加待办事项列表组件 (9. Adding A Todo List Component)
After we making that TodoForm.js, we’re gonna make a component for dealing with the todo data. Still, inside the components folder that we make, I’m gonna make a component called TodoList.js. And still, we’re gonna implement that context right here too, here’s the code.
制作完TodoForm.js之后 ,我们将制作一个用于处理todo数据的组件。 尽管如此,在我们创建的components文件夹中,我将创建一个名为TodoList.js的组件。 而且,我们也将在此处实现该上下文,这是代码。
It’s just a simple component, right? But see, we’re not dealing with any props until here, which is good. We’re just getting the function we defining in our Context State and get whatever we want in the component, here’s the advantage using Context from React.
这只是一个简单的组件,对不对? 但是请看,直到这里我们都不会处理任何道具,这很好。 我们只是在Context状态中获取定义的函数,并在组件中获取所需的内容,这是使用React中的Context的优势。
10.更新App.js (10. Update App.js)
Finally, to make your application and context ready to work, you need to update the App.js in your root src folder. Here’s the code.
最后,为了使您的应用程序和上下文准备就绪,您需要在根src文件夹中更新App.js。 这是代码。
If you notice, where we use the context? Okay, here’s the thing in context. The context you just create, you must define it in your main file of the application, in this case, App.js. you must wrap the entire component with your State, in this case, is TodoState. Because TodoState is accepting children's components in it, see the TodoState return statement. That’s you gonna be deal with context, every time you make a new context for the app, you must register it in your main application file in order to make work.
如果您注意到,我们在哪里使用上下文? 好的,这是上下文中的东西。 您刚刚创建的上下文,必须在应用程序的主文件(在本例中为App.js)中定义它。 您必须使用State将整个组件包装起来,在这种情况下,该组件为TodoState 。 由于TodoState接受其中的子组件,因此请参见 TodoState return语句 。 那就是您要处理的上下文, 每次为应用程序创建新的上下文时,都必须在主应用程序文件中注册它才能正常工作。
11.运行应用程序 (11. Run the application)
After you update your App.js, run the application by running.
更新App.js之后 ,通过运行来运行应用程序。
// Run this in root of your project folder
npm start
Here’s the result of our application that we build
这是我们构建的应用程序的结果
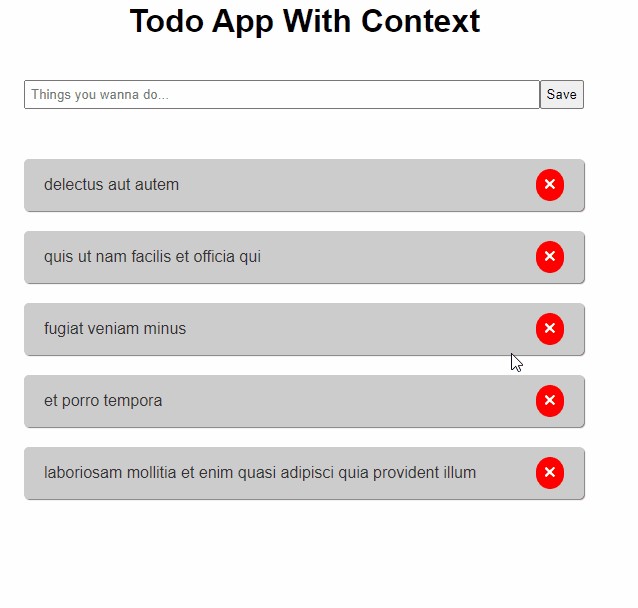
It’s ugly in the interface XD, but, we’re focusing in the context here. It’s just the same functionality, right? but we doing different in the code and more structured if I should say.
XD界面很丑陋,但是我们在这里重点关注。 只是功能相同,对不对? 但是如果我要说的话,我们在代码上做了不同的事情,并且结构更加结构化。
We finally did it! Making our simple application using context!
我们终于做到了! 使用上下文创建简单的应用程序!
如何注册新上下文? (How To Register a New Context?)
Here’s the example of registering a new state by the way. But, imagine if you have a bigger size application, see this example.
这是通过顺便注册新状态的示例。 但是,想象一下,如果您有一个更大的应用程序,请参见以下示例。
See? it’s like a nested right? it’s just like a tree XD, okay, here’s the disadvantage using Context by the way. But, don’t worry, it’s okay to deal with a medium-size app. It’s very powerful and easy to maintain with context!
看到? 就像是嵌套的吧? 就像一棵树XD,好吧,这是使用Context的缺点。 但是,不用担心,处理中等大小的应用程序是可以的。 它非常强大并且易于使用上下文进行维护 !
结论 (Conclusion)
After you read this article, maybe you want to use context? Or maybe you gonna stick around parsing props between component? It’s up to you actually. But, I recommend you use this Context because it makes you state cleaner and make your component stateless, and very important part is, you gonna make your application easy to manage and structured.
阅读本文之后,也许您想使用上下文? 或者,也许您会坚持在组件之间解析道具? 实际上取决于您。 但是,我建议您使用此Context,因为它可以使您的状态更整洁并使组件变为无状态,而且非常重要的一点是,您将使应用程序易于管理和结构化 。
Is it can be used for React Native? absolutely!
它可以用于React Native吗? 绝对!
Speaking structured, I’ve made some article back there for the Back-End talking about NodeJS — Make Your Response API Nicely, it’s very simple and catchy! Here’s the link:
说到结构化 ,我已经在后面写了一些文章来讨论关于NodeJS 的后端 - 制作您的Response API很好 ,它非常简单而且吸引人! 这是链接:
By the way, here’s the code for this Todo App with Context.
顺便说一下,这是带有上下文的Todo应用程序的代码。
If you still confused, please leave a comment in the discussion.
如果您仍然感到困惑,请在讨论中发表评论。
See ya in the next article!
在下一篇文章中见!
翻译自: https://medium.com/dev-genius/reactjs-manage-your-state-nicely-with-context-1ed3090a6a46
opengl上下文和状态机


 被折叠的 条评论
为什么被折叠?
被折叠的 条评论
为什么被折叠?
 到【灌水乐园】发言


