


Article originally published on dev.to
介绍 (Intro)
In this tutorial, I will cover all the steps on how to build a mobile application and train a deep learning model so that you can predict a handwritten digit between 0 and 9 by using your mobile’s camera.
在本教程中,我将介绍有关如何构建移动应用程序和训练深度学习模型的所有步骤,以便您可以使用移动电话的相机来预测介于0到9之间的手写数字。
But before we start building the mobile app, we need to come up with a high-level strategy. Let’s go through the thought process:
但是在开始构建移动应用程序之前,我们需要提出一个高级策略。 让我们经历一下思考过程:
Do we build a bare React-Native (RN) or an Expo app?
我们是构建裸机React-Native( RN )还是Expo应用程序?
- Which camera library do we want to use? 我们要使用哪个相机库?
- Do we have to crop the images and what library we want to use? 我们是否必须裁剪图像以及要使用什么库?
- How do we train a deep learning model? 我们如何训练深度学习模型?
- How do we use that model against the photo? 我们如何对照片使用该模型?
- How do we show the result? 我们如何显示结果?
Note: This tutorial needs some prerequisites and a good understanding of RN and Javascript in general. If you are an absolute beginner, I would suggest following a good course on Youtube, Udemy or Egghead before continuing with this tutorial.
注意:本教程一般需要具备一些先决条件和对RN和Java的良好理解。 如果您是绝对的初学者,建议您在继续学习本教程之前,先在YouTube,Udemy或Egghead上学习好课程。
让我们开始吧 (Let’s get started)
I’m going to divide this tutorial into three sections
我将本教程分为三个部分
Chapter 1: Create the RN applicationChapter 2: Train the deep learning modelChapter 3: Implement the model, predict and show the result
第1章 :创建RN应用程序 第2章 :训练深度学习模型 第3章 :实现模型,预测并显示结果
第1章:创建RN应用程序 (Chapter 1: Create the RN application)
Remember the first point of our thought process whether to create a bare or an Expo boilerplate app?
还记得我们思考过程的第一点是创建裸机还是Expo样板应用程序?
After some research, I decided to load the trained model locally. It’s the easiest way without fetching the model from a cloud server, but you can do that too.
经过研究后,我决定在本地加载经过训练的模型。 这是不从云服务器获取模型的最简单方法,但是您也可以这样做。
In this tutorial, we will use bundleResourceIO from @tensorflow/tfjs-react-native that is unfortunately not compatible with Expo.
在本教程中,我们将使用bundleResourceIO从@tensorflow/tfjs-react-native是不幸的是没有与世博会相兼容。
Also, since we want to use the camera we have to use a physical phone and not a simulator. For that you must have an Apple Developer Account to sign your app otherwise you will not be able to run the app.
另外,由于我们要使用摄像头,因此必须使用物理电话而不是模拟器。 为此,您必须具有Apple开发者帐户来签署您的应用程序,否则您将无法运行该应用程序。
Let’s create the app with the following command:
让我们使用以下命令创建应用程序:
$ react-native init MyFirstMLAppAfter the installation process has been completed make sure all your pods are installed too!
安装过程完成后,请确保还安装了所有吊舱!
$ cd MyFirstMLApp
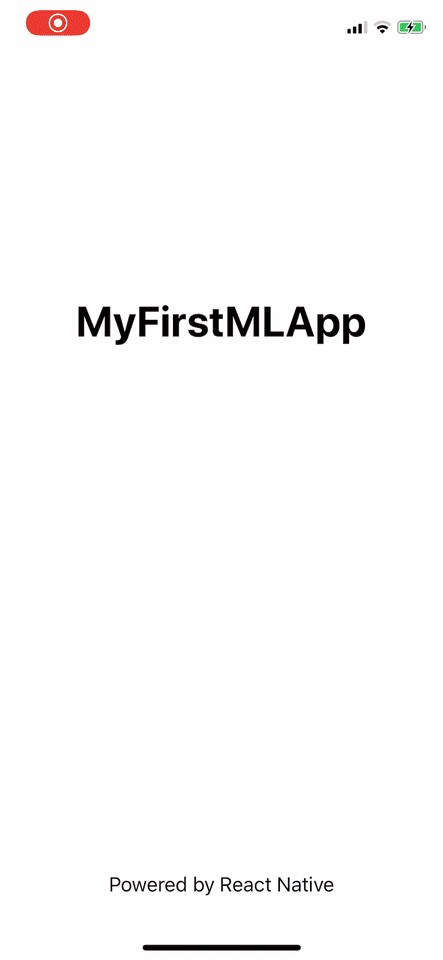
$ npx pod-installLet’s run the app for the first time on your physical iPhone. Open Xcode and find the MyFirstMLApp.xcworkspace and open it. Connect your iPhone to your Mac with the lightning cable and select your phone. Press the play button for building and running the app for the first time. You should see the Welcome to React screen on your iPhone.
让我们在您的物理iPhone上首次运行该应用程序。 打开Xcode并找到MyFirstMLApp.xcworkspace并将其打开。 使用避雷线将iPhone连接到Mac,然后选择手机。 按下播放按钮以首次构建和运行该应用程序。 您应该在iPhone上看到“ 欢迎使用React”屏幕。
🏆 Awesome!
🏆太棒了!
Let’s add some packages for this app:
让我们为此应用添加一些软件包:
yarn add @react-native-community/async-storage @react-native-community/cameraroll @tensorflow/tfjs @tensorflow/tfjs-react-native expo-camera expo-gl expo-gl-cpp expo-image-manipulator react-native-fs react-native-svg react-native-unimodules victory-nativeand finally, install the navigation library.
最后,安装导航库。
yarn add react-native-navigation && npx rnn-linkThe latter command will add the navigation package to iOS and Android. But we are not quite just done yet.
后面的命令会将导航包添加到iOS和Android。 但是我们还不是刚刚完成。
Because we use the bare framework of RN, unimodules need to be installed manually.
由于我们使用的是RN的裸框架,因此需要手动安装unimodule 。
Please click on the link and modify the Podfile as described in the iOS section. After that run
请点击链接, Podfile按照iOS部分中的说明修改Podfile 。 在那之后
$ npx pod-installand build the Xcode project to see if everything has been installed correctly.
并构建Xcode项目以查看是否已正确安装所有内容。
Then continue with adding the code for the unimodules to the AppDelegate.m and build the project again.
然后继续将unimodules的代码添加到AppDelegate.m并再次构建项目。
Because we want to use the camera to take pictures we also need to add a few privacy keys to the Info.plist
因为我们要使用相机拍照,所以我们还需要向Info.plist添加一些隐私密钥。
<?xml version=”1.0" encoding=”UTF-8"?>
<!DOCTYPE plist PUBLIC “-//Apple//DTD PLIST 1.0//EN” “http://www.apple.com/DTDs/PropertyList-1.0.dtd">
<plist version=”1.0">
  <dict>

    <! — Required for iOS 10 and higher -->
    <key>NSCameraUsageDescription</key>
    <string>We need to use the camera for taking pictures of the digits</string><! — Required for iOS 11 and higher: include this only if you are planning to use the camera roll -->
    <key>NSPhotoLibraryAddUsageDescription</key>
    <string>We need to access the photo library to upload the images</string><! — Include for only if you are planning to use the camera roll -->
    <key>NSPhotoLibraryUsageDescription</key>
    <string>We need to access the photo library to upload the images</string><! — Include this only if you are planning to use the microphone for video recording -->
    <key>NSMicrophoneUsageDescription</key>
    <string>We need to access the microphone</string>

    <key>CFBundleDevelopmentRegion</key>
    <string>en</string>
If Xcode builds fine you can either continue running the app from Xcode or just use the terminal.
如果Xcode构建良好,则可以从Xcode继续运行应用程序,也可以只使用终端。
If you decide to run the app from the command line from now on, like me, please add — device to the ios script in your package.json file and run
如果您决定像现在一样从现在开始从命令行运行应用程序,请在package.json文件的ios脚本中添加— device并运行
yarn iosOnce the app is starting on your iPhone don’t be surprised that you don’t see the welcome page anymore. That’s because we use react-native-navigation. But you should see the loading screen MyFirstMLApp
在iPhone上启动该应用程序后,不要再看到欢迎页面了,请不要感到惊讶。 那是因为我们使用react-native-navigation 。 但是您应该看到加载屏幕MyFirstMLApp
Now it’s time to create our 2 only screens and add the navigation for these screens to our project.
现在是时候创建仅2个屏幕并将这些屏幕的导航添加到我们的项目中了。
Please create the src/screens/CameraView and src/screens/EvaluationView directories in the root of our project.
请在我们项目的根目录中创建src/screens/CameraView和src/screens/EvaluationView目录。
Inside src/screens/CameraView create an index.js file and add this code:
在src/screens/CameraView创建一个index.js文件并添加以下代码:
import React, { useState, useRef, useEffect } from "react";
import {
SafeAreaView,
TouchableOpacity,
View,
Text,
StatusBar,
} from "react-native";
import { Navigation } from "react-native-navigation";
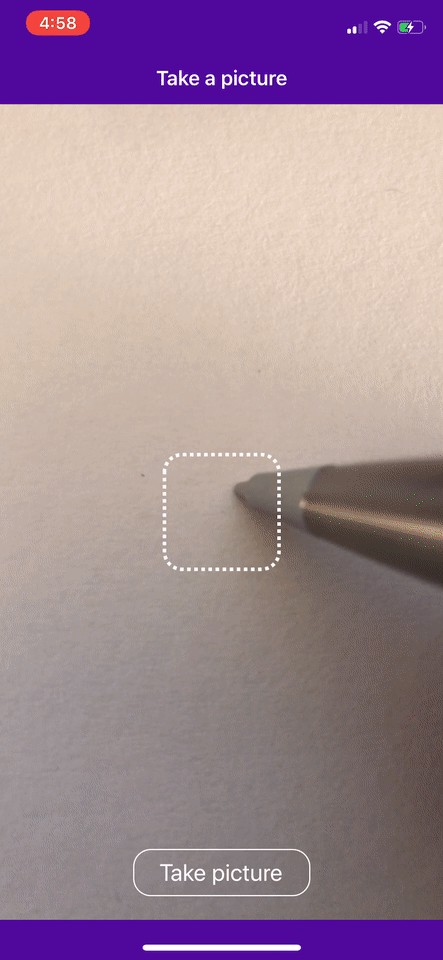
import { Camera } from "expo-camera";const MASK_DIMENSION = 100;export const CameraView = (props) => {
const [hasPermission, setHasPermission] = useState(null);
const [showShutterButton, setShowShutterButton] = useState(false);
const cameraRef = useRef();useEffect(() => {
(async () => {
const { status } = await Camera.requestPermissionsAsync();
setHasPermission(status === "granted");
})();
}, []);const handlePictureProcessing = async () => {
goToEvaluationView();
};const goToEvaluationView = () => {
Navigation.push(props.componentId, {
component: {
name: "evaluationView",
options: {
topBar: {
title: {
text: "Evaluating ML result",
color: "white",
},
background: {
color: "#4d089a",
},
backButton: {
color: "white",
showTitle: false,
},
},
},
passProps: {},
},
});
};if (hasPermission === null) {
return <View />;
}if (hasPermission === false) {
return <Text> No access to camera </Text>;
}return (
<React.Fragment>
<StatusBar barStyle="light-content" />
<SafeAreaView style={styles.safeArea}>
<Camera
ref={cameraRef}
type={Camera.Constants.Type.back}
whiteBalance={Camera.Constants.WhiteBalance.auto}
onCameraReady={() => setShowShutterButton(true)}>
<View style={styles.cameraView}>
<View style={styles.mask} />
{showShutterButton && (
<TouchableOpacity
style={styles.shutterButton}
onPress={handlePictureProcessing}>
<Text style={styles.shutterButtonText}>
Take a picture
</Text>
</TouchableOpacity>
)}
</View>
</Camera>
</SafeAreaView>
</React.Fragment>
);
};const styles = {
safeArea: {
backgroundColor: "#4d089a",
},
cameraView: {
height: "100%",
justifyContent: "center",
alignItems: "center",
backgroundColor: "transparent",
},
mask: {
height: MASK_DIMENSION,
width: MASK_DIMENSION,
borderWidth: 3,
borderColor: "white",
borderStyle: "dotted",
borderRadius: 15,
},
shutterButton: {
position: "absolute",
bottom: 0,
width: 150,
height: 40,
justifyContent: "center",
alignItems: "center",
borderWidth: 1,
borderColor: "white",
borderRadius: 15,
marginBottom: 20,
},
shutterButtonText: {
fontSize: 18,
color: "white",
},
};CameraView.options = {
statusBar: {
backgroundColor: null,
},
topBar: {
title: {
text: "Take a picture",
color: "white",
},
background: {
color: "#4d089a",
},
},
tapBar: {
background: {
color: "#4d089a",
},
},
};Inside src/screens/EvaluationView create an index.js file and add this code:
在src/screens/EvaluationView内部创建一个index.js文件并添加以下代码:
import React from "react";
import { SafeAreaView, View, Text, StatusBar } from "react-native";export const EvaluationView = (props) => {
  return (
    <React.Fragment>
       <StatusBar barStyle="light-content" />
      <SafeAreaView style={styles.safeArea}>
        <View style={styles.container}>
           <Text style={styles.headerText}>ANALYSIS</Text>
        </View>
      </SafeAreaView>
    </React.Fragment>
  );
};const styles = {
  safeArea: {
    backgroundColor: "#4d089a",
  },
  container: {
    height: "100%",
    alignItems: "center",
    backgroundColor: "white",
  },
  headerText: {
    fontSize: 20,
    fontWeight: "500",
    color: "#4d089a",
    margin: 20,
  },
};
Then override the index.js file in your root with the following code:
然后,使用以下代码覆盖根目录中的index.js文件:
import { Navigation } from "react-native-navigation";
import { CameraView } from "./src/screens/CameraView";
import { EvaluationView } from "./src/screens/EvaluationView";Navigation.registerComponent("cameraView", () => CameraView);
Navigation.registerComponent("evaluationView", () => EvaluationView);Navigation.setDefaultOptions({
  statusBar: {
    style: "light",
    backgroundColor: "#4d089a",
  },
  topBar: {
    title: {
      color: "white",
    },
    background: {
      color: "#4d089a",
    },
    backButton: {
      color: "white",
      showTitle: false,
    },
  },
});Navigation.events().registerAppLaunchedListener(() => {
  Navigation.setRoot({
    root: {
      stack: {
        children: [
          {
            component: {
              name: "cameraView",
            },
          },
        ],
      },
    },
  });
});
Finally, you can remove the App.js file as it’s not needed anymore.
最后,您可以删除App.js文件,因为它不再需要了。
Restart your metro bundler and you should see the app running like that …
重新启动您的地铁捆绑器,您应该看到该应用程序正在运行……
🏆 Congratulations!
🏆 恭喜!
You have created the base app that doesn’t take pictures yet but can navigate from one screen to the other.
您已经创建了基本应用程序,该应用程序目前无法拍照,但可以从一个屏幕导航到另一个屏幕。
第2章:训练深度学习模型 (Chapter 2: Train the deep learning model)
Initially, I used this pre-trained model from Kaggle but the effort to make the app work was huge.
最初,我使用了Kaggle的这种预训练模型 但是使应用正常运行的工作量很大。
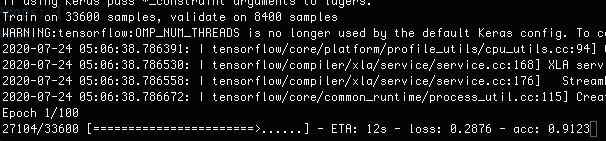
I had to create created an AWS EC2 Deep Learning AMI (Amazon Linux 2) Version 30.1 instance with SSH access because my Macbook doesn’t support CUDA. (GPU support needed to train the model)Then I had to copy the Jupyter notebook from Kaggle, ran the notebook to train the model on the AWS instance (it ran for 3 hours) and moved the model back into my project.Furthermore, I had to install OpenGL to modify the image and wrote a quite complex script to reshape the base64 string to a tensor to match the expected input for the model [1, 28, 28, 1].
我必须创建一个具有SSH访问权限的AWS EC2深度学习AMI(Amazon Linux 2)版本30.1实例 ,因为我的Macbook不支持CUDA。 (需要GPU支持来训练模型)然后我不得不复制Jupyter 来自Kaggle的笔记本,运行笔记本在AWS实例上训练模型(运行了3个小时),然后将模型移回我的项目中。此外,我必须安装OpenGL来修改图像并编写一个相当复杂的脚本来重塑形状将base64字符串转换为张量以匹配模型[1, 28, 28, 1] 1,28,28,1]的预期输入。
All that made me rethink how to write this tutorial. After all, this tutorial should be for people that just want to play around with the machine learning model without learning Python, Jupyter, Tensorflow and Keras beforehand. Also, the tutorial would have been 5 times the length of what it is now.
所有这些使我重新考虑了如何编写本教程。 毕竟,本教程应该是对于只想用机器学习模型来玩耍,而无需学习Python中 ,Jupyter,Tensorflow和Keras事先的人。 而且,本教程的长度是现在的5倍。
Note: If you want to learn how to use Tensorflow & Keras I found a good Youtube channel about deep learning with deeplizard , which is very informative and it is in line with what we want to do in this tutorial.Also, this course on Udemy is pretty good but it’s not free unfortunalety. 😕
注:如果您想了解如何使用Tensorflow&Keras我发现了大约深度学习具有良好的YouTube频道deeplizard ,这是非常丰富的,它是符合我们想要在这个tutorial.Also做, 这当然对Udemy 是相当不错的,但是它并不是免费的。 😕
Anyway, for this tutorial, I decided to use Google’s Teachable Machine to train the images.
无论如何,对于本教程,我决定使用Google的可教机来训练图像。
The idea is to take 28 x 28 pixels images with the app we just build, upload the images to the Teachable Machine and download the trained model back into our project.
我们的想法是使用我们刚刚构建的应用程序拍摄28 x 28像素的图像,然后将图像上传到可教学机器,然后将经过训练的模型下载回我们的项目中。
Just in case you were asking why I use 28 x 28 pixels images? Well, that was the original input size of the model I used first. So I stuck with it.
万一您问我为什么使用28 x 28像素的图像? 好吧,那是我首先使用的模型的原始输入大小。 所以我坚持下去。
That also means we have to crop and save the taken images to the camera library. In order to do that we need to modify our code a little.
这也意味着我们必须裁剪并把拍摄的图像保存到相机库中。 为此,我们需要稍微修改一下代码。
Please create a helper.js file inside the CameraView folder and paste the following code:
请创建一个helper.js内部文件CameraView文件夹,并粘贴以下代码:
import { Dimensions } from "react-native";
import * as ImageManipulator from "expo-image-manipulator";
import CameraRoll from "@react-native-community/cameraroll";const { height: DEVICE_HEIGHT, width: DEVICE_WIDTH } = Dimensions.get("window");// got the dimension from the trained data of the *Teachable Machine*; pixel resolution conversion (8x)
export const BITMAP_DIMENSION = 224;export const cropPicture = async (imageData, maskDimension) => {
  try {
    const { uri, width, height } = imageData;
    const cropWidth = maskDimension * (width / DEVICE_WIDTH);
    const cropHeight = maskDimension * (height / DEVICE_HEIGHT);
    const actions = [
      {
        crop: {
          originX: width / 2 - cropWidth / 2,
          originY: height / 2 - cropHeight / 2,
          width: cropWidth,
          height: cropHeight,
        },
      },
      {
        resize: {
          width: BITMAP_DIMENSION,
          height: BITMAP_DIMENSION,
        },
      },
    ];
    const saveOptions = {
      compress: 1,
      format: ImageManipulator.SaveFormat.JPEG,
      base64: false,
    };
    return await ImageManipulator.manipulateAsync(uri, actions, saveOptions);
  } catch (error) {
    console.log("Could not crop & resize photo", error);
  }
};export const saveToCameraRoll = async (uri) => {
  try {
    return await CameraRoll.save(uri, "photo");
  } catch (error) {
    console.log("Could not save the image", error);
  }
};
Add the import this file in src/screens/CameraView/index.js
在src/screens/CameraView/index.js添加导入此文件
import { cropPicture, saveToCameraRoll } from ‘./helpers’;and add the takePicture function and modify the handlePictureProcessing function like that
并添加takePicture函数并像这样修改handlePictureProcessing函数
const handlePictureProcessing = async () => {
  const imageData = await takePicture();
  const croppedData = await cropPicture(imageData, MASK_DIMENSION);
  await saveToCameraRoll(croppedData.uri);
  // we don't want to go to the evaluation view now
  //goToEvaluationView();
};const takePicture = async () => {
  const options = {
    quality: 0.1,
    fixOrientation: true,
  };
  try {
    return await cameraRef.current.takePictureAsync(options);
  } catch (error) {
    console.log("Could not take photo", error);
  }
};
As you can see we comment out the line //goToEvaluationView(); so we don’t go to the other screen. That means you can take as many pictures as you want in a row. All the pictures will now be saved in your photo library.
如您所见,我们注释掉//goToEvaluationView();行//goToEvaluationView(); 因此我们不会转到另一个屏幕。 这意味着您可以连续拍摄任意数量的照片。 现在,所有图片将保存在您的照片库中。
Our next task is to write as many variations of numbers between 0 and 9 as possible on a piece of paper. The more numbers, colours and pen shapes we use the better the prediction will be.
我们的下一个任务是在一张纸上写尽可能多的0到9之间的数字变体。 我们使用的数字,颜色和笔形越多,预测效果就越好。
I was lazy and ended up with roughly 10 variations per number but the prediction was a bit off for a few numbers such as 4 and 8.
我很懒,最终每个数字有10个变化,但对于一些数字(例如4和8),预测却有些偏离。
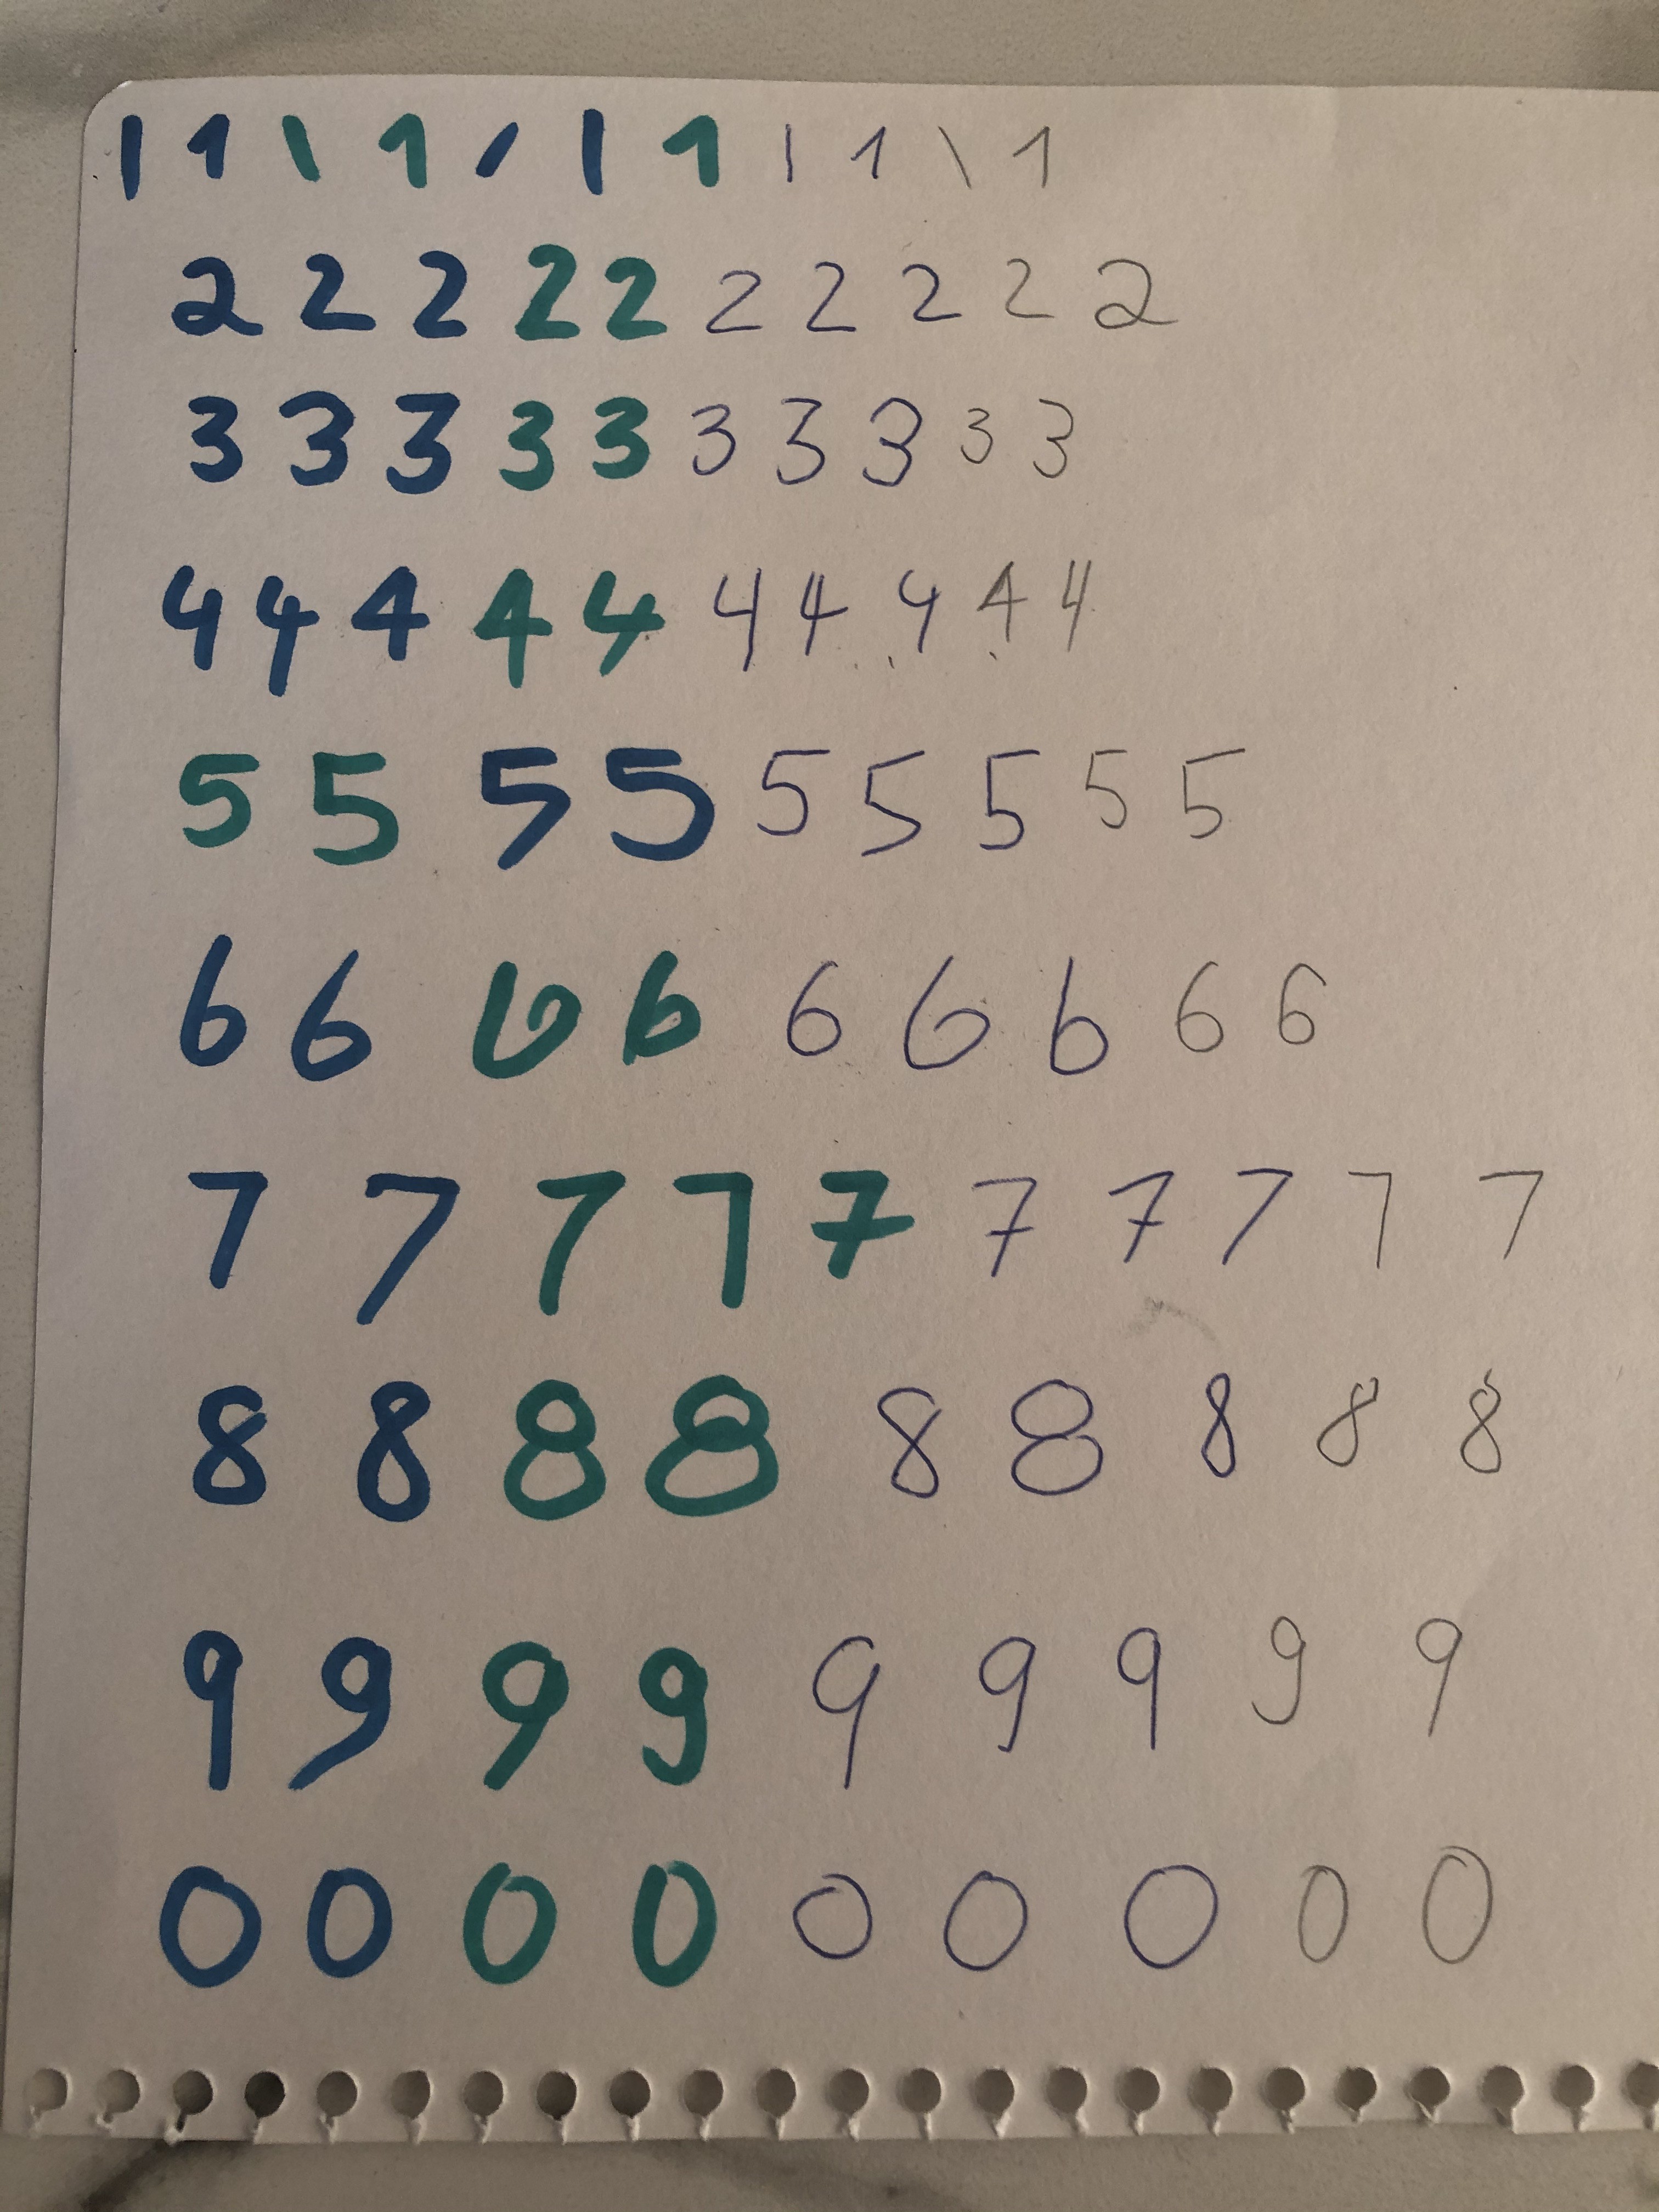
So it’s up to you how many numbers you will let the Teachable Machine train on.
因此,由您决定要让多少台Teachable Machine继续训练。
When you finished with taken the images, Airdrop them all back to your Mac and from there upload them to the Teachable Machine and start training them.
拍摄完图像后,将它们全部空投到Mac上,然后从那里将其上传到可教机器,并开始训练它们。

Once that has finished you can take additional pictures with your app and upload them too, to test against the trained model.
完成后,您可以使用您的应用拍摄其他照片并上传它们,以针对经过训练的模型进行测试。
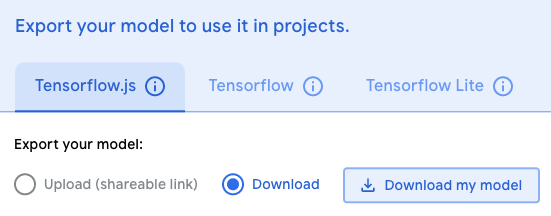
If you are happy with the result, click on Export Model -> Tensorflow.js -> Download -> Download my model, which will download a ZIP file.
如果您对结果满意,请单击Export Model -> Tensorflow.js > Download -> Download my model ,这将下载一个ZIP文件。
Unzip the ZIP file, create a model folder in the src directory (src/model) and copy the model.json and the weights.bin into that folder.
解压ZIP文件,创建一个model在该文件夹src目录( src/model )和复制model.json和weights.bin到该文件夹。
We also need to tell metro to deal with the new file format: *.bin. So please modify the metro.config.js like that:
我们还需要告诉Metro处理新的文件格式: *.bin 。 因此,请像这样修改metro.config.js :
const { getDefaultConfig } = require("metro-config");module.exports = (async () => {
  const {
    resolver: { assetExts },
  } = await getDefaultConfig();
  return {
    transformer: {
      getTransformOptions: async () => ({
        transform: {
          experimentalImportSupport: false,
          inlineRequires: false,
        },
      }),
    },
    resolver: {
      assetExts: [...assetExts, "bin"],
    },
  };
})();
Great! Now that our model is in the project, let’s start using the model to predict the number.
大! 现在我们的模型已经在项目中,让我们开始使用模型来预测数量。
第3章:实施模型,预测并显示结果 (Chapter 3: Implement the model, predict and show the result)
Firstly, we don’t want is to save the photos to our photo library anymore. (unless you want to).
首先,我们不想再将照片保存到我们的照片库中。 (除非你要)。
So comment out that line //await saveToCameraRoll(croppedData.uri);.We also need the base64 string of the cropped image and lastly, we want to pass that base64 string to the EvaluationView via props.
因此,注释掉该行//await saveToCameraRoll(croppedData.uri); 我们还需要裁剪图像的base64 string ,最后,我们想通过props将该base64 string传递给EvaluationView 。
Let’s modify our CameraView src/screens/CameraView/index.js file again like that:
让我们再次修改CameraView src/screens/CameraView/index.js文件,如下所示:
const handlePictureProcessing = async () => {
  const imageData = await takePicture();
  const croppedData = await cropPicture(imageData, MASK_DIMENSION);
  // await saveToCameraRoll(croppedData.uri);
  goToEvaluationView(croppedData);
};const goToEvaluationView = (croppedData) => {
  Navigation.push(props.componentId, {
    component: {
      name: "evaluationView",
      options: {
        topBar: {
          title: {
            text: "Evaluating ML result",
            color: "white",
          },
          background: {
            color: "#4d089a",
          },
          backButton: {
            color: "white",
            showTitle: false,
          },
        },
      },
      passProps: {
        base64: croppedData.base64 || null,
      },
    },
  });
};
🏆 Fantastic job!
job 出色的工作!
Let’s display the image in the EvaluationView. Import the Image from react-native and add the Image component to the View container like that
让我们在EvaluationView显示图像。 从react-native导入Image ,然后将Image组件添加到View容器中
<View style={styles.container}>
  <Text style={styles.headerText}>ANALYSIS</Text>
  <Image
    style={styles.imageContainer}
    source={{ uri: `data:image/gif;base64,${props.base64}` }}
    resizeMethod="scale"
  />
</View>;
and add the style for the imageContainer underneath the headerText style.
并在headerText样式下方添加imageContainer的样式。
imageContainer: {
 height: 300,
 width: 300,
},
The last step is to go to the src/screens/CameraView/helpers.js file and change the saveOptions to base64: true.
最后一步是转到src/screens/CameraView/helpers.js文件,并将saveOptions更改为base64: true 。
🏆 Voilà!
oilVoilà !
You should see the taken image now in the EvaluationView below the ANALYSIS text.
您现在应该在Analysis文本下方的EvaluationView中看到拍摄的图像。
Now we want to display the prediction result. We need to add the Victory Chart to the EvaluationView together with a few react-native packages
现在我们要显示预测结果。 我们需要将Victory Chart和一些react-native程序包添加到EvaluationView
import React from "react";
import {
  Dimensions,
  ActivityIndicator,
  SafeAreaView,
  View,
  Image,
  Text,
  StatusBar,
} from "react-native";
import {
  VictoryChart,
  VictoryAxis,
  VictoryBar,
  VictoryTheme,
} from "victory-native";const { width: DEVICE_WIDTH } = Dimensions.get("window");
To get the width of the device (needed for the VictoryChart) we use the Dimensions library.
为了获得设备的width (VictoryChart所需),我们使用了Dimensions库。
Then add the Victory Chart container. Since we only want to display the chart after we have a prediction result, we add a condition based on the length of the graphData.
然后添加胜利图表容器。 由于我们只希望在获得预测结果后显示图表,因此我们基于graphData.的长度添加了一个条件graphData.
Since we don’t have working model yet we have to add some fake graph data to see the horizontal bars of the graph.
由于我们还没有可用的模型,因此我们必须添加一些虚假的图形数据才能看到图形的水平条 。
import React from "react";
import {
  Dimensions,
  ActivityIndicator,
  SafeAreaView,
  View,
  Image,
  Text,
  StatusBar,
} from "react-native";
import {
  VictoryChart,
  VictoryAxis,
  VictoryBar,
  VictoryTheme,
} from "victory-native";const { width: DEVICE_WIDTH } = Dimensions.get("window");export const EvaluationView = (props) => {
  const graphData = [
    { number: 0, prediction: 0.04 },
    { number: 1, prediction: 0.02 },
    { number: 2, prediction: 0.02 },
    { number: 3, prediction: 0.1 },
    { number: 4, prediction: 0.85 },
    { number: 5, prediction: 0.04 },
    { number: 6, prediction: 0.2 },
    { number: 7, prediction: 0.12 },
    { number: 8, prediction: 0.0 },
    { number: 9, prediction: 0.0 },
  ];return (
    <React.Fragment>
      <StatusBar barStyle="light-content" />
      <SafeAreaView style={styles.safeArea}>
        <View style={styles.container}>
          <Text style={styles.headerText}>ANALYSIS</Text>
          <Image
            style={styles.imageContainer}
            source={{
              uri: `data:image/gif;base64,${props.base64}`
            }}
            resizeMethod="scale"/>
          <View style={styles.resultContainer}>
            {graphData.length ? (
              <VictoryChart
                width={DEVICE_WIDTH - 20}
                padding={{
                  top: 30, bottom: 70, left: 50, right: 30
                }}
                theme={VictoryTheme.material}>
                <VictoryAxis
                  tickValues={[1, 2, 3, 4, 5, 6, 7, 8, 9]}
                  tickFormat={[1, 2, 3, 4, 5, 6, 7, 8, 9]}/>
                 <VictoryAxis
                   dependentAxis
                   tickFormat={(tick) => tick} />
                <VictoryBar
                  style={{ data: { fill: "#c43a31" } }}
                  barRatio={0.8}
                  alignment="start"
                  data={graphData}
                  x="number"
                  y="prediction"/>
              </VictoryChart>
            ) : (
              <ActivityIndicator size="large" color="#4d089a" />
            )}
          </View>
        </View>
      </SafeAreaView>
    </React.Fragment>
  );
};
You should have a screen like that:
您应该有一个这样的屏幕:

🏆 You are a champion!
🏆 你是冠军!
We are slowly coming the final part of the tutorial, in where we will load the model and compare the taken photo against the model.
我们将慢慢进入本教程的最后部分,在该部分中,我们将加载模型并将所拍摄的照片与模型进行比较。
Please create a util.js in the src directory and paste the following code.
请在src目录中创建util.js并粘贴以下代码。
/* eslint-disable no-bitwise */
/*
Copyright (c) 2011, Daniel Guerrero
All rights reserved.
Redistribution and use in source and binary forms, with or without
modification, are permitted provided that the following conditions are met:
    * Redistributions of source code must retain the above copyright
      notice, this list of conditions and the following disclaimer.
    * Redistributions in binary form must reproduce the above copyright
      notice, this list of conditions and the following disclaimer in the
      documentation and/or other materials provided with the distribution.
THIS SOFTWARE IS PROVIDED BY THE COPYRIGHT HOLDERS AND CONTRIBUTORS "AS IS" AND
ANY EXPRESS OR IMPLIED WARRANTIES, INCLUDING, BUT NOT LIMITED TO, THE IMPLIED
WARRANTIES OF MERCHANTABILITY AND FITNESS FOR A PARTICULAR PURPOSE ARE
DISCLAIMED. IN NO EVENT SHALL DANIEL GUERRERO BE LIABLE FOR ANY
DIRECT, INDIRECT, INCIDENTAL, SPECIAL, EXEMPLARY, OR CONSEQUENTIAL DAMAGES
(INCLUDING, BUT NOT LIMITED TO, PROCUREMENT OF SUBSTITUTE GOODS OR SERVICES;
LOSS OF USE, DATA, OR PROFITS; OR BUSINESS INTERRUPTION) HOWEVER CAUSED AND
ON ANY THEORY OF LIABILITY, WHETHER IN CONTRACT, STRICT LIABILITY, OR TORT
(INCLUDING NEGLIGENCE OR OTHERWISE) ARISING IN ANY WAY OUT OF THE USE OF THIS
SOFTWARE, EVEN IF ADVISED OF THE POSSIBILITY OF SUCH DAMAGE.
 *//**
 * Uses the new array typed in javascript to binary base64 encode/decode
 * at the moment just decodes a binary base64 encoded
 * into either an ArrayBuffer (decodeArrayBuffer)
 * or into an Uint8Array (decode)
 *
 * References:
 * https://developer.mozilla.org/en/JavaScript_typed_arrays/ArrayBuffer
 * https://developer.mozilla.org/en/JavaScript_typed_arrays/Uint8Array
 */export const Base64Binary = {
  _keyStr: "ABCDEFGHIJKLMNOPQRSTUVWXYZabcdefghijklmnopqrstuvwxyz0123456789+/=",/* will return a  Uint8Array type */
  decodeArrayBuffer: function (input) {
    var bytes = (input.length / 4) * 3;
    var ab = new ArrayBuffer(bytes);
    this.decode(input, ab);return ab;
  },removePaddingChars: function (input) {
    var lkey = this._keyStr.indexOf(input.charAt(input.length - 1));
    if (lkey === 64) {
      return input.substring(0, input.length - 1);
    }
    return input;
  },decode: function (input, arrayBuffer) {
    //get last chars to see if are valid
    input = this.removePaddingChars(input);
    input = this.removePaddingChars(input);var bytes = parseInt((input.length / 4) * 3, 10);var uarray;
    var chr1, chr2, chr3;
    var enc1, enc2, enc3, enc4;
    var i = 0;
    var j = 0;if (arrayBuffer) {
      uarray = new Uint8Array(arrayBuffer);
    } else {
      uarray = new Uint8Array(bytes);
    }input = input.replace(/[^A-Za-z0-9\+\/\=]/g, "");for (i = 0; i < bytes; i += 3) {
      //get the 3 octects in 4 ascii chars
      enc1 = this._keyStr.indexOf(input.charAt(j++));
      enc2 = this._keyStr.indexOf(input.charAt(j++));
      enc3 = this._keyStr.indexOf(input.charAt(j++));
      enc4 = this._keyStr.indexOf(input.charAt(j++));chr1 = (enc1 << 2) | (enc2 >> 4);
      chr2 = ((enc2 & 15) << 4) | (enc3 >> 2);
      chr3 = ((enc3 & 3) << 6) | enc4;uarray[i] = chr1;
      if (enc3 !== 64) {
        uarray[i + 1] = chr2;
      }
      if (enc4 !== 64) {
        uarray[i + 2] = chr3;
      }
    }return uarray;
  },
};
Out of respect to the developer please don’t remove the copyright disclaimer 😃
出于对开发人员的尊重,请不要删除版权声明😃
Now create another helpers.js file but this time in the EvaluationView directory src/screens/EvaluationView/helpers.js and copy this code
现在创建另一个helpers.js文件,但这一次在EvaluationView目录src/screens/EvaluationView/helpers.js并复制此代码
import * as tf from "@tensorflow/tfjs";
import "@tensorflow/tfjs-react-native";
import { bundleResourceIO, decodeJpeg } from "@tensorflow/tfjs-react-native";
import { Base64Binary } from "../../util";
import { BITMAP_DIMENSION } from "../CameraView/helpers";const modelJson = require("../../model/model.json");
const modelWeights = require("../../model/weights.bin");// 0: channel from JPEG-encoded image
// 1: gray scale
// 3: RGB image
const TENSORFLOW_CHANNEL = 3;export const getModel = async () => {
  try {
    // wait until tensorflow is ready
    await tf.ready();
    // load the trained model
    return await tf.loadLayersModel(bundleResourceIO(modelJson, modelWeights));
  } catch (error) {
    console.log("Could not load model", error);
  }
};export const convertBase64ToTensor = async (props) => {
  try {
    const uIntArray = Base64Binary.decode(props.base64);
    // decode a JPEG-encoded image to a 3D Tensor of dtype
    const decodedImage = decodeJpeg(uIntArray, 3);
    // reshape Tensor into a 4D array
    return decodedImage.reshape([
      1,
      BITMAP_DIMENSION,
      BITMAP_DIMENSION,
      TENSORFLOW_CHANNEL,
    ]);
  } catch (error) {
    console.log("Could not convert base64 string to tesor", error);
  }
};export const startPrediction = async (model, tensor) => {
  try {
    // predict against the model
    const output = await model.predict(tensor);
    // return typed array
    return output.dataSync();
  } catch (error) {
    console.log("Error predicting from tesor image", error);
  }
};export const populateData = (typedArray) => {
  const predictions = Array.from(typedArray);
  return predictions.map((item, index) => {
    return {
      number: index,
      prediction: item,
    };
  });
};
These are our functions to load the model, convert the base64 string to a tensor, predict the digit and populate the data for the victory chart.
这些是我们的功能,用于加载模型,将base64字符串转换为张量,预测数字并填充胜利图表的数据。
Last but not least, we invoke these functions in the useEffect() hook of the src/screens/EvaluationView/index.js.
最后但并非最不重要的一点是,我们在src/screens/EvaluationView/index.js的useEffect()挂钩中调用这些函数。
Here the complete code of that view:
这里是该视图的完整代码:
import React, { useState, useEffect } from "react";
import {
  Dimensions,
  ActivityIndicator,
  SafeAreaView,
  View,
  Image,
  Text,
  StatusBar,
} from "react-native";
import {
  VictoryChart,
  VictoryAxis,
  VictoryBar,
  VictoryTheme,
} from "victory-native";
import {
  getModel,
  convertBase64ToTensor,
  startPrediction,
  populateData,
} from "./helpers";const { width: DEVICE_WIDTH } = Dimensions.get("window");export const EvaluationView = (props) => {
  const [graphData, setGraphData] = useState([]);useEffect(() => {
    const predictDigits = async () => {
      const model = await getModel();
      const tensor = await convertBase64ToTensor(props);
      const typedArray = await startPrediction(model, tensor);
      setGraphData(populateData(typedArray));
    };
    predictDigits();
  }, [props]);return (
    <React.Fragment>
      <StatusBar barStyle="light-content" />
      <SafeAreaView style={styles.safeArea}>
        <View style={styles.container}>
          <Text style={styles.headerText}>ANALYSIS</Text>
          <Image
            style={styles.imageContainer}
            source={{ uri: `data:image/gif;base64,${props.base64}` }}
            resizeMethod="scale"
          />
          <View style={styles.resultContainer}>
            {graphData.length ? (
              <VictoryChart
                width={DEVICE_WIDTH - 20}
                padding={{ top: 30, bottom: 70, left: 50, right: 30 }}
                theme={VictoryTheme.material}
              >
                <VictoryAxis
                  tickValues={[1, 2, 3, 4, 5, 6, 7, 8, 9]}
                  tickFormat={[1, 2, 3, 4, 5, 6, 7, 8, 9]}
                />
                 <VictoryAxis dependentAxis tickFormat={(tick) => tick} />
                <VictoryBar
                  style={{ data: { fill: "#c43a31" } }}
                  barRatio={0.8}
                  alignment="start"
                  data={graphData}
                  x="number"
                  y="prediction"
                />
              </VictoryChart>
            ) : (
              <ActivityIndicator size="large" color="#4d089a" />
            )}
          </View>
        </View>
      </SafeAreaView>
    </React.Fragment>
  );
};const styles = {
  safeArea: {
    backgroundColor: "#4d089a",
  },
  container: {
    height: "100%",
    alignItems: "center",
    backgroundColor: "white",
  },
  headerText: {
    fontSize: 20,
    fontWeight: "500",
    color: "#4d089a",
    margin: 20,
  },
  imageContainer: {
    height: 300,
    width: 300,
  },
  resultContainer: {
    flex: 1,
    justifyContent: "center",
    alignItems: "center",
  },
};
As I mentioned before, the model will be as good as you train the model.
如前所述,该模型将与您训练模型一样好。
In a real-world scenario, a data engineer would use tens of thousands of variations of handwritten digits to train the model. Then would use another set to tweak the model and use a completely new set to check the model performance.
在现实世界中,数据工程师将使用成千上万的手写数字变体来训练模型。 然后将使用另一个集合来调整模型,并使用一个全新的集合来检查模型性能。
On a side note before I close this tutorial; if you are a seasoned React Native developer you would have realised by now that with a few manual imports, especially for
react-native-unimodules,expo-cameraand permission settings, the project will work on Android out of the box too. 🤓在关闭本教程之前,请注意: 如果您是经验丰富的React Native开发人员,那么您现在应该已经意识到,只需手动导入一些内容,尤其是对于
react-native-unimodules,expo-camera和权限设置,该项目也可以在Android上直接使用。 🤓
I hope you have learnt something new.
希望您学到了一些新知识。
Please leave a comment if I could have done something differently or if you liked this tutorial. After all, we are all here to learn, right? 👨🏼🎓
如果我可以做一些不同的事情,或者您喜欢本教程,请发表评论。 毕竟,我们都在这里学习,对吗? 🎓
翻译自: https://towardsdatascience.com/deep-learning-with-react-native-ios-only-8089fed59773


 816
816

 被折叠的 条评论
为什么被折叠?
被折叠的 条评论
为什么被折叠?
 到【灌水乐园】发言


