


 本文提供了一个教程,指导读者利用ApiSpreadsheets.com和React创建一个简单的Web应用程序,并将其部署到线上环境。适合具备基础Web开发知识、希望学习React的开发者。
A tutorial about how to use ApiSpreadsheets.com to make a simple Web app with React and deploy it live. This is a great tutorial for someone familiar with basic Web development concepts and wants to make a switch to React.
关于如何使用ApiSpreadsheets.com通过React制作一个简单的Web应用程序并进行实时部署的教程。 对于熟悉基本Web开发概念并想转向React的人来说,这是一个很棒的教程。
关于React的快速说明 (Quick Notes About React)
If this is your first time using React, please please go through the official tutorial either before OR after this post.
如果这是您第一次使用React,请在这篇文章之前或之后阅读官方教程 。
If you are the kind of person who learns best by doing, then go through this tutorial THEN go through the React documentation.
如果您是那种从中学到的东西来最好的人,那么请通读本教程,然后通读React文档。
Otherwise, if you are a theoretical person, read the docs first.
否则,如果您是理论人员,请先阅读文档。
从创建电子表格开始 (Start by Creating Your Spreadsheet)
Create a spreadsheet that contains the data you want to show up on your website.
创建一个电子表格,其中包含要显示在网站上的数据。
You can make it on Google Sheets, upload it to Dropbox, or make it on Excel. I created mine on Google Sheets with information on Academy Award Winning Films in 2019.
您可以在Google表格中创建,上传到Dropbox或在Excel中创建。 我在Google表格上创建了我的照片,其中包含2019年奥斯卡获奖电影的信息。

Our data will power our front-end which will ultimately look like this
我们的数据将为我们的前端提供动力,最终将看起来像这样

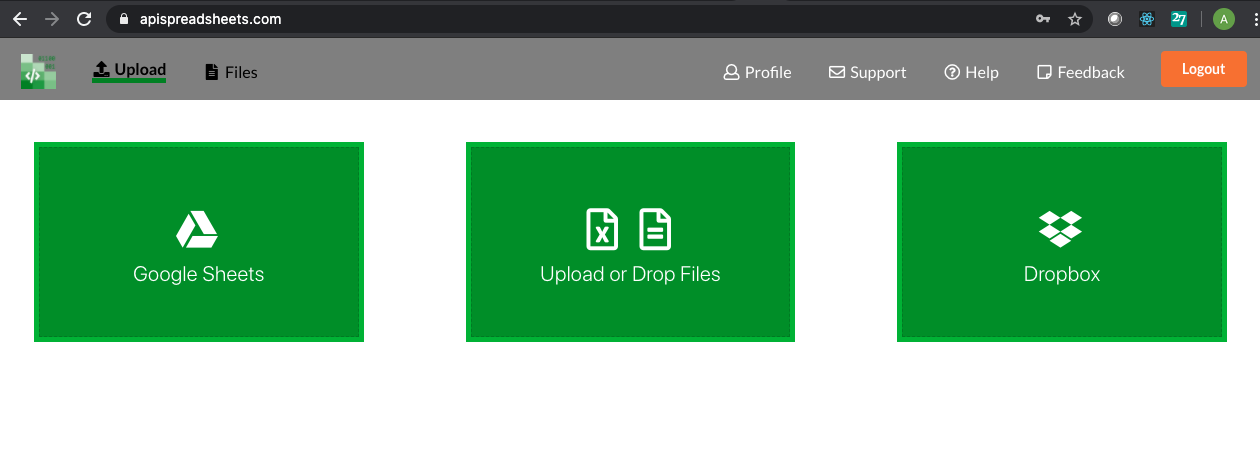
在APISpreadsheets.com上上传或连接电子表格 (Upload or Connect your Spreadsheet on APISpreadsheets.com)
Make an account if you don’t have one already (it’s free for up to 3 files!) and choose the file you want. Once you have uploaded the file, checkout the quick tour to get a deeper understanding of all the features!
开设一个帐户(如果您还没有帐户的话)(最多免费提供3个文件!),然后选择所需的文件。 上传文件后,请查看快速浏览,以更深入地了解所有功能!
For this tutorial, we will only be reading our spreadsheet so click on the “Read” tab and Javascript Code Sample
对于本教程,我们将仅阅读电子表格,因此请单击“阅读”选项卡和“ Javascript代码示例”
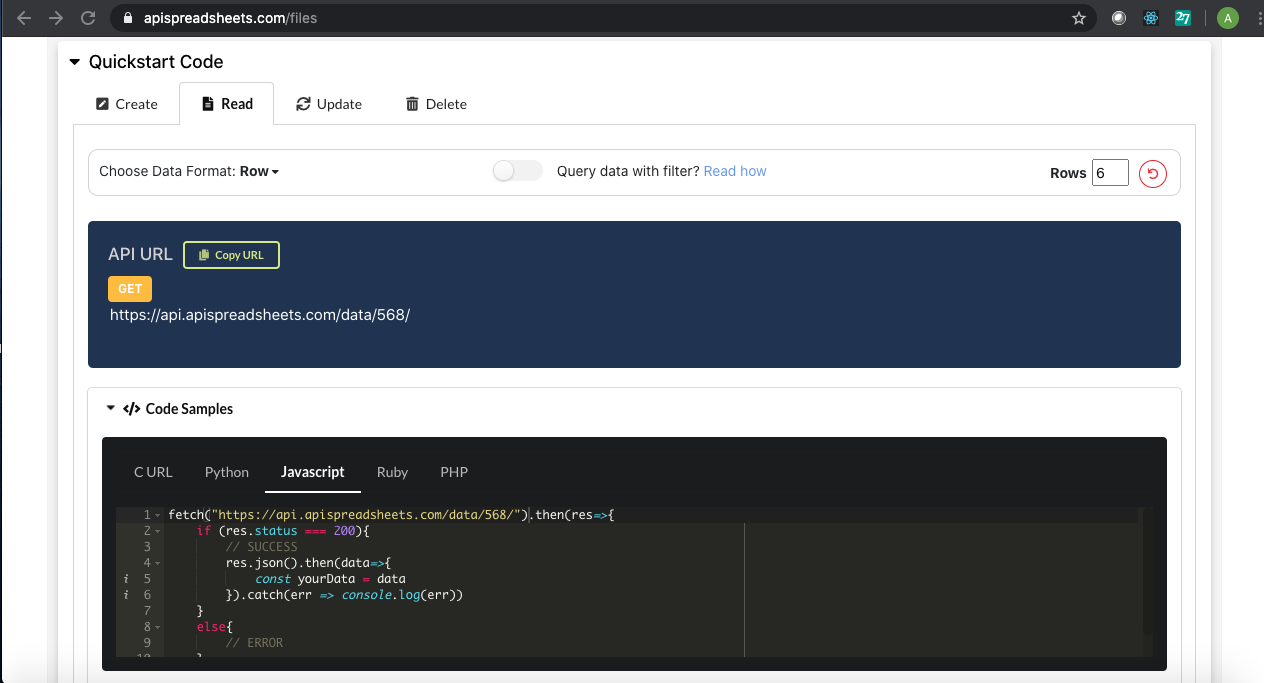
We will explain what to do with all this in a bit, but for now let’s start up our React App.
我们将稍候说明如何处理所有这些,但是现在让我们启动我们的React App。
在Mac上打开终端或在Windows上打开命令提示符 (Open up your Terminal on Mac or Command Prompt on Windows)
Before installing React we have to make sure we have node.js downloaded which you can do from here: https://nodejs.org/en/download/.
在安装React之前,我们必须确保已经下载了node.js,您可以从此处下载: https : //nodejs.org/en/download/。
Now, to create a project run the following commands on your Terminal or Command Prompt:
现在,要创建项目,请在终端或命令提示符上运行以下命令:
1. npx create-react app (name of your app), I’ve named mine award-winning movies
1. npx create-react应用程序 (您的应用程序名称),我将其命名为我的获奖电影
$ npx create-react app award-winning-movies2. cd award-winning-movies, this puts you in the folder you made so you can work on your app
2. cd award-winning-movies ,这会将您放入创建的文件夹中,以便您可以使用自己的应用
$ cd award-winning-movies3. npm start, you should see your app open up on your localhost and it looks like this
3. npm start ,您应该看到您的应用程序在本地主机上打开,看起来像这样
$ npm start 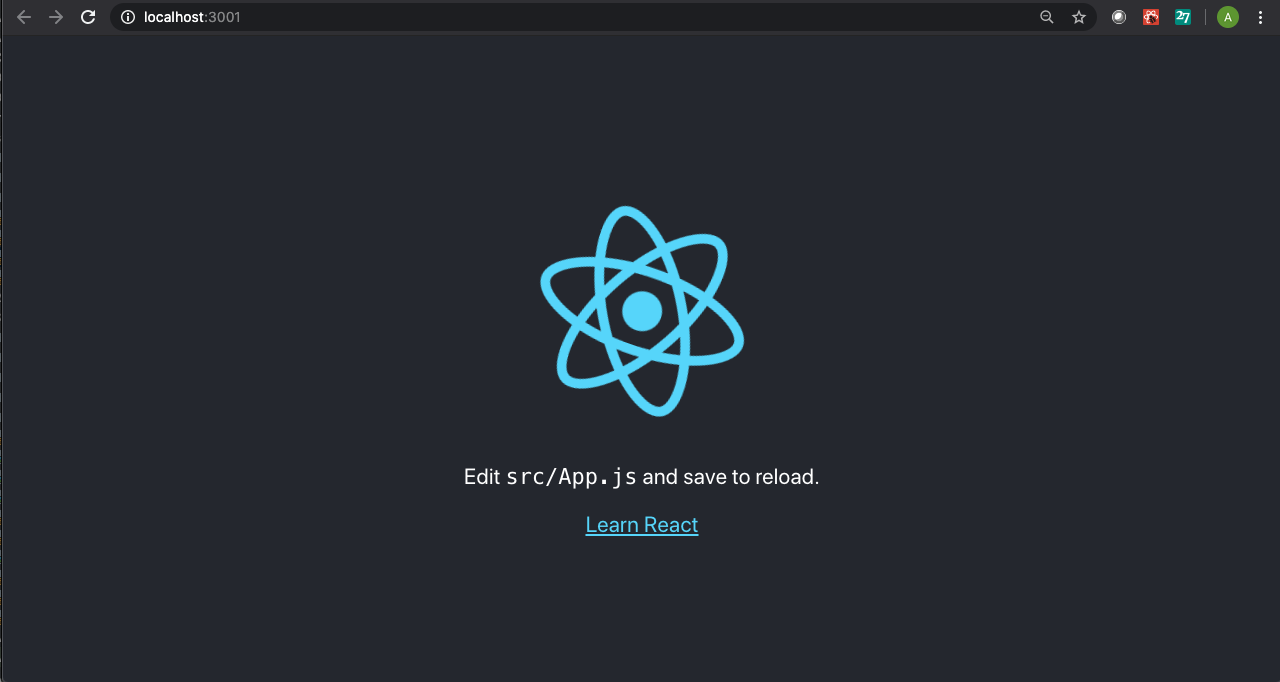
打开您在喜爱的IDE或文本编辑器中创建的React App (Open the React App you created in your favorite IDE or Text Editor)
An IDE stands for Integrated Development Environment where you can edit the React app we just created. I’m using WebStorm. You can also use a simple text editor like Atom.
IDE代表集成开发环境,您可以在其中编辑我们刚刚创建的React应用。 我正在使用WebStorm 。 您还可以使用简单的文本编辑器,例如Atom 。
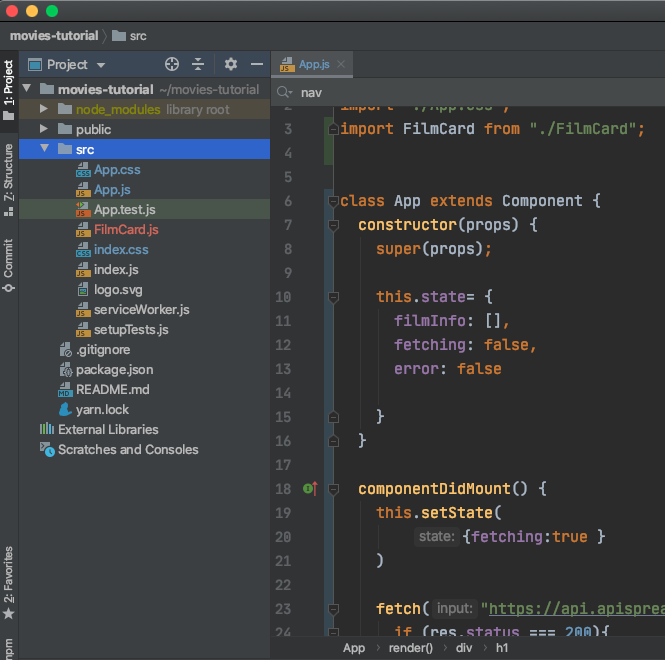
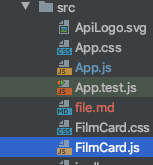
On the left you can see all the files we get from React but we will mainly be focusing on our App.js component in the folder “src”.
在左侧,您可以看到我们从React获得的所有文件,但我们将主要关注文件夹“ src”中的App.js组件。
When we are done with this tutorial, the App.js component will have the following code.
完成本教程的学习后, App.js组件将具有以下代码。
Don’t worry if all this looks confusing. We are going to walk you through it step by step below.
如果这一切看起来令人困惑,请不要担心。 我们将在下面逐步引导您。
什么是组件? (What is a Component?)
A component is a block of code that renders your given HTML elements or other components. Components are the building blocks of React and you can read more about them in the React documentation.
组件是一段代码,可呈现给定HTML元素或其他组件。 组件是React的基础,您可以在React文档中阅读有关组件的更多信息。
For now all you need is components display the visuals for our app.
现在,您只需要为组件显示我们应用程序的视觉效果即可。
我们的App.js组件 (Our App.js Component)
Our App.js component is the entry way to our React app.
我们的App.js组件是我们React应用程序的入口方式。
Import Statements
进口声明
We are going import React and the Component class from ‘react’. We will also be importing the App.css file and another Components: FilmCard. We will be walking through these individually later on.
我们将从'react'导入React和Component类。 我们还将导入App.css文件和另一个组件:FilmCard。 我们稍后将逐一介绍这些内容。
import React, { Component } from ‘react’;
import './App.css';
import FilmCard from './FilmCard';
Initialize Our Component
初始化我们的组件
We begin by declaring that our component is a class that extends the component class
我们首先声明我们的组件是一个扩展组件类的类
class App extends Component {Don’t forget to close this bracket at the end :)
不要忘了在结尾处关闭此括号:)
We initialize the component by setting the component’s state and inheriting props.
我们通过设置组件的状态并继承道具来初始化组件。
constructor(props){
  super(props);

  this.state = {
    filmInfo: [],
    fetching: false,
    error: false
  }
}
this.state = {} initializes the local state of the object, where we will be including our filmInfo that’s an empty array right now, since we don’t have and fetching and any error that could happen is set to false.
this.state = {}初始化对象的本地状态,因为我们没有获取信息,并且可能发生的任何错误都设置为false,所以我们现在将其中包括空数组filmInfo包括在内。
State is the component’s brain. Any changes in the state render the component again so we always think carefully on what the state should contain
状态是组件的大脑。 状态的任何更改都会再次呈现组件,因此我们始终会仔细考虑状态应包含的内容
Add componentDidMount Method and immediately change fetching state to be true
添加componentDidMount方法并立即将获取状态更改为true
componentDidMount() {
  this.setState({ fetching: true })
ComponentDidMount is a method that is part of React’s component lifecycle. It signals that the component and it’s sub-components have rendered properly and it’s where we will be making our API call.
ComponentDidMount是一种方法,它是React组件生命周期的一部分。 它表示该组件及其子组件已正确渲染,这是我们进行API调用的地方。
Go back to APISpreadsheets to copy our Javascript Code from earlier and paste in the componentDidMount() method
返回APISpreadsheets复制以前的Javascript代码,然后粘贴到componentDidMount()方法中
fetch("https://api.apispreadsheets.com/data/568/").then(res => {
 if (res.status === 200){
  // SUCCESS
  res.json().then(data => {
    const yourData = data
  }).catch(err => console.log(err))
 }
 else{
  // ERROR
 }
})
By the way, this API URL is public so feel free to use it yourself
顺便说一下,此API URL是公共的,因此您可以随时使用它
We are going to modify this code a bit so it handles all the different scenarios. Depending on the status of the fetch request, we will be changing the state using the this.setState function.
我们将对该代码进行一些修改,以便处理所有不同的情况。 根据获取请求的状态,我们将使用this.setState函数更改状态。
For example, if the fetch is successful (i.e. we have obtained our spreadsheet data), then we will set the filmInfo state to contain all our film data. Our film data will look like the following.
例如,如果获取成功(即,我们已获取电子表格数据),则将设置filmInfo状态以包含所有电影数据。 我们的电影数据将如下所示。
{"data":[{"title":"Parasite","awards_won":"Best Picture","rotten_tomato_score":"99%","imdb_score":"8.6","revenue":"$266.9 million","genre":"Comedy, Drama, Thriller","year":"2019","picture":"https://m.media-amazon.com/images/M/MV5BYWZjMjk3ZTItODQ2ZC00NTY5LWE0ZDYtZTI3MjcwN2Q5NTVkXkEyXkFqcGdeQXVyODk4OTc3MTY@._V1_UY1200_CR90,0,630,1200_AL_.jpg","film_url":"https://en.wikipedia.org/wiki/Parasite_(2019_film)"}We will also be adding different states for when the page is loading or if there is an error. Our final fetch code looks like the following:
我们还将在页面加载或错误时添加不同的状态。 我们最终的提取代码如下所示:
If successful, our filmInfo state will contain an array of all the films and their attributes. The ones we put into our spreadsheet.
如果成功,我们的filmInfo状态将包含所有电影及其属性的数组。 我们放入电子表格的内容。
Now we will need another Component that can take each element of that array (aka the info for a particular film) and create a Card to display.
现在,我们将需要另一个组件,该组件可以获取该数组的每个元素(又称特定电影的信息)并创建要显示的Card。
创建新组件FilmCard.js (Create New Component FilmCard.js)
Create a new file and name it FilmCard.js and put in the same directory as App.js.
创建一个新文件并将其命名为FilmCard.js ,并将其放置在与App.js相同的目录中。
This is where we will be displaying the info about the film. We will be passing props to this component that are equal to the film’s info.
这是我们将显示有关电影的信息的地方。 我们将把与电影信息相同的道具传递给该组件。
If you go back to APISpreadsheets and click on “Sample Response” you can see what you would be naming each prop.
如果您返回APISpreadsheets并单击“样本响应”,则可以看到每个道具的名称。
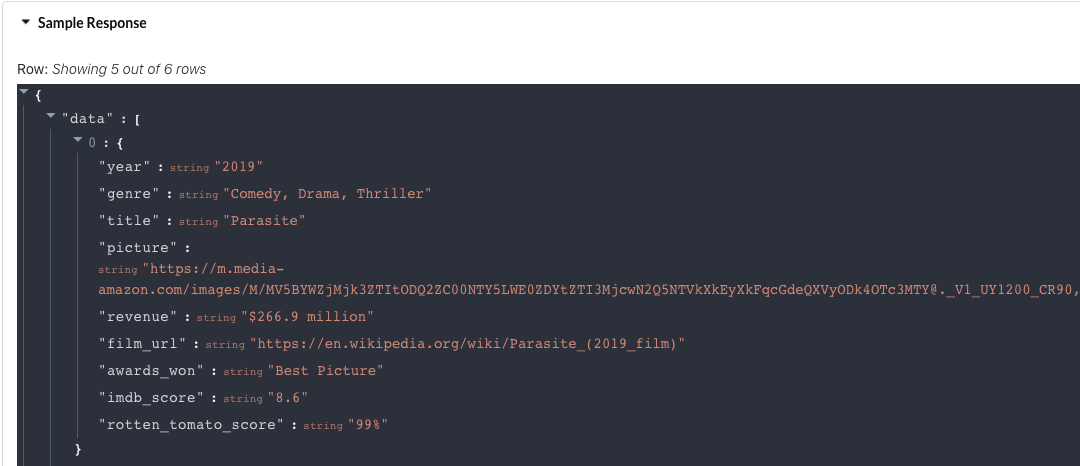
I gave each prop it’s own div and it looks like this:
我给了每个道具自己的div,看起来像这样:
我们快完成了! 现在是时候在App.js上使用render()函数了 (We’re almost done! Now it’s time to work on our render() function on App.js)
Your code will first run its constructor(props) method, then render(), then componentDidMount() and then render() anytime the state is change, for example when we call the this.setState function.
您的代码将首先运行其构造函数(props)方法,然后运行render(),然后运行componentDidMount(),然后在状态改变时(例如,当我们调用this.setState函数时)运行render()。
In the render we have if else statements that determine what should be displayed given a particular scenario. In our case, if the component is fetching, if there is an error, and if the data was successfully obtained.
在渲染器中,我们具有if else语句,这些语句确定在特定情况下应显示的内容。 在我们的例子中,如果组件正在获取,是否有错误以及是否成功获取了数据。
The first and second if else blocks are for when the screen is loading and the third is if there are errors.
第一个和第二个if else块是在屏幕加载时使用的,而第三个是如果有错误。
The last else is for getting your film info mapped to your FilmCard component to display the card. This is where we pass the film’s attributes as props to the FilmCard component. Our final render() code will look like this:
最后是将影片信息映射到FilmCard组件以显示卡片。 这是我们将影片的属性作为道具传递给FilmCard组件的地方。 我们最终的render()代码将如下所示:
让我们谈谈Return() (Let’s talk about the Return ())
We have to have a return() something from the render() method because this is what React shows to our browser. Since we are setting what should be displayed to the body variable, we will be returning, aka telling React to display it, in the return().
我们必须从render()方法获得一个return()东西,因为这是React向我们的浏览器显示的内容。 由于我们正在设置应显示在body变量上的内容,因此我们将在return()中返回(也告诉React将其显示)。
Finally, we also need to export each component.
最后,我们还需要导出每个组件。
return (
        <div>
          <h1> Award Winning Movies</h1>
          {body}
        </div>
    )
  }
}
export default App;
When you run your code, it will display like this on your localhost.
当您运行代码时,它会在本地主机上这样显示。
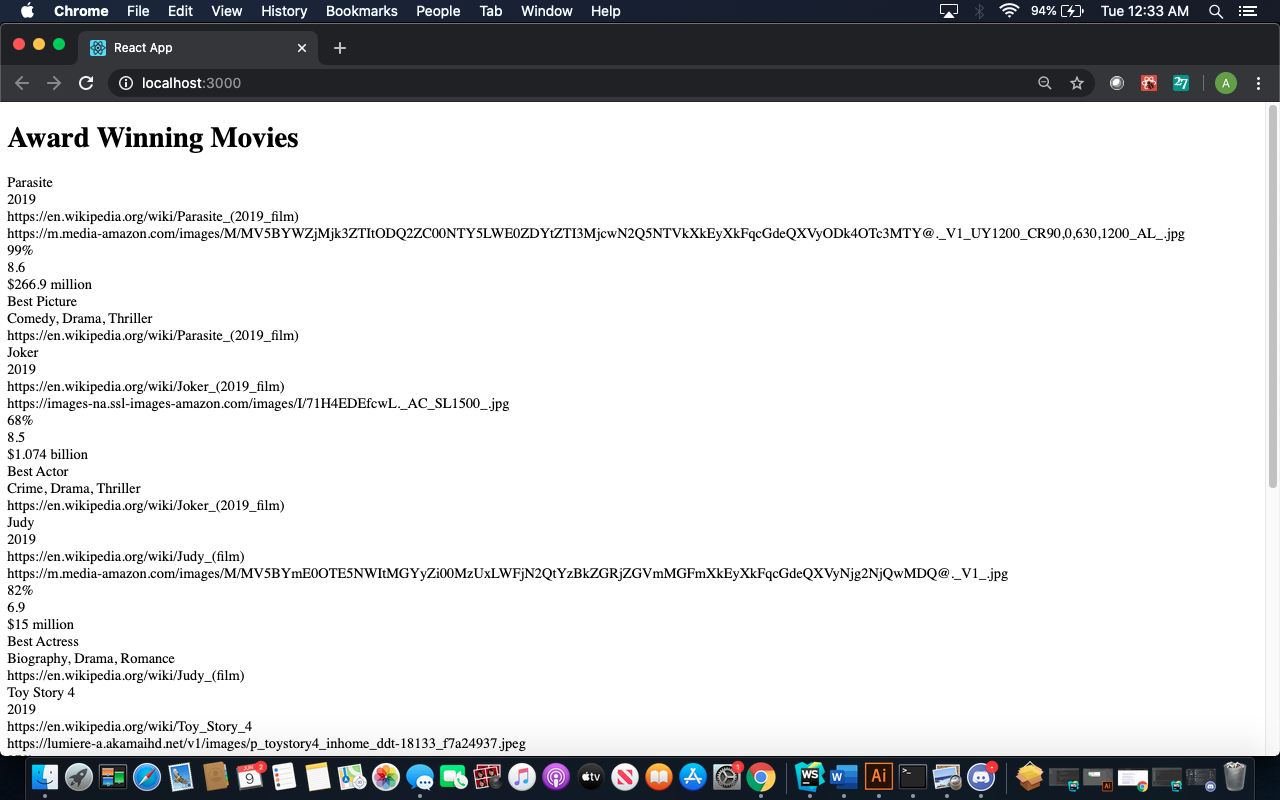
Here you have all your data and now you just need to add some CSS to make it look nice! You can reference my full code on GitHub and use guides on W3Schools to see what you can do!
在这里,您拥有了所有数据,现在只需要添加一些CSS即可使其看起来不错! 您可以在GitHub上引用我的完整代码,并使用W3Schools上的指南来了解您可以做什么!
Congratulations! You have now made a React Web app powered by Spreadsheets!
恭喜你! 您现在已经制作了一个由Spreadsheets驱动的React Web应用程序!

该部署代码了 (Time to Deploy Your Code)
After you created a nicer looking front-end you can use Heroku to host your site for free.
创建好看的前端后,您可以使用Heroku免费托管您的网站。
I followed this tutorial if you want to go more in depth but you basically just need to write this step by step in your terminal. First, make sure you make an account on heroku.com.
如果您想更深入地学习本教程,那么基本上您只需要在终端中逐步编写此教程即可。 首先,请确保您在heroku.com上创建了一个帐户。
npm install -g create-react-app
create-react-app my-app
cd my-app
git init
heroku create -b https://github.com/mars/create-react-app-buildpack.git
git add .
git commit -m "react-create-app on Heroku"
git push heroku master
heroku open
This gave me a randomly worded name but now my site can be shared and seen to anyone! Note, that free sites sometimes take a while to boot up on Heroku.
这给了我一个随机的名字,但是现在我的网站可以共享给任何人查看! 请注意,免费站点有时需要一段时间才能在Heroku上启动。
And there you have it, a simple React web app powered by Spreadsheets.
在这里,您将获得一个由Spreadsheets支持的简单React Web应用程序。
The best part is, if you add or modify any data to your Google Sheets, it will automatically show up on your web app! Even if you are working on an Excel file you can upload that in the same section you originally did on APISpreadsheets and your app will update! No additional code would be required.
最好的部分是,如果您在Google表格中添加或修改了任何数据,它将自动显示在您的网络应用中! 即使您正在处理Excel文件,也可以将其上传到与APISpreadsheets原来相同的部分,并且您的应用程序也会更新! 不需要其他代码。
If you have any further questions, feel free to email us at info@lovespreadsheets.com! We can’t wait to see what you build.
如果您还有其他疑问,请随时通过info@lovespreadsheets.com向我们发送电子邮件! 我们等不及要看您的构建。
翻译自: https://medium.com/swlh/how-to-make-a-react-web-app-powered-by-spreadsheets-6488d0b039ae


 1029
1029

 被折叠的 条评论
为什么被折叠?
被折叠的 条评论
为什么被折叠?
 到【灌水乐园】发言


