


 本文介绍如何利用three.js库进行3D墙的可视化绘制,通过实例讲解了该过程,帮助读者理解如何在Web环境中实现3D场景的构建。
three.js 绘制墙
Every developer has their favorite tools, languages, and technologies to work with. Sometimes it derives from another passion such as solving mathematical problems, white-hat hacking, or organization. Luckily, open-source technologies allow everyone to pick up their tool of choice and create something amazing. Now let me show you how you can leverage one of my favorite tools, Three.js
每个开发人员都有自己喜欢的工具,语言和技术可以使用。 有时,它源自另一种热情,例如解决数学问题,白帽黑客攻击或组织。 幸运的是,开源技术使每个人都可以选择自己喜欢的工具并创造出惊人的东西。 现在,让我向您展示如何利用我最喜欢的工具之一Three.js
什么是Three.js? (What is Three.js?)
Three.js is a JavaScript library for creating, rendering, and even animating 3D graphics in the browser. If you are into developing web-based games, creating web animations, or creative coding, this would be a great option to explore.
Three.js是一个JavaScript库,用于在浏览器中创建,渲染甚至动画制作3D图形。 如果您要开发基于Web的游戏,创建Web动画或创意编码,那么这将是一个不错的选择。
Under the hood, Three.js utilizes a low-level API called WebGL. The creator of Three.js, Ricardo Cabello (Mr.doob), knew the complexities of WebGL and simplified it into an easily accessible library for any developer to utilize.
在后台,Three.js利用了称为WebGL的低级API。 Three.js的创建者Ricardo Cabello(Mr.doob)知道WebGL的复杂性,并将其简化为可供任何开发人员使用的易于访问的库。
总览 (Overview)
There’s a lot this library is capable of, but for this article, I will just be focusing on the process of setting up a three.js scene. Personally, this was the most difficult part to remember. As a visual learner, I had to use mental images to understand how a 3D scene could be produced on a flat-screen.
这个库有很多功能,但是在本文中,我将只着重于设置three.js场景的过程 。 就个人而言,这是最难记住的部分。 作为视觉学习者,我不得不使用心理图像来了解如何在平面屏幕上产生3D场景。
Disclaimer: Practice coding out the set up every time you start a new project. This process will never change but if you copy and paste the setup you won’t understand why certain things aren’t working as expected.
免责声明:每次启动新项目时,请练习编码设置。 这个过程将永远不会改变,但是如果您复制并粘贴设置,您将无法理解为什么某些事情无法按预期进行。
Also, Three.js is a Javascript library. There may be a fair amount of references to Object-Oriented Programming and the Javascript language.
另外,Three.js是一个Javascript库。 可能有很多关于面向对象程序设计和Java语言的参考。
With that being said. Let’s begin!
话虽这么说。 让我们开始!
设置Three.js (Setting up Three.js)
To start off with a metaphoric example. Pretend you are building a stage set for a play. Right now your stage is empty, but you need to add things to it before your actors and actresses can use it.
从一个隐喻的例子开始。 假装您正在构建一个舞台剧。 现在您的舞台是空的,但是您需要在演员们使用它之前添加一些东西。
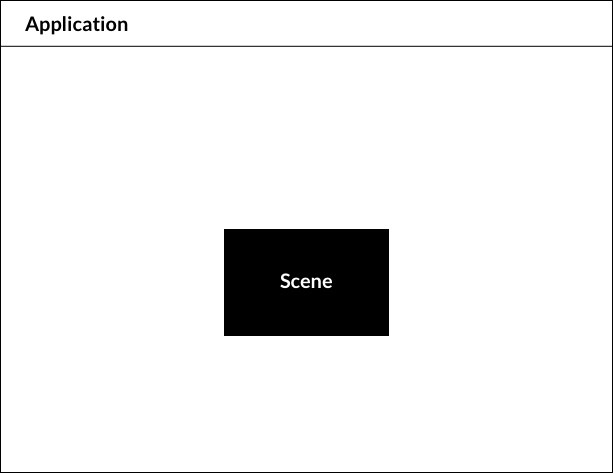
Setting up Three.js is very similar to that scenario above. You start with one Scene and pull the parts needed into that scene.
设置Three.js与上述情况非常相似。 你开始一路S cene和拉成所需的那一幕部分。
Here are the things you will need: Scene, Camera and Renderer
现场 (Scene)
场景允许您设置Three.js渲染的内容。 在这里放置对象,灯光和照相机。
Your scene is the first component you will set up. Three.js uses the Object-Oriented Paradigm so Scene is an Object Constructor. This allows you to create one or more instances of Scene and use it in your app. If your unfamiliar with Constructors check out this article.
您的场景是您要设置的第一个组件。 Three.js使用面向对象范例,因此Scene是对象构造函数 。 这使您可以创建一个或多个Scene实例并在您的应用程序中使用它。 如果您不熟悉构造函数,请查看本文 。
相机 (Camera)
The next thing you will need to set up is your Camera. Just like setting up a stage for a performance or show, the camera is one of the most essential objects needed to capture everything within the scene.
接下来需要设置的是您的相机。 就像为表演或表演搭建舞台一样,相机是捕获场景中所有事物所需的最重要的对象之一。
Similarly to the Scene, the Camera is just another Object Constructor.
与场景类似,摄影机只是另一个对象构造函数。

渲染器 (Renderer)
Once your Scene and Camera are set up, you will need to add them to your app. Like any other web components, you’ll have to add the Scene to the Document Object Model. This is where the Renderer comes in.
设置好场景和相机后,您需要将它们添加到您的应用程序中。 像任何其他Web组件一样,您必须将Scene添加到Document Object Model中 。 这就是渲染器的用武之地。
Three.js uses a Constructor called WebGLRenderer to add your Scene and Camera to the DOM. The Three.js documentation states, “The WebGL renderer displays your beautifully crafted scenes using WebGL”.
Three.js使用称为WebGLRenderer的构造函数将场景和摄像机添加到DOM。 Three.js文档指出:“ WebGL渲染器使用WebGL显示精美的场景 ”。
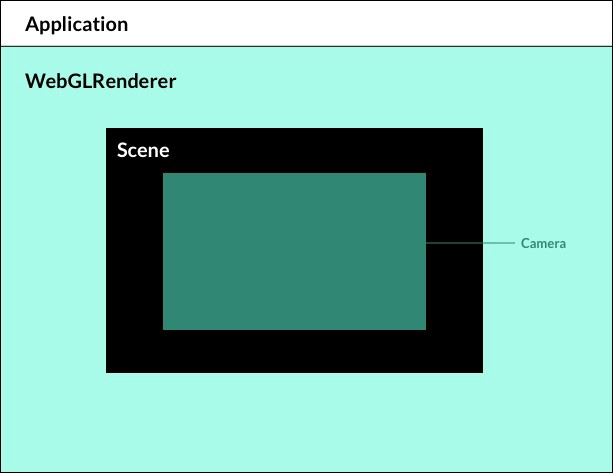
回顾 (Recap)
So to recap the visuals above:
因此,回顾一下上面的视觉效果:
- Create a Scene 创建一个场景
- Set up a Camera 设置相机
- Add a Renderer 添加渲染器
- Place the Scene and Camera into the Renderer 将场景和相机放入渲染器
These are the initial steps to create a scene and add it to your application.
这些是创建场景并将其添加到您的应用程序的初始步骤。
代码 (The Code)
Now that you have a visual idea of how the Scene, Camera, and Renderer work, you are better suited for understanding the code.
现在,您对场景,相机和渲染器的工作方式有了直观的了解,您将更适合理解代码。
Below is the Javascript code for setting up a Three.js project. I’ll go over each section in detail.
以下是用于设置Three.js项目的Javascript代码。 我将详细介绍每个部分。
Disclaimer: I recommend using CodePen to follow along. This will allow us to focus only on the Javascript set up.
免责声明:我建议使用 CodePen 。 这将使我们仅关注Javascript设置。
let scene, camera, renderer;
init();
function init(){scene = new THREE.Scene();camera = new THREE.PerspectiveCamera(75, window.innerWidth /    window.innerHeight, 0.01, 1000);
camera.position.set(0,0,10);renderer = new THREE.WebGLRenderer();
renderer.setSize(window.innerWidth, window.innerHeight);document.body.appendChild(renderer.domElement);window.addEventListener('resize', resize, false);update();}
function resize(){camera.aspect = window.innerWidth / window.innerHeight;
camera.updateProjectionMatrix();
renderer.setSize( window.innerWidth, window.innerHeight);}function update(){requestAnimationFrame(update);
renderer.render(scene, camera);}
设定变数 (Set variables)
Initialize your global variables. We’re making these variables global in order to access them in all of our functions. When working on a real application, you will most likely have these within the scope of your 3D component, so they don’t clash with other components of your application.
初始化全局变量。 我们将这些变量设为全局变量,以便在我们所有的函数中访问它们。 在实际的应用程序上工作时,您很可能会将它们包含在3D组件的范围内,因此它们不会与应用程序的其他组件冲突。
let scene, camera, renderer;创建初始化功能 (Create Initialize function)
The initialization, also known as the init function, is the main function that holds all your three.js objects. This includes your Scene, Camera, and Renderer.
初始化,也称为init函数,是保存所有three.js对象的主要函数。 这包括您的场景,相机和渲染器。
init()function init(){//threejs code goes here
}
创建一个场景 (Create a Scene)
Within the init function you will create a Scene, Camera, and Renderer instance.
在init函数中,您将创建一个Scene,Camera和Renderer实例。
let scene, camera, renderer;function init(){scene = new THREE.Scene();
camera = new THREE.PerspectiveCamera(75, window.innerWidth / window.innerHeight, 0.01, 1000);
camera.position.set(0,0,10);renderer = new THREE.WebGLRenderer();
renderer.setSize(window.innerWidth, window.innerHeight);}
相机设定 (Camera Setup)
camera = new THREE.PerspectiveCamera(75, window.innerWidth / window.innerHeight, 0.01, 1000);
camera.position.set(0,0,10);
The Perspective Camera constructor takes 4 arguments:
Perspective Camera构造函数采用4个参数:
- Point of View — I usually start with 75 观点–我通常从75开始
- Aspect Ratio — the window’s inner width divided by the window’s inner height 宽高比-窗口的内部宽度除以窗口的内部高度
- Near Clipping Path 剪切路径附近
- Far Clipping Path 远剪切路径
Clipping Paths are the limits in which your scene can be seen. In this example, anything before 0.01 and anything farther than 1000 will disappear. For a better description check the PerspectiveCamera.
剪切路径是可以看到场景的限制。 在此示例中,0.01之前的值和1000以后的值都将消失。 有关更好的描述,请查看PerspectiveCamera 。
After your Camera is set you’ll need to position your camera. A good start could be:
设置好相机后,您需要定位相机。 一个好的开始可能是:
// positions.set parameters are (x,y,z) axis
camera.position.set(0,0,20);
渲染器设置 (Renderer Setup)
To create the renderer, you’ll need to use the WebGLRenderer Constructor. Once created, you can use the setSize method to set the renderer size to fit the whole screen.
要创建渲染器,您需要使用WebGLRenderer构造函数。 创建后,可以使用setSize方法设置渲染器大小以适合整个屏幕。
renderer = new THREE.WebGLRenderer();
renderer.setSize(window.innerWidth, window.innerHeight);
创建一个DOM元素 (Create a DOM Element)
Once your Scene, Camera, and Renderer is set up, we now have to create the canvas which will house all the components. The canvas will also allow us to display our 3D application in the DOM. The WebGLRenderer’s has a method called domElement. When domElement is called it will display the canvas to the DOM.
设置好场景,相机和渲染器后,我们现在必须创建将容纳所有组件的画布 。 画布还将使我们能够在DOM中显示3D应用程序。 WebGLRenderer的方法称为domElement 。 调用domElement时 ,它将向DOM显示画布。
renderer = new THREE.WebGLRenderer();
renderer.setSize(window.innerWidth, window.innerHeight);document.body.appendChild(renderer.domElement)
调整大小和更新功能 (Resize and Update Functions)
Lastly, we need to create two essential functions and call them inside your init function.
最后,我们需要创建两个基本函数,并在您的init函数中调用它们。
resize — a function to resize your application on tablet and mobile.
调整大小-一种在平板电脑和移动设备上调整应用程序大小的功能。
update — a function to render the scene and camera and update them every frame.
更新—渲染场景和相机并每帧更新它们的功能。
//variables
let scene, camera, renderer;init()function init(){//threejs code goes here
}function resize(){camera.aspect = window.innerWidth / window.innerHeight;
camera.updateProjectionMatrix();
renderer.setSize( window.innerWidth, window.innerHeight);}function update(){requestAnimationFrame(update);
renderer.render(scene, camera);}
最后步骤 (Final Steps)
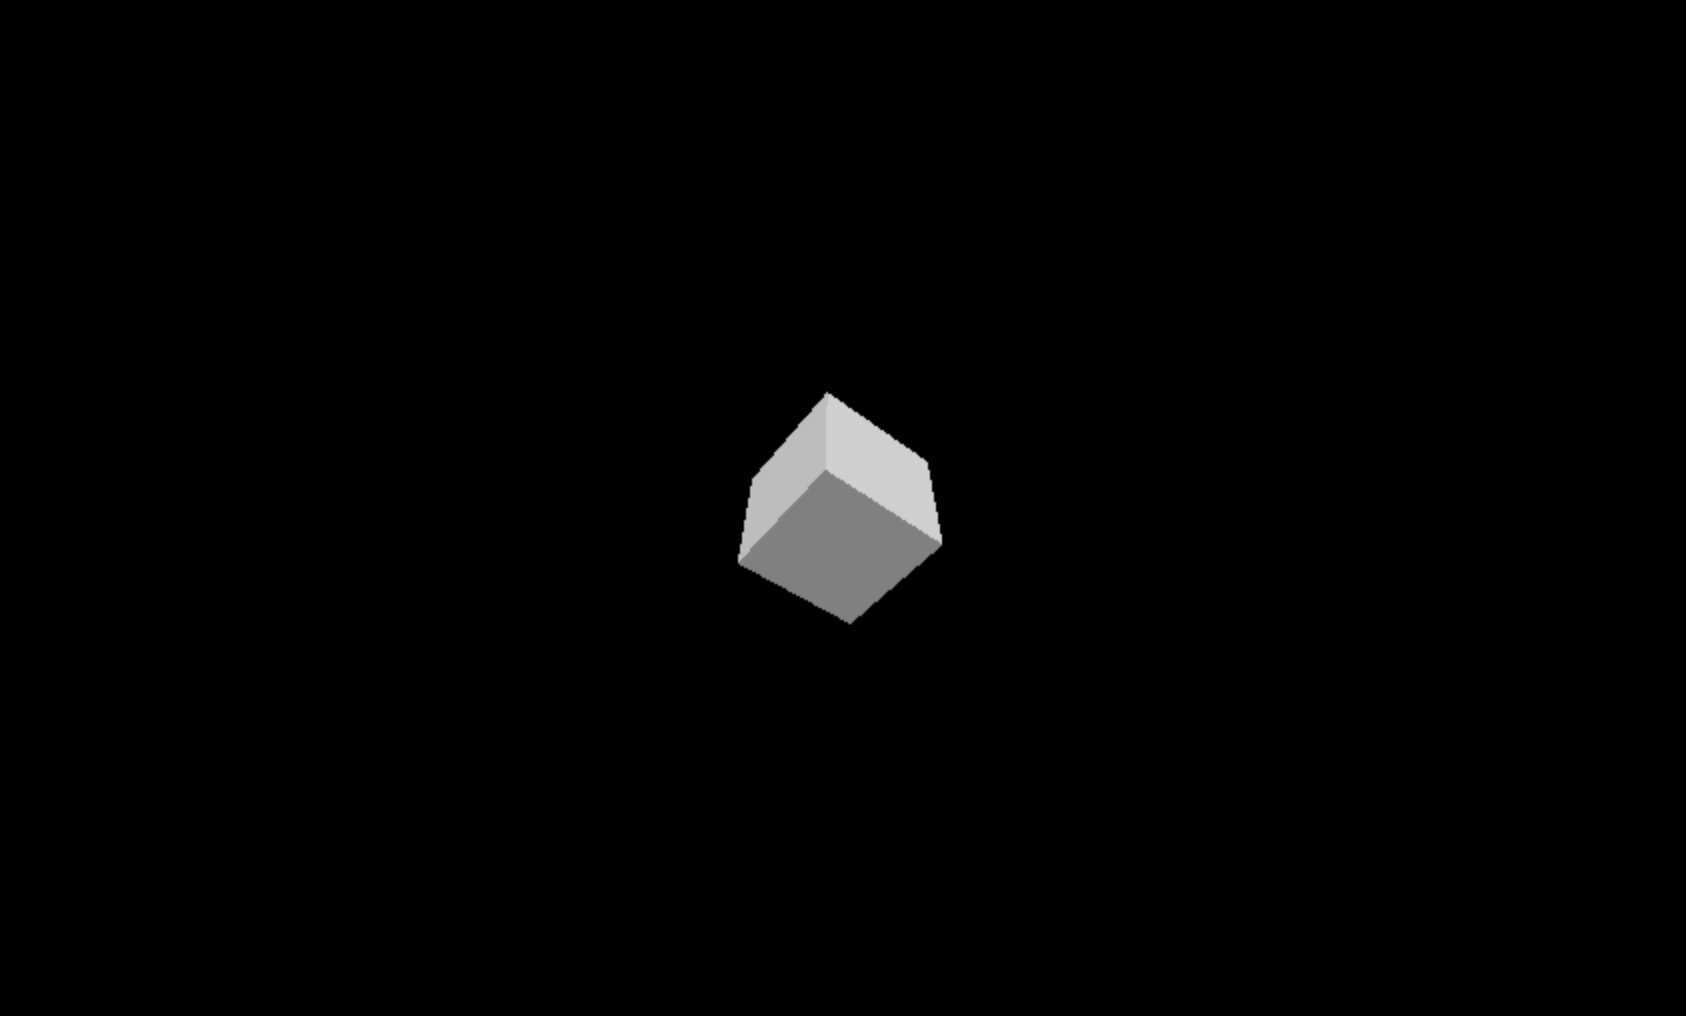
Both the resize and update functions will be called within the init function. Lastly, call the init function, if the screen turns black, that means you’ve just rendered your first Three.js scene!
调整大小和更新功能都将在init函数中调用。 最后,调用init函数,如果屏幕变黑,则意味着您刚刚渲染了第一个Three.js场景!
You're now set up to start adding geometry to your scene. Check out the Three.js documentation for more information.
现在,您已设置为开始向场景添加几何。 请查看Three.js文档以获取更多信息。
View the final steps below.
查看下面的最后步骤。
let scene, camera, renderer;init();function init(){scene = new THREE.Scene();
camera = new THREE.PerspectiveCamera(75, window.innerWidth / window.innerHeight, 0.01, 1000);
camera.position.set(0,0,10);renderer = new THREE.WebGLRenderer();
renderer.setSize(window.innerWidth, window.innerHeight);document.body.appendChild(renderer.domElement);window.addEventListener('resize', resize, false);update();}function resize(){camera.aspect = window.innerWidth / window.innerHeight;
camera.updateProjectionMatrix();
renderer.setSize( window.innerWidth, window.innerHeight);}function update(){requestAnimationFrame(update);
renderer.render(scene, camera);}
查看下面的代码 (See code in action below)
翻译自: https://levelup.gitconnected.com/visually-mapping-out-3d-with-three-js-eef3f6adfd2f
three.js 绘制墙


 2308
2308

 被折叠的 条评论
为什么被折叠?
被折叠的 条评论
为什么被折叠?
 到【灌水乐园】发言


