


 本文探讨如何在Next.js应用中调整主题组件的位置,同时介绍将Styled Components与服务器端渲染相结合的方法,详细翻译自一篇Medium文章。
next主题调整组件位置
为什么要在服务器端完全渲染样式化组件? (Why render styled-components on the server-side at all?)
Therefore we should take a closer look at styled-components and especially how it actually works.
因此,我们应该仔细研究样式化组件,尤其是其实际工作方式。
Thanks to the library we write our CSS code directly in JavaScript. This has many advantages but is problematic from a performance point of view.
感谢该库,我们直接用JavaScript编写了CSS代码。 这具有许多优点,但是从性能角度来看是有问题的。
It is the same problem as with classic client-side rendering. Since everything is only available in JavaScript, but the browser only understands CSS, which can be integrated and understood e.g. by inline-styling, the style-tag, or external CSS files, when executing our web app, the CSS is generated directly with the execution of JavaScript. Only after this process, the CSS code is readable for the browser, but not immediately, as when we simply write CSS in the head area.
这是与经典客户端渲染相同的问题。 由于所有内容仅在JavaScript中可用,而浏览器仅了解CSS,因此可以通过内联样式,样式标签或外部CSS文件对其进行集成和理解,因此在执行我们的Web应用程序时,CSS会直接通过执行JavaScript。 只有在完成此过程之后,浏览器才能读取CSS代码,但不能立即读取CSS代码,就像我们只是在顶部区域编写CSS一样。
So let’s just keep in mind that CSS-in-JS solutions always need one more step — this of course has a bad effect on performance, even if only minimal.
因此,请记住,CSS-in-JS解决方案始终需要再走一步-这当然会对性能产生不良影响,即使影响很小。
Here is an interesting benchmark about styled-components vs. native CSS.
这是有关样式组件与本机CSS的有趣基准 。
让我们首先创建一个新的Next.js项目 (Let’s create a new Next.js project first)
To use Next.js with styled-components we need a new, basic project.
要将Next.js与样式化组件一起使用,我们需要一个新的基本项目。
mkdir <project-name>
cd <project-name>npm init -y npm install react react-dom next styled-componentsmkdir pages
Make sure to update the package.json, so we can actually run and build our project:
确保更新package.json,以便我们可以实际运行和构建项目:
“scripts”: {
 “start”: “next start”,
 “dev”: “next dev”,
 “build”: “next build”,
 “export”: “next export”
 }
Let’s create the index.js as our starting page. It should be placed right inside the /pages directory, which serves as the default directory for routes in Next.js.
让我们创建index.js作为我们的起始页面。 它应该放在/ pages目录中,该目录是Next.js中路由的默认目录。
export default () => (
  <React.Fragment>
    <h1>Welcome!</h1>
    <p>This is our next.js app</p>
  </React.Fragment>
)
If you now start the development mode, with “npm run dev”, the app should be working fine.
如果现在使用“ npm run dev ”启动开发模式,则该应用程序应该可以正常运行。
让我们通过SSR支持实现样式化组件 (Let’s implement Styled Components with SSR support)
Let’s get to the interesting part since our basic Next.js app is already running.
让我们进入有趣的部分,因为我们的基本Next.js应用程序已经在运行。
- We need to implement Babel to be able to render even styled-components on the server: npm install -D babel-plugin-styled-components 我们需要实现Babel才能在服务器上呈现甚至样式化的组件:npm install -D babel-plugin-styled-components
- Create and fill out the .babelrc. In this file, we set SSR to true, meaning, our styled-components styles will be rendered on the server. 创建并填写.babelrc。 在此文件中,我们将SSR设置为true,这意味着我们的样式化组件样式将在服务器上呈现。
{
  “presets”: [“next/babel”],
  “plugins”: [[“styled-components”, { “ssr”: true }]]
}
Now we can start to use styled-components in our Next.js:
现在我们可以开始在Next.js中使用样式化组件了:
import styled from “styled-components”const Headline = styled.h1`
color: red;
font-family: Arial, Helvetica, sans-serif;
`export default () => (
<React.Fragment>
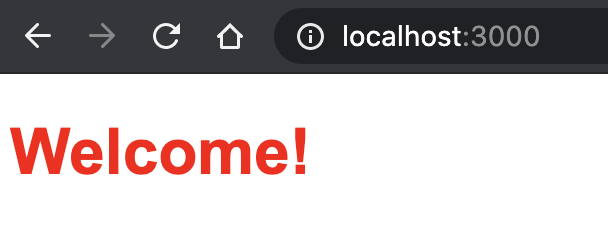
<Headline>Welcome!</Headline>
</React.Fragment>
)And again, running the development mode, and also creating the production version with “npm run build” & serving it with “npm start” should let to a working app — this time, the output is styled with styled-components.
再一次,运行开发模式,并使用“ npm run build”创建生产版本并通过“ npm start”为其提供服务,这应该可以正常工作的应用程序-这次,使用样式化组件对输出进行样式设置。
But there is only one problem: Server-side rendering for styled-components is not yet active. You can see this by the fact that the CSS styles are not served in the response of the server, in the HTML document.
但是只有一个问题:样式组件的服务器端渲染尚未激活。 您可以通过HTML文档中的服务器响应中未提供CSS样式的事实来看到这一点。
Run “npm run build && npm run start” to create and serve the build version of our app.
运行“ npm run build && npm run start”来创建并提供我们应用程序的构建版本。

If you now enter the page and look at the page source code, you will see that the styles for our h1 are applied, but that the CSS code for it is not directly available in the document. Server-side-rendering is still disabled.
如果现在进入页面并查看页面源代码,您将看到我们的h1的样式已应用,但是它CSS代码在文档中不直接可用。 服务器端渲染仍处于禁用状态。
To solve this we first have to include the _document.js This is the default file we have to create and fill in Next.js to create a custom document to influence the <html> and <head> section of our web app.
为了解决这个问题,我们首先必须包含_document.js。这是我们必须创建的默认文件,并填写Next.js来创建自定义文档以影响Web应用程序的<html>和<head>部分。
This file is located under /pages/_document.js by default and only works there. We still have to create it.
默认情况下,此文件位于/pages/_document.js下,并且仅在此处工作。 我们仍然必须创建它。
Fortunately, at GitHub, we find an official example of Next.js + styled-components where the _document.js is already finished.
幸运的是,在GitHub上 ,我们找到了一个官方的Next.js +样式化组件示例,其中_document.js已经完成。
You can ignore the _app.js, which is also in the code example on GitHub. To simply include styled-components, it does not matter. Just make sure your _document.js looks like this:
您可以忽略_app.js ,该代码也在GitHub上的代码示例中。 仅包含样式化组件就没有关系。 只要确保您的_document.js看起来像这样:
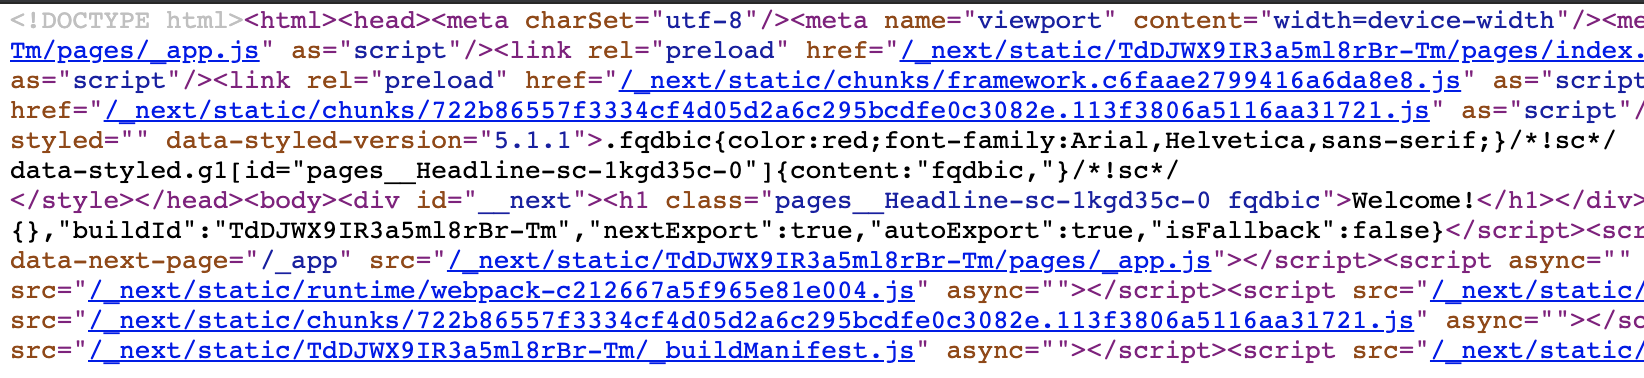
If we now run the project this way, we see that styled-components are actually rendered on the server-side:
如果现在以这种方式运行项目,我们将看到样式化组件实际上是在服务器端呈现的:
That’s it.
而已。
普通英语JavaScript (JavaScript In Plain English)
Enjoyed this article? If so, get more similar content by subscribing to Decoded, our YouTube channel!
喜欢这篇文章吗? 如果是这样,请订阅我们的YouTube频道解码,以获得更多类似的内容!
next主题调整组件位置


 450
450

 被折叠的 条评论
为什么被折叠?
被折叠的 条评论
为什么被折叠?
 到【灌水乐园】发言


