


react 封装api组件
In this article, we will create a small app in React using a Hackernews API
在本文中,我们将使用Hackernews API在React中创建一个小型应用程序
This article assumes that you have a basic understanding of React and bootstrap.
本文假定您对React和Bootstrap具有基本的了解。
Context API简介 (Introduction to Context API)
Context API is an API offered by React to help in state management. It offers us with similar features as redux.
上下文API是React提供的用于状态管理的API。 它为我们提供了与redux类似的功能。
If we were to pass the value of a state from parent component to other children component, we would have to pass the data through props. But, this process can get difficult as the number of components increases. In order to make the task of sharing data among the components easy, we had to use some third-party state management libraries. But, React now offers us with the Context API which helps us with the state management.
如果要将状态值从父组件传递到其他子组件,则必须通过prop传递数据。 但是,随着组件数量的增加,此过程可能会变得困难。 为了简化在组件之间共享数据的任务,我们不得不使用一些第三方状态管理库。 但是,React现在为我们提供了Context API,它可以帮助我们进行状态管理。
Let’s now use the API to create a small app. Our app is going to be very simple. We will use Context API to create the app. Our project will look like this:
现在让我们使用API创建一个小型应用。 我们的应用程序将非常简单。 我们将使用Context API创建应用。 我们的项目将如下所示:

We will display the latest hacker news story and let the user click one of the news. When the user clicks the news, we will display more information about it on the right. We won’t focus a lot on styling in our app here, okay?
我们将显示最新的黑客新闻故事,并让用户单击其中一项新闻。 当用户单击新闻时,我们将在右侧显示有关该新闻的更多信息。 我们不会在这里集中精力设计应用程序中的样式,好吗?
Now, let’s get started.
现在,让我们开始吧。
Let’s create a react app. For that, we need to enter the following command in our terminal inside of our main working directory:
让我们创建一个React应用。 为此,我们需要在主工作目录内的终端中输入以下命令:
npx create-react-app .Now that we have created our react app, let’s install the packages we need.
既然我们已经创建了react应用,请安装所需的软件包。
npm i bootstrap axiosWe will use bootstrap for styling purposes and axios for requesting data.
我们将使用引导程序来进行样式设置,并使用axios来请求数据。
Now that we have installed the package, let’s move on to implement the project.
现在我们已经安装了该软件包,让我们继续实施该项目。
Let’s open up the file App.js inside of the src directory. Then, write the following lines of code:
让我们打开src目录中的App.js文件。 然后,编写以下代码行:
You can see in the above code we have made some imports. We have imported two components: NewsList and Description . We will work on these components shortly. You can see at line 6, we have imported NewsState . Then we used it as a wrapper at line 12. This NewsState is the global state which can be used by any components which are children to it. This means NewsList and Description , which are the components at line 14&15 have access to the NewsState. We’ll work on NewsState soon.
您可以在上面的代码中看到我们已经进行了一些导入。 我们导入了两个组件: NewsList和Description 。 我们将很快处理这些组件。 您可以在第6行看到,我们已经导入了NewsState 。 然后,将其用作第12行的包装器。此NewsState是全局状态,可以由属于它的子级的任何组件使用。 这意味着NewsList和Description是第14&15行的组件,可以访问NewsState 。 我们将尽快处理NewsState 。
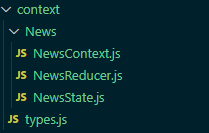
We’ll now work on the state. For that, let’s create a directory called context inside of the src directory. Create a file named types.js inside of the context directory. Then, create a folder named News inside of the context directory. Then, create three files named NewsContext.js, NewsState.js, NewsReducer.js, inside of the src/context/News directory. This should make the folder structure of the context directory something like this:
现在,我们将在该州开展工作。 为此,让我们在src目录中创建一个名为context的目录。 在上下文目录中创建一个名为types.js的文件。 然后,在上下文目录中创建一个名为News的文件夹。 然后,在src / context / News目录中创建三个名为NewsContext.js , NewsState.js , NewsReducer.js的文件。 这应该使上下文目录的文件夹结构如下所示:
Now that we have created those files, let’s open up the file NewsContext.js and write the following lines of code:
现在,我们已经创建了这些文件,让我们打开文件NewsContext.js并编写以下代码行:
import { createContext } from "react";const NewsContext = createContext();
export default NewsContext;
Here, we have imported createContext . The function of createContext is to create context as the name suggests.
在这里,我们导入了createContext 。 顾名思义, createContext的功能是创建上下文。
With the help of createContext, we created the context and stored it in the constant NewsContext. We then exported the NewsContext.
在createContext的帮助下,我们创建了上下文并将其存储在常量NewsContext 。 然后,我们导出NewsContext 。
Now, let’s open up NewsState.js and write the following lines of code:
现在,让我们打开NewsState.js并编写以下代码行:
In the above code, we can see that the first few lines are just imports. At line 1, we have imported React and useReducer. Then at line 4 and 5, we’ve imported NewsContext and NewsReducer respectively. We will work on NewsReducer shortly. Similarly, we’ve imported GET_NEWS and GET_DESCRIPTION at line 6 from types.js. We‘ll discuss about these types in a while.
在上面的代码中,我们可以看到前几行只是导入。 在第1行,我们导入了React和useReducer 。 然后在第4行和第5行,我们分别导入了NewsContext和NewsReducer 。 我们将在短期内使用NewsReducer 。 同样,我们引进了GET_NEWS和GET_DESCRIPTION从types.js线6。 我们将在一段时间内讨论这些类型。
At line 8, we have created NewsState . We’ve created an initialState at line 9. After that, at line 14, we used the useReducer. The useReducer takes in two arguments. The first argument should be reducer which in our case is NewsReducer. The second argument is the initialState. This useReducer provides us with state and dispatch . The state provides us with the values of the state, as the name suggests. The dispatch function helps us to dispatch the data we receive to our reducer function.
在第8行,我们创建了NewsState 。 我们在第9行创建了initialState 。然后,在第14行,我们使用了useReducer 。 useReducer接受两个参数。 第一个参数应该是reducer,在我们的例子中是NewsReducer 。 第二个参数是initialState 。 这个useReducer为我们提供state和dispatch 。 顾名思义, state为我们提供了state的值。 dispatch功能帮助我们将接收到的数据调度到化简函数。
After that at line 16, we have a function called getNews. This function helps us to get the news from the Rest API’s endpoint at line 18. If there occurs any error fetching the data, we log it in the console at line 23. At line 21, we have used the dispatch function. The dispatch function helps to dispatch our data to the reducer. The reducer will eventually change our state. We will work on reducers soon.
之后,在第16行,我们有一个名为getNews的函数。 此功能帮助我们从第18行的Rest API端点获取新闻。如果在获取数据时发生任何错误,我们将其记录在控制台的第23行。在第21行,我们使用了dispatch功能。 dispatch功能有助于将我们的数据调度到reducer。 减速器最终将改变我们的状态。 我们将尽快开发减速器。
Let’s take a look at the dispatch function closely. The dispatch function at line 21, takes in an object containing payload and type as the options. The payload should be the data that we need to store in the state. The type takes in the name of the type which in this case is GET_NEWS.
让我们仔细看一下dispatch功能。 第21行的dispatch功能接收一个包含payload和type的对象作为选项。 payload应该是我们需要在状态中存储的数据。 该type采用该type的名称,在这种情况下为GET_NEWS 。
At line 27, we can see the function called getDescription. This function helps us to fetch descriptions of particular news. We have written code to make a request at line 29 using the id. Then at line 32, we dispatched our payload and type with their values as data and GET_DESCRIPTION respectively. If there occurs any error, we log it in the console at line 34.
在第27行,我们可以看到名为getDescription的函数。 此功能可帮助我们获取特定新闻的描述。 我们已经编写了代码,使用id在第29行发出请求。 然后在第32行,我们分派了payload和type ,其值分别为data和GET_DESCRIPTION 。 如果发生任何错误,我们将其记录在控制台的第34行。
Now, take a look at line 39 to 48. There, we have used NewsContext.Provider. This NewsContext.Provider acts as a wrapper for the context we have created. Remember that we had created NewsContext in NewsContext.js file. You might also remember that we had used this wrapper as NewsState in App.js file.
现在,看一下39至48行。在这里,我们使用了NewsContext.Provider 。 此NewsContext.Provider充当我们创建的上下文的包装。 请记住,我们已经创建了NewsContext在NewsContext.js文件。 您可能还记得我们在App.js文件中将此包装用作NewsState 。
Now, let’s talk about NewsContext.Provider. The NewsContext.Provider takes in the prop value . The value should be an object containing the key value pair of our states and functions. The value is accessible to every descendant of this Provider. Then at line 47, you can see that we have written code to render children components with the help of {props.children}.
现在,让我们谈谈NewsContext.Provider 。 NewsContext.Provider接受prop value 。 该value应该是一个包含我们状态和函数的键值对的对象。 该提供者的每个后代都可以访问该value 。 然后在第47行,您可以看到我们已经编写了代码,借助{props.children}渲染子组件。
Now that we have understood the code written in NewsState.js, let’s now open the file NewsReducer.js and write the following lines of code:
现在我们已经了解了用NewsState.js编写的代码,现在让我们打开文件NewsReducer.js并编写以下代码行:
You can see at line 1, we have imported GET_NEWS and GET_DESCRIPTION types. Then we exported our reducer function. We can see that the reducer function lies from line 3 to 20. The reducer function takes in state and payload as the argument. Then at line 4, we created two constants payload and type and stored the values of action.payload and action.type. Remember that action is an object that we received from the dispatch function in NewsState.js.
您可以在第1行看到,我们已经导入了GET_NEWS和GET_DESCRIPTION类型。 然后,我们导出了reducer函数。 我们可以看到reducer函数位于第3行到第20行之间。reduce函数以state和payload作为参数。 然后在第4行,我们创建了两个常量payload和type并存储了action.payload和action.type的值。 请记住, action是我们从NewsState.js中的dispatch功能接收到的对象。
From line 6 to 19, we have used the switch case . We are checking the type of the action. If the type is GET_NEWS , we de-structure our initial state and then we change the value of news in our state to payload . If the type is GET_DESCRIPTION, we de-structure our state and then change the value of activeNews in our state to payload.
从第6行到第19行,我们使用了switch case 。 我们正在检查操作的type 。 如果类型为GET_NEWS , GET_NEWS初始状态,然后将状态中的news值更改为payload 。 如果类型为GET_DESCRIPTION , activeNews对状态进行activeNews ,然后将状态中的activeNews的值更改为payload 。
Let’s now open up the file types.js, and write the following lines of code:
现在,打开文件types.js ,并编写以下代码行:
export const GET_NEWS = "GET_NEWS";export const GET_DESCRIPTION = "GET_DESCRIPTION";The major reason why we have created the types.js is because we need the name of the types for different actions, as you’ve seen. Those type names are used in our reducer and state. We could have hardcoded the type in both of the files, but we might encounter some problems with this. If there occurs any typo in the type name, we might encounter some error which might be hard to debug.
正如您所看到的,我们创建types.js的主要原因是,我们需要为不同的操作使用类型名称。 这些类型名称在我们的reducer和state中使用。 我们本可以在两个文件中对类型进行硬编码,但是与此有关的我们可能会遇到一些问题。 如果类型名称中出现任何错字,我们可能会遇到一些错误,可能很难调试。
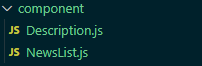
Now, let’s create a component directory inside of the main project directory. Then, let’s create two files Description.js and NewsList.js inside of the component directory. This should make our component directory look like this:
现在,让我们在主项目目录中创建一个组件目录。 然后,让我们在组件目录中创建两个文件Description.js和NewsList.js 。 这应该使我们的组件目录如下所示:
Let’s now open up the file NewsList.js and write the following lines of code:
现在,打开文件NewsList.js并编写以下代码行:
We can see that, first few lines are imports. We have imported useContext and useEffect at line 1. We have imported our newsContext at line 3.
我们可以看到,前几行是导入。 我们在第1行导入了useContext和useEffect 。在第3行导入了newsContext 。
At line 6, we used useContext. The useContext takes in our context that we had created. In this case our context is newsContext . We then stored the context as NewsContext.
在第6行,我们使用了useContext 。 useContext采用我们创建的上下文。 在这种情况下,我们的上下文是newsContext 。 然后,我们将上下文存储为NewsContext 。
Now, let’s take a look at line 8 to 10. There, we have used the useEffect. The way we have used useEffect acts as ComponentDidMount in class based components. When component gets mounted, we execute a code NewsContext.getNews(). Remember that we had added getNews function as our value in NewsContext.Provider in NewsState.js file. What this getNews does is, it fetches the news from the API and then add it to our state.
现在,让我们看一下8至10行。在这里,我们使用了useEffect 。 我们使用useEffect的方式在基于类的组件中充当ComponentDidMount 。 装入组件后,我们执行代码NewsContext.getNews() 。 请记住,我们在NewsState.js文件的NewsContext.Provider中添加了getNews函数作为我们的value 。 此getNews所做的是,它从API提取新闻,然后将其添加到我们的状态。
Now, let’s look at line 15. We have written code for conditional rendering. If the NewsContext.news exists, we map through the news array and render it to the DOM. Remember that news is the state value which we had defined in NewsContext.Provider inside of the NewsState.js file.
现在,让我们看一下第15行。我们已经编写了用于条件渲染的代码。 如果NewsContext.news存在,我们将遍历news数组并将其呈现到DOM。 请记住, news是我们在已定义的状态值NewsContext.Provider的NewsState.js文件里。
At line 20, we have used the onClick event listener. When it gets clicked, we ask the NewsContext to fetch the description of that particular news Id using NewsContext.getDescription(news.id). Remember that getDescription is the function which we had added in the value in NewsContext.Provider in NewsState.js file.
在第20行,我们使用了onClick事件侦听器。 单击它后,我们要求NewsContext使用NewsContext.getDescription(news.id)来获取特定新闻ID的描述。 请记住, getDescription是我们在NewsState.js文件的NewsContext.Provider中的value中添加的函数。
Now that we have worked on NewsList.js file, let’s open up the file Description.js and write the following lines of code:
现在,我们已经处理了NewsList.js文件,让我们打开文件Description.js并编写以下代码行:
Let’s take a look at what’s happening here. We have made some imports here. At line 1, we've imported useContext and React. At line 3, we have imported newsContext.
让我们看看这里发生了什么。 我们在这里做了一些进口。 在第1行,我们导入了useContext和React 。 在第3行,我们导入了newsContext 。
You can see at line 14, we have used conditional rendering. If activeNews exists, we have written code to render the values present in activeNews. At line 16, we have written code to display the title of the news by using activeNews.title. Then, at line 19 we have written code to display the writer’s name by using activeNews.user. Then, at line 20, we have written code to display how long ago the article had been published using activeNews.time_ago. Then at line 21, we have written code to display the number of comments using activeNews.comment.length. Similarly, at line 27 we have written code to display the URL for the article/news using activeNews.url. We have also used a tag to direct our user to that URL. Also, at line 32 we have written code to display points using activeNews.points.
您可以在第14行看到,我们使用了条件渲染。 如果activeNews存在,我们编写代码来渲染存在的价值activeNews 。 在第16行,我们编写了代码,以使用activeNews.title显示新闻的标题。 然后,在第19行,我们使用activeNews.user编写了显示作者姓名的activeNews.user 。 然后,在第20行,我们编写了代码,以显示使用activeNews.time_ago发布该文章的activeNews.time_ago 。 然后在第21行,我们编写了代码,以使用activeNews.comment.length显示注释的数量。 同样,在第27行,我们编写了代码,以使用activeNews.url显示文章/新闻的URL。 我们还使用a标记将用户定向到该URL。 同样,在第32行,我们编写了代码来使用activeNews.points显示点。
With this, we have completed our mini project, and learnt how to use Context API in functional components.
至此,我们已经完成了迷你项目,并学习了如何在功能组件中使用Context API。
I recommend you to check out React’s documentation to learn more about the context API.
我建议您查看React的文档以了解有关上下文API的更多信息。
普通英语JavaScript (JavaScript In Plain English)
Enjoyed this article? If so, get more similar content by subscribing to Decoded, our YouTube channel!
喜欢这篇文章吗? 如果是这样,请订阅我们的YouTube频道解码,以获得更多类似的内容!
react 封装api组件


 1591
1591

 被折叠的 条评论
为什么被折叠?
被折叠的 条评论
为什么被折叠?
 到【灌水乐园】发言


