


For one reason or the other, be it convenience (to continue using a workstation), financial or pure choice; you have decided to develop IOS apps on a non-mac machine or on a virtual machine on your Mac(for whatever reason).
出于一个或另一个原因,是方便(继续使用工作站),财务还是纯粹的选择; 您已决定在非Mac机器上或Mac上的虚拟机上开发IOS应用程序(无论出于何种原因)。
DISCLAIMER : It is illegal to develop or run Apple software on non-Apple hardware, this tutorial is strictly for educational purposes.
免责声明:在非Apple硬件上开发或运行Apple软件是非法的,本教程仅用于教育目的。
VirtualBox and VMWare have come to the rescue for the most part, but you may still have issues running your app on a physical iPhone, so I created this tutorial.
VirtualBox和VMWare在大多数情况下都可以解决,但是在物理iPhone上运行应用程序时仍然可能遇到问题,因此我创建了本教程。
Hot Reloading/Fast Refresh may not work on an iPhone because your guest virtual Mac(Hackintosh) may not be on the same network as your iPhone. Most Hackintoshes aren’t compatible with the Network Drivers on your host system, therefore there is no Wi-Fi on the guest Mac.
热装/快速刷新可能无法在iPhone上使用,因为来宾虚拟Mac(Hackintosh)可能与iPhone不在同一网络上。 大多数Hackintoshes与主机系统上的网络驱动程序不兼容,因此来宾Mac上没有Wi-Fi。
The internet connectivity on the guest mac would be through a virtual ethernet network(Brigded) from the host system(NAT), which your iPhone cannot connect to.
来宾mac上的Internet连接将通过来自主机系统(NAT)的虚拟以太网网络(已绑定),您的iPhone无法连接到该网络。
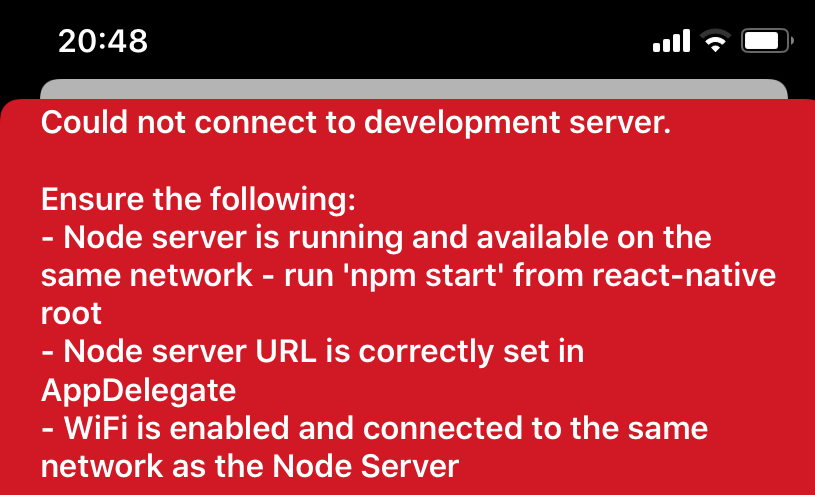
Could not connect to development server.
无法连接到开发服务器。
Ensure the following:
确保以下各项:
Node server is running and available on the same network — run ‘npm start’ from react-native root
节点服务器正在运行并且在同一网络上可用—从react-native根目录运行“ npm start”
- Node server URL is correctly set in AppDelegate
-在AppDelegate中正确设置了节点服务器URL
-Wifi is enabled and connected to the same network as the Node Server
-Wifi已启用并连接到与节点服务器相同的网络
THE SOLUTION
解决方案
For issues running the app on simulator, skip to step 8.
对于在模拟器上运行应用程序的问题,请跳至步骤8。
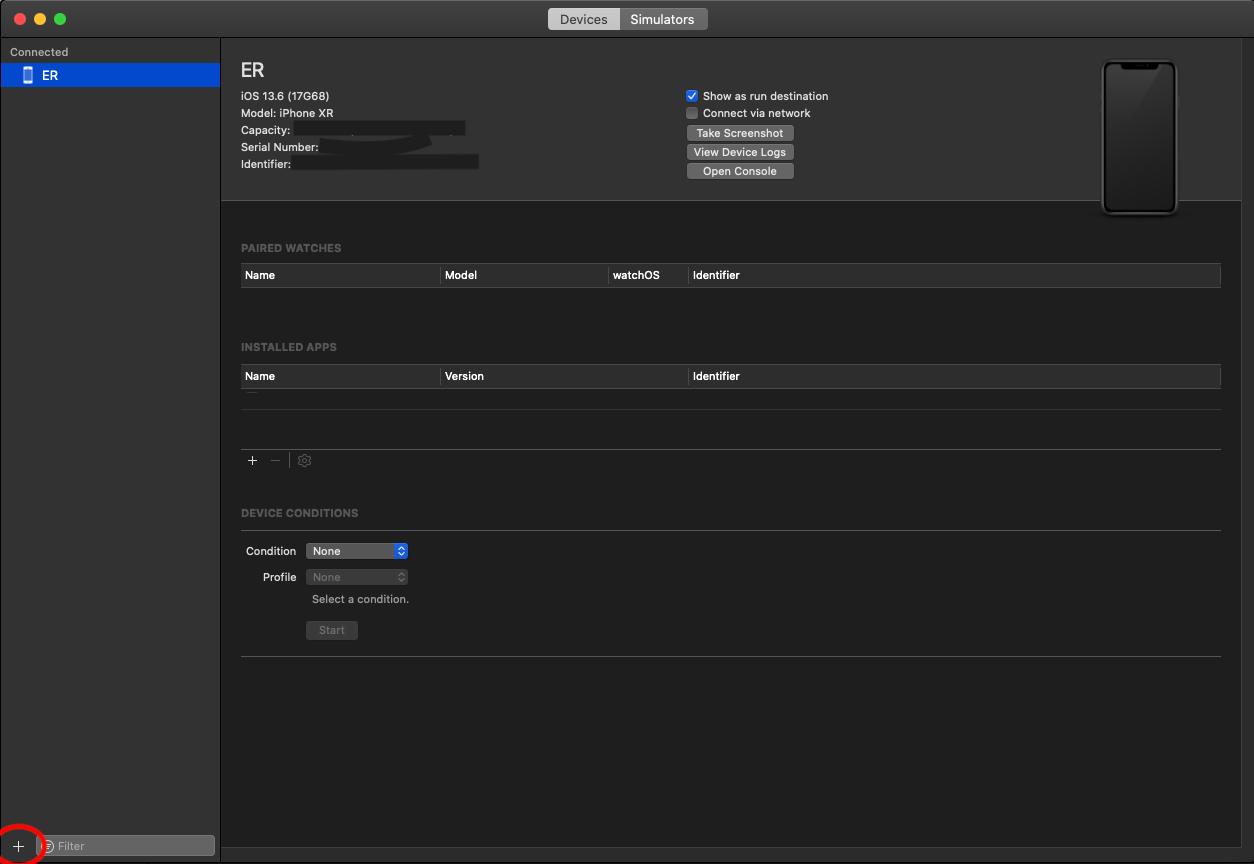
I assume your device is already recognized by your guest Mac and Xcode, if not, follow this tutorial.
我认为您的设备已经被来宾Mac和Xcode识别,如果没有,请按照本教程进行操作 。
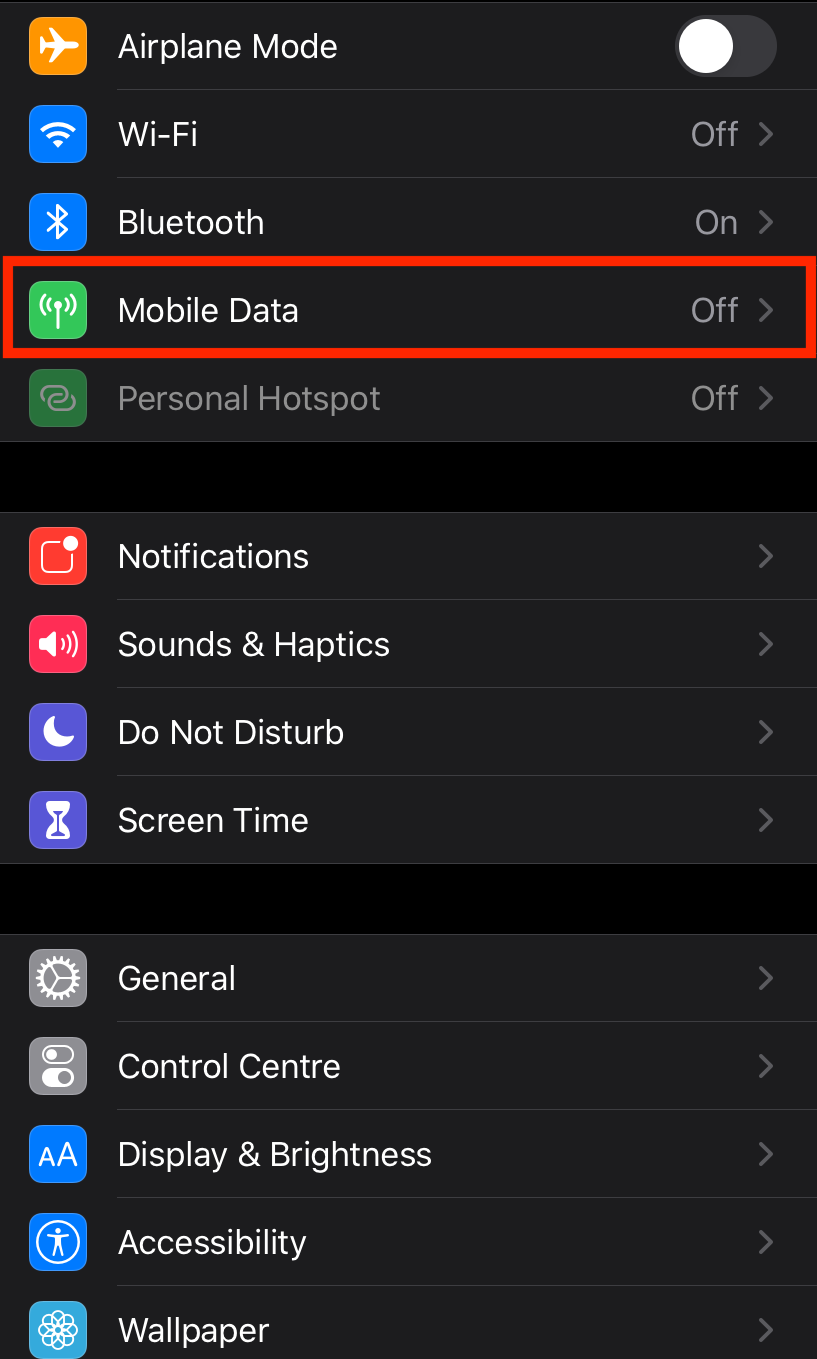
STEP 1
第1步
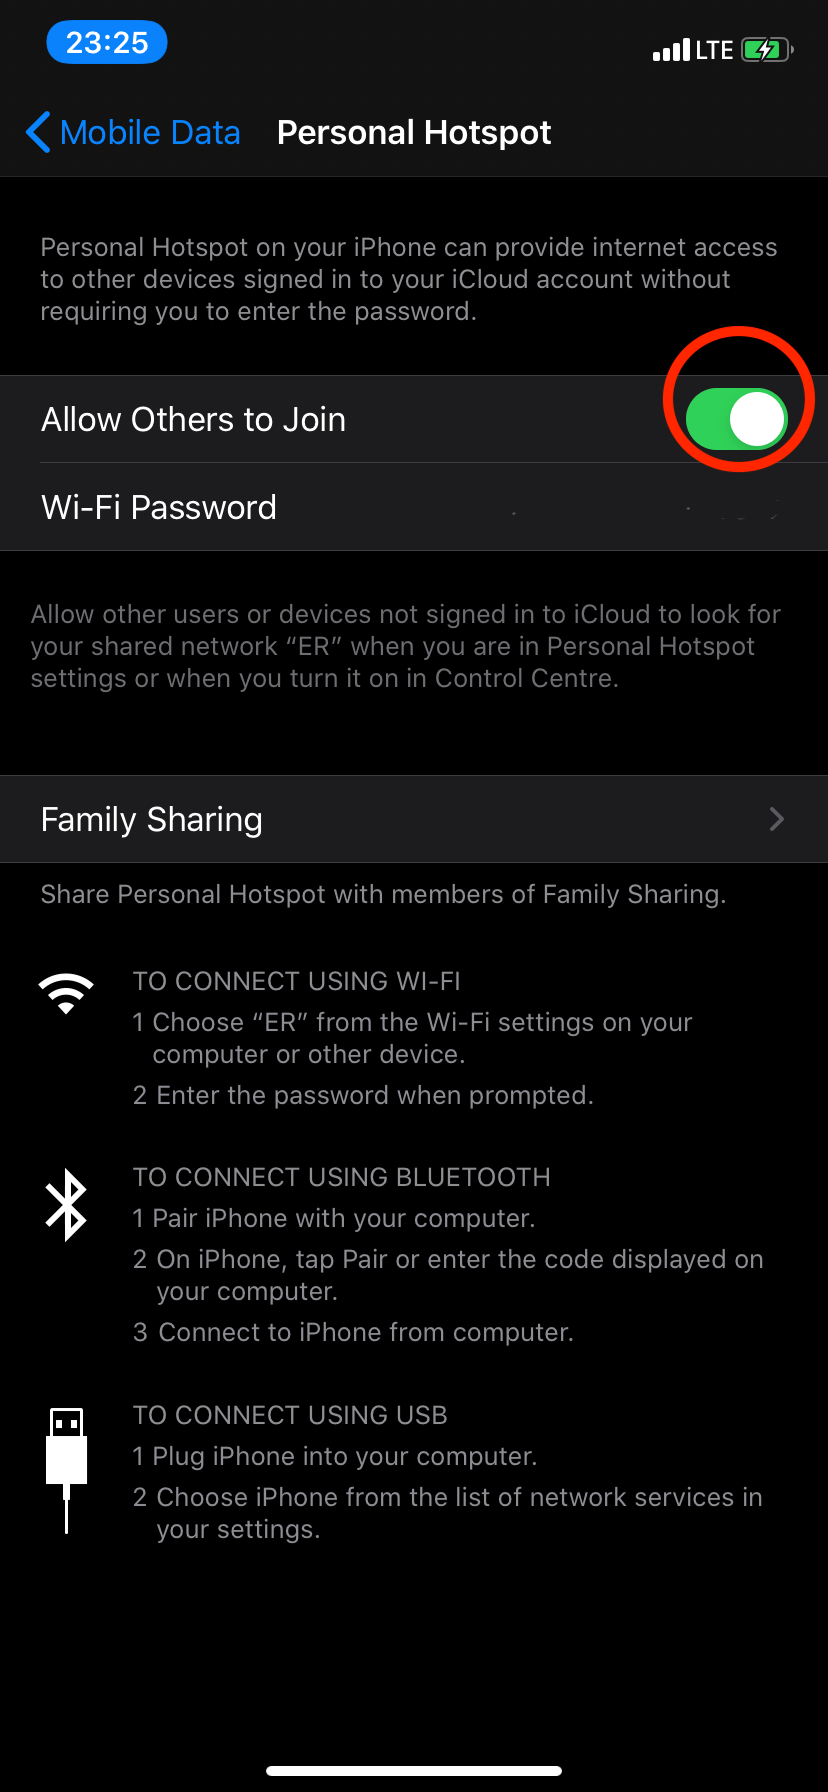
On your iPhone, while it is plugged in, go to settings, then Mobile Data.
在插入iPhone的iPhone上,进入设置,然后进入移动数据。
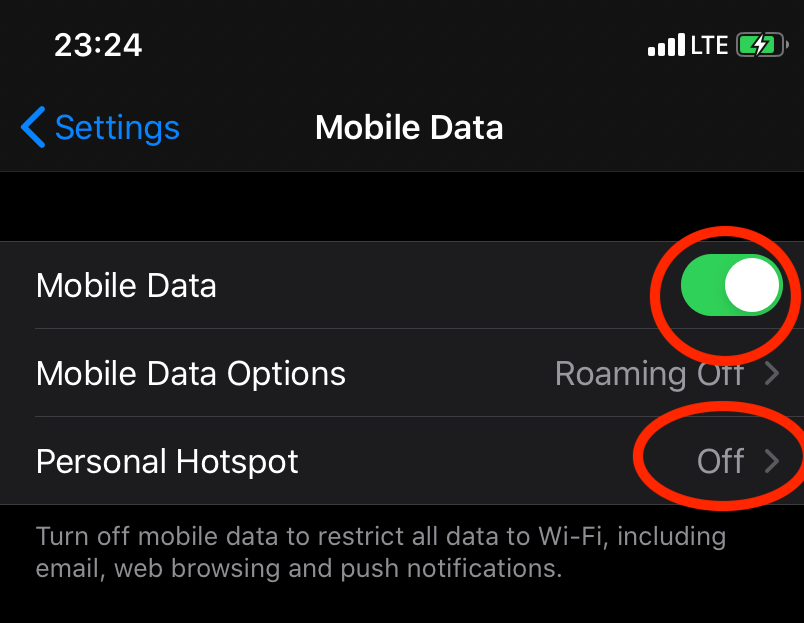
STEP 2
第2步
Switch on Mobile Data and Click on Personal Hotspot.
打开移动数据,然后单击个人热点。
STEP 3
步骤3
Click on Allow Others to join, then Personal Hotspot comes on.
单击允许其他人加入,然后出现个人热点。
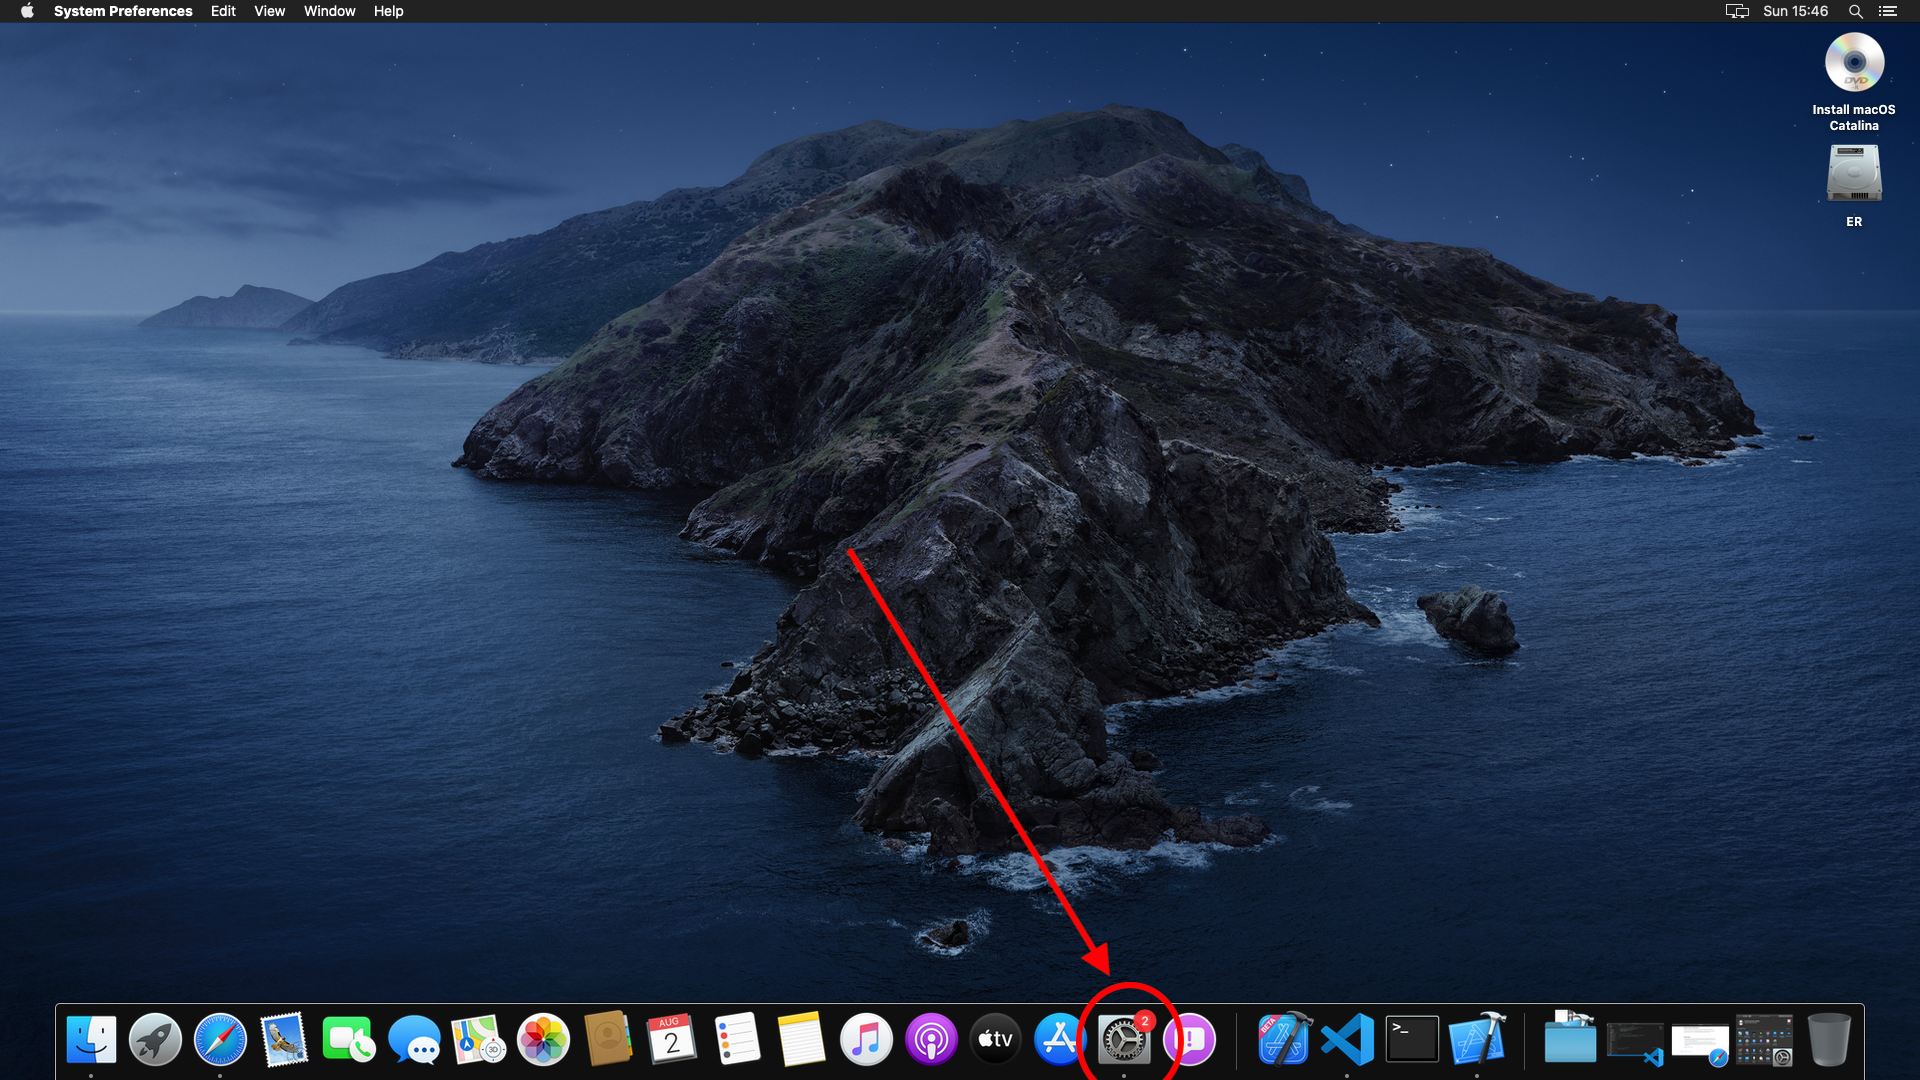
STEP 4
第4步
Open System Preferences and click on Network.
打开系统偏好设置,然后单击网络。
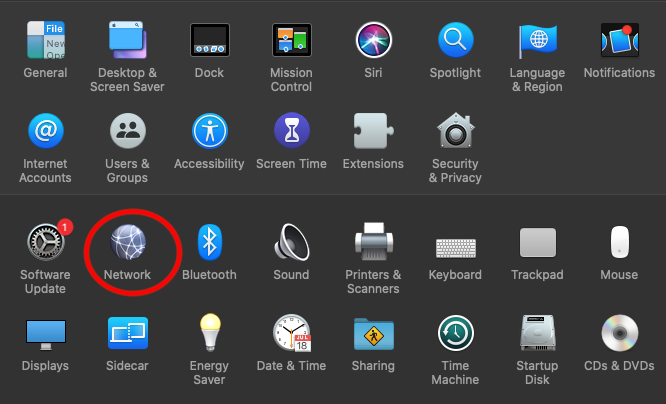
STEP 5
步骤5
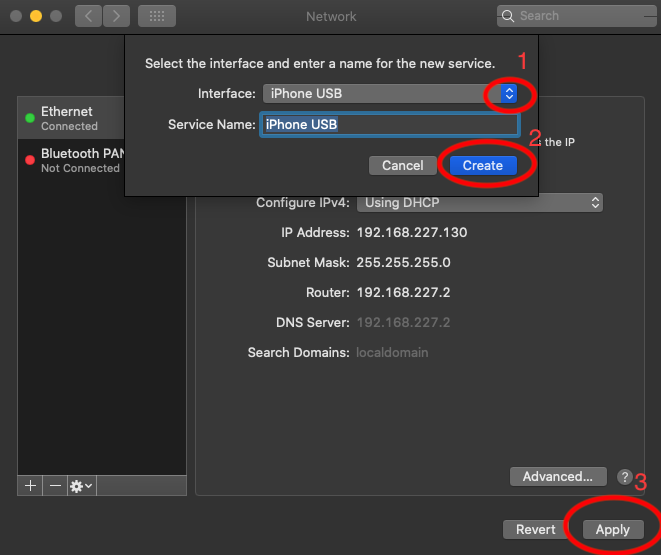
Click on the “+” sign to add a new network.
单击“ +”号以添加新的网络。
STEP 6
步骤6
A dialog box will appear, where you click on the dropdown then select “iPhone USB”. Next, click on “Create” then click on “Apply”.
将出现一个对话框,单击下拉菜单,然后选择“ iPhone USB ”。 接下来,单击“ 创建”,然后单击“ 应用”。
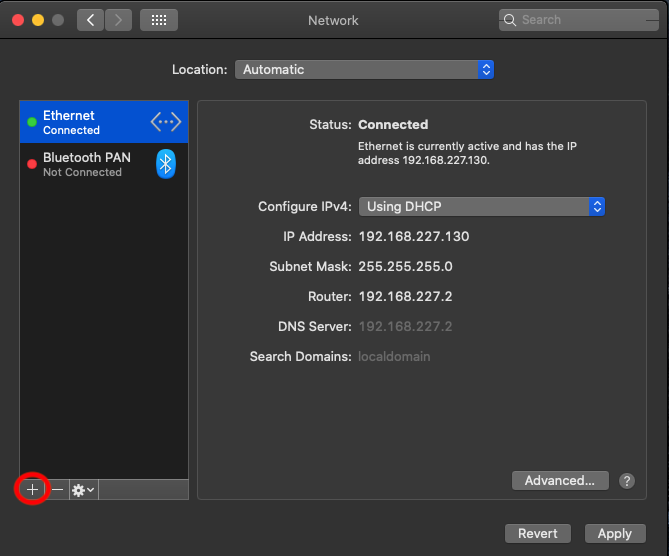
STEP 7
步骤7
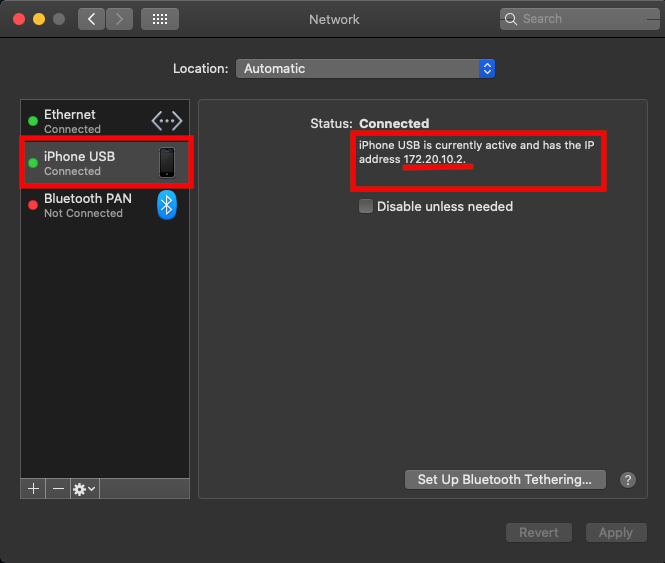
Once the device is connected successfully, it will look like what’s in the rectangle to the left. If successfully connected, take note of the IP address, we’ll use this later on. In my case it’s:
设备成功连接后,将看起来像左侧矩形中的内容。 如果连接成功,请记下IP地址,稍后我们将使用它。 就我而言:
172.20.10.2
172.20.10.2
STEP 8
步骤8
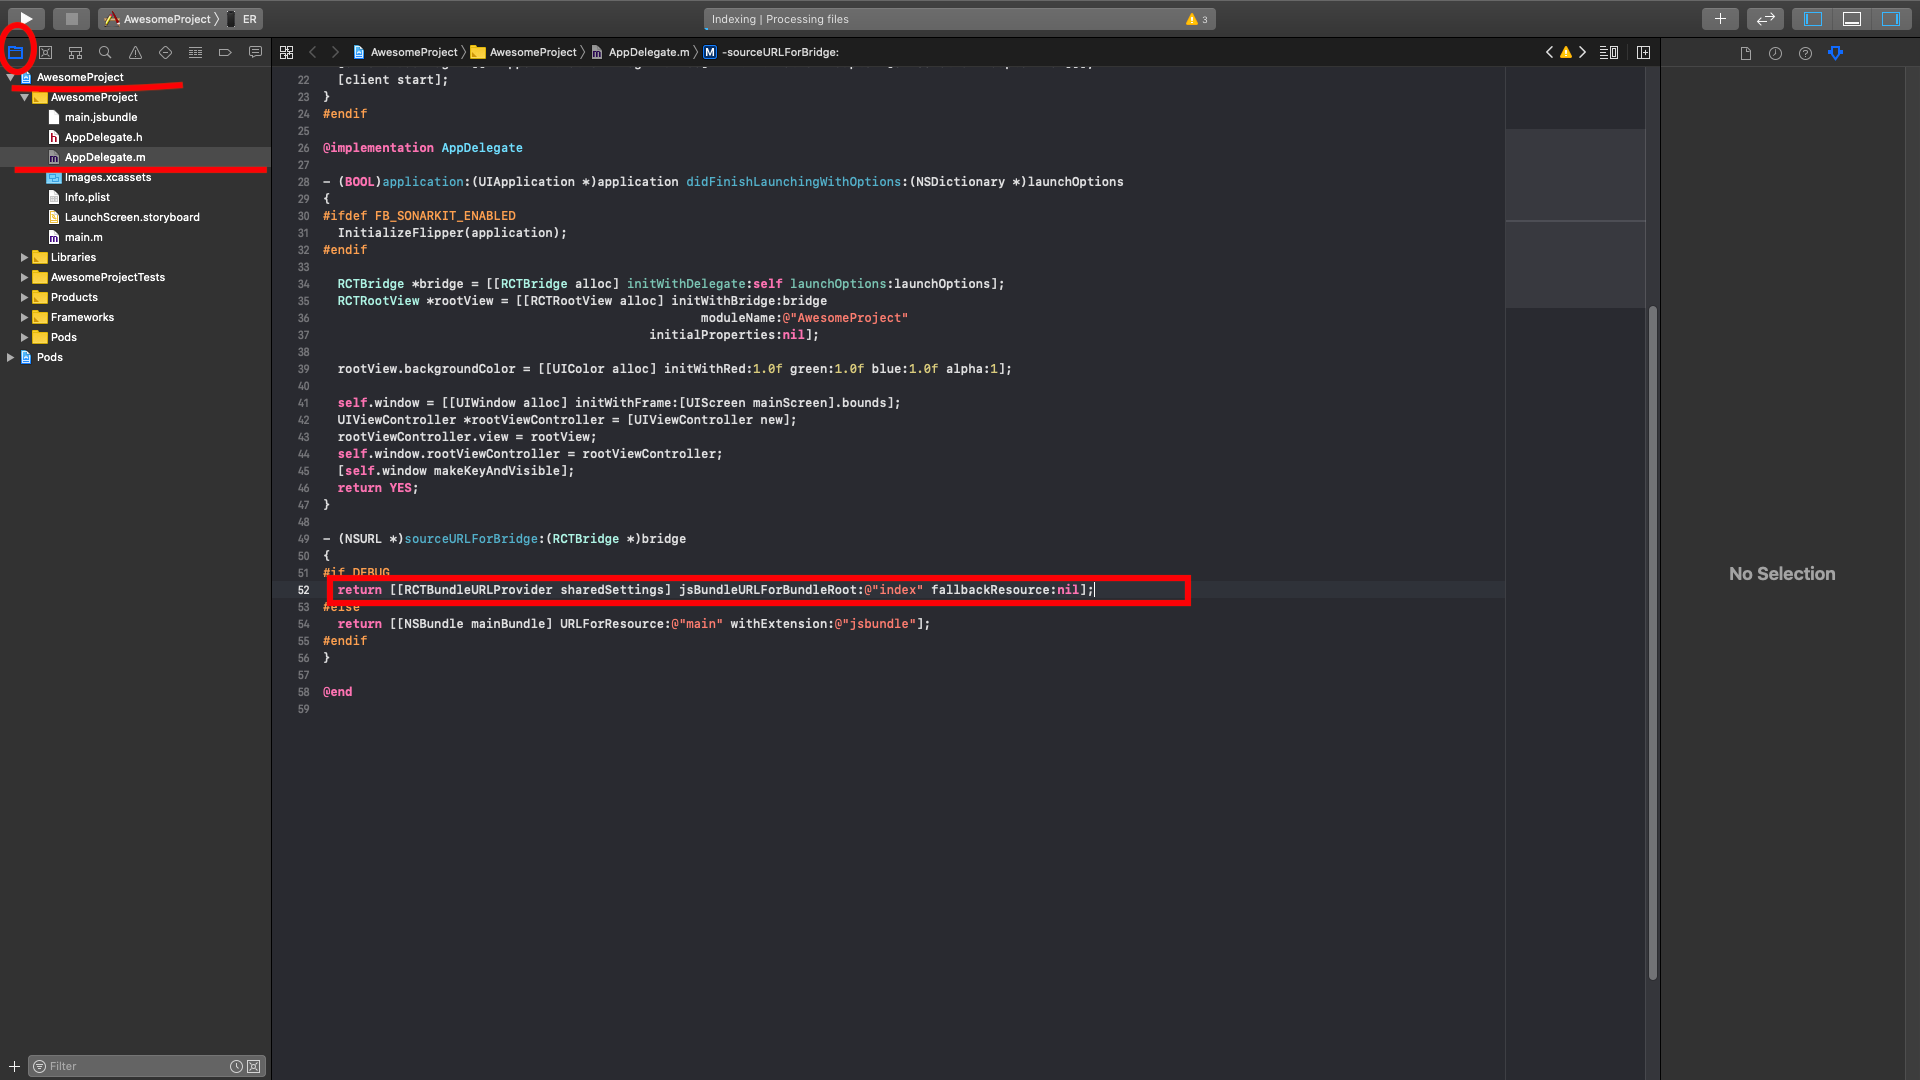
Open up Xcode again and edit your AppDelegate.m file. It would be found in the explorer pane at the left hand side. Within the folder named after the project.
再次打开Xcode并编辑您的AppDelegate.m文件。 可以在左侧的资源管理器窗格中找到。 在以项目命名的文件夹内。
Scroll to the bottom and replace
滚动到底部并替换
return [[RCTBundleURLProvider sharedSettings] jsBundleURLForBundleRoot:@”index” fallbackResource:nil]
返回[[RCTBundleURLProvider sharedSettings] jsBundleURLForBundleRoot:@“ index” fallbackResource:nil]
with
与
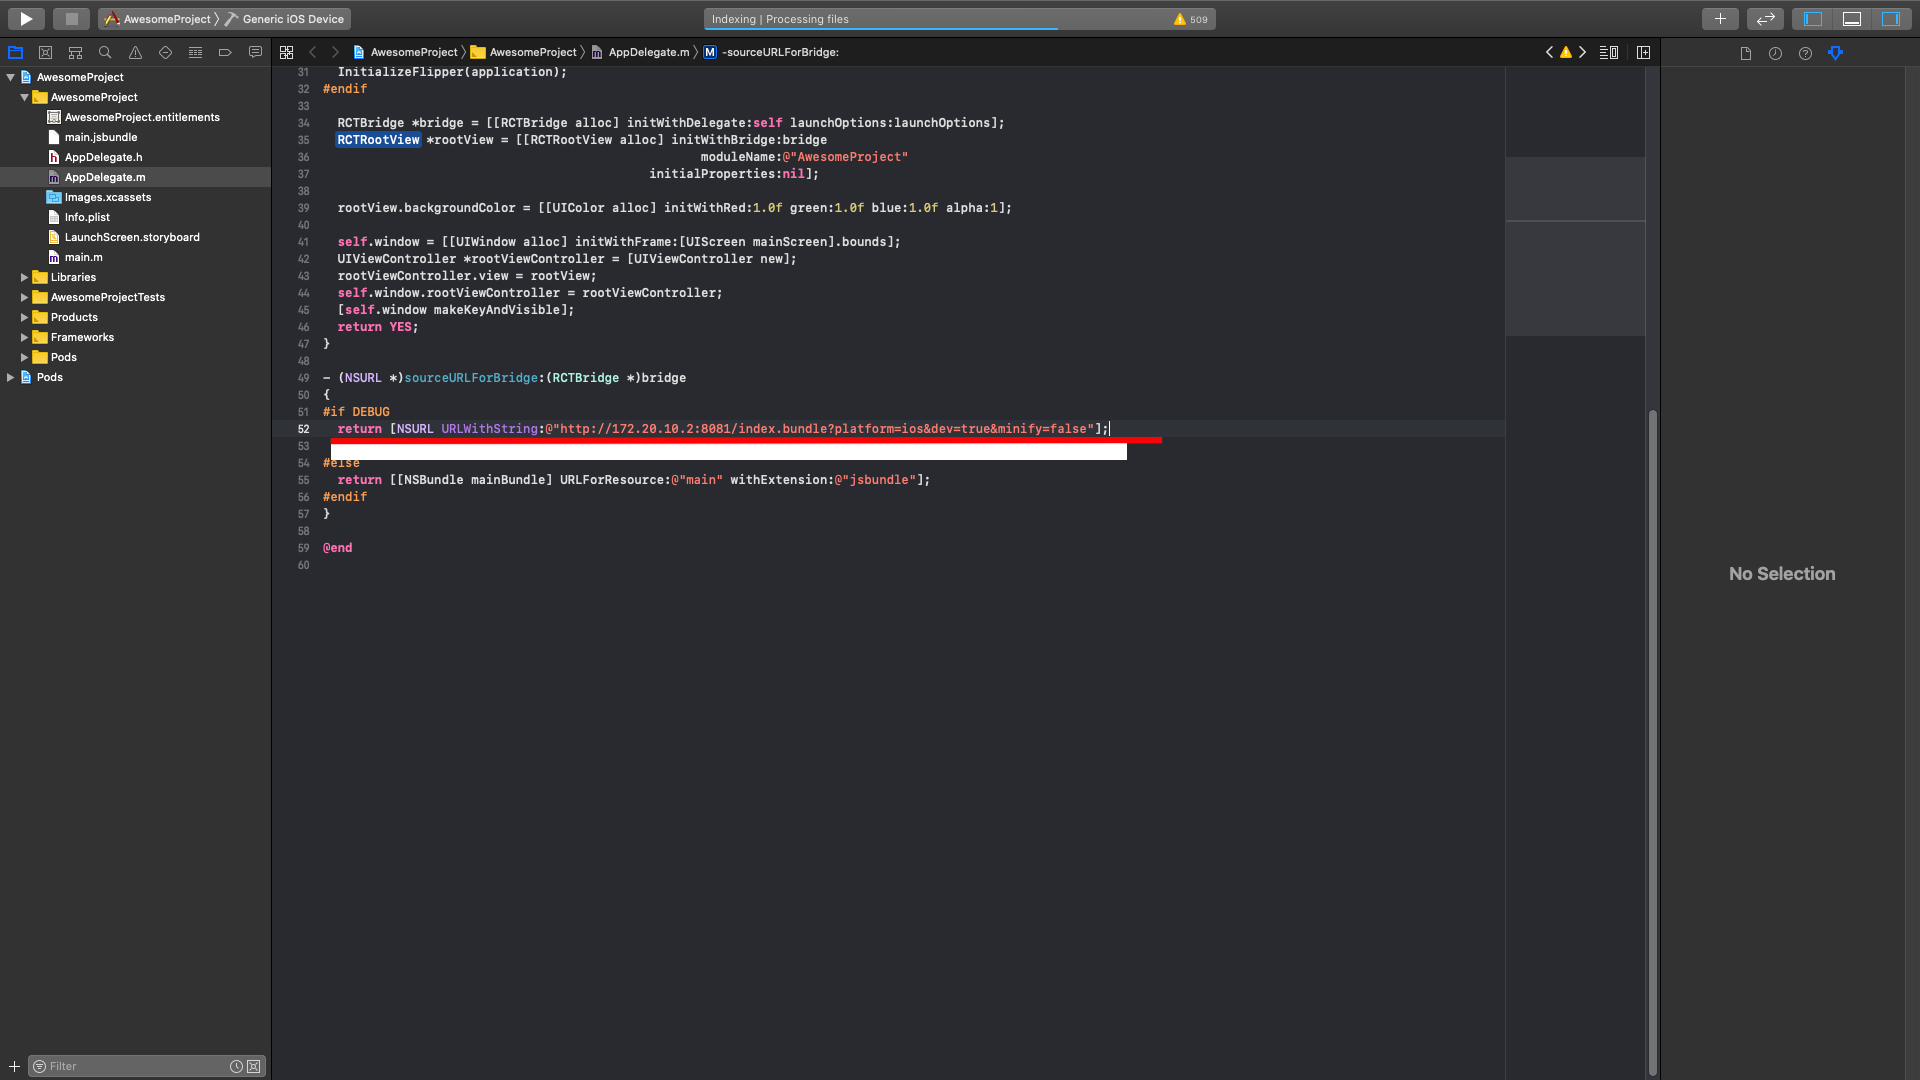
return [NSURL URLWithString:@”http://”Your IP address from before”:”Port the server is running on”/index.bundle?platform=ios&dev=true&minify=false"];
返回 [NSURL URLWithString:@” http://“您之前的IP地址”:“服务器正在运行的端口” /index.bundle?platform=ios&dev=true&minify=false“];
FOR A SIMULATOR, REPLACE WITH
对于模拟器,请替换为
return [NSURL URLWithString:@”http://localhost:8081/index.bundle?platform=ios&dev=true&minify=false"];
返回 [NSURL URLWithString:@” http:// localhost:8081 / index.bundle?platform = ios&dev = true&minify = false“];
in my case;
就我而言
return [NSURL URLWithString:@”http://172.20.10.2:8081/index.bundle?platform=ios&dev=true&minify=false"];
返回 [NSURL URLWithString:@” http://172.20.10.2:8081/index.bundle?platform=ios&dev=true&minify=false“];
It should look similar to what I have below.
它看起来应该与下面的内容相似。
STEP 9
步骤9
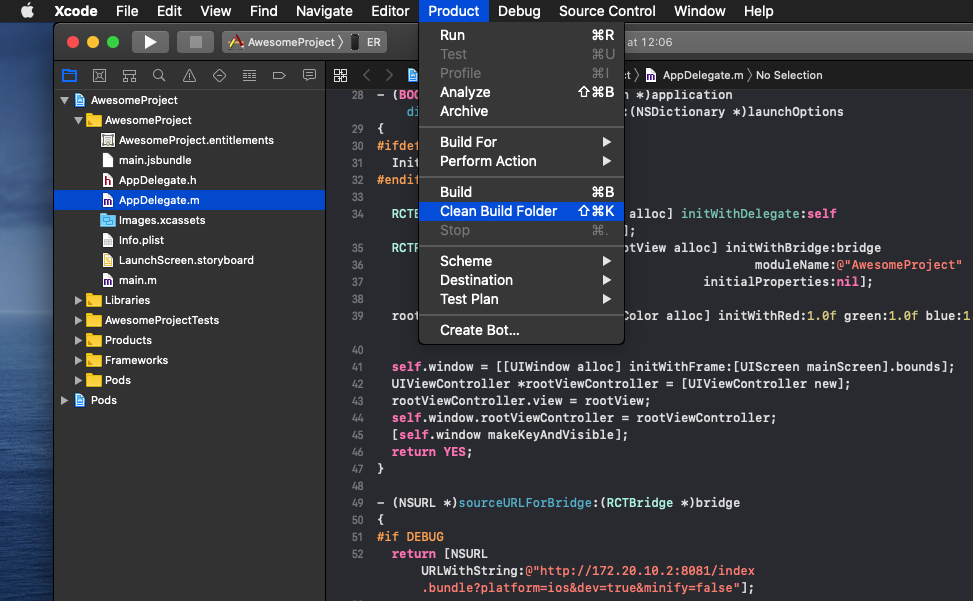
Go to Product on the Menu bar and then Clean the build folder.
转到菜单栏上的产品,然后清洁构建文件夹。
STEP 10
步骤10
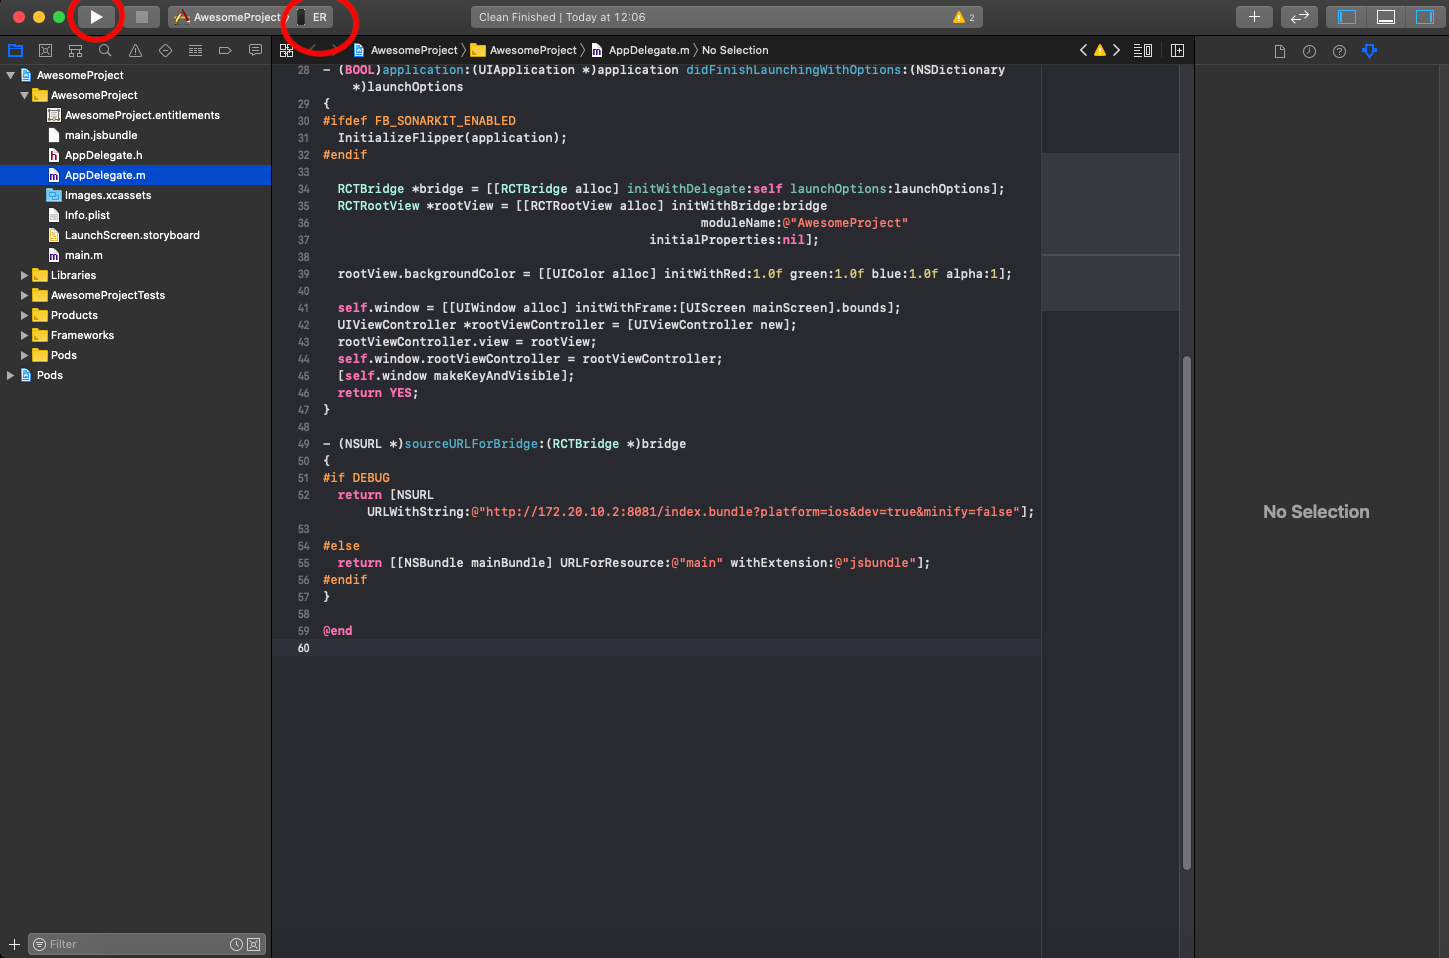
Run your build (Hit the play Button). Ensure that your physical device is selected and that the previous builds have been deleted from your device.
运行您的构建(单击播放按钮)。 确保已选择您的物理设备,并且以前的版本已从设备中删除。
And that’s it!!!
就是这样!!!
The app should now run on your iPhone. If it doesn't work and the development server is running, try reloading the app by:
该应用程序现在应该可以在您的iPhone上运行。 如果它不起作用并且开发服务器正在运行,请尝试通过以下方式重新加载应用程序:
- Shaking the device and selecting reload. 摇动设备并选择重新加载。
- Going to the running terminal and pressing “r” to reload. 转到运行的终端,然后按“ r”重新加载。


 1万+
1万+

 被折叠的 条评论
为什么被折叠?
被折叠的 条评论
为什么被折叠?
 到【灌水乐园】发言


