


jupyter 托管
背景故事 (Backstory)
Some while back I received a call from a good friend that is learning about Data Science and wanted some help. As we are often taught about Jupyter Notebooks when learning Data Science, it was not surprise that he was using a Jupyter Notebook, but this instantly stomped me. How are we going to collaborate on a Notebook?
š青梅前阵子我收到从正在了解数据科学的好朋友打个电话,想一些帮助。 当我们在学习数据科学时经常被教导有关Jupyter笔记本的信息时,他使用Jupyter笔记本并不奇怪,但是这立即使我tom脚。 我们如何在笔记本上进行协作?
We ended up doing a zoom call and he gave me authorization to control his screen, but the latency was turning me crazier than the problem at hand.
我们最终进行了一次变焦通话,他给了我授权来控制他的屏幕,但是延迟使我变得比手头的问题更疯狂。
Fast-forward 2 months, the tables have turned, I am now the one in need. I reached out to a Senior Data Scientist (we will call him Billy for this article) and told him of my woes:
快进了2个月,桌子已经翻了,我现在是需要的那个。 我联系了一位高级数据科学家(本文中称他为Billy),并告诉他我的麻烦:
Billy: That’s fine, Do you want to do some pair programming?
比利 :很好,你想做一对编程吗?
Me: Yes please that would be great. ** Sigh of relief **
我 :是的,那太好了。 ** 松了一口气 **
Billy: Are you using Google Colabs?
比利:您在使用Google Colabs吗?
Note: Turns out Colab is super easy to collaborate on.
注意:事实证明,Colab超级易于协作。
Me: No, I am using Jupyter Notebooks locally
我:不,我在本地使用Jupyter Notebooks
Billy: That’s fine. We can use Ngrok!
比利 :很好。 我们可以使用Ngrok !
Me: Ah yes, Sure!
我 :是的,当然!
I will be totally honest… I had no clue what Ngrok was, but I had faith in my googling skills.
我会完全诚实的……我不知道Ngrok是什么,但是我对自己的谷歌搜索技术充满信心。
恩格罗克 (Ngrok)
Ngrok exposes local servers behind NATs and firewalls to the public internet over secure tunnels. Subsequently, we are able to provide our local server to the port of a web server and this enables us to get the local address we specified — If this makes no sense to you, don’t worry about it. All I am saying is that we will obtain a public URL of our locally hosted Jupyter Notebook that we can share and use to collaborate.
Ngrok通过安全隧道将位于NAT和防火墙后面的本地服务器公开到公共Internet。 随后,我们能够将本地服务器提供给Web服务器的端口,这使我们能够获取我们指定的本地地址-如果这对您没有意义,请不必担心。 我要说的是,我们将获得本地托管的Jupyter Notebook的公共URL,我们可以共享该URL并用于协作。
安装Ngrok (Installing Ngrok)
Setting up Ngrok consist of 3 simple steps:
设置Ngrok包含3个简单步骤:
Sign Up
注册
You can easily make a free account by clicking on “Sign Up”. Just fill in your credentials and you’re fired up — Link to sign up page here
您可以通过单击“注册”轻松注册一个免费帐户。 只需填写您的凭据,您就会被解雇— 在此处链接以注册页面
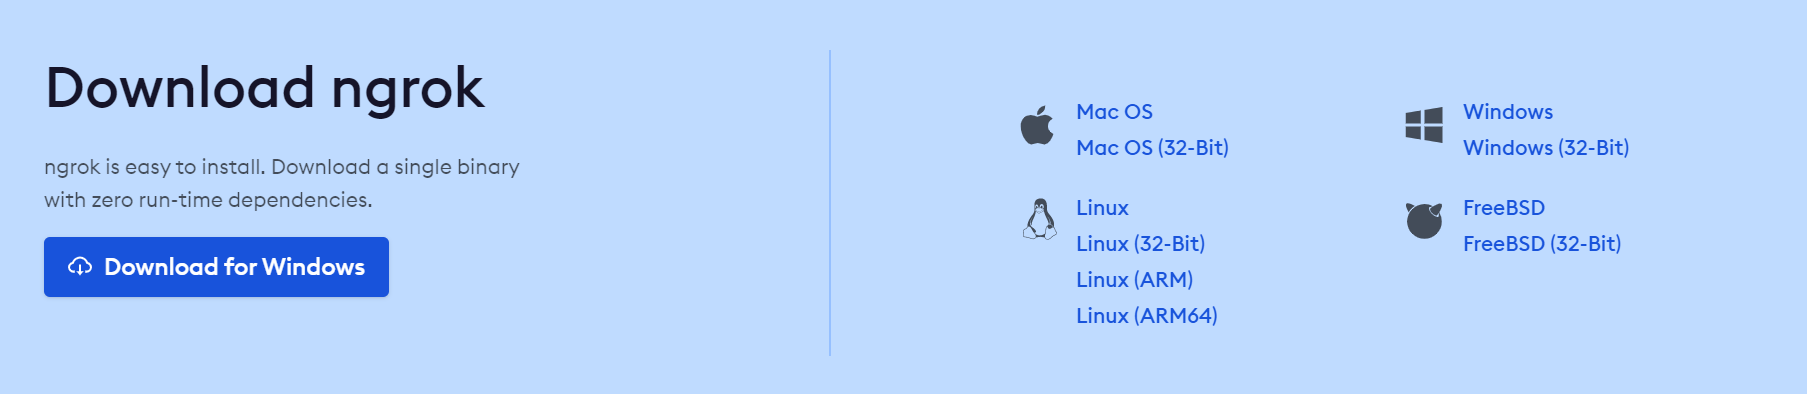
2. Download
2. 下载
Download Ngrok that is suitable for your operating system then Unzip it once it’s downloaded.
下载适合您的操作系统的Ngrok,然后在下载后解压缩。
Note: On Linux or Mac OS X you can unzip ngrok from a terminal with the following command. On Windows, just double click ngrok.zip to extract it.
注意:在Linux或Mac OS X上,可以使用以下命令从终端解压缩ngrok。 在Windows上,只需双击ngrok.zip将其解压缩。
unzip /path/to/ngrok.zip3. Connect your Account
3. 连接您的帐户
The next step is simply authenticating your Ngrok agent, which only needs to be done once as the Authtoken is saved in the default configuration file.
下一步就是对您的Ngrok代理进行身份验证,仅需完成一次,因为Authtoken被保存在默认配置文件中。
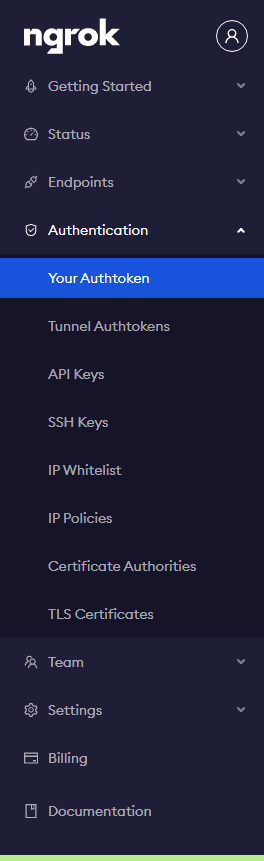
Your authentication token can be accessed by going to Authentication on the side bar then Your Authtoken — See image below.
可以通过以下方法访问身份验证令牌:转到侧栏上的身份验证 ,然后转到您的身份验证令牌-参见下图。
I prefer the command line set up which includes simply telling Ngrok your authentication token.
我更喜欢命令行设置,其中包括简单地告诉Ngrok您的身份验证令牌。
./ngrok authtoken 1g3Zd5XeTdmRTYIvOZmGVBW3hAH_2873ypJDaDf6ybyUzmSUjGreat! You are now all set up, but now you must learn to share your Jupyter Notebook.
大! 现在您已经完成所有设置,但是现在您必须学习共享Jupyter Notebook。
共享笔记本 (Sharing the Notebook)
For Jupyter Notebooks to be accessed remotely we must make some adjustments to our Jupyter Notebook configuration, and for extra security, we will add a password.
为了可以远程访问Jupyter Notebook,我们必须对Jupyter Notebook配置进行一些调整,并且为了增加安全性,我们将添加一个密码。
jupyter notebook --generate-configThis will return the link address to the configuration file of your Jupyter Notebook.
这会将链接地址返回到Jupyter Notebook的配置文件。
Writing default config to: C:\Users\Kurtis\.jupyter\jupyter_notebook_config.pyCopy the link address and run the following command
复制链接地址并运行以下命令
echo "NotebookApp.allow_remote_access = True" >> C:\Users\Kurtis\.jupyter\jupyter_notebook_config.pyThen we add a password…
然后我们添加密码...
jupyter notebook passwordWe now have everything required to run and connect our Jupyter Notebook so that it could be shared remotely.
现在,我们拥有运行和连接Jupyter Notebook所需的一切,以便可以远程共享它。
Tip: In the next part we’ll need two separate terminals connected to our remote because once we run jupyter, it will occupy a window with logging. You can either open a second terminal and ssh into it again, or you can use a tool like tmux to manage them within a single terminal. (Source: ArtificialSoph Github)
提示 :在下一部分中,我们需要将两个独立的终端连接到我们的遥控器,因为一旦运行jupyter,它将占据一个带有日志记录的窗口。 您可以打开第二个终端并再次SSH进入,也可以使用tmux之类的工具在单个终端中进行管理。 (来源: ArtificialSoph Github )
Open your Jupyter Notebook by typing jupyter notebook in your terminal.
通过在终端中键入jupyter notebook ,打开Jupyter笔记本。
jupyter notebookAfter we’ve accessed our Jupyter Notebook we tell Ngrok what port our web server is listening on.
访问Jupyter Notebook后,我们告诉Ngrok Web服务器正在监听的端口。

The above image highlights the port. Thence we would tell Ngrok the port is 8888.
上图突出显示了端口。 因此,我们将告诉恩格罗克港口是8888。
ngrok http [port] -host-header="localhost:[port]"Your results should look like the one displayed below
您的结果应如下所示
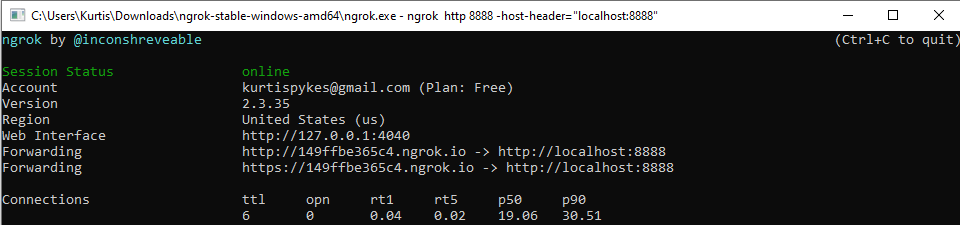
Copy the forwarding address and share it with whoever you want to collaborate with — if you followed our steps and set up a password then you’ll have to tell them the password.
复制转发地址并与任何您想与之合作的人共享-如果您按照我们的步骤操作并设置了密码,则必须告诉他们该密码。
Great, now you can collaborate!
太好了,现在您可以合作!
结论 (Conclusion)
Magnificent! Now you don’t have to be stomped or put up with bad latency (because you’ve shared your screen on zoom) whenever you need to collaborate with someone on a Jupyter Notebook on their local machine (or yours for that matter) — You now know how to share your Jupyter Notebook and work on a different machine.
壮丽的! 现在,当您需要与本地计算机上的Jupyter Notebook上的某人(或与此相关的您)进行协作时,您不必再为步履蹒跚或忍受严重的延迟(因为您已经共享了缩放屏幕)。现在,您知道如何共享Jupyter Notebook和在其他计算机上工作。
I enjoy connecting with people, I am most reachable on LinkedIn — Connect and stay up to date with anything new I am learning (and feel free to share what you’re learning too).
我喜欢与人交流,我在LinkedIn上的联系方式最广泛-与我学习的任何新事物保持联系并保持最新(并随时分享您所学的内容)。
jupyter 托管


 1689
1689

 被折叠的 条评论
为什么被折叠?
被折叠的 条评论
为什么被折叠?
 到【灌水乐园】发言


