python调用yolov3模型,pytorch版yolov3训练自己的数据(数据,代码,预训练模型下载链接)...

1.数据预处理

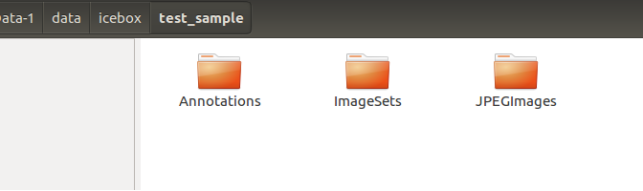
准备图片数据(JPEGImages),标注文件(Annotations),以及划分好测试集训练集的索引号(ImageSets)

0282da3f647ea565d5e02b11641d6aa8.png

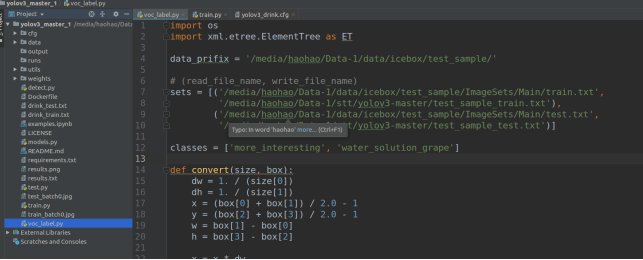
修改代码中voc_label.py文件中的路径以及类别,生成test_sample_train.txt  和test_sample_test.txt文件(训练,测试读此文件来找到图片路径),以及labels文件夹为数据的voc标注文件转换为txt文件(内容为每个图片中物体类别,以及框的归一化位置)

fe16a62c3dece8d04210681e1736b092.png

2.训练

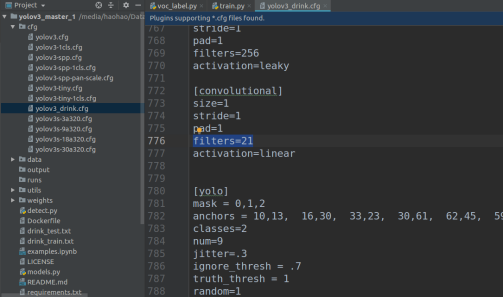
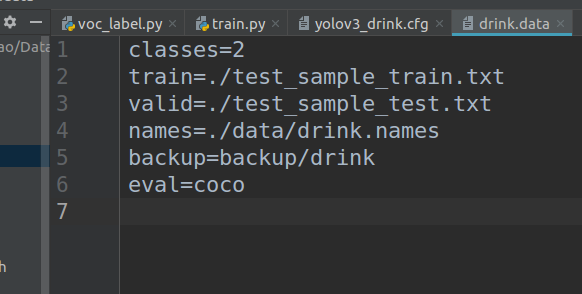
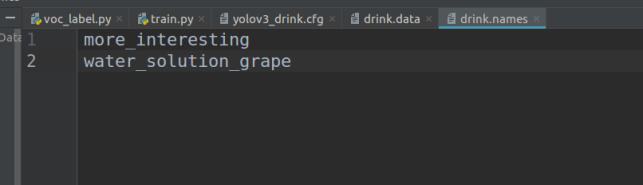
准备cfg(修改yolo层的类别classes(类别个数)和对应的filters((classes+5)× 3)如下图,data(训练测试的路径改为数据预处理生成的文件路径),names(类别名称)三个文件
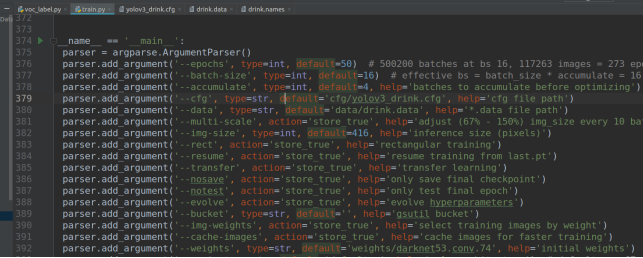
a6efd31a74c2988ff4067ea76919e79d.png

0d5ad1e6e1bfe46927aee35057d39458.png

dbfcda52cf3e38a829677a9c5550ea5a.png

然后在train.py中修改

--epochs    所有数据共迭代多少次

--cfg   刚才的cfg文件路径

--data    data文件路径

--weights    预训练模型(我会和数据一起打包发你)

命令行执行的话,也可以不修改代码中的这些位置直接输入下面命令效果一样

python train.py  --epochs 100  --cfg cfg/yolov3_drink.cfg   --data drink.data  --weights weights/yolov3.weights
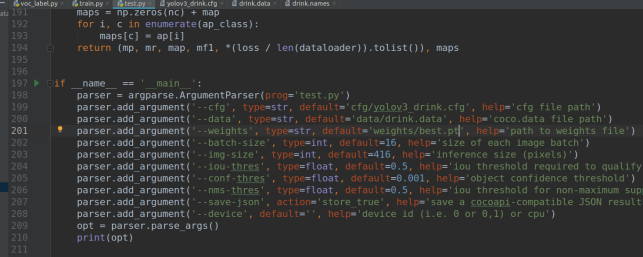
eb30e5881c30caf0617c0bfd1ac7a30a.png

3.测试(test.py)

和训练差不多,修改  --cfg   --data  --weights(要测试的模型)然后run test.py

或命令行输入 python test.py  --cfg cfg/yolov3_drink.data  --data data/drink.data  --weights weights/best.pt

运行结束会计算每个类别的map等,以及总体的精度结果
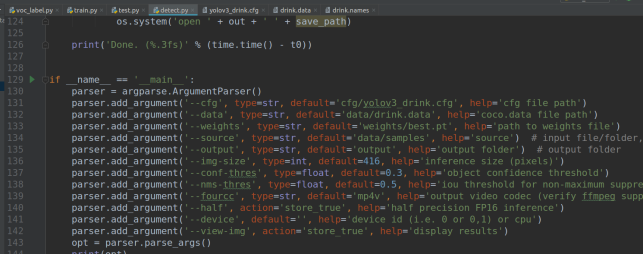
2f388d46026e4278125e19a341db7b75.png

4.批量推理图片(detect.py)

--source 被推理的图片路径, --output 推理过后图片存放路径

0d1fec2db6fb47fa84085826ded8e18d.png

代码,预训练模型(darknet53,yolov3两个),数据(100张voc格式标好的数据)下载链接https://download.csdn.net/download/weixin_44562081/11939321

  • 0
    点赞
  • 4
    收藏
    觉得还不错? 一键收藏
  • 0
    评论
可以使用以下步骤调用 YOLOv5 模型来识别户型图: 1.安装 PyTorchYOLOv5: ``` pip install torch torchvision git clone https://github.com/ultralytics/yolov5.git cd yolov5 pip install -r requirements.txt ``` 2.下载预训练模型: 可以从 https://github.com/ultralytics/yolov5/releases 下载预训练模型。 3.编写 Python 代码进行识别: ```python import torch import cv2 import numpy as np from models.experimental import attempt_load from utils.datasets import letterbox from utils.general import non_max_suppression, scale_coords, plot_one_box from utils.torch_utils import select_device # 加载模型 weights_path = 'path/to/weights.pt' device = select_device('cpu') model = attempt_load(weights_path, map_location=device) # 图像预处理 img_path = 'path/to/image.jpg' img_size = 640 img = cv2.imread(img_path) img = letterbox(img, new_shape=img_size)[0] img = img[:, :, ::-1].transpose(2, 0, 1) img = np.ascontiguousarray(img) img = torch.from_numpy(img).to(device).float() img /= 255.0 # 模型推理 model.eval() with torch.no_grad(): pred = model(img.unsqueeze(0)) # 后处理 pred = non_max_suppression(pred, conf_thres=0.5, iou_thres=0.5) for i, det in enumerate(pred): if len(det): det[:, :4] = scale_coords(img.shape[2:], det[:, :4], img.shape[1:]).round() for *xyxy, conf, cls in reversed(det): label = f'{model.names[int(cls)]} {conf:.2f}' plot_one_box(xyxy, img, label=label, color=(0, 255, 0)) # 显示结果 img = img.permute(1, 2, 0).cpu().numpy() img = cv2.cvtColor(img, cv2.COLOR_RGB2BGR) cv2.imshow('result', img) cv2.waitKey(0) ``` 在上述代码中,我们首先加载预训练模型,并使用 `letterbox` 函数将输入图像调整为模型输入大小。然后,我们将图像转换为 PyTorch 张量,并使用模型进行推理。最后,我们使用 `non_max_suppression` 函数过滤掉重叠的边界框,并使用 `plot_one_box` 函数将边界框绘制在图像上。

“相关推荐”对你有帮助么?

  • 非常没帮助
  • 没帮助
  • 一般
  • 有帮助
  • 非常有帮助
提交
评论
添加红包

请填写红包祝福语或标题

红包个数最小为10个

红包金额最低5元

当前余额3.43前往充值 >
需支付:10.00
成就一亿技术人!
领取后你会自动成为博主和红包主的粉丝 规则
hope_wisdom
发出的红包
实付
使用余额支付
点击重新获取
扫码支付
钱包余额 0

抵扣说明:

1.余额是钱包充值的虚拟货币,按照1:1的比例进行支付金额的抵扣。
2.余额无法直接购买下载,可以购买VIP、付费专栏及课程。

余额充值