02. 注解
1、注解方式的实现:
Java注解:使用事先定义好的注解标签,对类、方法、属性的特征进行标记,在编译、运行时会找到对应的类、方法、属性,进行标签的执行功能。
注解功能封装在jar包中,导入Spring aop jar包即可
    <!-- spring-context -->
    <dependency>
        <groupId>org.springframework</groupId>
        <artifactId>spring-context</artifactId>
        <version>5.2.2.RELEASE</version>
    </dependency>
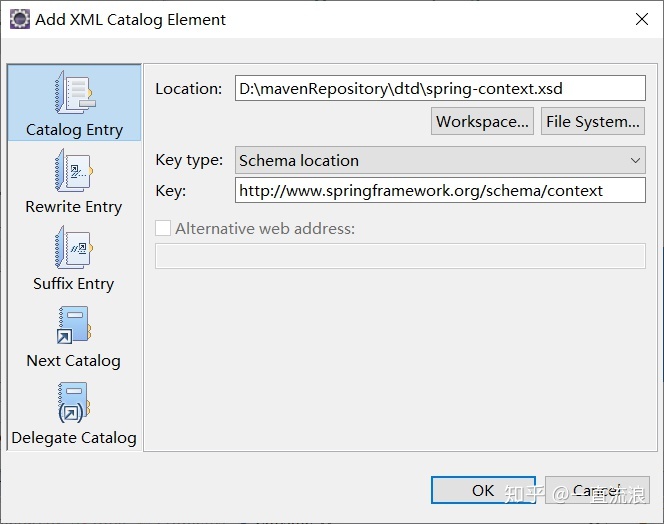
添加xml文件约束,源码包中找到对应的 xsd文件。

修改配置文件,application.xml
<?xml version="1.0" encoding="UTF-8"?>
<beans xmlns="http://www.springframework.org/schema/beans"
xmlns:xsi="http://www.w3.org/2001/XMLSchema-instance"
xmlns:context="http://www.springframework.org/schema/context"
xsi:schemaLocation="http://www.springframework.org/schema/beans
                    http://www.springframework.org/schema/beans/spring-beans.xsd
                    http://www.springframework.org/schema/context
                    http://www.springframework.org/schema/context/spring-context.xsd">

      <!-- 开启自动扫描注解,base-package是需要扫描的包名 -->
      <context:component-scan base-package="com.company.springPro"></context:component-scan>
2、标签的使用
2.1 注解创建对象
(1)@Component
对bean层对象的创建
例如:等于 <bean id="user" class="com.company.springPro.bean.UserPo"></bean>
@Component(value="user")
public class UserPo {}
(2)@Repository
对数据库操作层对象的创建
例如:等于 <bean id="userDao" class="com.company.springPro.dao.UserDao"></bean>
@Repository(value = "userDao")
public class UserDao {}
(3)@Service
对业务处理层对象的创建
例如:等于 <bean id="userService" class="com.company.springPro.service.UserService"></bean>
@Service(value="userService")
public class UserService {}
(4)@Controller
一般用在表现层
@Controller(value="userCtl")
public class UserController {}
2.2 对象创建的功能的扩展
(1)@Scope(value=“prototype”) 多例
(2)@Scope(value=“ singleton ”) 单例
@Component(value="user")
@Scope(value="prototype")
public class UserPo {}
2.3 注解注入属性
(1)@Autowired
作用:自动按照类型注入,只要容器中有唯一的一个bean对象类型和要注入的变量类型匹配,就可以注入成功。
出现位置:可以是变量上,也可以是方法上。
细节:在使用注解注入时,set方法就不是必须的了。
    @Autowired
    private UserDao userDao;
(2)@Qualifier:
作用:在按照类中注入的基础之上再按照名称注入。它再给类成员注入时不能单独使用,但是给方法参数注入时可以。
属性:value:用于注入bean的id
细节:一般和@Autowired配合使用。
    @Autowired
    @Qualifier("demoDaoImpl1")
    private DemoDao demoDao;
(3)@Resource
作用:直接按照bean的id注入,它可以独立使用。
属性:name:用于指定bean的Id
    @Resource(name="demoDaoImpl1")
    private DemoDao demoDao;
以上三个注解都只能注入其他bean类型的数据,而基本类型和String类型无法使用上述注解实现。另外,集合类型的注入只能通过XML来实现。
(4)@Value
作用:用于注入基本类型和String类型的数据
属性:value:用于指定数据的值,它可以使用spring中的SpEL(也就是spring的el表达式),SpEL的写法${表达式}
    @Value("ssss")
    private String str;

    @Value("${url}")
    private String url;
2.4 用于改变作用范围的
作用:他们的作用就和在bean标签中使用scope属性实现的功能一样的
@Scope
作用:用于指定bean的作用范围
属性:
value:指定范围的取值。
常用取值:singleton(单例,默认)、prototype(多例)
@Service
@Scope("prototype")
public class DemoServiceImpl implements DemoService {}
2.5 和生命周期相关的(了解)
作用:他们的作用就和在bean标签使用init-method 和 destory-method 的作用一样
(1)@PreDestory
作用:用于指定销毁方法
(2)@PostConstruct
作用:由于指定初始化方法
    @PostConstruct
    public void init(){
        System.out.println("初始化成功");
    }

    @PreDestroy
    public void destroy(){
        System.out.println("销毁成功");
    }
2.6 配置类中的一些新注解
(1)@Configuration
作用:指定当前类是一个配置类
细节:当配置类作为AnnotationConfigApplicationContext对象创建时,该注解可以不写。
@Configuration
public class SpringConfig {}
(2)@ComponentScan
作用:用于通过注解指定spring在创建容器时要扫描的包
属性:
value:它和basePackages的作用是一样的,都是用于指定创建容器时要扫描的包。
@ComponentScan("com.company")
public class SpringConfig {}
我们使用此注解就等于在xml中配置了:
<context:component-scan base-package="com.company"></context:component-scan>(3)@Bean
作用:用于把当前方法的返回值作为bean对象存入spring的ioc容器中。
属性:name:用于指定bean的id,当不写时,默认值是当前方法的名称。
细节:当我们使用注解配置方法时,如果方法有参数,spring框架会去容器中查找有没有可用的bean对象。查找的方式和Autowired一样。
 @Bean
    public JdbcTemplate createJdbcTemplate(DataSource dataSource){
        return new JdbcTemplate(dataSource);
    }

 @Bean(name="dataSource")
    public DataSource createDataSource(){
        DruidDataSource druidData = new DruidDataSource();
        druidData.setDriverClassName("com.mysql.cj.jdbc.Driver");
        druidData.setUrl("jdbc:mysql://127.0.0.1:3306/shop?characterEncoding=utf-8&serverTimezone=GMT");
        druidData.setUsername("root");
        druidData.setPassword("123456");
        return  druidData;
    }
(4)@PropertySource
作用:用于指定 properties文件的位置
属性:value:指定文件的路径和名称
关键字:classpath,表示在类路径下
@PropertySource("classpath:jdbc.properties")2.7 spring整合Junit
为什么要整合Junit?
(1)应用程序的入口
main方法
(2)junit单元测试中,没有main方法也能执行
junit集成了一个main方法
该方法就会判断当前测试类中那些方法有 @Test 注解
junit就让有Test注解的方法执行
(3)junit不会管我们是否采用spring容器
在执行测试方法时,junit根本不知道我们是不是使用了spring框架
所以也就不会为我们读取配置文件/配置类创建spring核心容器
(4)由上面三点可知
当测试方法执行时,没有IOC容器,就算写了Autowired注解,也无法注入。
如何整合?
1、首先,需要导入jar包,必须保证junit的版本是4.12及以上
<!-- junit的jar包 -->
<dependency>
      <groupId>junit</groupId>
      <artifactId>junit</artifactId>
      <version>4.12</version>
      <scope>test</scope>
</dependency>

<!-- spring整合junit的jar -->
<dependency>
      <groupId>org.springframework</groupId>
      <artifactId>spring-test</artifactId>
      <version>5.0.2.RELEASE</version>
</dependency>
2、使用Junit提供的一个注解把原有的main方法替换成spring提供的
@Runwith
@RunWith(SpringJUnit4ClassRunner.class)
public class Client {}
3、告知spring的运行器,spring和ioc创建是基于xml还是注解的,并且说明位置
@ContextConfiguration
locations:指定xml文件的位置,加上classpath关键字,表示在类路径下 classes:指定注解类所在位置
@RunWith(SpringJUnit4ClassRunner.class)
@ContextConfiguration(classes = SpringConfig.class)
public class Client {}
@RunWith(SpringJUnit4ClassRunner.class)
@ContextConfiguration(locations = “classpath:bean.xml”)
public class Client {}


 2583
2583


 被折叠的 条评论
为什么被折叠?


