


步骤1、ubuntu17.10配置IP (这个版本配置IP方式改变较大,apt-get upgrade更新至最新以前配置方式也可以用了)
root@ubuntu:~# vi /etc/netplan/01-netcfg.yaml
# This file describes the network interfaces available on your system
# For more information, see netplan(5).
network:
version: 2
renderer: networkd
ethernets:
ens32:
dhcp4: no
dhcp6: no
addresses: [192.168.10.222/24]
gateway4: 192.168.10.1
nameservers:
addresses: [61.134.1.5, 114.114.114.114]
配置修改保存后执行命令让配置生效:
root@ubuntu:~# netplan apply
步骤2、安装 Apache Web Server
输入以下命令来安装Apache Web服务器。该apache2-utils包将安装一些有用的实用程序,如Apache HTTP服务器基准测试工具(ab)。
root@ubuntu:~# sudo apt install -y apache2 apache2-utils
安装完成后,应自动启动Apache。 使用systemctl检查其状态。
root@ubuntu:~# systemctl status apache2.service
apache2.service - The Apache HTTP Server
Loaded: loaded (/lib/systemd/system/apache2.service; enabled; vendor preset:
Drop-In: /lib/systemd/system/apache2.service.d
└─apache2-systemd.conf
Active: active (running) since Mon 2018-01-22 22:14:47 EST; 1min 52s ago
Main PID: 21380 (apache2)
Tasks: 55 (limit: 4915)
Memory: 4.9M
CPU: 179ms
CGroup: /system.slice/apache2.service
├─21380 /usr/sbin/apache2 -k start
├─21382 /usr/sbin/apache2 -k start
└─21383 /usr/sbin/apache2 -k start
Jan 22 22:14:47 ubuntu systemd[1]: Starting The Apache HTTP Server...
Jan 22 22:14:47 ubuntu apachectl[21360]: AH00558: apache2: Could not reliably de
Jan 22 22:14:47 ubuntu systemd[1]: Started The Apache HTTP Server.
如果没有运行,请使用systemctl启动它。使Apache启动时自动启动也是一个好方法
root@ubuntu:~# sudo systemctl start apache2
root@ubuntu:~# sudo systemctl enable apache2
Synchronizing state of apache2.service with SysV service script with /lib/systemd/systemd-sysv-install.
Executing: /lib/systemd/systemd-sysv-install enable apache2
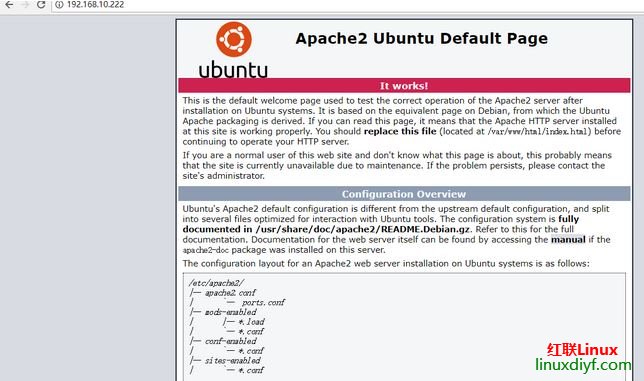
启动后浏览器测试IP是否可以打开访问
现在我们需要将www-data(Apache用户)设置为文档根目录的所有者。默认情况下,它由root用户拥有。
root@ubuntu:~# sudo chown www-data:www-data /var/www/html/ -R
步骤3、安装 MariaDB 数据库服务器
MariaDB是MySQL的替代品。 输入以下命令将其安装在Ubuntu 17.10上。
root@ubuntu:~# sudo apt install mariadb-server mariadb-client
Reading package lists... Done
Building dependency tree
Reading state information... Done
The following additional packages will be installed:
galera-3 libaio1 libcgi-fast-perl libcgi-pm-perl libdbd-mysql-perl
libdbi-perl libencode-locale-perl libfcgi-perl libhtml-parser-perl
libhtml-tagset-perl libhtml-template-perl libhttp-date-perl
libhttp-message-perl libio-html-perl libjemalloc1 liblwp-mediatypes-perl
安装完毕后,MariaDB服务器应自动开启。 使用systemctl检查其状态。
root@ubuntu:~# systemctl start mariadb
root@ubuntu:~# systemctl enable mariadb //开机自动自动
root@ubuntu:~# systemctl status mariadb
mariadb.service - MariaDB 10.1.30 database server
Loaded: loaded (/lib/systemd/system/mariadb.service; enabled; vendor preset:
Active: active (running) since Mon 2018-01-22 22:34:51 EST; 5s ago
Docs: man:mysqld(8)
Process: 23372 ExecStartPost=/bin/sh -c systemctl unset-environment _WSREP_STA
Process: 23368 ExecStartPost=/etc/mysql/debian-start (code=exited, status=0/SU
Process: 23254 ExecStartPre=/bin/sh -c [ ! -e /usr/bin/galera_recovery ] && VA
Process: 23246 ExecStartPre=/bin/sh -c systemctl unset-environment _WSREP_STAR
Process: 23237 ExecStartPre=/usr/bin/install -m 755 -o mysql -g root -d /var/r
Main PID: 23341 (mysqld)
Status: "Taking your SQL requests now..."
Tasks: 26 (limit: 4915)
Memory: 59.2M
CPU: 464ms
CGroup: /system.slice/mariadb.service
└─23341 /usr/sbin/mysqld
Jan 22 22:34:50 ubuntu systemd[1]: Starting MariaDB 10.1.30 database server...
Jan 22 22:34:50 ubuntu mysqld[23341]: 2018-01-22 22:34:50 139684071342016 [Note]
Jan 22 22:34:51 ubuntu systemd[1]: Started MariaDB 10.1.30 database server.
现在运行安装后的安全脚本。
sudo mysql_secure_installation
当它要求您输入MariaDB root密码时,按Enter键,因为root密码尚未设置。 然后输入y设置MariaDB服务器的root密码。
root@ubuntu:~# sudo mysql_secure_installation
NOTE: RUNNING ALL PARTS OF THIS SCRIPT IS RECOMMENDED FOR ALL MariaDB
SERVERS IN PRODUCTION USE! PLEASE READ EACH STEP CAREFULLY!
In order to log into MariaDB to secure it, we'll need the current
password for the root user. If you've just installed MariaDB, and
you haven't set the root password yet, the password will be blank,
so you should just press enter here.
Enter current password for root (enter for none):
OK, successfully used password, moving on...
Setting the root password ensures that nobody can log into the MariaDB
root user without the proper authorisation.
Set root password? [Y/n] y
New password:
Re-enter new password:
##后面的设置选项按需选择即可
默认情况下,Ubuntu上的MaraiDB软件包使用unix_socket对用户登录进行身份验证,这主要表示您可以使用操作系统的用户名和密码登录到MariaDB控制台。 因此,您可以运行以下命令登录,而不提供MariaDB root密码。
root@ubuntu:~# sudo mariadb -u root
Welcome to the MariaDB monitor. Commands end with ; or \g.
Your MariaDB connection id is 10
Server version: 10.1.30-MariaDB-0ubuntu0.17.10.1 Ubuntu 17.10
Copyright (c) 2000, 2018, Oracle, MariaDB Corporation Ab and others.
Type 'help;' or '\h' for help. Type '\c' to clear the current input statement.
MariaDB [(none)]> exit
Bye
步骤4、安装 PHP7.1
在选写本文时,PHP7.1是PHP的最新稳定版本,在PHP7.0上具有较小的性能优势。输入以下命令来安装PHP7.1。
root@ubuntu:~# sudo apt install php7.1 libapache2-mod-php7.1 php7.1-mysql php-common php7.1-cli php7.1-common php7.1-json php7.1-opcache php7.1-readline
Reading package lists... Done
Building dependency tree
Reading state information... Done
Suggested packages:
php-pear
The following NEW packages will be installed:
libapache2-mod-php7.1 php-common php7.1 php7.1-cli php7.1-common php7.1-json
php7.1-mysql php7.1-opcache php7.1-readline
0 upgraded, 9 newly installed, 0 to remove and 3 not upgraded.
Need to get 3,783 kB of archives.
After this operation, 15.0 MB of additional disk space will be used.
Get:1 http://us.archive.ubuntu.com/ubuntu artful/main amd64 php-common all 1:54ubuntu1 [12.1 kB]
Get:2 http://us.archive.ubuntu.com/ubuntu artful-updates/main amd64 php7.1-common amd64 7.1.11-0ubuntu0.17.10.1 [836 kB]
Get:3 http://us.archive.ubuntu.com/ubuntu artful-updates/main amd64 php7.1-json amd64 7.1.11-0ubuntu0.17.10.1 [17.5 kB]
Get:4 http://us.archive.ubuntu.com/ubuntu artful-updates/main amd64 php7.1-opcache amd64 7.1.11-0ubuntu0.17.10.1 [146 kB]
启用Apache php7.1模块,然后重新启动Apache Web服务器。
root@ubuntu:~# sudo a2enmod php7.1
Considering dependency mpm_prefork for php7.1:
Considering conflict mpm_event for mpm_prefork:
Considering conflict mpm_worker for mpm_prefork:
Module mpm_prefork already enabled
Considering conflict php5 for php7.1:
Module php7.1 already enabled
root@ubuntu:~# sudo systemctl restart apache2
root@ubuntu:~# php --version
PHP 7.1.11-0ubuntu0.17.10.1 (cli) (built: Nov 1 2017 16:30:52) ( NTS )
Copyright (c) 1997-2017 The PHP Group
Zend Engine v3.1.0, Copyright (c) 1998-2017 Zend Technologies
with Zend OPcache v7.1.11-0ubuntu0.17.10.1, Copyright (c) 1999-2017, by Zend Technologies
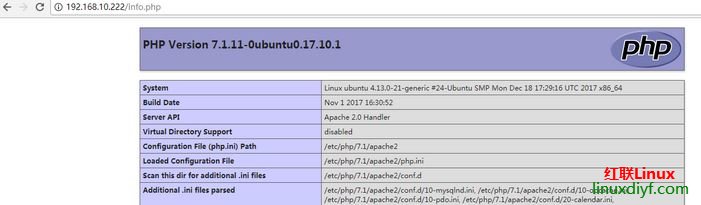
要使用Apache服务器测试PHP脚本,我们需要在文档根目录中创建一个info.php文件。
root@ubuntu:~# sudo vi /var/www/html/info.php
将以下PHP代码粘贴到文件中。
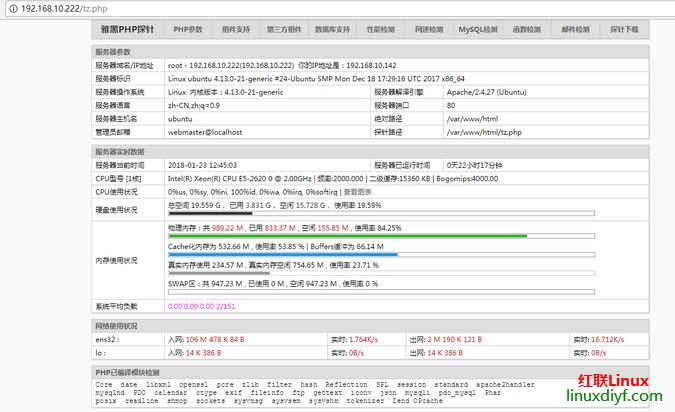
顺便测试下探针,将tz.php放/var/www/html/目录下
至此,ubuntu17.10的web环境已经ok。


 730
730


 被折叠的 条评论
为什么被折叠?
被折叠的 条评论
为什么被折叠?
 到【灌水乐园】发言


