


 本文围绕夸克浏览器,介绍仿写其主页底部工具栏的过程。先展示原本与实现的效果,阐述整体思路,包括用底部对话框和自定义可伸缩布局。接着说明底部对话框的实现,以及自定义折叠布局的知识运用,如手动对换子view顺序、计算大小等,最后给出源码地址。
点击上方蓝字关注 ?

来源:大头呆 https://juejin.im/post/5a2a05dc6fb9a045030ffe97
详解
夸克浏览器是我非常喜欢的一款浏览器,使用起来简洁流畅,UI做的也很精致。今天我就来仿写主页底部的工具栏。先来看看原本的效果:
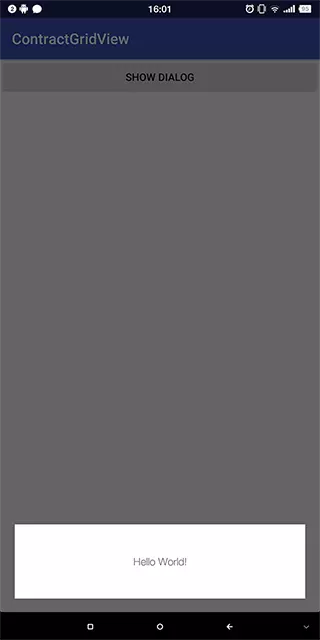
效果比较简单,从外表看就是一个弹框,特别之处就是可以收缩伸展布局,再来看看我实现的效果:
怎么样?效果是不是已经非常接近。先整体说下思路吧,底部对话框用DialogFragment来实现,里面的可伸缩布局采用自定义ViewGroup。看了本文你将能学到(巩固)以下知识点:
DialogFragment的用法;自定义
ViewGroup的用法,包括onMeasure和onLayout方法;ViewDragHelper的用法,包括处理手势和事件冲突
听起来内容挺多的,但只要一步步去解析,其实实现过程也不算复杂。
底部对话框
底部对话框我采用了DialogFragment,因为相比传统的AlertDialog实现起来更简单,用法也几乎和普通的Fragment没有什么区别。主要工作就是指定显示位置:
public class BottomDialogFragment extends DialogFragment {@Overridepublic View onCreateView(LayoutInflater inflater, ViewGroup container, Bundle savedInstanceState) {return inflater.inflate(R.layout.fragment_bottom, null); }public void onStart() {super.onStart(); Dialog dialog = getDialog();if (dialog != null && dialog.getWindow() != null) { Window window = dialog.getWindow();//指定显示位置 dialog.getWindow().setGravity(Gravity.BOTTOM);//指定显示大小 dialog.getWindow().setLayout(ViewGroup.LayoutParams.MATCH_PARENT, ViewGroup.LayoutParams.WRAP_CONTENT);//显示消失动画 window.setWindowAnimations(R.style.animate_dialog);//设置背景透明 window.setBackgroundDrawable(new ColorDrawable(Color.TRANSPARENT));//设置点击外部可以取消对话框 setCancelable(true); } }}
点击显示弹框:
FragmentManager fm = getSupportFragmentManager();BottomDialogFragment bottomDialogFragment = new BottomDialogFragment();bottomDialogFragment.show(fm, "fragment_bottom_dialog");
自定义折叠布局
这里主要用到的就是自定义ViewGroup的知识了。先大致梳理一下:我们需要包含两个子view,在上面的topView,在下面的bottomView。topView往下滑的时候要覆盖bottomView。但是ViewGroup的显示的层次顺序和添加顺序是反过来的,后面添加的view如果和前面添加的View有重叠的话会覆盖前面会覆盖添加的view,而我们预想的布局文件应该是这样的:
<topView/> ViewGroup>
所以我们需要在代码中手动对换两者顺序:
@Overrideprotected void onFinishInflate() {super.onFinishInflate();if (getChildCount() != 2) {throw new RuntimeException("必须是2个子View!"); } topView = getChildAt(0); bottomView = getChildAt(1); bringChildToFront(topView); }
这样之后getChildAt(0)取到的就是bottomView了。接下来是onMeasure(),计算自身的大小:
/**
 * 计算所有ChildView的宽度和高度 然后根据ChildView的计算结果,设置自己的宽和高
 */ @Overrideprotected void onMeasure(int widthMeasureSpec, int heightMeasureSpec) {/**
 * 获得此ViewGroup上级容器为其推荐的宽和高,以及计算模式
 */int widthMode = MeasureSpec.getMode(widthMeasureSpec);int heightMode = MeasureSpec.getMode(heightMeasureSpec);int sizeWidth = MeasureSpec.getSize(widthMeasureSpec);int sizeHeight = MeasureSpec.getSize(heightMeasureSpec);// 计算出所有的childView的宽和高 measureChildren(widthMeasureSpec, heightMeasureSpec);int width = 0;int height = 0;/**
 * 根据childView计算的出的宽和高,以及设置的margin计算容器的宽和高,主要用于容器是warp_content时
 */for (int i = 0; i < getChildCount(); i++) { View childView = getChildAt(i); MarginLayoutParams cParams = (MarginLayoutParams) childView.getLayoutParams();int cWidthWithMargin = childView.getMeasuredWidth() + cParams.leftMargin + cParams.rightMargin;int cHeightWithMargin = childView.getMeasuredHeight() + cParams.topMargin + cParams.bottomMargin;//高度为两个子view的和 height = height + cHeightWithMargin;//宽度取两个子view中的最大值 width = cWidthWithMargin > width ? cWidthWithMargin : width; }/**
 * 如果是wrap_content设置为我们计算的值
 * 否则:直接设置为父容器计算的值
 */ setMeasuredDimension((widthMode == MeasureSpec.EXACTLY) ? sizeWidth : width, (heightMode == MeasureSpec.EXACTLY) ? sizeHeight : height); }
然后自定义onLayout(),放置两个子View的位置:
@Overrideprotected void onLayout(boolean changed, int l, int t, int r, int b) {/**
 * 遍历所有childView根据其宽和高,以及margin进行布局
 */for (int i = 0; i < getChildCount(); i++) { View childView = getChildAt(i);int cWidth = childView.getMeasuredWidth();int cHeight = childView.getMeasuredHeight(); MarginLayoutParams cParams = (MarginLayoutParams) childView.getLayoutParams();int cl = 0, ct = 0, cr = 0, cb = 0;switch (i) {case 0://bottomView放下面 cl = cParams.leftMargin; ct = getHeight() - cHeight - cParams.bottomMargin; cb = cHeight + ct ; childView.setPadding(0, extendHeight, 0, 0); cr = cl + cWidth;break;case 1://topView放上面 cl = cParams.leftMargin; ct = cParams.topMargin; cb = cHeight + ct; cr = cl + cWidth;break; } childView.layout(cl, ct, cr, cb); } }
这样之后,就可以显示布局了,但还是不能滑动。处理滑动我采用了ViewDragHelper,这个工具类可谓自定义ViewGroup神器。有了它,ViewGroup可以很容易的控制各个子View的滑动。什么事件分发,滑动冲突都不需要我们操心了。
mDragger = ViewDragHelper.create(this, 1.0f, new ViewDragHelperCallBack())
创建实例需要3个参数,第一个就是当前的ViewGroup,第二个是sensitivity(敏感系数,联想下鼠标灵敏度就知道了)。第三个参数就是Callback,会在触摸过程中会回调相关方法,也是我们主要需要实现的方法。
private class ViewDragHelperCallBack extends ViewDragHelper.Callback {@Overridepublic boolean tryCaptureView(View child, int pointerId) {return topView == child;//限制只有topView可以滑动 }@Overridepublic int clampViewPositionHorizontal(View child, int left, int dx) {return 0;//横向可滑动范围,因为不可以横向滑动直接返回0就行 }@Overridepublic int getViewVerticalDragRange(View child) {return getMeasuredHeight() - child.getMeasuredHeight(); }@Overridepublic int clampViewPositionVertical(View child, int top, int dy){//竖向可滑动范围,top是child即将滑动到的top值,限制top的范围在topBound和bottomBound之间。final int topBound = getPaddingTop();final int bottomBound = getHeight() - child.getHeight() - getPaddingBottom();return Math.min(Math.max(top, topBound), bottomBound); }@Overridepublic void onViewPositionChanged(View changedView, int left, int top, int dx, int dy) {float percent = (float) top / (getHeight() - changedView.getHeight());//处理topView动画if (Build.VERSION.SDK_INT >= Build.VERSION_CODES.LOLLIPOP) { changedView.setElevation(percent * 10); }//处理bottomView动画 bottomView.setScaleX(1 - percent * 0.03f); }@Overridepublic void onViewReleased(View releasedChild, float xvel, float yvel) {//手指释放时,滑动距离大于一半直接滚动到底部,否则返回顶部if (releasedChild == topView) {float movePercentage = (float) (releasedChild.getTop()) / (getHeight() - releasedChild.getHeight() - elevationHeight);int finalTop = (movePercentage >= .5f) ? getHeight() - releasedChild.getHeight() - elevationHeight : 0; mDragger.settleCapturedViewAt(releasedChild.getLeft(), finalTop); invalidate(); } } }
至于处理事件分发,处理滚动全都交给ViewDragHelper做就行了:
@Overridepublic void computeScroll() {if (mDragger.continueSettling(true)) { invalidate(); } }@Overridepublic boolean onInterceptTouchEvent(MotionEvent event) {return mDragger.shouldInterceptTouchEvent(event); }@Overridepublic boolean onTouchEvent(MotionEvent event) { mDragger.processTouchEvent(event);return true; }
总结
好了实现大致分析完了,还有一些小细节的处理和自定义View常用的回调、get/set方法就不说了,大家如果有兴趣的话就直接去看源码吧。个人觉得以上实现通用性还是不足吧,现在只能实现一层折叠,折叠方向也是固定的。
源码地址:
https://github.com/ren93/OverFlyingView
—————END—————

创作不易,点个“在看”


 1万+
1万+

 被折叠的 条评论
为什么被折叠?
被折叠的 条评论
为什么被折叠?
 到【灌水乐园】发言


