Tensorboard 可视化之训练过程
上一篇涉及 Tensorboard 可视化的神经网络图层, 只是让我们看清楚神经网络的结构. 今天, 我们要借助 Tensorboard 来可视化训练过程, 看看训练的过程到底是多么坎坷艰难的.
基本步骤
- 制作输入源
- 在
layer中为 Weights, biases 设置变化图 - 设置
loss的变化图 - 合并所有训练图
- 在 tensorboard 中查看
制作输入源
生成模拟数据, 加入噪声 noize 仿真
x_data = np.linspace(-1, 1, 300, dtype=np.float32)[:, np.newaxis]
noise    = np.random.normal(0, 0.05, x_data.shape).astype(np.float32)
y_data = np.square(x_data) - 0.5 + noise
在 layer 中为 Weights, biases 设置变化图
首先, 我们要为每个图表命名, 所以简单的修改 add_layer 函数 (add_layer 函数只是方便添加层, 不是固定的), 添加个图层名
def add_layer(inputs, in_size, out_size, n_layer, activation_function=None):
    # Add layer name
    layer_name = 'layer%s' % n_layer
接着就是先给 Weights 设置变化图, 使用函数 tf.summary.histogram(name, variable) 来设置
def add_layer(inputs, in_size, out_size, n_layer, activation_function=None):
    # Add layer name
    layer_name = 'layer%s' % n_layer

    with tf.name_scope('weights'):
        Weights = tf.Variable(tf.random_normal([in_size, out_size]), name='W')
        # name: 图表名, variable: 要监测的变量
        tf.summary.histogram(layer_name+'/weights', Weights)
    # 后面的类似...
用同样的方法绘制 biases, output 等, 每个 histogram 都会独立绘制一副直方图.
添加隐藏层和输出层, 只是加了 layer 层数
# Add hidden layer
with tf.name_scope('hidden_layer'):
    l1 = add_layer(xs, 1, 10, n_layer=1, activation_function=tf.nn.relu)
# Add output layer
with tf.name_scope('output_layer'):
    prediction = add_layer(l1, 10, 1, n_layer=2, activation_function=None)
设置 loss 变化图
为什么 loss 变化图要另外设置呢? 因为 loss 是在 tensorboard 的 event 选项卡下的, 要使用 tf.scalar_summary() 方法创建 (最新版在 scalars 下, 没有 event 这项了)
with tf.name_scope('loss'):
    loss = tf.reduce_mean(tf.reduce_sum(tf.square(ys-prediction), reduction_indices=[1]))
    tf.summary.scalar('loss', loss)
合并所有训练图
合并所有 summary 需要用 tf.summary.merge_all()
merged = tf.summary.merge_all()开始训练
如果只是 run train_step, 并不会记录训练的数据. 所以我们需要在训练过程中记录结果, 当然 merged 也需要 run 才真正执行
for i in range(1000):
    sess.run(train_step, feed_dict={xs: x_data, ys: y_data})
    if i % 50 == 0:
        rs = sess.run(merged, feed_dict={xs: x_data, ys: y_data})
        # 记录训练数据
        writer.add_summary(rs, i)
运行程序, 浏览器查看
[Ubuntu16 ~]# python3 filename.py
[Ubuntu16 ~]# tensorboard --logdir='graph'
Starting TensorBoard b'41' on port 6006
(You can navigate to http://127.0.1.1:6006)
...
loss 图表在 SCALARS 选项卡下
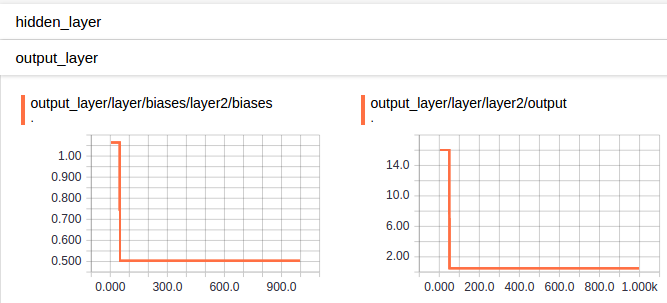
DISTRIBUTIONS & HISTOGRAMS 选项卡下都有 hidden_layer & output_layer, 但形式不一样
DISTRIBUTIONS
HISTOGRAMS
完整代码
# !/usr/bin/env python3
# -*- coding: utf-8 -*-

import tensorflow as tf
import numpy as np
import matplotlib.pyplot as plt


# Define add layer function.
def add_layer(inputs, in_size, out_size, n_layer, activation_function=None):
    layer_name = 'layer%s' % n_layer
    # add one more layer and return the output of this layer
    with tf.name_scope('layer'):
        with tf.name_scope('weights'):
            Weights = tf.Variable(tf.random_normal([in_size, out_size]), name='W')
            # Draw histogram: name, variable
            tf.summary.histogram(layer_name + '/weights', Weights)

        with tf.name_scope('biases'):
            biases = tf.Variable(tf.zeros([1, out_size]) + 0.1)
            tf.summary.histogram(layer_name + '/biases', biases)

        with tf.name_scope('wx_plus_b'):
            Wx_plus_b = tf.add(tf.matmul(inputs, Weights), biases)

        if activation_function is None:
            outputs = Wx_plus_b
        else:
            outputs = activation_function(Wx_plus_b, )

        # at histogram
        tf.summary.histogram(layer_name + '/output', outputs)
        return outputs

# Define palceholder for inputs to network.
# Use [with] including xs & ys:
with tf.name_scope('inputs'):
    xs = tf.placeholder(tf.float32, [None, 1], name='x_in') # Add name
    ys = tf.placeholder(tf.float32, [None, 1], name='y_in')

# Make up some real data
x_data = np.linspace(-1, -1, 300, dtype=np.float32)[:, np.newaxis]
noise = np.random.normal(0, 0.05, x_data.shape).astype(np.float32)
y_data = np.square(x_data) - 0.5 + noise


# Add hidden layer
with tf.name_scope('hidden_layer'):
    l1 = add_layer(xs, 1, 10, n_layer=1, activation_function=tf.nn.relu)
# Add output layer
with tf.name_scope('output_layer'):
    prediction = add_layer(l1, 10, 1, n_layer=2, activation_function=None)

# The error between prediction and real data
with tf.name_scope('loss'):
    loss = tf.reduce_mean(tf.reduce_sum(tf.square(ys-prediction),
        reduction_indices=[1]))
    # Scalar -- at event
    tf.summary.scalar('loss', loss)

with tf.name_scope('train'):
    train_setp = tf.train.GradientDescentOptimizer(0.1).minimize(loss)

sess = tf.Session()

merged = tf.summary.merge_all()

# ** Add frame to file
writer = tf.summary.FileWriter('./graph/', sess.graph)

# Important step
sess.run(tf.global_variables_initializer())

# Start training:
for i in range(1000):
    sess.run(train_setp, feed_dict={xs: x_data, ys: y_data})
    if i % 50 == 0:
        result = sess.run(merged, feed_dict={xs: x_data, ys: y_data})
    writer.add_summary(result, i)


 2007
2007

 被折叠的 条评论
为什么被折叠?


