


前 言
絮叨絮叨
继上篇内容,本篇继续讲一下这款优秀并且实用的前端插件AngularJS。
| 六、 AngularJS中的HTTP |
6.1先看看JQuery的Ajax写法
 $ajax({
   method : "get",
   url : ".....",
   success : function(){},
   error : function(){}
 });
6.2$HTTP写法
$http({
  method : "get",/*请求的方法*/
  url : "h51701.json"/*请求的地址*/
}).then(function(obj){
   /*请求成功的回调函数*/
   alert("请求成功");
   $scope.data=obj.data;
},function(){
    /*请求失败的回调函数*/
    alert("请求失败");
});
还有一种简写方式:
可以直接简写为get或者post方式
$http.get('/someUrl').then(successCallback, errorCallback);
$http.post('/someUrl', data).then(successCallback, errorCallback);
如:
$http.get("h51701.json",{/*需要传递给后台的数据*/})
.then(function(){
  alert("请求成功");
},function(){
  alert("请求失败");
})
| 七、 AngularJS中的select和表格 |
7.1使用数组作为数据源
使用数组作为数据源
1、item表示数组中的每一项!
2、循环出的option中,value的值,默认为item
3、option显示出的内容(<option></option>标签中的文字)是由item.site for决定的!
<select ng-model="site" ng-options="item.site for item in sites"></select>
<script type="text/javascript">
  angular.module("app",[])
  .controller("ctrl",function($scope){
  $scope.sites = [

     {site : "Google", url : "http://www.google.com"},
{site : "Runoob", url : "http://www.runoob.com"},
{site : "Taobao", url : "http://www.taobao.com"}
];
})
这种写法,默认生成的option效果如下:
<option value='{site : "Google", url : "http://www.google.com"}'>Google</option>
7.2以对象作为数据源
以对象作为数据源
1、 (key,value) 第一项表示对象的键,第二项表示对象的值;
2、 option的value,永远都是对象的值!
3、 option显示出的内容(<option></option>标签中的文字)是由...for 决定的!也就是说 for前面是什么,option标签中就是什么。
<select ng-model="site3" ng-options="key for (key,value) in sitess">
<script type="text/javascript">
        angular.module("app",[])
        .controller("ctrl",function($scope){
            $scope.sitess = {
                site01 : "Google",
                site02 : "Runoob",
                site03 : "Taobao"
            }
        })
    </script>
这种写法,默认生成的option效果如下:
<option value=" value "> <!--key/value(取决于for前面的内容)--> </option>
6.3ng-options 和 ng-repeat
1、ng-options使用时,是将指令添加在select上;
ng-repeat使用时,试讲指令添加在option上;
2、 ng-options使用时,必须同步给select标签绑定ng-model;
ng-repeat使用时,不一定需要绑定ng-model
3、 ng-options使用时,我们只需要关心for前面的部分,即option标签中显示的文字;而option的value会自动分配,不由我们决定。 (使用数组作为数据源是,value就是数组的每一项;使用对象作为数据源是,value永远都是对象的值)
ng-repeat使用,除了要指定option标签中显示的文字,还需要手动指定value中的内容,如果没有指定则默认没有value;
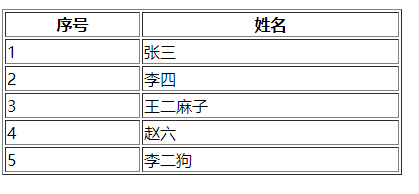
实例:
<table width="400" border="1">
  <tr>
    <th>序号</th>
    <th>姓名</th>
  </tr>
  <tr ng-repeat="item in options">
    <!--
       ng-repeat遍历是,$index 表示当前的行索引!
     -->
    <td>{{$index + 1}}</td>
    <td>{{item}}</td>
  </tr>
</table>
<script type="text/javascript">
  angular.module("app",[])
  .controller("ctrl",function($scope){
      $scope.options = ["张三","李四","王二麻子","赵六","李二狗"];
  })
</script>
| 八、 AngularJS中的DOM与事件 |
8.1DOM中的几个小指令
1、ng-disabled="true/false"
传入true表示禁用,传入false表示可用
<button ng-disabled="!myCheck">YES</button>

        <lable>
            是否同意Jasper很萌?<input type="checkbox" ng-model="myCheck" />
        </lable>
        <p>{{myCheck}}</p>

2、ng-show="true/false" 是否显示
传入true表示显示,传入false表示隐藏
ng-hide同上 是否隐藏
传入true表示隐藏,传入false表示显示
<lable>
  <input type="checkbox" ng-model="myShow" />是否显示?
</lable>
<p ng-show="myShow">我显示出来啦!</p>
<lable>
  <input type="checkbox" ng-model="myHide" />是否隐藏?
</lable>
<p ng-hide="myHide">我隐藏啦!</p>
3、ng-if: 是否移除元素
当传入true是显示,传入false时移除
效果与ng-show相同,但是ng-show和ng-hide只是隐藏,而ng-if
4、hg-bind-html : 相当于innerhtml
而ng-bind 相当于innerText
注意,要使用hg-bind-html,必须导入angular-sanitize.js文件进行安全验证。同时需要在声明模块的时候,在数组中注入安全验证模块'ngSanitize'
<div ng-bind-html="html"></div>
<script type="text/javascript">
   angular.module("app",[]).controller("ctrl",function($scope){
   $scope.html = '<h1>hahaha</h1>';</script>
5、ng-checked 设置复选框或单选矿的状态
传入true设置当前复选框被选中
<input type="checkbox" ng-model="all"> Check all<br><br>

<input type="checkbox" ng-checked="all">Volvo<br>
<input type="checkbox" ng-checked="all">Ford<br>
<input type="checkbox" ng-checked="all">Mercedes
6、ng-class: 用于设置给元素添加class类
可选值有以下几种情况:
① 可以是字符串.表示直接给元素添加对应的class。多个class之间,用空格分隔
② 可以是对象。对象的键表示class名字,对象的值为true或false,当值为true时表示添加对应的class
③ 可以是数组,数组中的值可以是字符串或对象,判断规则同上。
<style type="text/css">
  .div{
     width: 200px;
     height: 200px;
     background-color: red;
  }
  .div1{
     width: 200px;
     height: 200px;
     background-color: green;
  }
  .div3{
     color: blue;
  }
</style>
<div ng-class="'div div2'">这是一个div</div>
<lable>
  <input type="checkbox" ng-model="myClass" />是否给div添加样式?
</lable>
<div ng-class="{'div':myClass,'div1':!myClass}">这是一个div</div>
<div ng-class="[{'div':myClass,'div1':!myClass},'div3']">这是一个div</div>
8.2事件
AngularJS中的事件
AngularJS中的事件只能触发绑定在AngularJS作用域上面的属性和方法
<button ng-click="func()">点我弹个窗</button>
<button ng-mouseover="func()">mouseover</button>
<button ng-mouseout="func()">mouseout</button>
<button ng-mouseleave="func()">mouseleave</button>
<script type="text/javascript">
  angular.module("app",[]).controller("ctrl",function($scope){
    $scope.func=function(){
       alert("Jasper真萌!")
    }
  })
</script>
| 九、AngularJS中的表单和输入验证 |
1、表单中,常用的验证操作:
$dirty 表单有填写记录
$valid 字段内容合法的
$invalid 字段内容是非法的
$pristine 表单没有填写记录
$error 表单验证不通过的错误信息
2、验证时,必须给form和input,设置name属性。
给form和input设置了name后,会自动将表单信息绑定到$scope作用域中。所以,可以直接使用formName.inputName.$验证操作, 得到验证结果
例如:
formName.inputName.$dirty = "true"; 表示表单被填写过!
formName.inputName.$invalid = "true"; 表示表单输入内容不合法!
formName.inputName.$error.required = "true"; 表示设置了必填,但是没有输入
注意:
$error支持的验证:
required /minlength /maxlength /partten /eami l/number /date /url等。
3、为了避免AngularJS的验证与html5的表单验证冲突!!比如说 type = "email" required等,h5也会进行验证,
那么可以给form添加“novalidate”属性,禁用HTML5的验证功能
<div class="container" style="width: 400px;margin: 50px auto; padding: 0px;">
            <div class="panel panel-primary">
                <div class="panel-heading">
                    <div class="panel-title" style="text-align: center;">用户注册</div>
                </div>
                <div class="panel-body">
                    <form class="form-horizontal" name="form" novalidate="novalidate">
                        <div class="row">
                            <div class="col-xs-3">用户名</div>
                            <div class="col-xs-9">
                                <input type="text" class="form-control" name="name" ng-model="user.name" required ng-minlength="6" ng-maxlength="12"/>
                                <p style="color: red; margin: 0px; " ng-show="form.name.$invalid && form.name.$dirty">
                                    <span ng-show="form.name.$error.required">用户名必填</span>
                                    <span ng-show="form.name.$error.minlength">用户名长度最小6位</span>
                                    <span ng-show="form.name.$error.maxlength">用户名长度最大16位</span>
                                </p>
                            </div>
                        </div>
                        <div class="row">
                            <div class="col-xs-3">邮箱</div>
                            <div class="col-xs-9">
                                <input type="email" class="form-control" name="email" ng-model="user.email" required/>
                                <p style="color: red; margin: 0px; " ng-show="form.email.$invalid && form.email.$dirty">
                                    <span ng-show="form.email.$error.required">邮箱必填</span>
                                    <span ng-show="form.email.$error.email">邮箱不合法</span>
                                </p>
                            </div>
                        </div>
                        <div class="row">
                            <div class="col-xs-3">密码</div>
                            <div class="col-xs-9">
                                <input type="password" class="form-control" name="pwd" ng-model="user.pwd" pattern="^\w{6,18}$" required="required"/>
                                <p style="color: red; margin: 0px; " ng-show="form.pwd.$invalid && form.pwd.$dirty">
                                    <span ng-show="form.pwd.$error.pattern">密码只能有6-18位的字母数字下划线组成</span>

                                </p>
                            </div>
                        </div>
                        <div class="row">
                            <div class="col-xs-3">确认密码</div>
                            <div class="col-xs-9">
                                <input type="text" class="form-control" name="repwd" ng-model="user.repwd" required="required"/>
                                <p style="color: red; margin: 0px;" ng-show="form.repwd.$dirty&&user.pwd!=user.repwd"></p>
                            </div>
                        </div>
                        <div class="row">
                            <div class="col-xs-5">
                                <input type="submit" value="注册" class="btn btn-success" ng-disabled="form.$invalid || user.pwd!=user.repwd"/>
                            </div>
                            <div class="col-xs-5">
                                <input type="submit" value="重置"  class="btn btn-warning"/>
                            </div>
                        </div>
                    </form>
                </div>
            </div>
        </div>
| 十、 AngularJS中的动画 |
在AngularJS中使用动画:
1、导入angular-animate.js
2、如果页面中没有自定义app模块,则可以直接绑定系统模块ng-app="ngAnimate"
如果页面中有自定义app模块,则可以在自定义模块的数组中,注入ngAnimate
angular.module("app",["ngAnimate"])
3、当使用ng-show、ng-hide显示或者隐藏元素的时候,系统会自动添加或者移除.hg-hide这个类;
4、当使用ng-if、ng-switch、ng-repeat等其他指令,需要分别设置显示后和隐藏后 的两种class样式
显示后的class:
.hg-enter-active,.ne-leaave{}
隐藏后的class:
.hg-enter,.ne-leaave-active{}
<style type="text/css">
  .div{
     width: 200px;
     height: 200px;
     background-color: red;
     transition: all ease 1s;
  }
  .ng-hide{
     width: 0px;
     height: 0px;
     background-color: green;
     margin-right: -200px;
 }
 .ng-enter-active,.ne-leaave{}{
     width: 200px;
     height: 200px;
     background-color: red;
     margin: 200px;
  }
  .ng-enter,.ne-leaave-active{
    width: 0px;
    height: 0px;
    background-color: green;
    margin: 0px;
  }
</style>
<input type="checkbox" ng-model="myCheck"/>隐藏div
<div class="div" ng-show="!myCheck">这是一个div</div>
| 十一、 AngularJS中的路由 |
在AngularJS中使用路由:
1. 导入路由文件:angular-route.js
2. 在主模块中注入"ngRoute"。 rg:angular.module("app",["ngRoute"])
3. 将超链接改写为路由格式。 --> "#/标记"
<a href="#/">首页</a> 首页直接使用 #/ 表示
<a href="#/page1">page1</a> 其他页面"#/标记" 表示
4. 在config配置阶段,注入$routeProvider,进行路由配置:
5. 在页面的合适位置,添加ng-view,用于承载路由打开的页面:
<div ng-view></div> 或 <ng-view></ng-view>
【路由对象中接受的可选参数:】
① template: 自定义HTML模板,会直接将这段HTML记载到ng-view中;
② templateUrl: 导入外部的HTML模板文件。 为了避免冲突,外部的HTML应该是一个代码片段,即只保留body以内的部分。
③ controller: 在当前HTML模板上,执行的controller函数。会生出新的作用域$scope. 可以接受字符串(声明好的controller名字),也可以直接接受函数。
>>> 注意: 使用ng-view打开的页面,controller中的作用域是属于当前页面作用域的子作用域!! 依然符合Angular中父子作用域"能读不能写"的要求!
>>> 所以: 如果需要在ng-view中修改当前作用域的变量,必须把这个变量声明为对象的属性!!
④ redirectTo:重定向。一般用于.otherwise()中,用于重定向回首页!
<style type="text/css">
            ul{
                overflow: hidden;
            }
            li{
                width: 100px;
                height: 40px;
                text-align: center;
                float: left;
                line-height: 40px;
                list-style: none;
                cursor: pointer;
            }
            li a{
                text-decoration: none;
                color: black;
            }
            li:hover{
                background-color: yellow;
            }
            #div1{
                width: 1000px;
                height: 500px;
                margin: 20px auto;
                border: 2px solid red;
            }
        </style>
<body ng-app="app" ng-controller="ctrl">

        <ul>
            <li><a href="#/">首页</a></li>
            <li><a href="#/page1">page1</a></li>
            <li><a href="#/page2">page2</a></li>
            <li><a href="#/page3">page3</a></li>
            <li><a href="#/page4">page4</a></li>
        </ul>
        <input type="text" ng-model="test" />
        <p>{{test}}</p>
        <p>{{obj.test}}</p>


    </body>
<script type="text/javascript">
    angular.module("app",["ngRoute"])
.config(function($routeProvider){
    $routeProvider
    .when("/",{template:'<h1 style="color:red;">这是首页</h1>'})
    .when("/page1",{templateUrl:"page.html",controller:"ctrl1"})
    .when("/page2",{templateUrl:"page.html",controller:function($scope){
        $scope.text = "这是ctrl不知道是几控制器!!"
    }})
    .when("/page3",{templateUrl:"page.html"})
    .when("/page4",{})
    .otherwise({redirectTo:"/"})
})
.controller("ctrl",function($scope){
    $scope.test = "这是一段测试文字!";
    $scope.obj = {
        test:"这是一个测试对象!"
    }
})
.controller("ctrl1",function($scope){
    $scope.text = "这是ctrl1控制器!";
})
</script>
AngularJS允许用户自定义指令!!
例如: <div ng-view></div> 或 <ng-view></ng-view>
1. 使用.directive()声明一个自定义指令;
2. 定义指令时,指令名必须使用驼峰命名法; 而调用指令时,用"-"链接
.directive("jiangHao") --> <jiang-hao><jiang-hao>
.directive("jianghao") --> <jianghao><jianghao>
3. 定义指令时,对象中使用的属性:
① template: 调用指令时,生成的模板
② restrict: 用于声明指令允许的调用方式:
E->允许标签名表明 A->允许属性调用 C->允许类名调用 M->允许注释调用
默认值为:EA
如果需要注释调用,必须再添加一个属性:replace:true,而且注释调用前必须添加"directive:" eg:<!-- directive: jiang-hao -->
<body ng-app="app" ng-controller="ctrl">
        <div id="div1" ng-view></div>
        <!--<ng-view></ng-view>-->


        <jiang-hao></jiang-hao>
        <div jiang-hao></div>

        <div class="jiang-hao"></div>
        <!-- directive:jiang-hao -->


    </body>
<script type="text/javascript">
.directive("jiangHao",function(){
    return {
        restrict : "EACM",
        replace:true,
        template:"<h1>这是一个自定义指令</h1>",

    }
})
</script>


 1万+
1万+


 被折叠的 条评论
为什么被折叠?
被折叠的 条评论
为什么被折叠?
 到【灌水乐园】发言


