


陈琛+ 原创作品转载请注明出处《Linux内核分析》MOOC课
实验过程
1.代码修改
//修改test.c文件,添加PPIdAsm函数
151 int PPId(int argc, char *argv[])
152 {
153     long ppid;
154     ppid = getppid();
155
156     printf("the parent pid is:%ld\n",ppid);
157     return 0;
158 }

修改test.c文件,添加PPIdAsm函数
60 int PPIdAsm(int argc, char *argv[])
161 {
162     long ppid;
163
164     asm volatile(
165         "mov $64,%%eax\n\t"
166         "int $0x80\n\t"
167         "mov %%eax,%0\n\t"
168         :"=m"(ppid)
169     );
170
171     printf("the parent pid is:%ld\n",ppid);
172
173     return 0;
174 }

//修改test.c文件,修改主函数,添加命令
MenuConfig("ppid","Get Parent Process's ID",PPId);
MenuConfig("ppid-asm","Get Parent Process's ID(asm)",PPIdAsm);
2.编译
gcc -o init linktable.c menu.c test.c -m32 -static –lpthread
cd ../rootfs
cp ../menu/init ./
find . | cpio -o -Hnewc |gzip -9 > ../rootfs.img

# 启动MenuOS系统
cd ~/LinuxKernel/
qemu -kernel linux-3.18.6/arch/x86/boot/bzImage -initrd rootfs.img
3.运行过程
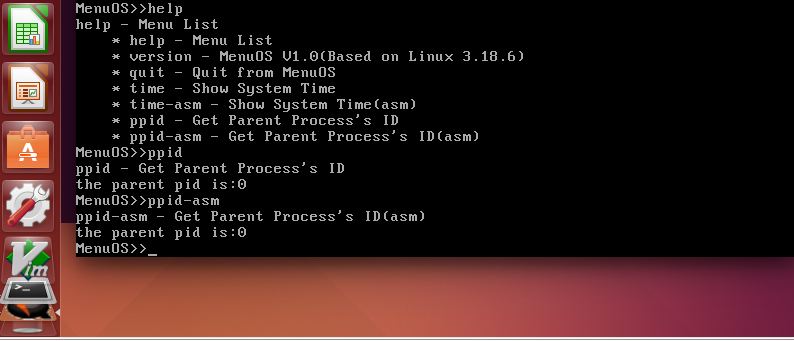
4.调试过程
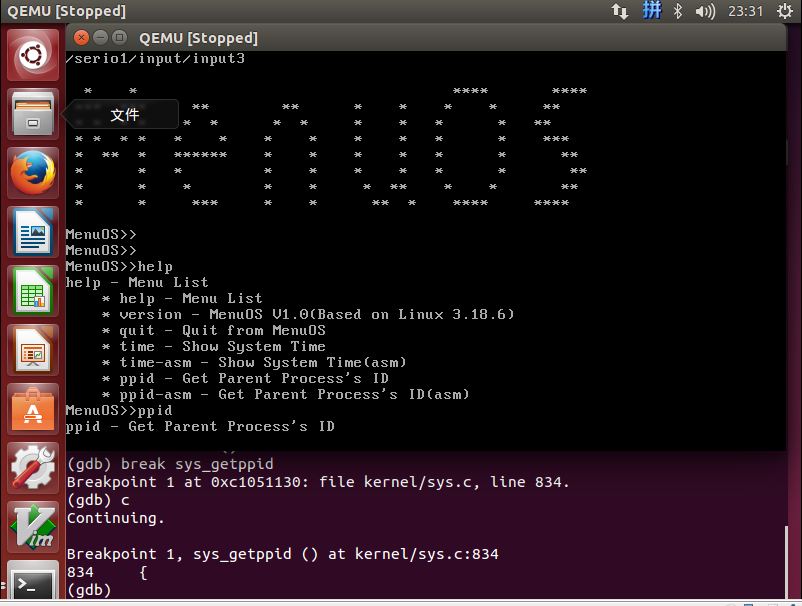
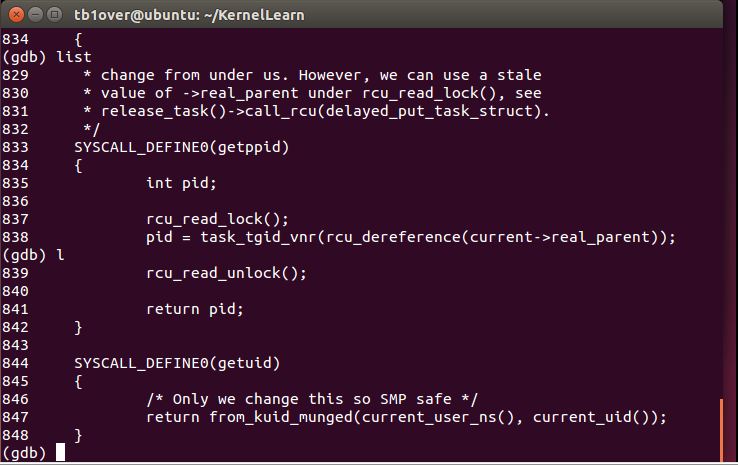
// 使用qemu和gdb调试内核
 qemu -kernel linux-3.18.6/arch/x86/boot/bzImage -initrd rootfs.img -s -S

 $ gdb
(gdb) file linux-3.18.6/vmlinux
Reading symbols from linux-3.18.6/vmlinux...done.
(gdb) target remote:1234
Remote debugging using :1234
0x0000fff0 in ?? ()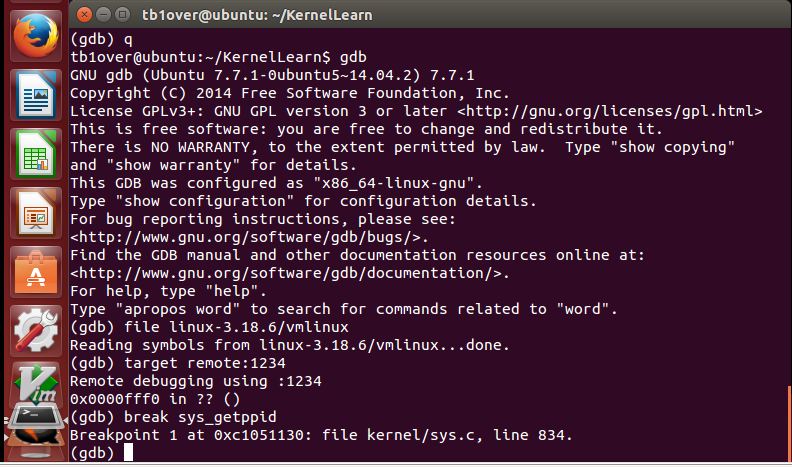
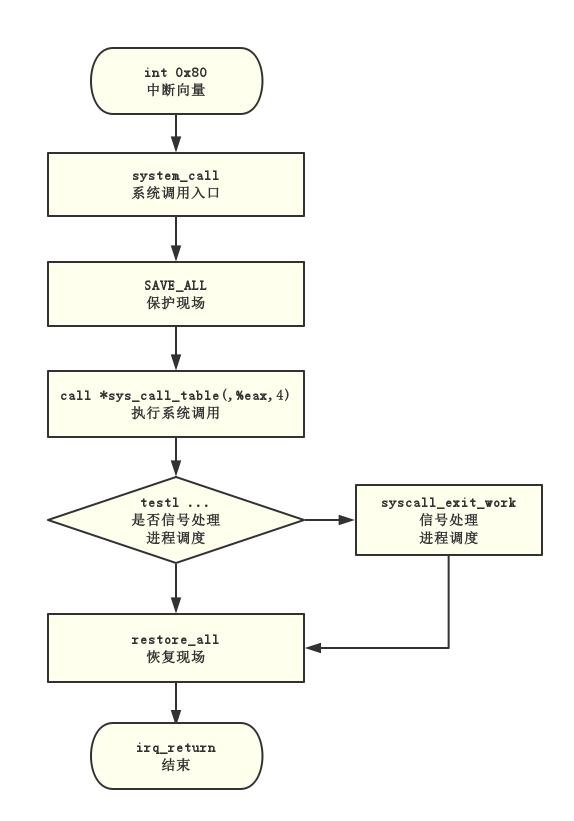
5.流程图
从sys_call开始到iret结束过程的流程图
实验总结
虽然在老师的视频指导下,参考网络资源,大致调试了一次系统调用过程,但是还是有很多疑惑。


 792
792


 被折叠的 条评论
为什么被折叠?
被折叠的 条评论
为什么被折叠?
 到【灌水乐园】发言


