@Autowired 注解可以说是每天都要用到, 但我们很少去想它底层实现依赖注入的原理到底是什么, 面试被问到这题大部分人也只能说出来 Autowired 注入的一些规则, 今天从SpringBoot 创建 Bean 的过程来给大家详细讲解 @Autowired 注解;
看完后, 你将对 @Autowired 注解的注入原则, SpringBoot 属性加载机制, SpringBoot 创建Bean 的过程, @Value 注解的原理, Spring Bean 的生命周期有新的认识;
强烈建议看过 [ SpringBoot 的启动过程以及配置类的解析原理 ] 后再来看本篇文章 ;
详细介绍SpringBoot启动流程及配置类解析原理_wx63e86c947a9be的技术博客_51CTO博客
注入规则
- @Autowired 是 Spring Framework 提供的注解。
- @Resource 是 JSR-250(Java EE 标准)提供的注解,Spring 也支持它。
装配机制:
- @Autowired 默认按类型装配。可以通过 @Qualifier 注解进行按名称装配。
- @Resource 默认按名称装配。如果指定了 name 属性,则按name装配;如果没有指定 name 属性,则按字段名装配。如果按名称没有找到匹配的 Bean,则按类型装配。
是否必需:
- @Autowired 有一个 required 属性,默认为 true。如果没有匹配的 Bean,且 required 为 true,会抛出异常。可以通过将 required 设置为 false 来使其成为可选。
- @Resource 没有 required 属性。如果没有找到匹配的 Bean,会抛出异常。
SpringBoot 属性加载
一个 SpringBoot 应用的配置属性可以有多种不同的来源, 比如可以来自操作系统的环境变量, 比如可以来自 application.yaml 文件; 每一种不同的属性来源, 都会被 SpringBoot 封装成一个PropertySource对象, 保存在 Environment 对象的 PropertySources 类型成员的 propertySourceList 中;
一个PropertySource对象中就通过一个 Map 保存了这个属性源下的所有属性配置;例如application.yaml文件中的配置会被保存到一个OrginTrackedMapPropertySource对象中;
这些属性源在 List 中的顺序决定了他们的优先级;
因为无论是通过@Value注解还是 @ConfigurationProperties 注解去获取属性值, 其本质都是调用了 Environment::getProperty方法; 具体获取的过程下面会讲到;
而这个方法的逻辑是顺序遍历所有属性源, 在遍历到的属性源中尝试去获取指定的属性, 如果找到了就直接返回; 所以在propertySourceList中越靠前, 属性源的优先级就越高;
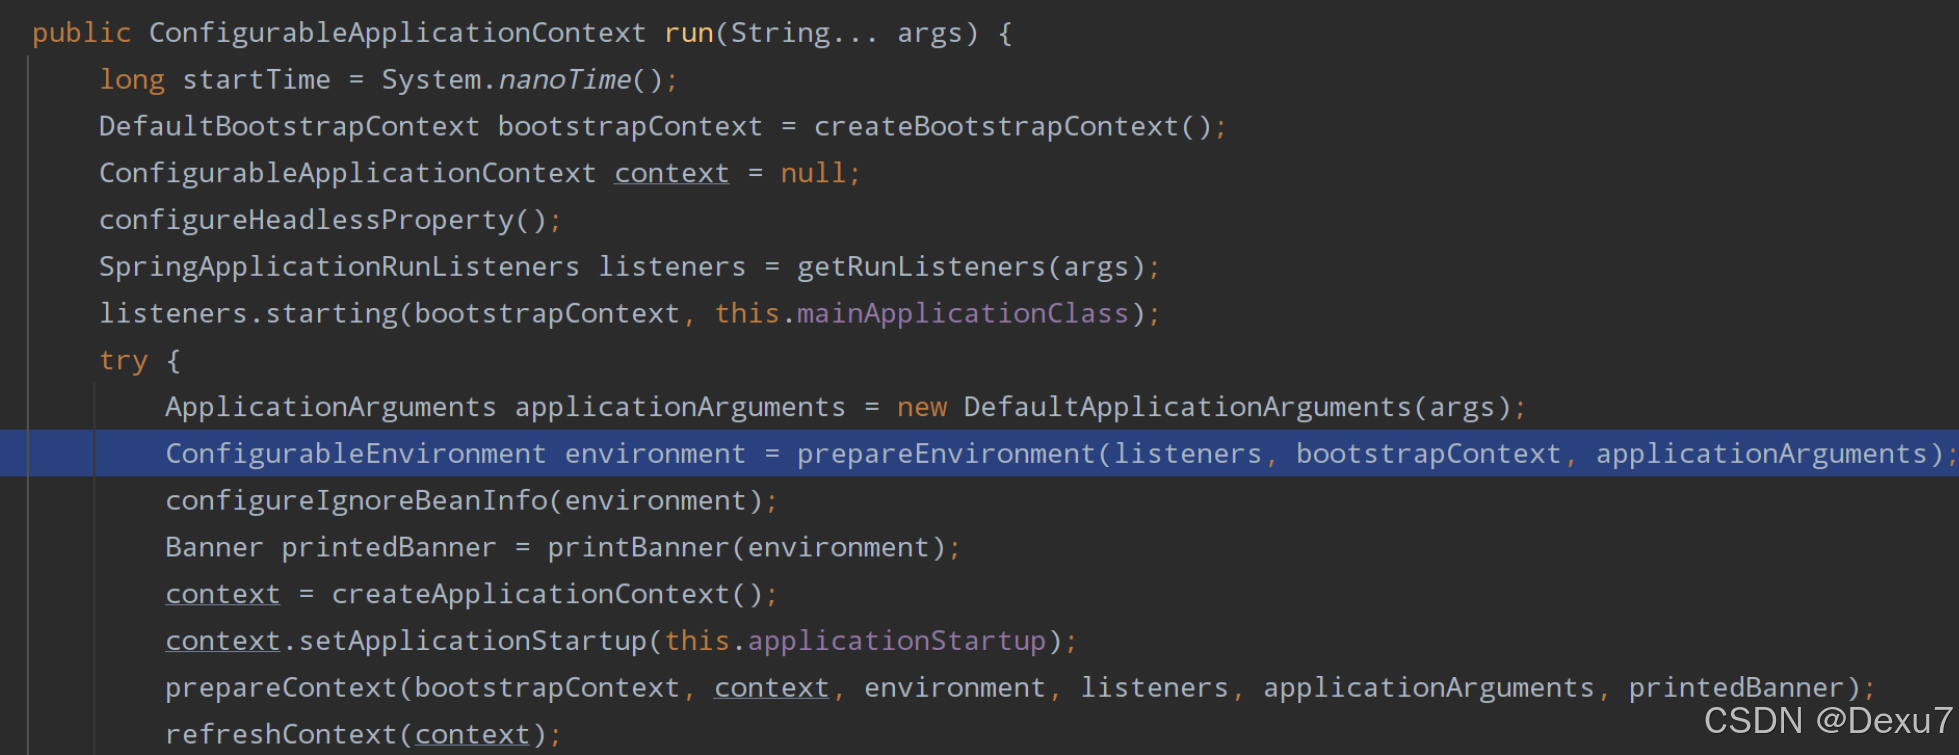
在 SpringApplication 的 run 方法内, prepareContext 之前, 先调用prepareEnvironment方法, 准备应用环境,加载各种属性源, 包括系统变量,环境变量,命令行参数,默认变量, 配置文件等;
(不了解SpringBoot启动过程点这里 详细介绍SpringBoot启动流程及配置类解析原理_wx63e86c947a9be的技术博客_51CTO博客

属性源优先级
优先级从高到低
- Nacos 配置中心的配置;
- 当前应用的命名行参数;
- JAVA 的系统属性, 也就是来自JVM的启动时给的参数;
- 操作系统的环境变量;
- application-xxx.yaml, 例如 application-dev.yaml
- application.yaml
- boostrap.yaml
- @PropertySource 注解指定的配置文件;
- 默认属性
SpringBoot官网对优先级的描述:Spring Boot uses a very particular order that is designed to allow sensible overriding of values. Later property sources can override the values defined in earlier ones. Sources are considered in the following order:PropertySource
- Default properties (specified by setting ).
SpringApplication.setDefaultProperties - @PropertySource annotations on your classes. Please note that such property sources are not added to the until the application context is being refreshed. This is too late to configure certain properties such as and which are read before refresh begins.
- Config data (such as files).
application.properties - A that has properties only in .
RandomValuePropertySource``random.* - OS environment variables.
- Java System properties ().
System.getProperties() - JNDI attributes from .
java:comp/env ServletContextinit parameters.ServletConfiginit parameters.- Properties from (inline JSON embedded in an environment variable or system property).
SPRING_APPLICATION_JSON - Command line arguments.
propertiesattribute on your tests. Available on @SpringBootTest and the test annotations for testing a particular slice of your application.- @TestPropertySource annotations on your tests.
- Devtools global settings properties in the directory when devtools is active.
$HOME/.config/spring-boot
@Value 注解原理
总结来说是通过 BeanPostProcessor, 在 Bean 实例化以后, 通过 Environment::getProperoty 获取属性值, 然后通过反射注入到 bean 中;
篇幅原因就不细说这里了, 中间不重要的方法调用太多, 下面讲Bean创建过程的时候还会提到;
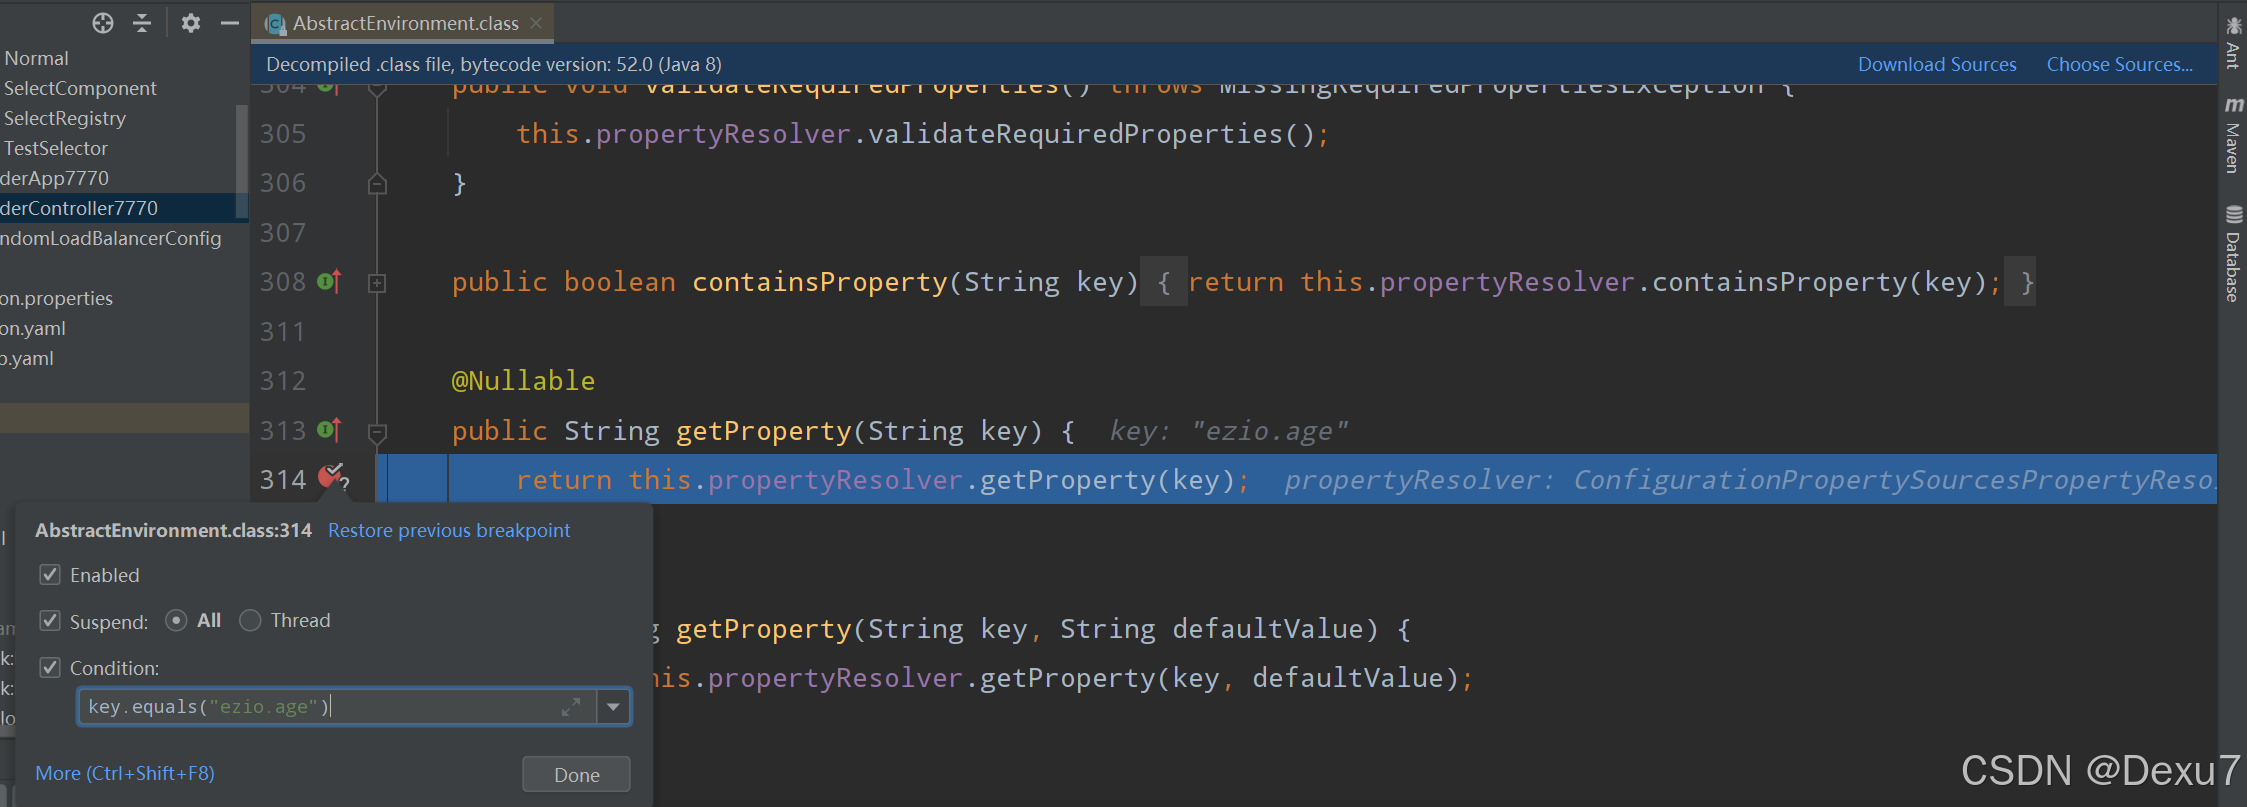
大家可以自己在AbstractEnvironment 的 getProperty() 方法内打一个条件断点, 通过方法调用栈查看自定义的属性例如ezio.age是如何注入的;
这里教大家怎么打条件断点: 小红点右键, 勾选Condition, 里面写某个变量的期望值;

Bean实例化
- SpringBoot启动时在
refreshContext的时候, 在finishBeanFactoryInitialization创建所有预先加载的单例 bean 时 (不了解SpringBoot启动过程点这里 详细介绍SpringBoot启动流程及配置类解析原理_wx63e86c947a9be的技术博客_51CTO博客 - 遍历 BeanFactory 的
BeanDefinitionNames, 拿到BeanDefinition, 通过BeanDefinition判断这个Bean是不是抽象的, 是不是要预先加载的单例Bean; - 如果不是抽象的, 并且是非懒加载的, 是单例的, 则会调用
BeanFactory的getBean方法将其添加到容器中;
- 调用
getBean方法之前, 会根据 BeanDefinition 判断一下这个Bean是否是FactoryBean, 如果是需要预先加载的FactoryBean, 才会getBean; - 如果不是
FactoryBean, 直接调用getBean(beanName), 实例化并初始化对应的Bean, 将其添加到容器;
getBean
最终来到AbstractAutowireCapableBeanFactory::doCreateBean方法;
doCreateBean
- 通过反射创建 Bean 对象, 默认调用无参构造函数, 如果没有无参, 则调用有参构造函数, 并根据类型,从容器中获取参数的Bean实例, 如果容器中没有,则调用
createBean()创建Bean,又会走同样的流程; - 创建 Bean 对象后, 向三级缓存添加当前正在创建的Bean,这里是为了处理循环依赖 (不了解循环依赖看这里)。
- 调用
populateBean进行属性填充 (依赖注入); - 调用
initializeBean方法, 执行初始化操作;
populateBean
@Value, @Autowired注解在这里被处理
AbstractAutowireCapableBeanFactory::populateBean;- 判断当前Bean的 autowire 属性, 默认是NO, 其它的还有ByName 和 ByType; 通过注解方式注册的Bean, 一般都不设置这个属性;
如果设置了 ByName 或 ByType, 那么会遍历 bean 的成员, 按成员名或成员类型装配;
- 如果不是 ByName 和 ByType 的话, 会调用
AutowiredAnnotationBeanPostProcessor::postProcessProperties方法; 所以说, @Autowired 和 @Value 注解, 归根结底都是 BeanPostProcessor 处理的 - 层层调用, 最终来到
AutowiredFieldElement::inject; 在这里处理 @Value 和 @Autowired @Value就通过Environment.getProperty()获取属性值, 然后反射, 通过Field.set(bean, value)注入;@Autowired, 调用findAutowireCandidates方法, 该方法按照类型获取满足要求的候选者, 放到一个Map中返回; 如果有超过一个, 根据@Primary注解或者@Order注解来决定注入哪个Bean;
initializeBean
AbstractAutowireCapableBeanFactory::initializeBean- 执行一系列的 Aware接口回调方法: BeanNameAware, BeanClassLoaderAware, BeanFactoryAware
其它的 Aware 接口, 例如
ApplicationContextAware, 是通过BeanPostProcessor处理的;
- 执行所有的
BeanPostProcessor.postProcessBeforeInitialization()方法; - 调用所有 init 方法
- 先判断是否实现了 InitializingBean, 如果是则调用
afterPropertiesSet方法- 然后通过 BeanDefinition 获取 @Bean 注解 initMethod 属性, 如果指定了这个属性, 就执行对应的方法
- 执行所有的
BeanPostProcessor.postProcessAfterInitialization()方法;
Bean 生命周期总结
- 处理配置类的时候, 创建BeanDefinition对象; 将BD放入BDMap; 不了解配置类处理点这里 详细介绍SpringBoot启动流程及配置类解析原理_wx63e86c947a9be的技术博客_51CTO博客
- 执行BeanDefinitionRegistryPostProcessor的后处理方法;
- 执行BeanFactoryPostProcessor的后处理方法
- 遍历BDMap, 反射, 用构造方法生成Bean对象
- @Autowired 进行注入;
- 调用Aware接口 ( 有的 Aware 是在 BeanPostProcessor 之前处理的, 有的是用 BeanPostProcessor 的 beforeInitialization处理的)
- 执行BeanPostProcessor的beforeInitialization
- 如果实现InitializingBean, 调用afterPropertiesSet方法
- 执行init-method
- 执行BeanPostProcessor的afterInialization方法
- 放到singletonObjects中


 869
869

 被折叠的 条评论
为什么被折叠?


