


使用OpenSSL创建证书。采用的OS为CentOS7.
1. 修改OpenSSL的配置文件
vim /etc/pki/tls/openssl.cnf
[ CA_default ]

dir             = /etc/pki/CA           # Where everything is kept
certs           = $dir/certs            # Where the issued certs are kept
crl_dir         = $dir/crl              # Where the issued crl are kept
database        = $dir/index.txt        # database index file.
#unique_subject = no                    # Set to 'no' to allow creation of
                                        # several ctificates with same subject.
new_certs_dir   = $dir/newcerts         # default place for new certs.

certificate     = $dir/my-ca.crt        # The CA certificate
serial          = $dir/serial           # The current serial number
crlnumber       = $dir/crlnumber        # the current crl number
                                        # must be commented out to leave a V1 CRL
crl             = $dir/crl.pem          # The current CRL
private_key     = $dir/private/my-ca.key # The private key
RANDFILE        = $dir/private/.rand    # private random number file

x509_extensions = usr_cert              # The extentions to add to the cert
2. 准备文件目录
cd /etc/pki/CA
rm -rf *
cd /etc/pki/tls/misc
./CA -newca
ctrl-c
创建Serial文件
cd /etc/pki/CA
echo 00 > serial

3. 生成根密钥
cd /etc/pki/CA
openssl genrsa -out private/my-ca.key
or
( umask 077; openssl genrsa -out private/cakey.pem )
4. 生成根证书
openssl req -new -x509 -key private/my-ca.key -out my-ca.crt
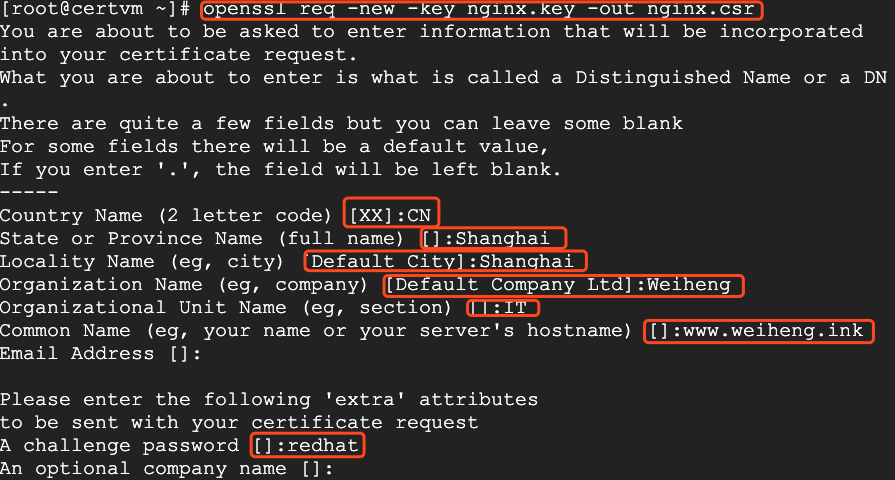
5. 创建用户证书密钥和证书请求文件
cd /root
openssl genrsa -out nginx.key
openssl req -new -key nginx.key -out nginx.csr
6. 用CA签署证书
openssl ca -in nginx.csr -out nginx.crt
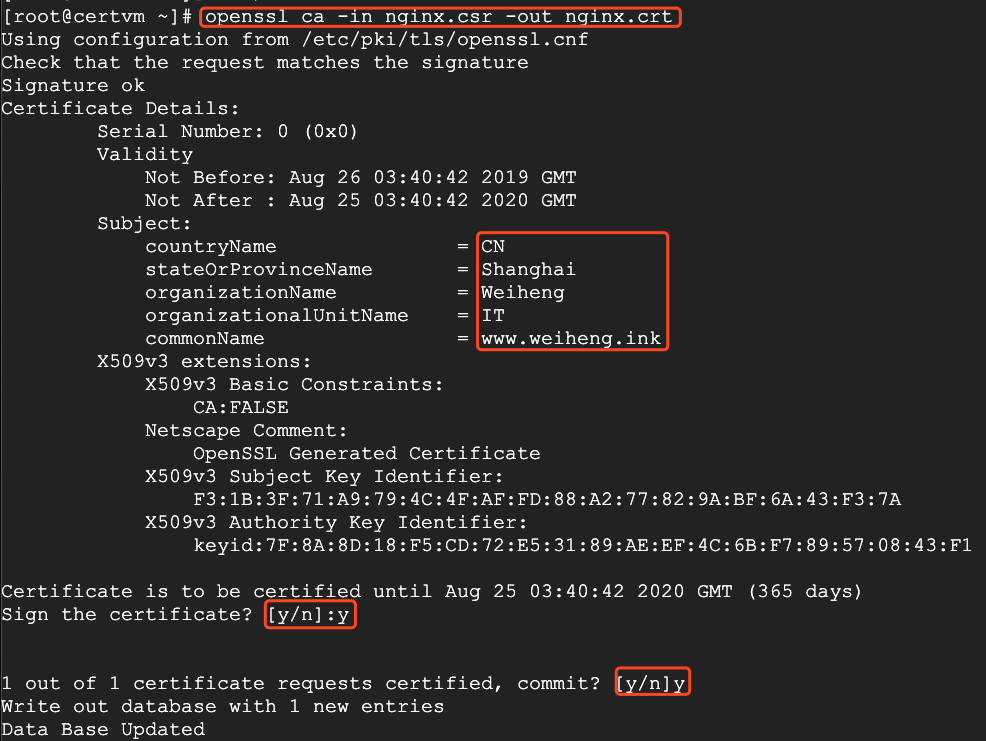
这样,证书就创建成功了。


 4609
4609


 被折叠的 条评论
为什么被折叠?
被折叠的 条评论
为什么被折叠?
 到【灌水乐园】发言


