


项目地址:https://github.com/sohutv/cachecloud
# 初始化数据库
默认插入admin超级管理员,用户名admin, 密码:admin
安装mysql
yum -y install mariadb mariadb-server mariadb-devel
systemctl enable mariadb
systemctl start mariadb
# clone项目并导入mysql数据
cd /usr/local/src
git clone https://github.com/sohutv/cachecloud.git
cd /usr/local/src/cachecloud/script
cd
如果mysql是5.5的,修改下cachecloud.sql 745行,内容修改为如下内容,5.7版本的不用修改
`service_time` timestamp NOT NULL DEFAULT "0000-00-00 00:00:00" COMMENT '上线时间'
进入mysql
创建数据库
create database `cache_cloud` default character set utf8 COLLATE utf8_general_ci;
grant all on cache_cloud.* to admin@'localhost' identified by 'admin';
source cachecloud.sql;
# CacheCloud项目配置
cd /usr/local/src/cachecloud
编辑配置文件: cat cachecloud-open-web/src/main/swap/online.properties
cachecloud.db.url = jdbc:mysql://127.0.0.1:3306/cache_cloud
cachecloud.db.user = admin
cachecloud.db.password = admin
cachecloud.maxPoolSize = 20

isClustered = true
isDebug = false
spring-file=classpath:spring/spring-online.xml
log_base=/opt/cachecloud-web/logs
web.port=8585
log.level=WARN
安装maven
wget http://mirror.bit.edu.cn/apache/maven/maven-3/3.6.0/binaries/apache-maven-3.6.0-bin.tar.gz
解压到 /usr/local/maven
maven配置阿里云中央仓库(加速包的下载)
编辑 /usr/local/maven/conf/settings.xml,mirrors 标签内添加
<mirror>
      <id>alimaven</id>
      <name>aliyun maven</name>
    <url>http://maven.aliyun.com/nexus/content/groups/public/</url>
      <mirrorOf>central</mirrorOf>
</mirror>
把 /usr/local/maven/bin 添加到系统环境变量
. /etc/prefile
cd /usr/local/src/cachecloud
mvn clean compile install -Ponline
mkdir -p /opt/cachecloud-web
cp cachecloud-open-web/target/cachecloud-open-web-1.0-SNAPSHOT.war /opt/cachecloud-web
cp cachecloud-open-web/src/main/resources/cachecloud-web.conf /opt/cachecloud-web/cachecloud-open-web-1.0-SNAPSHOT.conf
cp script/start.sh /opt/cachecloud-web
cp script/stop.sh /opt/cachecloud-web
chmod +x /opt/cachecloud-web/*.sh
修改 /opt/cachecloud-web/cachecloud-open-web-1.0-SNAPSHOT.conf
PID_FOLDER=/opt/cachecloud-web
LOG_FOLDER=/opt/cachecloud-web/logs
LOG_FILENAME=cachecloud-web.log
APP_NAME=cachecloud-web
RUN_ARGS=
JAVA_HOME=/usr/local/jdk
JAVA_OPTS="-server -Xmx4g -Xms4g -Xss256k -XX:MaxDirectMemorySize=1G -XX:+UseG1GC -XX:MaxGCPauseMillis=200 -XX:G1ReservePercent=25 -XX:InitiatingHeapOccupancyPercent=40 -XX:+PrintGCDateStamps -Xloggc:/opt/cachecloud-web/logs/gc.log -XX:+UseGCLogFileRotation -XX:NumberOfGCLogFiles=10 -XX:GCLogFileSize=100M -XX:+HeapDumpOnOutOfMemoryError -XX:HeapDumpPath=/opt/cachecloud-web/logs/java.hprof -XX:+DisableExplicitGC -XX:-OmitStackTraceInFastThrow -XX:+PrintCommandLineFlags -XX:+UnlockCommercialFeatures -XX:+FlightRecorder -Djava.awt.headless=true -Djava.net.preferIPv4Stack=true -Djava.util.Arrays.useLegacyMergeSort=true -Dfile.encoding=UTF-8 -Dcom.sun.management.jmxremote -Dcom.sun.management.jmxremote.port=22099 -Dcom.sun.management.jmxremote.ssl=false -Dcom.sun.management.jmxremote.authenticate=false"
启动cachecloud
sh /opt/cachecloud-web/start.sh
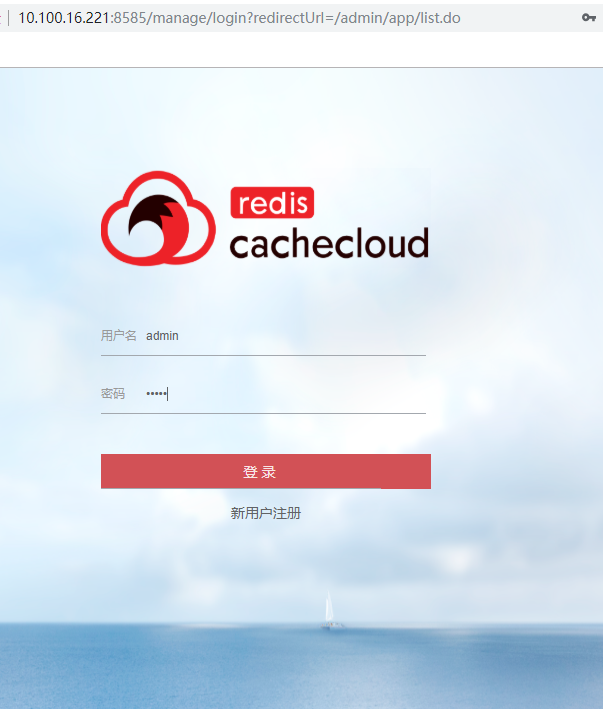
登录cachecloud管理系统
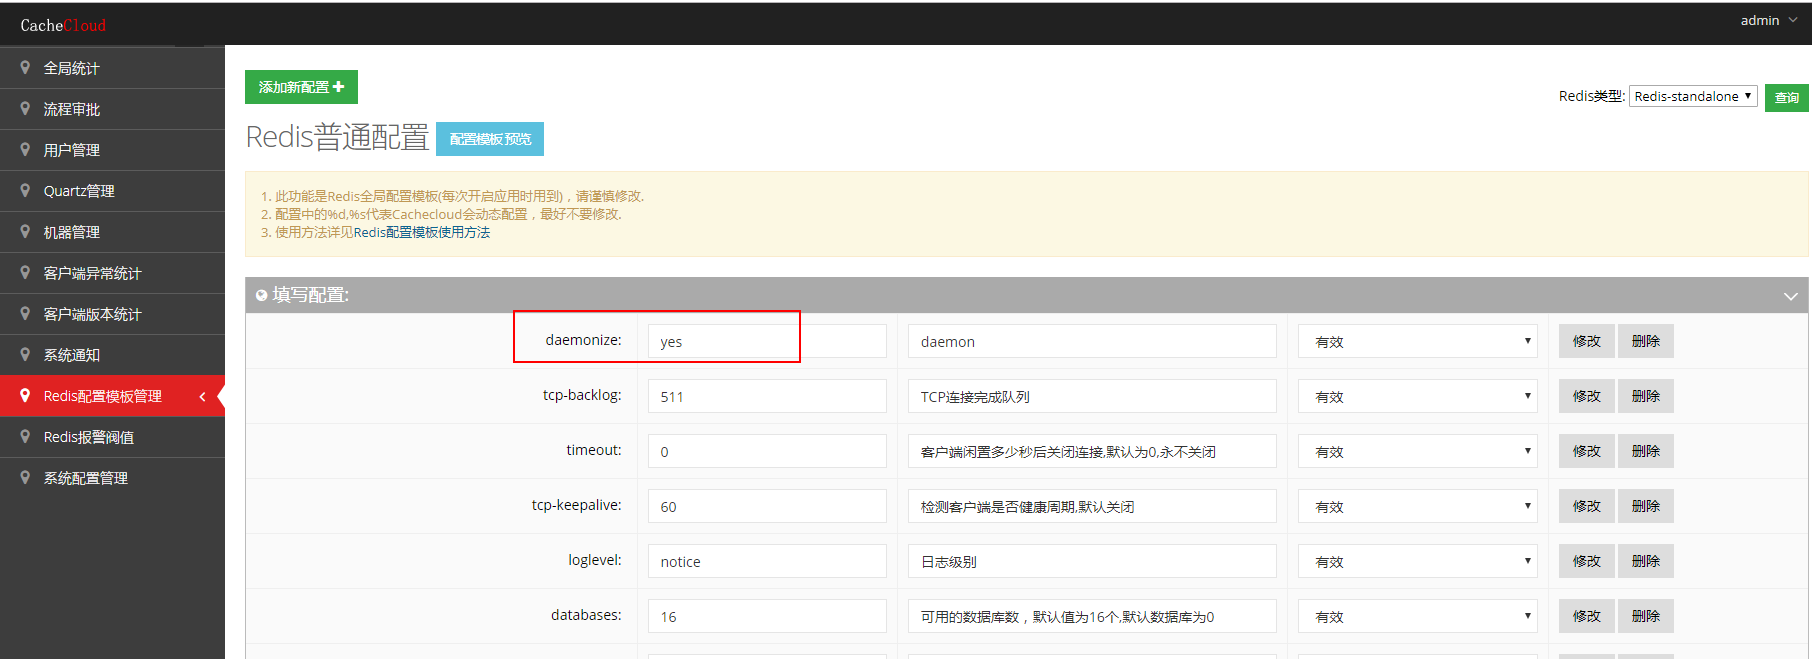
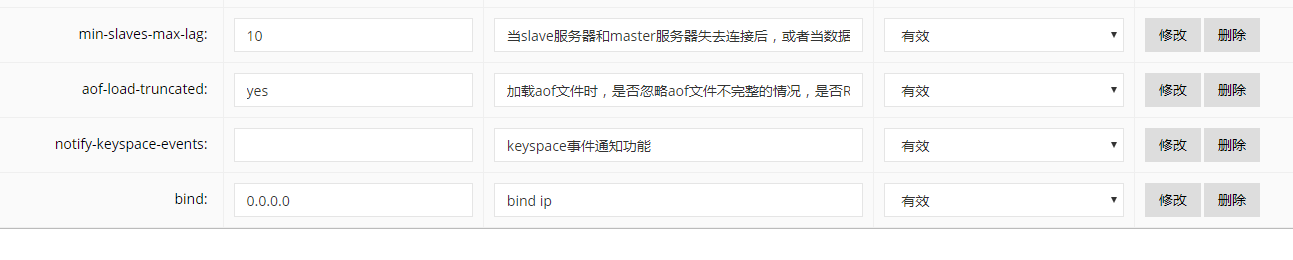
修改redis配置模板:(不添加下面这两个参数,在建redis集群时将出现redis连接失败的情况)
1 修改Redis-standalone 模板
daemonize 值修改为yes
再添加一个参数
bind,值为 0.0.0.0
2 修改Redis-sentinel模板
添加一个参数
protected-mode 值 为no

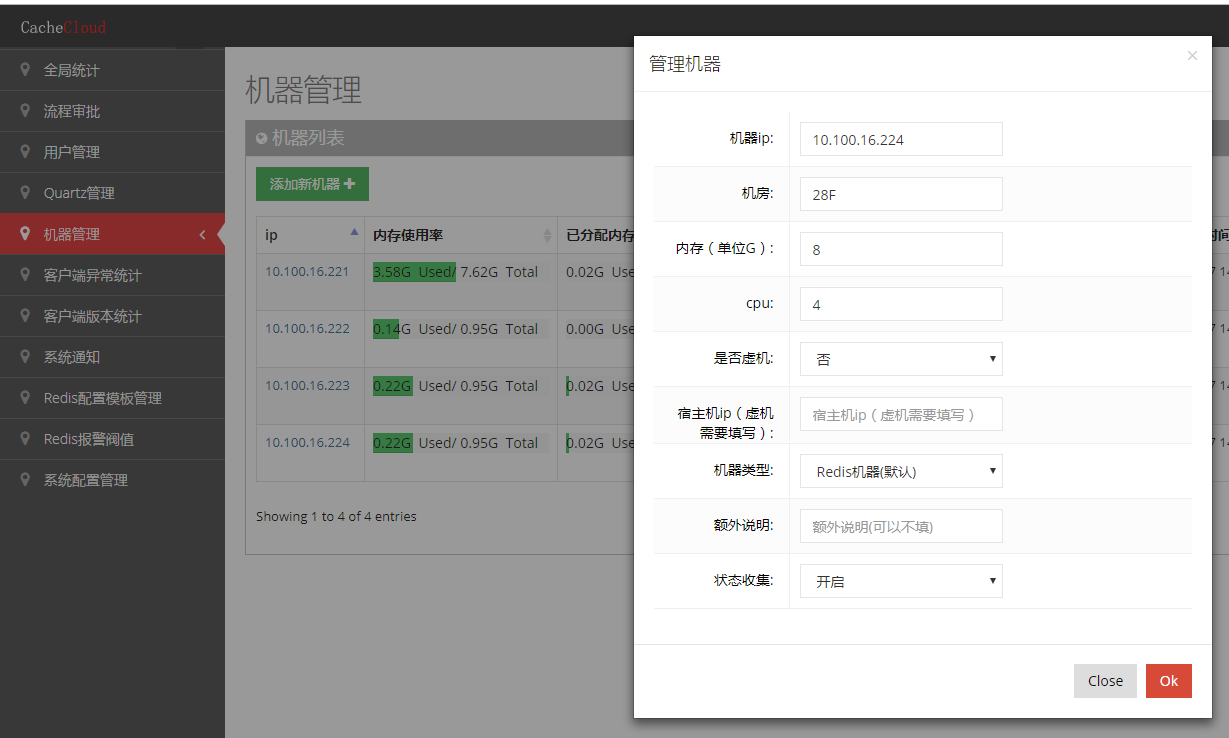
# 添加主机
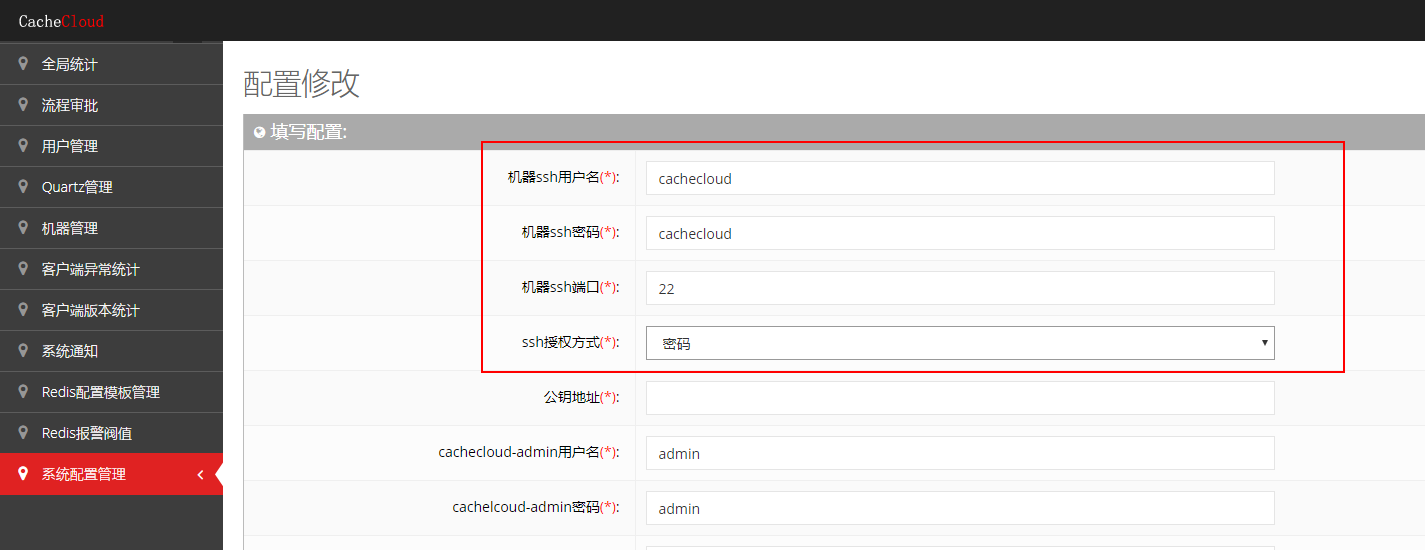
要求所有的主机节点,ssh端口一致,用于控制节点的用户相同(该用户为普通可ssh远程登录的用户即可),如果是用密码则要求密码也相同,redis也将用这个用户运行。
如果用ssh key连接:
在cachecloud 服务器上生成key
ssh-keygen # 使用root生效ssh key,生成的公钥位于:cat /root/.ssh/id_rsa.pub ,把该文件内容更新到 系统配置管理中的 公钥地址 项
ssh-copy-id cachecloud@redis节点Ip # cachecloud为上面设置的用户,如果ssh端口不是22,可以用参数-p 端口来指定ssh端口,有多少节点执行多少次
执行初始化脚本:
把cachecloud 项目中 cachecloud/script/cachecloud-init.sh 复制到redis节点的主机上,修改安装的redis版本,建议所有节点的redis版本一致
#!/bin/bash

############################################################################
# @desc:
#	- 1. create user;
#	- 2. create default directories and authorize;
#	- 3. @usage: sh cachecloud-init.sh [username]
# @author: leifu
# @time:
###########################################################################

set -o nounset
set -o errexit

readonly redisDir="/opt/cachecloud/redis"
readonly redisTarGz="redis-3.2.12.tar.gz"


# check if the user exists
checkExist() {
	local num=`cat /etc/passwd | grep -w $1 | wc -l`

	#cat /etc/passwd | grep -q "$1"
	if [[ $num == 1 ]]; then
		echo "user $1 exists, overwrite user and *init all data*: [y/n]?"
		read replace
		if [[ ${replace} == "y" ]]; then
			echo "delete existed user: $1."
			userdel -r "$1"
			createUser "$1"
			init "$1"
			return 0
		fi
	else
		createUser "$1"
		init "$1"
	fi
	return 0
}


# create the user
createUser() {
	# create a user
	useradd -m -d /home/$1 -s /bin/bash $1

	# give the user a password
	passwd $1

	# add the user to sudoers
	#	echo "$1	ALL=(ALL)   ALL" >> /etc/sudoers

	#  Maximum number of days between password change
	chage -M 9999 $1
	echo "OK: create user: $1 done"

}

# create defautl dirs and authorize
init() {
	# create working dirs and a tmp dir
	mkdir -p /opt/cachecloud/data
	mkdir -p /opt/cachecloud/conf
	mkdir -p /opt/cachecloud/logs
	mkdir -p /opt/cachecloud/redis
	mkdir -p /tmp/cachecloud

	# change owner
	chown -R $1:$1 /opt/cachecloud
	chown -R $1:$1 /tmp/cachecloud
	echo "OK: init: $1 done"
}


# install redis
installRedis() {
	#which redis-server
	#if [[ $? == 0 ]]; then
	#	echo "WARN: redis is already installed, exit."
	#	return
	#fi

	yum install -y gcc
	mkdir -p ${redisDir} && cd ${redisDir}
	wget http://download.redis.io/releases/${redisTarGz} && mv ${redisTarGz} redis.tar.gz && tar zxvf redis.tar.gz --strip-component=1
	make && make install
	if [[ $? == 0 ]]; then
		echo "OK: redis is installed, exit."
		chown -R $1:$1 ${redisDir}
		export PATH=$PATH:${redisDir}/src
		return
	fi
	echo "ERROR: redis is NOT installed, exit."
}

username=$1
checkExist "${username}"
installRedis "${username}"
执行脚本初始化:
- (a). 使用root登录目标服务器。
- (b). 将cachecloud-init.sh脚本拷贝到目标服务器当前用户目录下。
- (c). 执行 sh cachecloud-init.sh ${yourusername}
- (d). 两次确认密码
- (e). 一路安装直到成功。
脚本作用:
-
(a). 创建cachecloud项目用户:因为cachecloud项目的部分功能(redis启动、服务器监控)是通过ssh完成的,所以这里的用户和密码要和项目中的相对应,具体详见第三节。
-
(b). 创建cachecloud项目的工作目录、数据目录、配置目录、日志目录、redis安装目录、临时目录等等。(/opt/cachecloud/data、/opt/cachecloud/conf、/opt/cachecloud/logs、/opt/cachecloud/redis、/tmp/cachecloud)
-
(c). 安装脚本中指定的release版本的Redis
添加好主机后,过一会有相关的检测信息,
Quartz管理会两相相应的定时任务,如果没有出现,可以尝试把cachecloud服务停止再开启

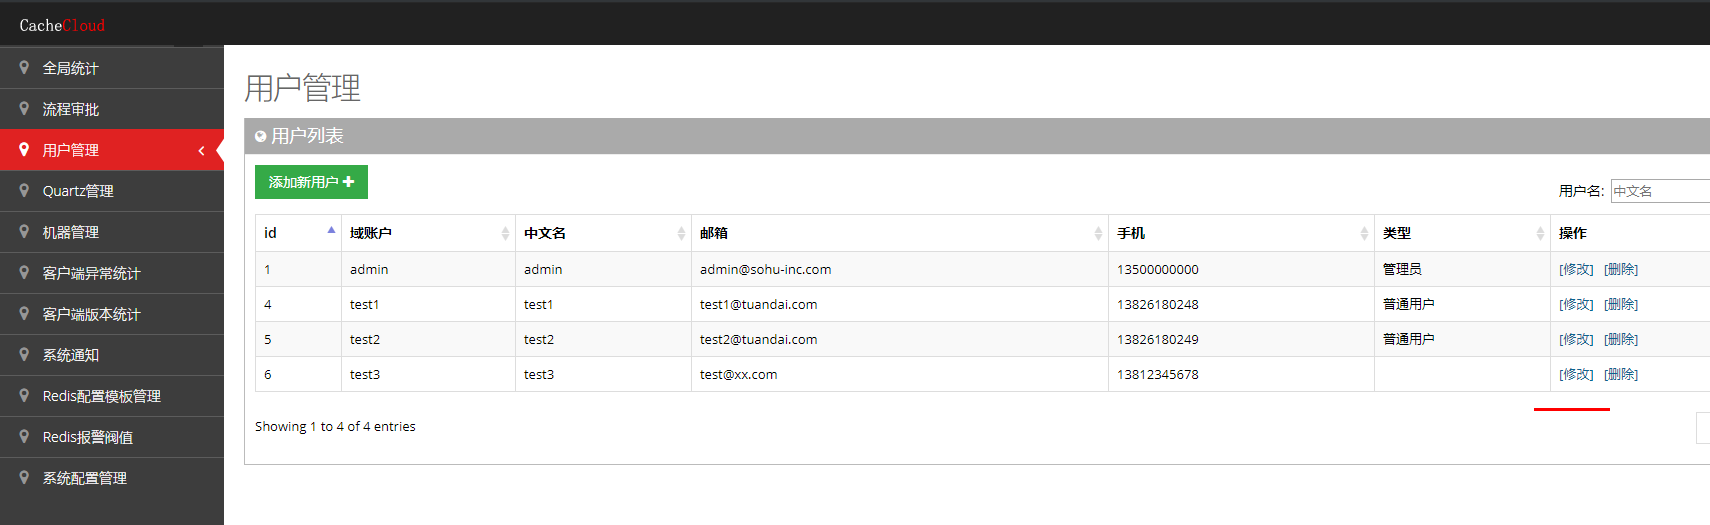
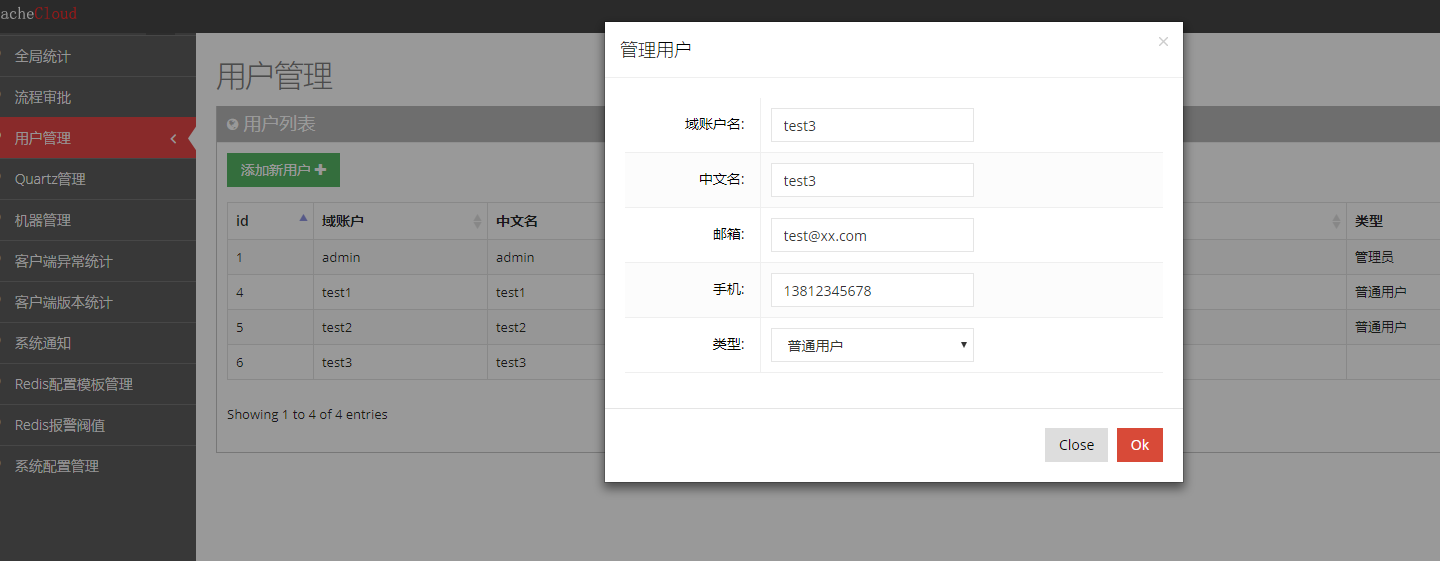
# 注册用户

用户密码就是用户名

admin管理员登录后台审核用户通过
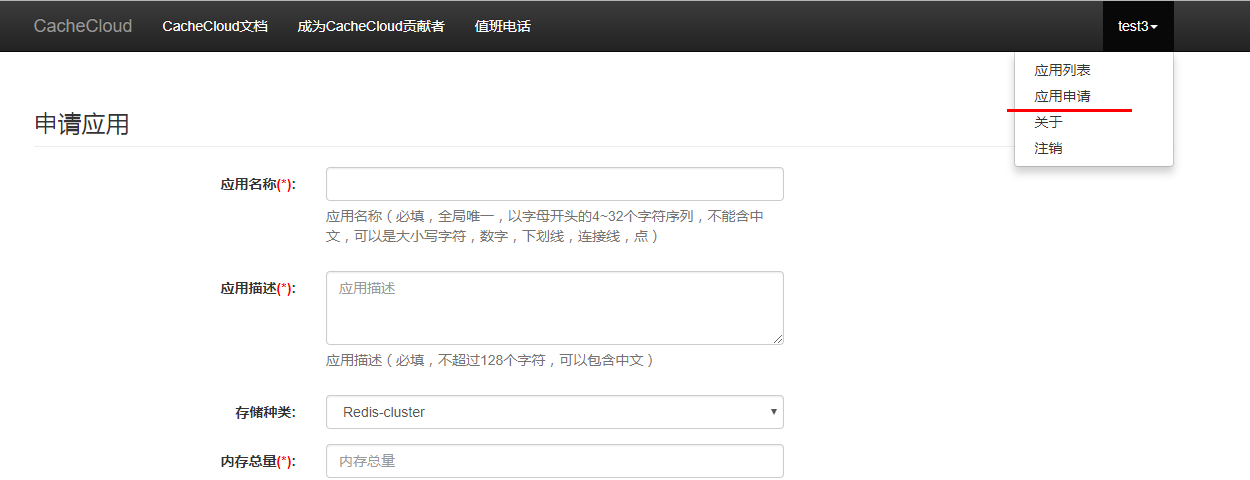
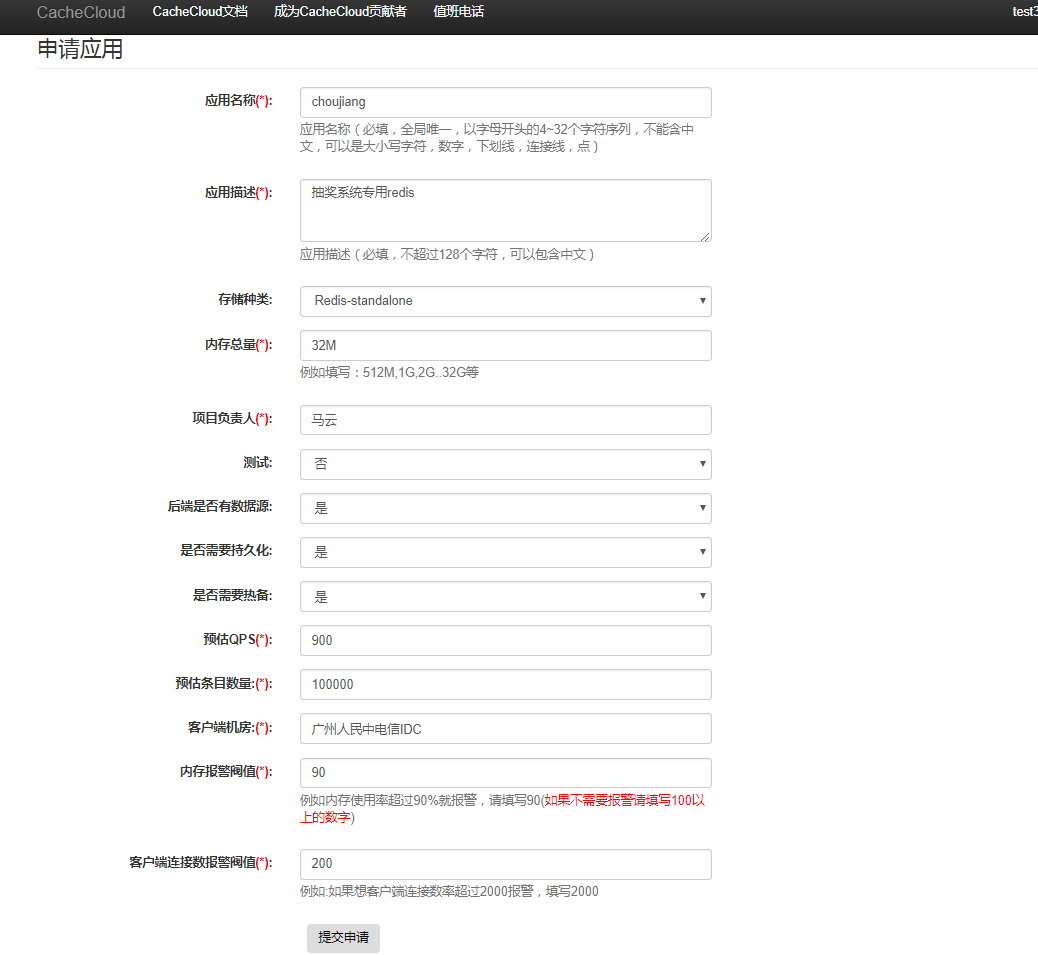
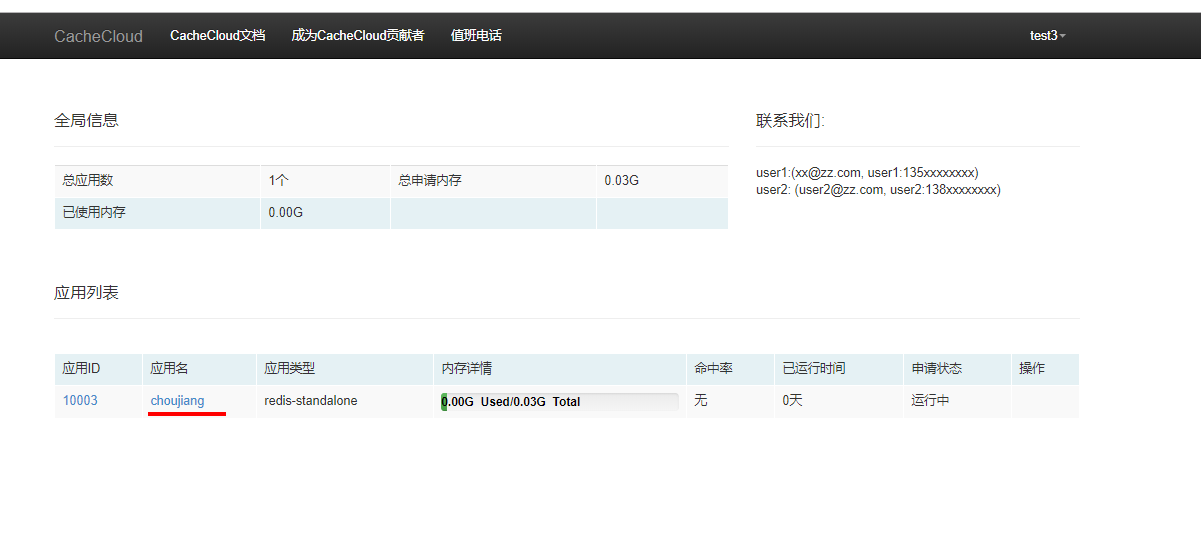
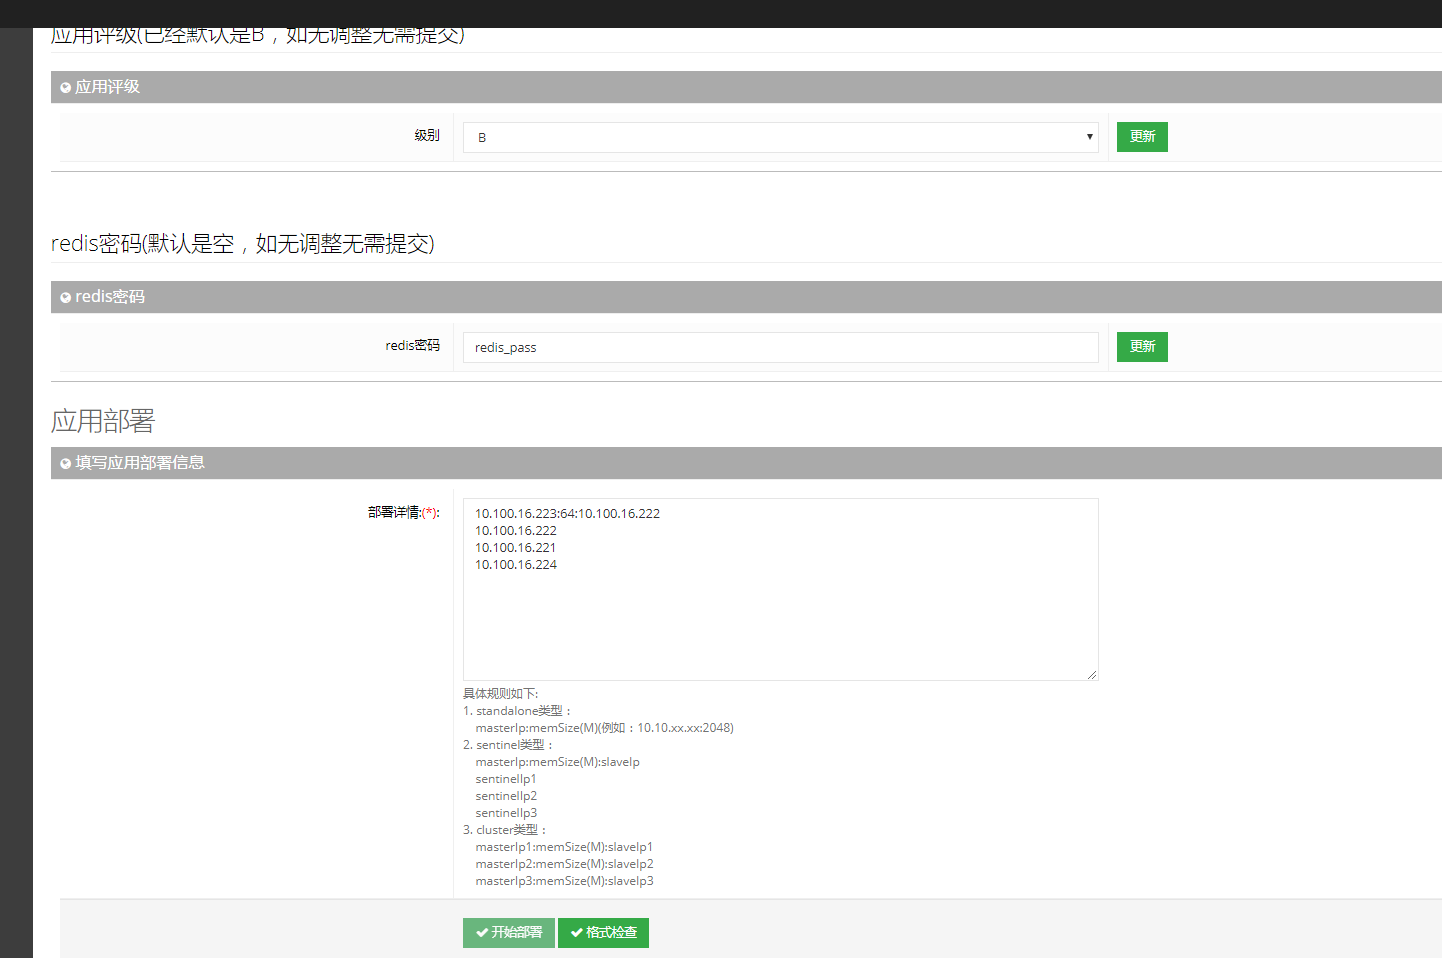
# 新建redis应用(Redis-standalone)
test3登录cachecloud
管理员登录后台通过审核并执行部署等

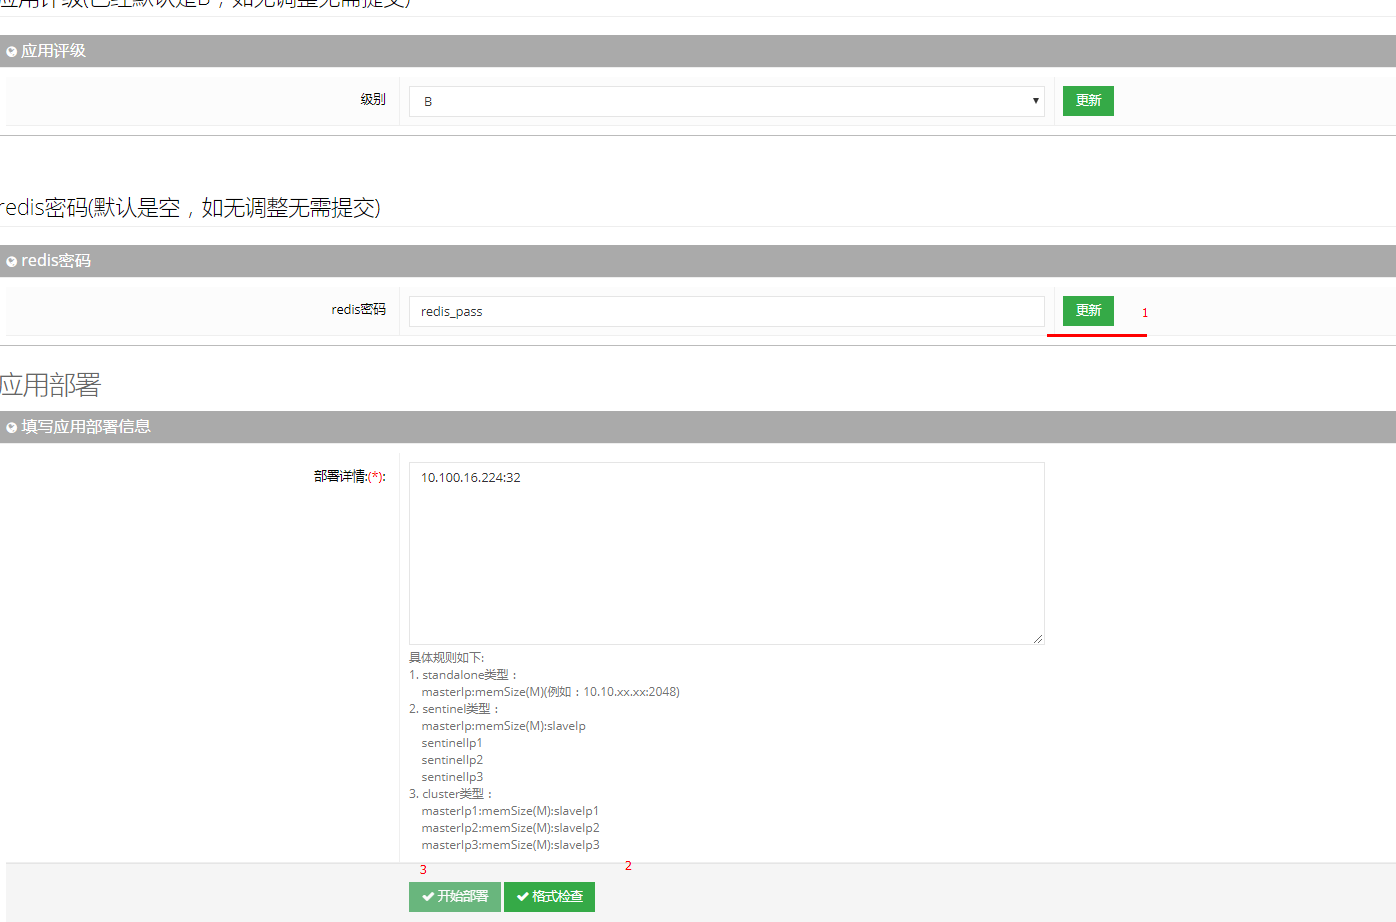
如果要设置redis密码,则在redis密码后设置密码,再点击后面的更新按钮
接下来,按要求把部署详情写好
点击 格式检查
最后点击部署
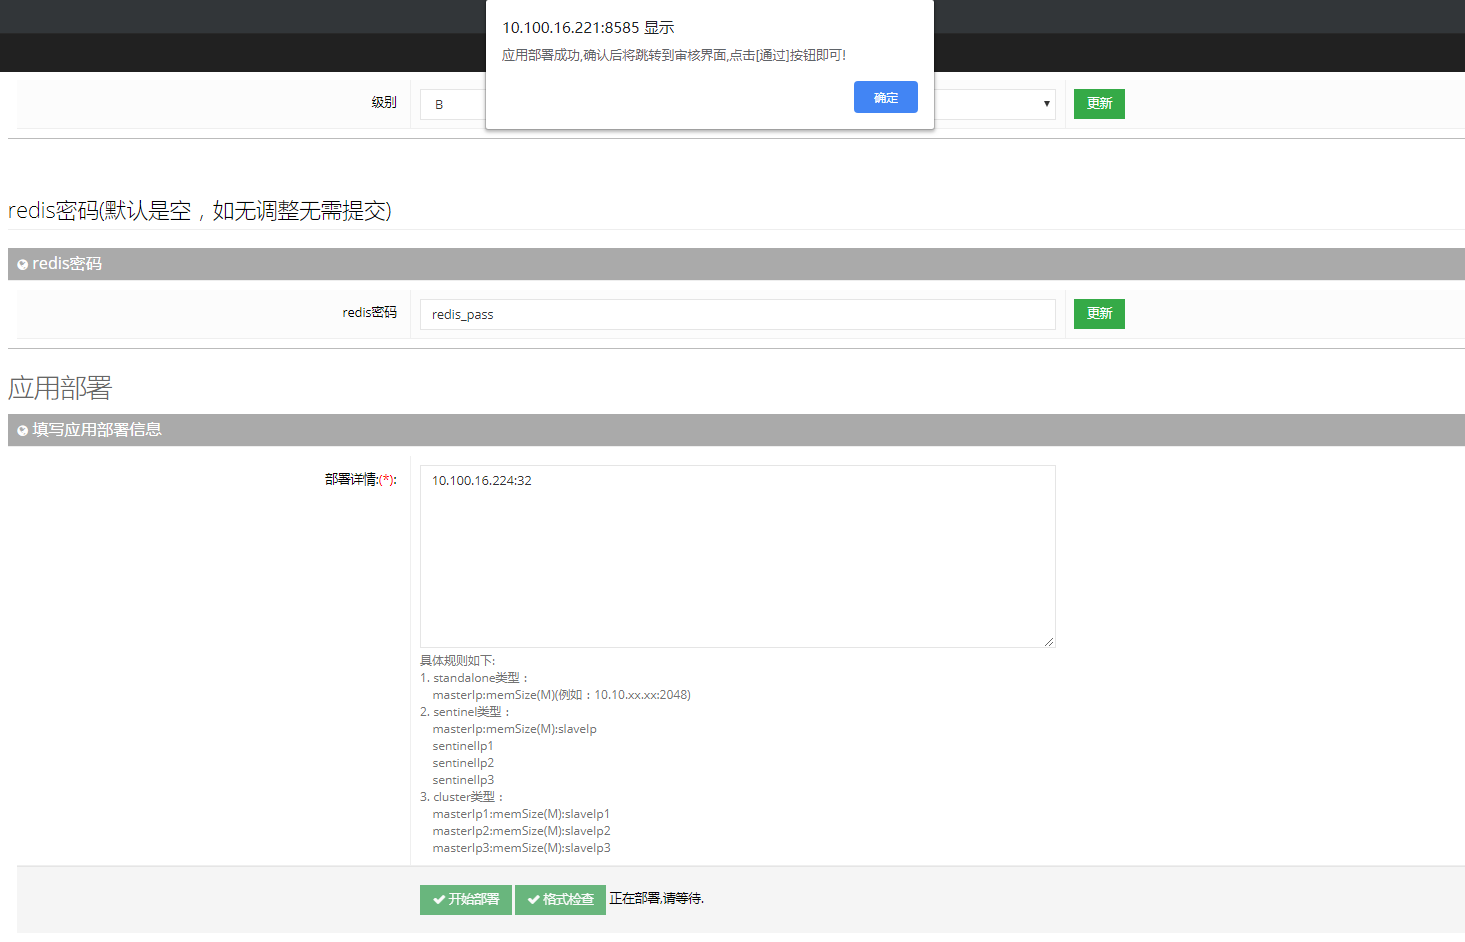
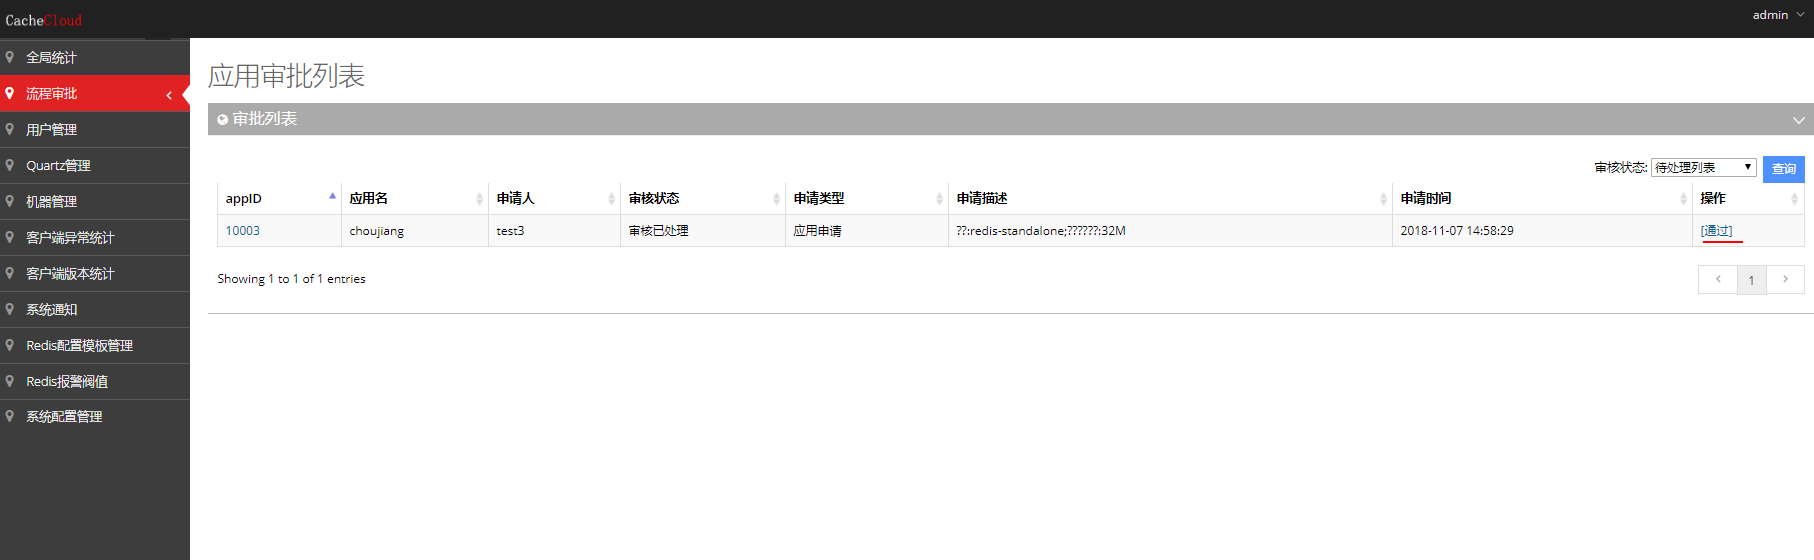
部署成功后,点击通过即可
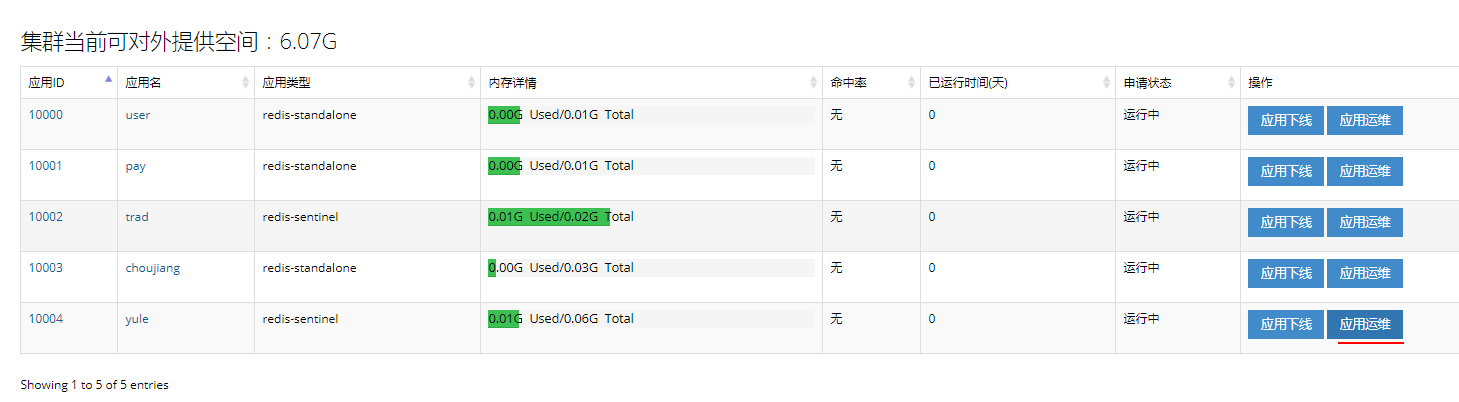
申请用户查看redis详情
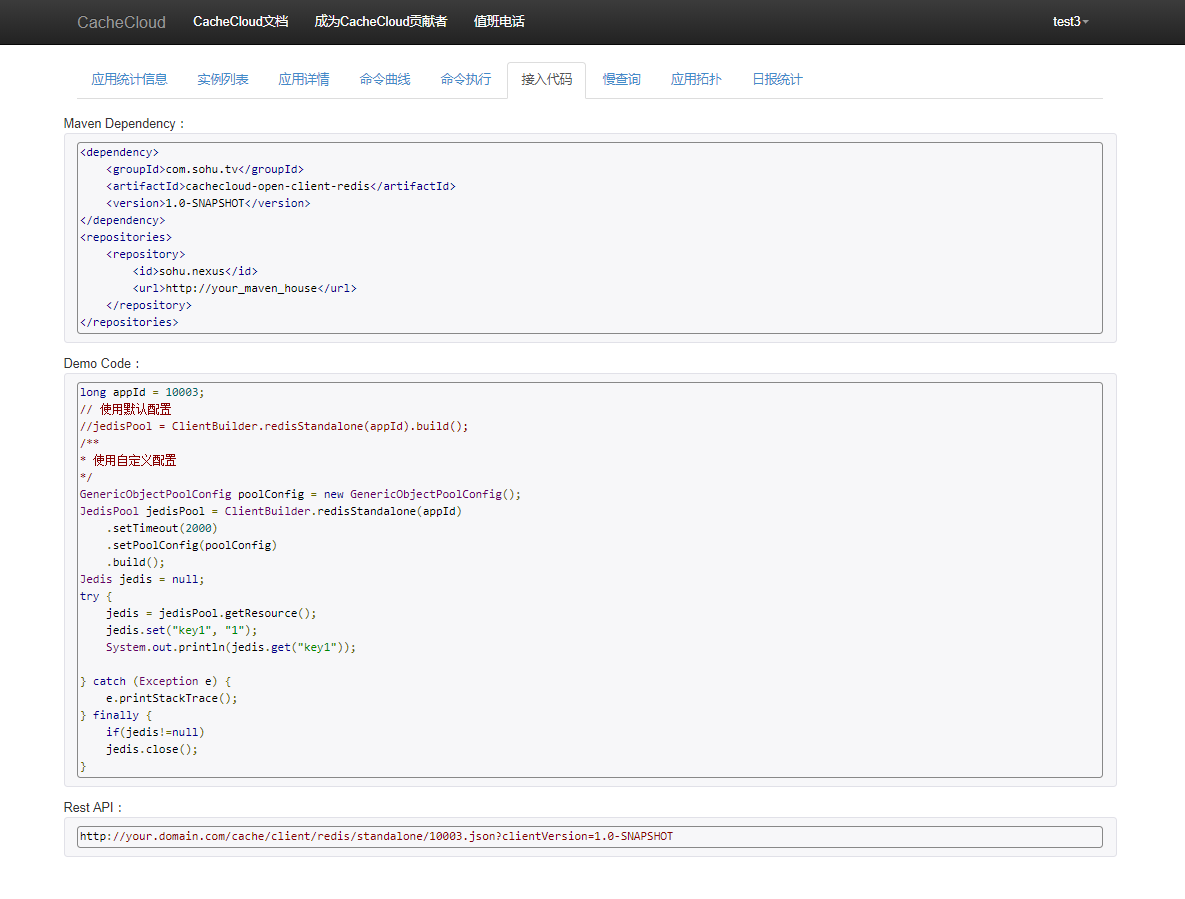
通过Rest API可以查看该redis应用详情,如下

带appKey的查询

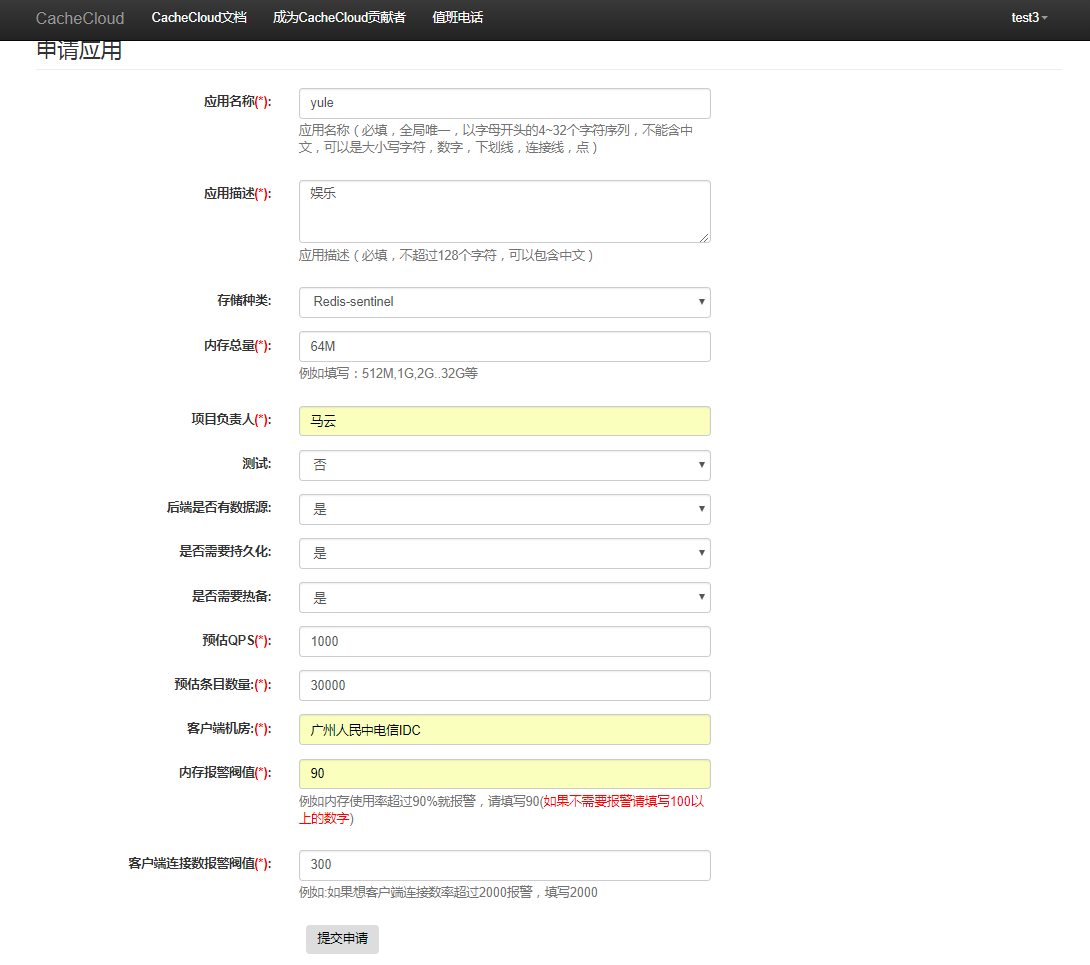
新建Redis-sentinel类型应用
管理员通过审核
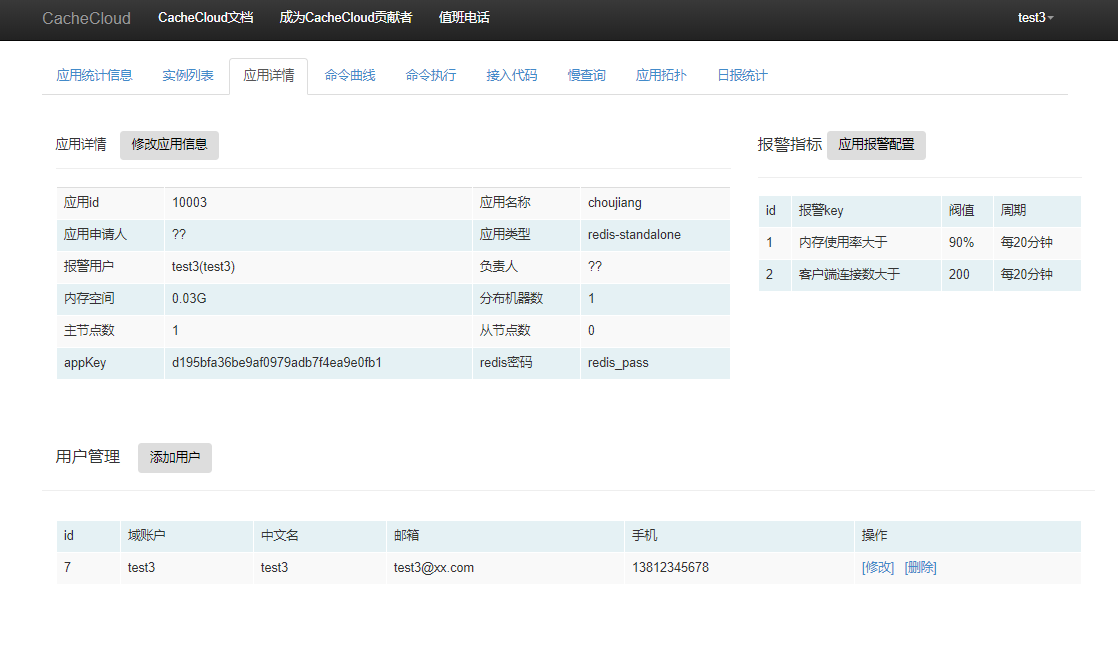
redis应用详情:

redis应用运行,应用的启停、FailOver等

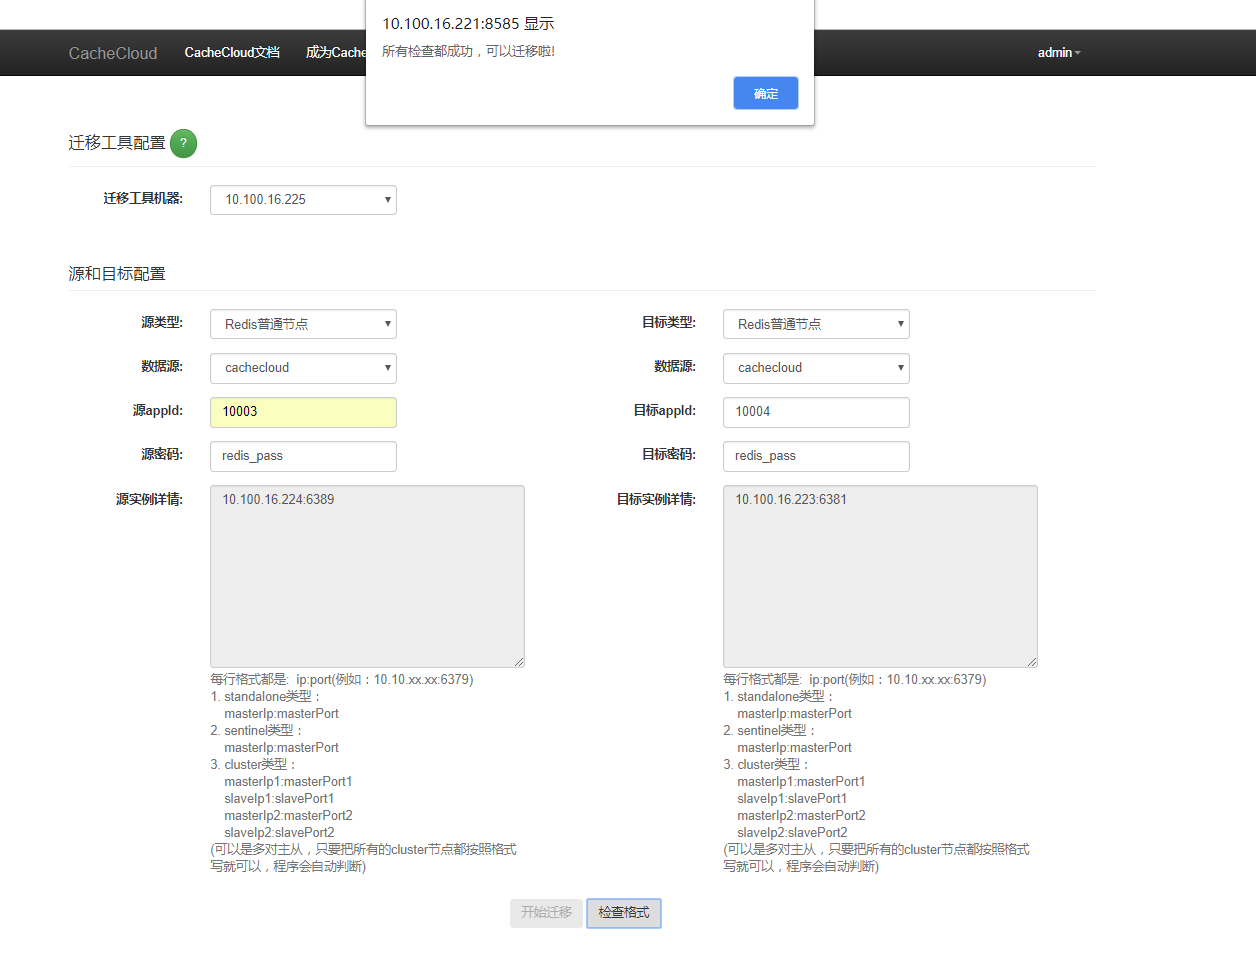
# redis-migrate-tool迁移工具部署
redis-migrate-tool项目: https://github.com/vipshop/redis-migrate-tool
找一台机单独部署redis-migrate-tool
安装依赖环境
yum -y install automake libtool autoconf bzip2
mkdir /opt/cachecloud/
cd /opt/cachecloud/
git clone https://github.com/vipshop/redis-migrate-tool.git
cd redis-migrate-tool
编译
autoreconf -fvi; ./configure; make
验证安装是否成功
src/redis-migrate-tool -h
useradd {cachecloud-ssh-username}
passwd {cachecloud-ssh-username} # 密码设置为 {cachecloud-ssh-password}
chown -R {cachecloud-ssh-username}.{cachecloud-ssh-username} /opt/cachecloud/redis-migrate-tool
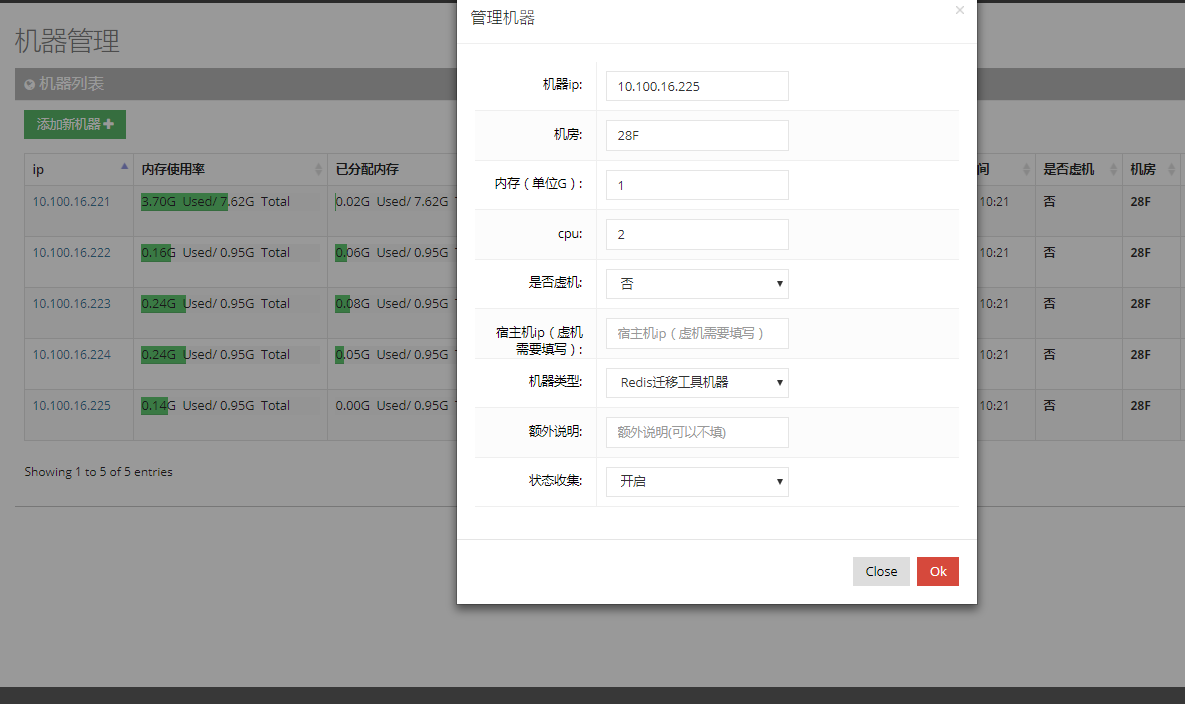
添加迁移主机


 8990
8990


 被折叠的 条评论
为什么被折叠?
被折叠的 条评论
为什么被折叠?
 到【灌水乐园】发言


