


一、简介
MyBatis 是支持定制化 SQL、存储过程以及高级映射的持久层框架(ORM)。MyBatis 可以使用简单的 XML 或 注解用于配置和映射数据表,是将 POJO(Plain Old Java Objects)映射成数据表中的记录。
历史
以前是 Apache 的一个开源项目 iBatis,后面迁移到了 Google Code,此时 iBatis3.x 更名为 MyBatis,最后于 2013 年 11 月 迁移到了 GitHub(https://github.com/mybatis/mybatis-3)(至今 2019)。
二、特点
由于 单纯的 JDBC 是将 SQL 写在代码块里,耦合度高且维护不易,所以就诞生了 ORM 框架诸如 Hibernate、Mybatis 等。MyBatis 和 Hibernate 都是 对 JDBC 更加抽象的封装,底层都是 JDBC,这二者的区别在于 MyBatis 是一个半自动的持久化层框架,而 Hibernate 是一个全自动化的持久化层框架。为什么呢?我们知道 Hibernate 是旨在消除 SQL 语句,所以当我们使用 Hibernate 时我们可以不写一条 SQL,全交给框架来处理,但是在实际的开发过程中,针对特定的场景我们是需要自己定制优化 SQL 的,针对于此,Hibernate 提出了 HQL(与标准 SQL 类似,但是倾向于面向对象的风格),为此我们还需要学习下 HQL。而 MyBatis 与 Hibernate 最大的不同就是,MyBatis 是让我们自己编写 SQL 语句。可以看出这两者之间没有绝对的壁垒,如何选择就要视情况来定。
三、用法实例
1、新建表 Employee 并插入一条记录
CREATE TABLE Employee (
id INTEGER ( 11 ) PRIMARY KEY AUTO_INCREMENT,
last_name VARCHAR ( 255 ),
gender CHAR ( 1 ),
email VARCHAR ( 255 )
)

INSERT INTO Employee(last_name, gender, email) VALUES
('Alice', 0, '123@qq.com')
2、创建一个 Maven 工程
pom.xml:
<?xml version="1.0" encoding="UTF-8"?>

<project xmlns="http://maven.apache.org/POM/4.0.0" xmlns:xsi="http://www.w3.org/2001/XMLSchema-instance"
  xsi:schemaLocation="http://maven.apache.org/POM/4.0.0 http://maven.apache.org/xsd/maven-4.0.0.xsd">
  <modelVersion>4.0.0</modelVersion>

  <groupId>com.yunche</groupId>
  <artifactId>mybatis</artifactId>
  <version>1.0-SNAPSHOT</version>


  <properties>
    <project.build.sourceEncoding>UTF-8</project.build.sourceEncoding>
    <maven.compiler.source>1.8</maven.compiler.source>
    <maven.compiler.target>1.8</maven.compiler.target>
  </properties>

  <dependencies>
    <dependency>
      <groupId>junit</groupId>
      <artifactId>junit</artifactId>
      <version>4.11</version>
      <scope>test</scope>
    </dependency>


    <!-- https://mvnrepository.com/artifact/mysql/mysql-connector-java -->
    <dependency>
      <groupId>mysql</groupId>
      <artifactId>mysql-connector-java</artifactId>
      <version>8.0.11</version>
    </dependency>

    <!-- 导入 MyBatis-->
    <dependency>
      <groupId>org.mybatis</groupId>
      <artifactId>mybatis</artifactId>
      <version>3.4.5</version>
    </dependency>

  </dependencies>
</project>
3、使用 XML 构建 SqlSessionFactory
mybatis-config.xml:
<?xml version="1.0" encoding="UTF-8" ?>
<!DOCTYPE configuration
PUBLIC "-//mybatis.org//DTD Config 3.0//EN"
"http://mybatis.org/dtd/mybatis-3-config.dtd">
<configuration>
<environments default="development">
<environment id="development">
<transactionManager type="JDBC" />
<dataSource type="POOLED">
<property name="driver" value="com.mysql.cj.jdbc.Driver" />
<property name="url" value="jdbc:mysql://localhost:3306/mybatis?useSSL=false&serverTimezone=Asia/Shanghai" />
<property name="username" value="root" />
<property name="password" value="123456" />
</dataSource>
</environment>
</environments>
<!-- 将我们写好的 sql 映射文件(EmployeeMapper.xml)一定要注册到全局配置文件(mybatis-config.xml)中 -->
<mappers>
<mapper resource="EmployeeMapper.xml" />
</mappers>
</configuration>4、编写 Mapper.xml
EmployeeMapper.xml:
<?xml version="1.0" encoding="UTF-8" ?>
<!DOCTYPE mapper
 PUBLIC "-//mybatis.org//DTD Mapper 3.0//EN"
 "http://mybatis.org/dtd/mybatis-3-mapper.dtd">
<mapper namespace="com.yunche.dao.EmployeeMapper">
<!--
namespace:名称空间;指定为接口的全类名
id:唯一标识
resultType:返回值类型
#{id}:从传递过来的参数中取出 id 值
 -->
   <select id="getEmpById" resultType="com.yunche.bean.Employee">
      select id,last_name lastName,email,gender from employee where id = #{id}
   </select>
</mapper>
5、编写接口与 mapper.xml 中的方法动态绑定
package com.yunche.dao;

import com.yunche.bean.Employee;

/**
 * @ClassName: EmployeeMapper
 * @Description:
 * @author: yunche
 * @date: 2019/01/21
 */
public interface EmployeeMapper {

    //与 EmployeeMapper 中 id 为 getEmpById 的方法动态绑定
    Employee getEmpById(Integer id);
}
5、编写 POJO 实体
package com.yunche.bean;

/**
 * @ClassName: Employee
 * @Description: 员工实体
 * @author: yunche
 * @date: 2019/01/21
 */
public class Employee {
    private Integer id;
    private String lastName;
    private String email;
    private String gender;


    public Integer getId() {
        return id;
    }
    public void setId(Integer id) {
        this.id = id;
    }
    public String getLastName() {
        return lastName;
    }
    public void setLastName(String lastName) {
        this.lastName = lastName;
    }
    public String getEmail() {
        return email;
    }
    public void setEmail(String email) {
        this.email = email;
    }
    public String getGender() {
        return gender;
    }
    public void setGender(String gender) {
        this.gender = gender;
    }
    @Override
    public String toString() {
        return "Employee [id=" + id + ", lastName=" + lastName + ", email="
                + email + ", gender=" + gender + "]";
    }
}
6、测试
package com.yunche;
import com.yunche.bean.Employee;
import com.yunche.dao.EmployeeMapper;
import org.apache.ibatis.io.Resources;
import org.apache.ibatis.session.SqlSession;
import org.apache.ibatis.session.SqlSessionFactory;
import org.apache.ibatis.session.SqlSessionFactoryBuilder;
import org.junit.Test;
import java.io.IOException;
import java.io.InputStream;
/**
* @ClassName: MyBatisTest
* @Description:
* @author: yunche
* @date: 2019/01/21
*/
public class MyBatisTest {
public SqlSessionFactory getSqlSessionFactory() throws IOException {
//1.从 xml 中构建 SqlSessionFactory
String resource = "mybatis-config.xml";
InputStream inputStream = Resources.getResourceAsStream(resource);
SqlSessionFactory sqlSessionFactory = new SqlSessionFactoryBuilder().build(inputStream);
return sqlSessionFactory;
}
@Test
public void testSimpleSelect() throws IOException {
//2. 从 SqlSessionFactory 中获取 SqlSession
// SqlSession 包含所有的 SQL 方法
SqlSessionFactory sqlSessionFactory = getSqlSessionFactory();
SqlSession session = sqlSessionFactory.openSession();
try {
// 3. 使用接口的方式
EmployeeMapper employeeMapper = session.getMapper(EmployeeMapper.class);
// 会为接口自动创建一个代理对象,由这个代理对象去执行相应的方法
System.out.println(employeeMapper.getClass());
Employee employee = employeeMapper.getEmpById(1);
System.out.println(employee);
} finally {
session.close();
}
} /* class com.sun.proxy.$Proxy3
Employee [id=1, lastName=Alice, email=123@qq.com, gender=0]
*/
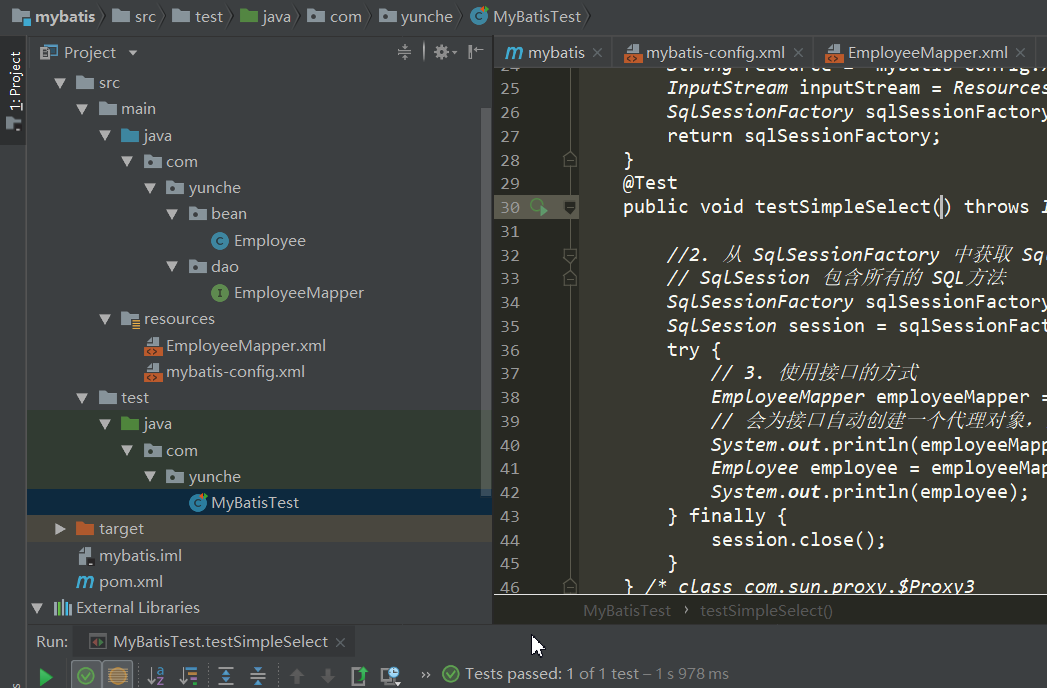
}7、项目结构树
四、参考
尚硅谷 MyBatis。


 8428
8428


 被折叠的 条评论
为什么被折叠?
被折叠的 条评论
为什么被折叠?
 到【灌水乐园】发言


