


Tinymce是目前几个主流的Web文本编辑器之一,不过它的图片上传功能是要收费的,而其它几个免费的上传图片的插件支持的都是PHP。那么就只能自己动手写一个了(源代码下载)。
准备工作如下:
1. 创建一个MVC.Net的项目(废话)
2. 添加jQuery类库。我使用的是jQuery 1.11.1版本。可以通过NuGet直接加入到项目中。
Install-Package jQuery -Version 1.11.1
3. 添加jQuery UI类库。下载地址如下:http://jqueryui.com/download/ 此处我们只用到它的Dialog Widget。
4. 添加Tinymce类库。我使用的是Tinymce 3.5.8版本。可以通过NuGet直接加入到项目中。
Install-Package TinyMCE -Version 3.5.8
5. 添加Tinymce的中文语言包,下载地址:http://www.tinymce.com/i18n3x/index.php?ctrl=lang&act=download&pr_id=1
6. 准备一个上传图片的ICON,这里我直接copy了cnblogs的。:D
准备工作结束,这时的项目结构如下: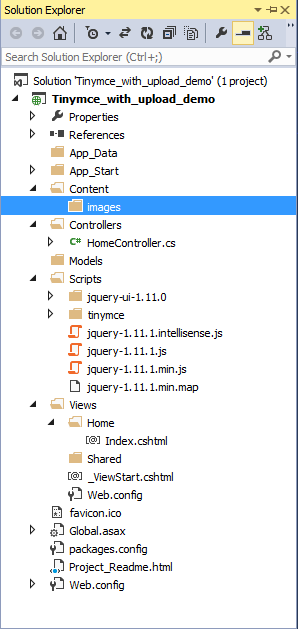
接下来开始代码部分:
1. 创建html文件
<!DOCTYPE HTML PUBLIC "-//W3C//DTD XHTML 1.0 Transitional//EN" "http://www.w3.org/TR/xhtml1/DTD/xhtml1-transitional.dtd">
<html xmlns="http://www.w3.org/1999/xhtml">
<head>
    <meta charset="utf-8" />
    <title>Tinymce with upload feature's demo</title>
</head>
<body>
    <div>
        <label>Tinymce with upload feature's demo</label>
        <br />
        <textarea name="content" id="content" cols="50" rows="20"></textarea>
    </div>
</body>
</html>
2. 引入需要的js和css文件。
    <link type="text/css" href="/Scripts/jquery-ui-1.11.0/jquery-ui.min.css" rel="stylesheet" />
    <script type="text/javascript" src="/Scripts/jquery-1.11.1.min.js"></script>
    <script type="text/javascript" src="/Scripts/tinymce/tiny_mce.js"></script>
    <script type="text/javascript" src="/Scripts/jquery-ui-1.11.0/jquery-ui.min.js"></script>
3. 将Tinymce初始化
    <script type="text/javascript">
        tinyMCE.init({
            language: "cn",
            mode: "textareas",
            theme: "advanced",
            plugins: "emotions,spellchecker,advhr,insertdatetime,preview",

            // Theme options - button# indicated the row# only
            theme_advanced_buttons1: "newdocument,|,bold,italic,underline,|,justifyleft,justifycenter,justifyright,fontselect,fontsizeselect,formatselect",
            theme_advanced_buttons2: "cut,copy,paste,|,bullist,numlist,|,outdent,indent,|,undo,redo,|,link,unlink,anchor,image,|,code,preview,|,forecolor,backcolor",
            theme_advanced_buttons3: "insertdate,inserttime,|,spellchecker,advhr,,removeformat,|,sub,sup,|,charmap,emotions",
            theme_advanced_toolbar_location: "top",
            theme_advanced_toolbar_align: "left",
            theme_advanced_statusbar_location: "bottom",
            theme_advanced_resizing: true
        });
    </script>
4. 这时textarea控件应该已经变成Tinymce编辑器了。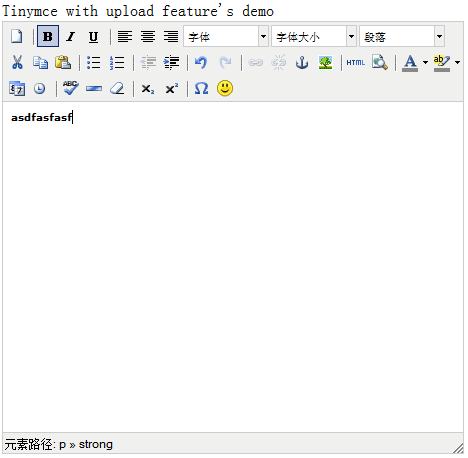
5. 现在开始创建上传图片的插件。先在Tinymce的plugins目录中创建如下目录和文件。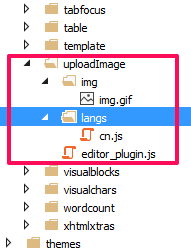
1) Img.gif就是上传图片的ICON
2) Editor_plugin.js的代码如下(注:此处代码copy自cnblogs,做了少量修改):
(function () {
    tinymce.PluginManager.requireLangPack('uploadImage');

    tinymce.create('tinymce.plugins.uploadImagePlugin', {
        /**
        * Initializes the plugin, this will be executed after the plugin has been created.
        * This call is done before the editor instance has finished it's initialization so use the onInit event
        * of the editor instance to intercept that event.
        *
        * @param {tinymce.Editor} ed Editor instance that the plugin is initialized in.
        * @param {string} url Absolute URL to where the plugin is located.
        */
        init: function (ed, url) {
            // Register the command so that it can be invoked by using tinyMCE.activeEditor.execCommand('mceExample');
            ed.addCommand('mceuploadImage', function () {
                imageUploadWindow();
            });

            // Register example button
            ed.addButton('uploadImage', {
                title: '上传图片',
                cmd: 'mceuploadImage',
                image: url + '/img/img.gif'
            });

            // Add a node change handler, selects the button in the UI when a image is selected
            ed.onNodeChange.add(function (ed, cm, n) {
                cm.setActive('uploadImage', n.nodeName == 'img');
            });
        },

        /**
        * Creates control instances based in the incomming name. This method is normally not
        * needed since the addButton method of the tinymce.Editor class is a more easy way of adding buttons
        * but you sometimes need to create more complex controls like listboxes, split buttons etc then this
        * method can be used to create those.
        *
        * @param {String} n Name of the control to create.
        * @param {tinymce.ControlManager} cm Control manager to use inorder to create new control.
        * @return {tinymce.ui.Control} New control instance or null if no control was created.
        */
        createControl: function (n, cm) {
            return null;
        },

        /**
        * Returns information about the plugin as a name/value array.
        * The current keys are longname, author, authorurl, infourl and version.
        *
        * @return {Object} Name/value array containing information about the plugin.
        */
        getInfo: function () {
            return {
                longname: 'uploadImage plugin',
                author: 'cnblogs',
                authorurl: 'http://www.cnblogs.com',
                infourl: 'http://www.cnblogs.com',
                version: "1.0"
            };
        }
    });

    // Register plugin
    tinymce.PluginManager.add('uploadImage', tinymce.plugins.uploadImagePlugin);
})();
3) cn.js的代码:
tinyMCE.addI18n('zh.uploadImage_cn', {
    desc: '上传图片'
});
6. 接着回到刚才的HTML页面,添加如下JS代码:
        var imageUploadWindow = function () {
            $("#dialog-confirm").dialog({
                resizable: false,
                width: 350,
                height: 200,
                modal: true,
                buttons: {
                    "确定": function () {
                        $(this).dialog("close");

                        var formObj = $('#updateForm');
                        var formURL = formObj.attr("action");

                        if (window.FormData !== undefined)  // for HTML5 browsers
                        {
                            var formData = new FormData();
                            jQuery.each($('input[name^="Photo"]')[0].files, function (i, file) {
                                formData.append('photo', file);
                            });
                            //formData.append('photo',);

                            $.ajax({
                                url: formURL,
                                type: 'POST',
                                data: formData,
                                async: false,
                                mimeType: "multipart/form-data",
                                contentType: false,
                                cache: false,
                                processData: false,
                                success: function (data, textStatus, jqXHR) {
                                    var ed = tinyMCE.get('content');
                                    var newNode = ed.dom.createHTML('img', { src: '/Content/images/' + data });  // create img node
                                    if (tinymce.isIE) {
                                        tinyMCE.activeEditor.selection.moveToBookmark(actualCaretPositionBookmark);
                                        ed.execCommand('mceInsertContent', false, newNode);
                                    } else {
                                        ed.execCommand('mceInsertContent', false, newNode);
                                    }
                                },
                                error: function (jqXHR, textStatus, errorThrown) {

                                }
                            });
                        }
                        else  //for olden browsers
                        {
                            //generate a random id
                            var iframeId = 'unique' + (new Date().getTime());

                            //create an empty iframe
                            var iframe = $('<iframe src="javascript:false;" name="' + iframeId + '" />');

                            //hide it
                            iframe.hide();

                            //set form target to iframe
                            formObj.attr('target', iframeId);

                            //Add iframe to body
                            iframe.appendTo('body');
                            iframe.load(function (e) {
                                var doc = getDoc(iframe[0]);
                                var docRoot = doc.body ? doc.body : doc.documentElement;
                                var data = docRoot.innerHTML;
                                //data is returned from server.

                            });
                        }
                    },
                    "取消": function () {
                        $(this).dialog("close");
                    }
                }
            });
        };

    function getDoc(frame) {
        var doc = null;

        // IE8 cascading access check
        try {
            if (frame.contentWindow) {
                doc = frame.contentWindow.document;
            }
        } catch (err) {
        }

        if (doc) { // successful getting content
            return doc;
        }

        try { // simply checking may throw in ie8 under ssl or mismatched protocol
            doc = frame.contentDocument ? frame.contentDocument : frame.document;
        } catch (err) {
            // last attempt
            doc = frame.document;
        }
        return doc;
    }
7. 修改Tinymce的初始化代码,加入uploadImage插件。
        tinyMCE.init({
            language: "cn",
            mode: "textareas",
            theme: "advanced",
            plugins: "emotions,spellchecker,advhr,insertdatetime,preview,uploadImage",

            // Theme options - button# indicated the row# only
            theme_advanced_buttons1: "newdocument,|,bold,italic,underline,|,justifyleft,justifycenter,justifyright,fontselect,fontsizeselect,formatselect",
            theme_advanced_buttons2: "cut,copy,paste,|,bullist,numlist,|,outdent,indent,|,undo,redo,|,link,unlink,anchor,image,uploadImage,|,code,preview,|,forecolor,backcolor",
            theme_advanced_buttons3: "insertdate,inserttime,|,spellchecker,advhr,,removeformat,|,sub,sup,|,charmap,emotions",
            theme_advanced_toolbar_location: "top",
            theme_advanced_toolbar_align: "left",
            theme_advanced_statusbar_location: "bottom",
            theme_advanced_resizing: true,
            setup: function (ed) {
                ed.onKeyUp.add(function (ed, e) {
                    actualCaretPositionBookmark = tinyMCE.activeEditor.selection.getBookmark();
                });
                ed.onClick.add(function (ed, e) {
                    actualCaretPositionBookmark = tinyMCE.activeEditor.selection.getBookmark();
                });
            }
        });
8. 添加上传图片的弹出窗口
        <div id="dialog-confirm" title="上传图片" style="display:none;">
            <form action="/File/Upload" method="post" role="form" enctype="multipart/form-data" name="updateForm" id="updateForm">
                <input type="file" name="Photo" accept="image/*">
            </form>
        </div>
9. 创建FileController.cs,代码如下:
        public ActionResult Upload()
        {
            return View();
        }

        [HttpPost]
        public ActionResult Upload(HttpPostedFileBase photo)
        {
            if (photo != null)
            {
                var path = Server.MapPath("/Content/images");
                var fileName = "p" + DateTime.Now.Ticks.ToString() +".jpg";
                photo.SaveAs(Path.Combine(path, fileName));
                ViewBag.FileName = fileName;
                return View();
            }
            else
            {
                ViewBag.FileName = "";
                return View();
            }
        }
10. 最后创建Upload.cshtml文件,内容就是一行代码:
@ViewBag.fileName
11. OK,效果如下:
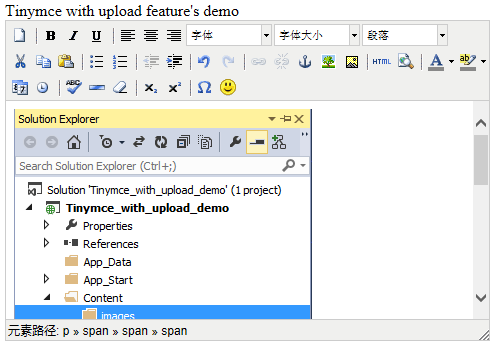
其实整个代码还有需要改善的地方,比如实现文件上传时的等待效果。这里就不展开了。


 1840
1840


 被折叠的 条评论
为什么被折叠?
被折叠的 条评论
为什么被折叠?
 到【灌水乐园】发言


