


反射,在Java常用框架中屡见不鲜。它存在于java.lang.reflact包中,就我的认识,它可以拿到类的字段和方法,及构造方法,还可以生成对象实例等。对深入的机制我暂时还不了解,本篇文章着重在使用方面,并附上一个本人应用到项目中的案例。
基础姿势
拿到类,反射是以类为基础的基础,首先拿到项目中的类,既可以这样拿
Class> clazz = Class.forName(类路径);
也可以这样拿
Class> clazz = 类名.getClass();
在一般意义的JavaBean中,存在构造函数、字段、一般函数三中不同元素,只要拿到了类,接着拿到它们就是水到渠成
Constructor constructors = clazz.getConstructor(null);//拿到构造函数
Field[] fields = clazz.getDeclaredFields();//拿到它定义的所有字段
Method[] methods = clazz.getDeclaredMethods();//拿到它定义的所有方法
注意,拿到无参的构造函数传入的是null,拿到有参构造函数,则按照构造函数的参数位置传入对应的类型class就行,比如
Constructor constructors = clazz.getConstructor(String.class,Integer.class,Double.class);//拿到有参构造函数
拿到他们有什么用?拿到构造函数还好可以新建对象,拿到字段呢?这时候就得配合自定义注解来使用了?
定义一个自定义标签
import java.lang.annotation.*;
@Target(ElementType.FIELD)
@Retention(RetentionPolicy.RUNTIME)//@Documented
public @interfaceAnnotationDemo {publicString name();publicString value();
}
ElementType是作为标志存在的,而这个RetentionPolicy则是对功能上有影响的,它里面有三种策略。从源码上看它存在CLASS,RUNTIME,SOURCE三种方式。这个Documented是生成java文档时候是否带上的意思。
packagejava.lang.annotation;/*** Annotation retention policy. The constants of this enumerated type
* describe the various policies for retaining annotations. They are used
* in conjunction with the {@linkRetention} meta-annotation type to specify
* how long annotations are to be retained.
*
*@authorJoshua Bloch
*@since1.5*/
public enumRetentionPolicy {/*** Annotations are to be discarded by the compiler.*/SOURCE,/*** Annotations are to be recorded in the class file by the compiler
* but need not be retained by the VM at run time. This is the default
* behavior.*/CLASS,/*** Annotations are to be recorded in the class file by the compiler and
* retained by the VM at run time, so they may be read reflectively.
*
*@seejava.lang.reflect.AnnotatedElement*/RUNTIME
}
官方解释是,这个注解会留在编译器,class文件,和VM中,我理解为作用范围。一般使用RUNTIME。
接着造一个bean。
public classDemoBean {publicString pubField;protectedString protectField;
String defaultField;
@AnnotationDemo(name="test",value="123")privateString priField;publicDemoBean(){this("pub","protect","default","pri");
}publicDemoBean(String pubField,String protectField,String defaultField,String priField){this.pubField =pubField;this.protectField =protectField;this.defaultField =defaultField;this.priField =priField;
}public voidfunction1(){
System.out.println("public function");
}protected voidfunction2(){
System.out.println("protect function");
}voidfunction3(){
System.out.println("default function");
}private voidfunction4(){
System.out.println("private function");
}
}
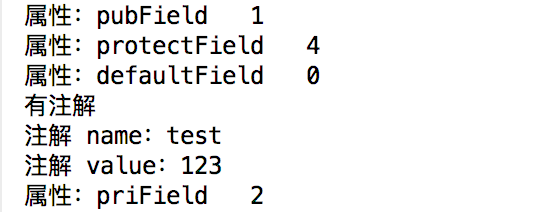
在拿到class之后,遍历它的field寻找注解,当然了,对method也可以这样。
Field[] fields = clazz.getDeclaredFields();//拿到它定义的所有字段
for(Field field:fields){if(field.isAnnotationPresent(AnnotationDemo.class)){
System.out.println("有注解");
}
AnnotationDemo annotationDemo= field.getAnnotation(AnnotationDemo.class);if(annotationDemo != null){
System.out.println("注解 name:"+annotationDemo.name());
System.out.println("注解 value:"+annotationDemo.value());
}
System.out.println("属性:"+field.getName()+" "+field.getModifiers());
}
这种方式是不是很眼熟啊?没错,Spring里面到处都是。
实际应用
在给字段和方法打上标签之后,繁琐的,重复性的行为都让框架为你处理,这种开发方式节省了很多代码,加强了阅读性,是非常提升效率的。
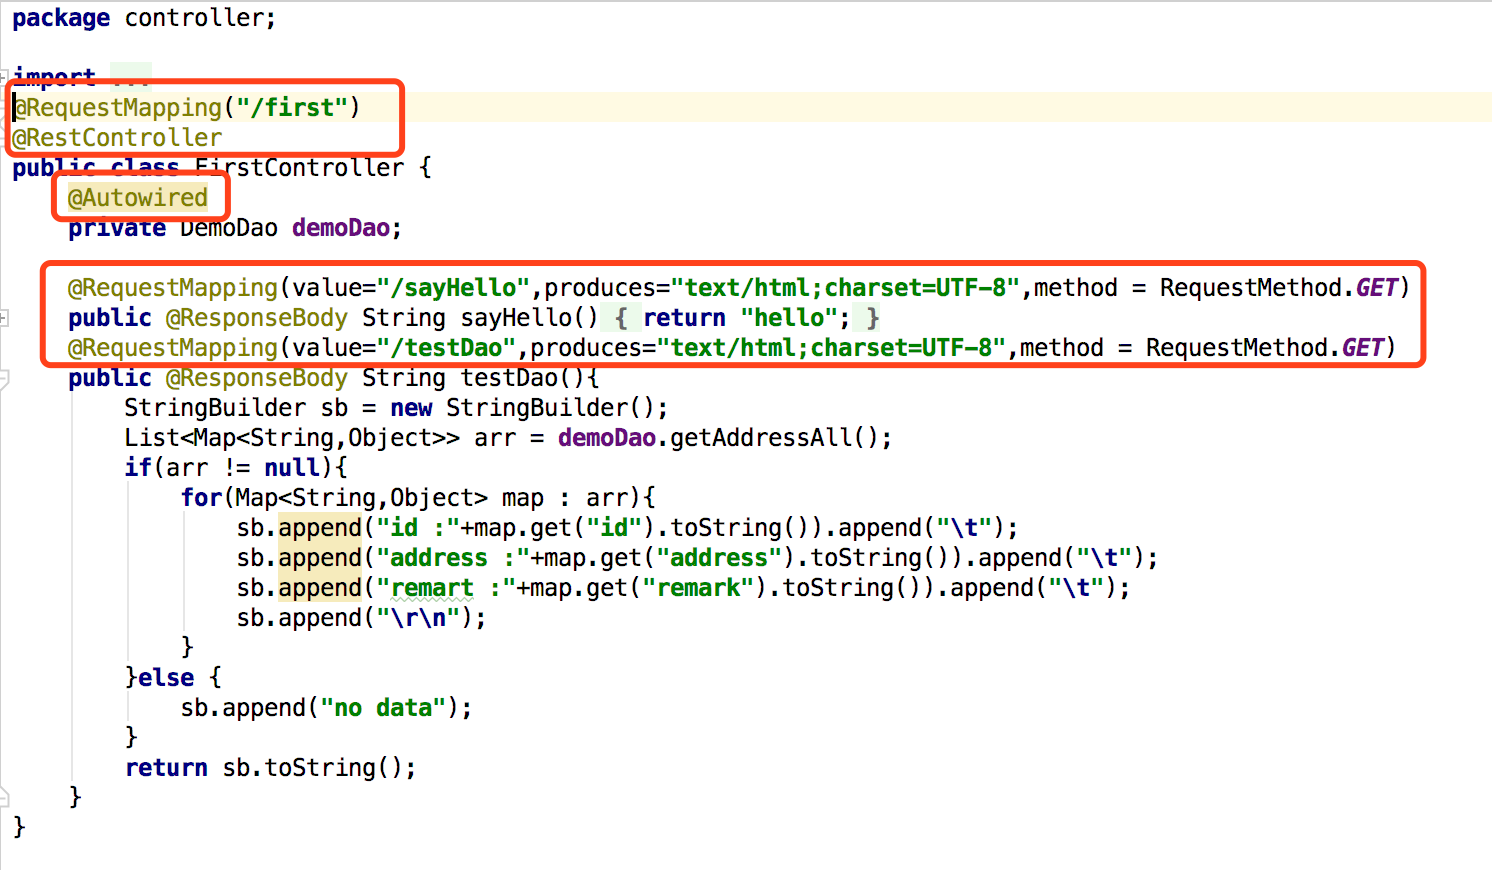
反射有种方式是绕过编译器对字段封装性的限制的,也就是无论是public还是private的字段,在反射的程序中都是可以拿到并且改变它的值的。我们知道Spring框架对bean的注入,有好几种方式。最让人想的清楚的是构造方法注入和setter注入。而@autowired呢?即使不提供暴露接口一样可以设置,这就是利用了反射的方式。
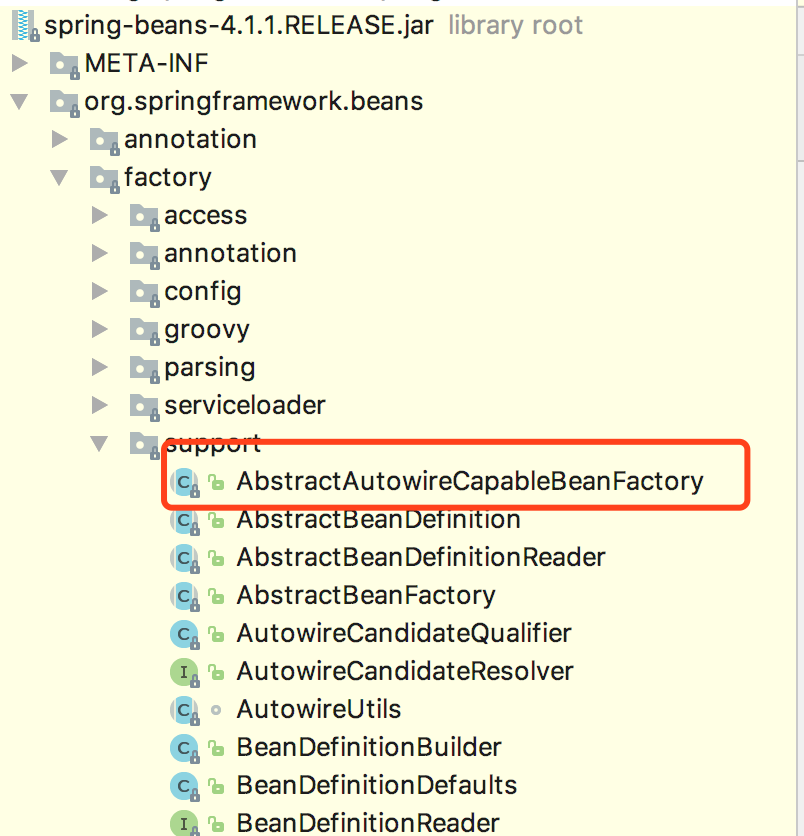
经过查阅资料,阅读源码,在Spring-bean中寻找到这两个类,因为设计图太过复杂,本人只能在细小之处分析了。
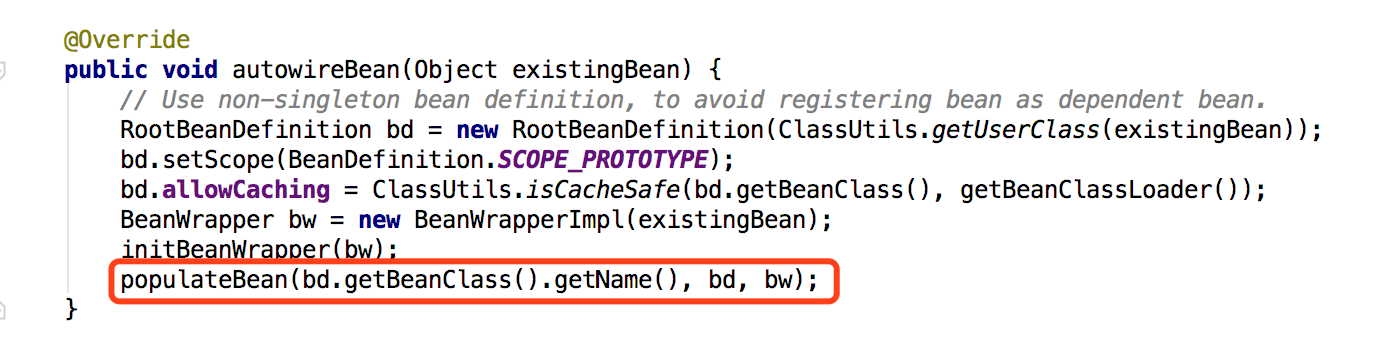
/*** Populate the bean instance in the given BeanWrapper with the property values
* from the bean definition.
*@parambeanName the name of the bean
*@parammbd the bean definition for the bean
*@parambw BeanWrapper with bean instance*/
protected voidpopulateBean(String beanName, RootBeanDefinition mbd, BeanWrapper bw) {
PropertyValues pvs=mbd.getPropertyValues();if (bw == null) {if (!pvs.isEmpty()) {throw newBeanCreationException(
mbd.getResourceDescription(), beanName,"Cannot apply property values to null instance");
}else{//Skip property population phase for null instance.
return;
}
}//Give any InstantiationAwareBeanPostProcessors the opportunity to modify the//state of the bean before properties are set. This can be used, for example,//to support styles of field injection.
boolean continueWithPropertyPopulation = true;if (!mbd.isSynthetic() &&hasInstantiationAwareBeanPostProcessors()) {for(BeanPostProcessor bp : getBeanPostProcessors()) {if (bp instanceofInstantiationAwareBeanPostProcessor) {
InstantiationAwareBeanPostProcessor ibp=(InstantiationAwareBeanPostProcessor) bp;if (!ibp.postProcessAfterInstantiation(bw.getWrappedInstance(), beanName)) {
continueWithPropertyPopulation= false;break;
}
}
}
}if (!continueWithPropertyPopulation) {return;
}if (mbd.getResolvedAutowireMode() == RootBeanDefinition.AUTOWIRE_BY_NAME ||mbd.getResolvedAutowireMode()==RootBeanDefinition.AUTOWIRE_BY_TYPE) {
MutablePropertyValues newPvs= newMutablePropertyValues(pvs);//Add property values based on autowire by name if applicable.
if (mbd.getResolvedAutowireMode() ==RootBeanDefinition.AUTOWIRE_BY_NAME) {
autowireByName(beanName, mbd, bw, newPvs);
}//Add property values based on autowire by type if applicable.
if (mbd.getResolvedAutowireMode() ==RootBeanDefinition.AUTOWIRE_BY_TYPE) {
autowireByType(beanName, mbd, bw, newPvs);
}
pvs=newPvs;
}boolean hasInstAwareBpps =hasInstantiationAwareBeanPostProcessors();boolean needsDepCheck = (mbd.getDependencyCheck() !=RootBeanDefinition.DEPENDENCY_CHECK_NONE);if (hasInstAwareBpps ||needsDepCheck) {
PropertyDescriptor[] filteredPds=filterPropertyDescriptorsForDependencyCheck(bw, mbd.allowCaching);if(hasInstAwareBpps) {for(BeanPostProcessor bp : getBeanPostProcessors()) {if (bp instanceofInstantiationAwareBeanPostProcessor) {
InstantiationAwareBeanPostProcessor ibp=(InstantiationAwareBeanPostProcessor) bp;
pvs=ibp.postProcessPropertyValues(pvs, filteredPds, bw.getWrappedInstance(), beanName);if (pvs == null) {return;
}
}
}
}if(needsDepCheck) {
checkDependencies(beanName, mbd, filteredPds, pvs);
}
}
applyPropertyValues(beanName, mbd, bw, pvs);
}
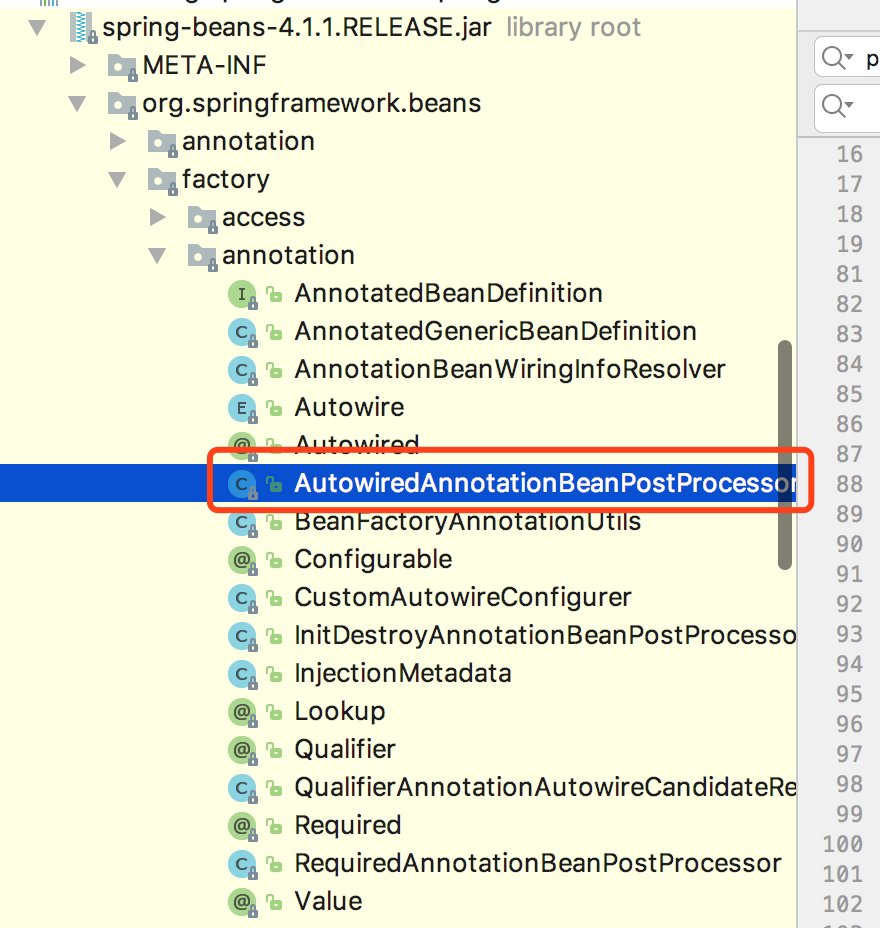
经过一系列前置验证(看得迷迷糊糊)然后进行bean注入,调用的是postProcessPropertyValues方法,点进去是个接口(多态性是挺坑的)。找了一下,最后找到AutowiredAnnotationBeanPostProcessor类,里面有个内部类AutowiredMethodElement,其中有个Inject方法是实施注入的。
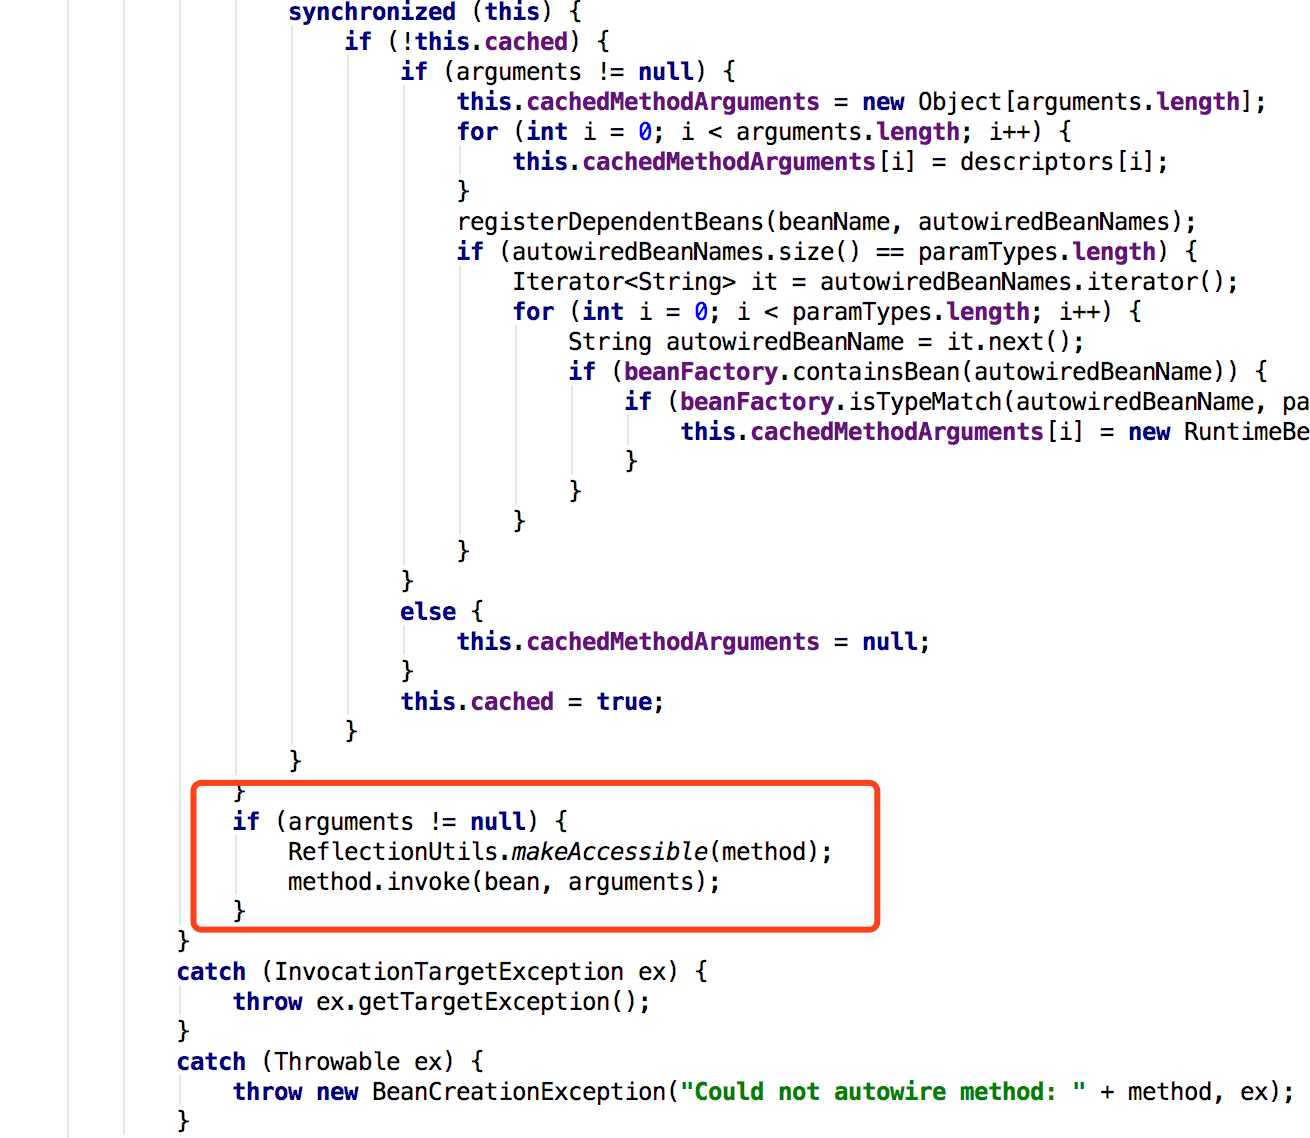
public static voidmakeAccessible(Field field) {if((!Modifier.isPublic(field.getModifiers()) || !Modifier.isPublic(field.getDeclaringClass().getModifiers()) || Modifier.isFinal(field.getModifiers())) && !field.isAccessible()) {
field.setAccessible(true);
}
}
@CallerSensitivepublicObject invoke(Object obj, Object... args)throwsIllegalAccessException, IllegalArgumentException,
InvocationTargetException
{if (!override) {if (!Reflection.quickCheckMemberAccess(clazz, modifiers)) {
Class> caller =Reflection.getCallerClass();
checkAccess(caller, clazz, obj, modifiers);
}
}
MethodAccessor ma= methodAccessor; //read volatile
if (ma == null) {
ma=acquireMethodAccessor();
}returnma.invoke(obj, args);
}
前一个是打开权限,后一个粗略看了下,就是注入了。
大概的思路就是使用反射打开权限,然后从对象池中拿取对象并设置到该字段中。如果对象池没有,大概就是放个空进去了,最后调用的时候就是空指针了。
实践案例
未能吸取Spring优秀框架的思想,但是自己在项目中应用了一下这种技术。小型项目对建表的要求就是,新建一个bean自动生成一个表。是不是很像某ORM?是的,仅仅使用几百行代码就可以实现这个功能了,采用的就是以反射、Annotation为基础的技术。
packageCommon;importjava.io.File;importjava.io.FileInputStream;importjava.io.FileNotFoundException;importjava.io.IOException;importjava.io.InputStream;importjava.lang.reflect.Field;importjava.sql.Connection;importjava.sql.DriverManager;importjava.sql.PreparedStatement;importjava.sql.ResultSet;importjava.sql.SQLException;importjava.util.HashSet;importjava.util.Properties;importjava.util.Set;importorg.apache.log4j.Logger;importCommon.Annotation.ATable;importCommon.Annotation.AutoIncrement;importCommon.Annotation.Column;importCommon.Annotation.PrimaryKey;/*** 初始化数据库 按照Model包下的类及字段创建
*@authorctk
**/
public classInitDataBases {private static Logger logger = Logger.getLogger(InitDataBases.class);private Connection conn = null;private Settables;//单例
private static InitDataBases instance = newInitDataBases();privateInitDataBases(){
conn=getConnection();
tables= new HashSet<>();
searchTables();
}/*** 读取数据库资源文件
* 获得数据库链接
*@return
*/
privateConnection getConnection(){
logger.debug("建立数据库连接");
String driver= "";
String url= "";
String username= "";
String password= "";
File f= new File(this.getClass().getClassLoader().getResource("/").getPath()+"jdbc.properties");
Properties pro= newProperties();
InputStream in= null;try{
in= newFileInputStream(f);
pro.load(in);
driver= pro.getProperty("jdbc.driverClass");
url= pro.getProperty("jdbc.url");
username= pro.getProperty("jdbc.username");
password= pro.getProperty("jdbc.password");
}catch(FileNotFoundException e) {
logger.error("资源文件未找到,请命名为jdbc.properties,并置于src下");
System.err.println("资源文件未找到,请命名为jdbc.properties,并置于src下");
}catch(IOException e) {
logger.error("资源文件读写异常");
System.err.println("资源文件读写异常");
}
Connection conn= null;try{
Class.forName(driver);
conn=DriverManager.getConnection(url,username,password);
}catch(ClassNotFoundException e) {
logger.error("加载驱动不成功,请检查是否添加了jdbc的必要包");
System.err.println("加载驱动不成功,请检查是否添加了jdbc的必要包");
}catch(SQLException e) {
logger.error("数据库连接错误,检查账号密码和数据库地址");
System.err.println("数据库连接错误,检查账号密码和数据库地址");
}returnconn;
}/*** 自动建表
*@paramclazz*/
public void checkAndCreate(Class>clazz){
String tableName=getTableName(clazz);if(tableExist(tableName))
{
logger.debug(tableName+"表已存在");return;
}
Field[] fields=clazz.getDeclaredFields();
StringBuilder sb= new StringBuilder("create table ");
sb.append(tableName);
sb.append(" (");for(int i=0;i
PrimaryKey pk= fields[i].getAnnotation(PrimaryKey.class);
sb.append(getColumnName(fields[i]));
sb.append(" ");
Class> type =fields[i].getType();if(type == String.class)
sb.append("VARCHAR(255)");else if(type == int.class)
sb.append("INT(50)");else if(type == long.class)
sb.append("BIGINT(20)");else if(type == double.class || type == float.class)
sb.append("DOUBLE");//如果是主键字段
if(pk != null){
sb.append(" primary key");
AutoIncrement ai= fields[i].getAnnotation(AutoIncrement.class);//判断是否自增
if(ai != null){
sb.append(" AUTO_INCREMENT");
}
}if(i != (fields.length-1))
sb.append(",");
}
sb.append(")DEFAULT CHARSET=utf8");
logger.debug("sql:"+sb.toString());try{
PreparedStatement pst=conn.prepareStatement(sb.toString());
pst.execute();
}catch(SQLException e) {
logger.error("建表错误:"+e.getMessage());
}
}/*** 获得表名字
*@paramclazz
*@return
*/
public String getTableName(Class>clazz){//获得表别名
ATable table = clazz.getAnnotation(ATable.class);if(table != null && "".equals(table.name()))returntable.name();else{returnclazz.getSimpleName();
}
}/*** 获取列名称
*@paramfield
*@return
*/
publicString getColumnName(Field field){
Column column= field.getAnnotation(Column.class);if(column != null){returncolumn.value();
}else{returnfield.getName();
}
}/*** 查询表是否存在
*@return
*/
private voidsearchTables(){
String sql= "show tables";try{
PreparedStatement pst=conn.prepareStatement(sql);
logger.debug("sql执行:"+sql);
ResultSet rset=pst.executeQuery();while(rset.next()){
String tname= rset.getString(1);
tables.add(tname);
}
}catch(SQLException e) {
logger.error("sql错误:"+e.getMessage());
}
}/*** 判断是否存在某数据
*@paramsql
*@return
*/
public booleandataExist(String sql){try{
PreparedStatement pst=conn.prepareStatement(sql);
logger.debug("sql执行:"+sql);
ResultSet rset=pst.executeQuery();long id = 0;while(rset.next()){
id= rset.getLong("id");
}if(id == 0)return false;else
return true;
}catch(SQLException e) {
logger.error("sql错误:"+e.getMessage());return false;
}
}/*** 插入数据sql
*@paramsql*/
public voidinsertSql(String sql){try{
PreparedStatement pst=conn.prepareStatement(sql);
logger.debug("sql执行:"+sql);
pst.execute();
}catch(SQLException e) {
logger.error("sql错误:"+e.getMessage());
}
}//获得单例
public staticInitDataBases getInstance(){returninstance;
}public booleantableExist(String table) {returntables.contains(table);
}//关闭链接
public voidcloseConn(){
logger.debug("关闭数据库连接...");try{
conn.close();
}catch(SQLException e) {
logger.error("关闭数据库连接失败:"+e.getMessage());
}
}
}
然后在启动的Listener中加入。
CommonInfo.FilePackage = this.getClass().getClassLoader().getResource("/").getPath()+"/WEB-INF/fildDownload";
File pkg= newFile(CommonInfo.FilePackage);if(!pkg.exists())
pkg.mkdirs();
File f= new File(this.getClass().getClassLoader().getResource("/").getPath()+"/Model");
File[] fs=f.listFiles();
List tables = new ArrayList<>();for(File fl:fs){
String fname=fl.getName();
fname= fname.substring(0,fname.length()-6);
tables.add(fname);
}
InitDataBases initDB=InitDataBases.getInstance();try{for(String table : tables) {
Class> clazz = Class.forName("Model." +table);
initDB.checkAndCreate(clazz);
}
}catch(ClassNotFoundException e) {
logger.error("找不到bean:"+e.getMessage());;
大概的思路就是,检查bean文件夹下是否存在bean并且bean中是否有Annotation修饰,并拼凑建表语句,最后新建表,别忘了关闭数据库连接。


 677
677


 被折叠的 条评论
为什么被折叠?
被折叠的 条评论
为什么被折叠?
 到【灌水乐园】发言


