


本篇文章带大家了解一下Angular4中的共享模块。有一定的参考价值,有需要的朋友可以参考一下,希望对大家有所帮助。

相关教程推荐:《angular教程》
1. AppModule@NgModule({
declarations: [
AppComponent
],
imports: [
BrowserModule
],
exports: [ AppComponent ],
providers: [],
bootstrap: [AppComponent]
})
export class AppModule { }
imports 本模块声明的组件模板需要的类所在的其它模块。providers 服务的创建者,并加入到全局服务列表中,可用于应用任何部分。declarations 声明本模块中拥有的视图类。Angular 有三种视图类:组件、指令和管道。exports declarations 的子集,可用于其它模块的组件模板。bootstrap 指定应用的主视图(称为根组件),它是所有其它视图的宿主。只有根模块才能设置 bootstrap 属性。
2. CommonModule
先看一下CommonModule中有什么内容。
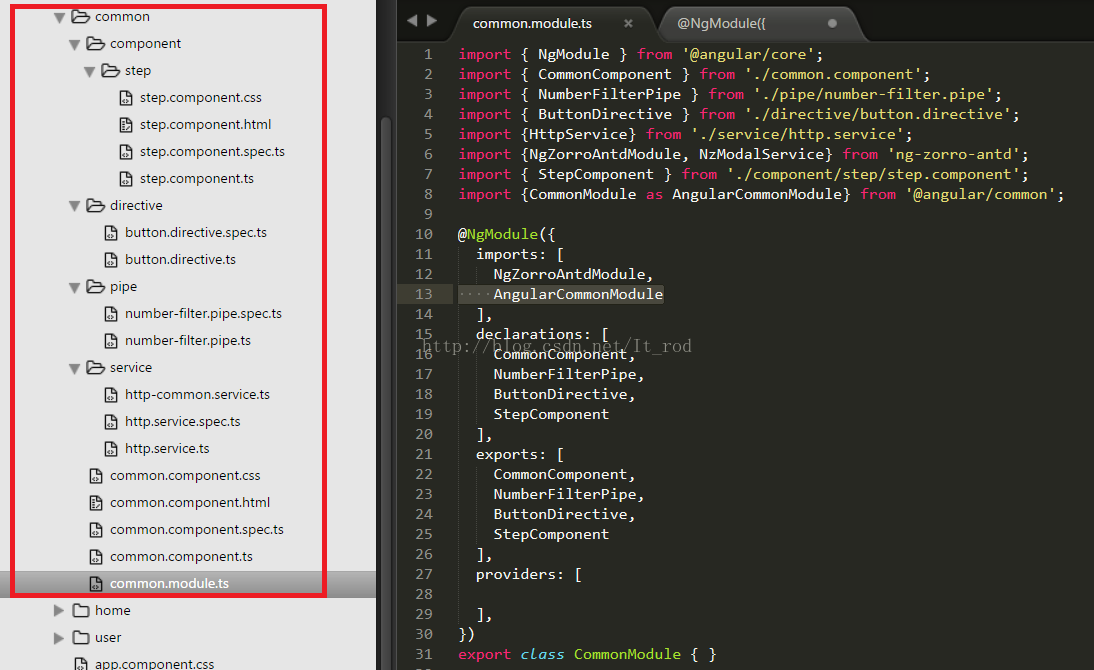
common.module.ts代码
@NgModule({
imports: [
NgZorroAntdModule,
AngularCommonModule
],
declarations: [
CommonComponent,
NumberFilterPipe,
ButtonDirective,
StepComponent
],
exports: [
CommonComponent,
NumberFilterPipe,
ButtonDirective,
StepComponent
],
providers: [
],
})
我在comon 文件夹中创建了service, pipe, component, directive,但是这个service和这个module没有任何关系。至于service会在下面说到。然后将 pipe, component, directive输出,这样其他模块才能使用。
3. AngularModule
然后我们需要在其他的模块中使用这个模块,就需要import进来。
import { NgModule } from '@angular/core';
import { AngularComponent } from './angular.component';
import {RouterModule, Routes} from '@angular/router';
import {CommonModule as CommonPrivateModule} from '../../common/common.module';
import {CommonModule} from '@angular/common';
import {HttpService} from '../../common/service/http.service';
import {HttpCommonService} from '../../common/service/http-common.service';
import {BrowserModule} from '@angular/platform-browser';
const routes: Routes = [
{path: '', component: AngularComponent}
];
@NgModule({
imports: [
CommonModule,
RouterModule.forChild(routes),
CommonPrivateModule
],
declarations: [AngularComponent],
providers: []
})
export class AngularModule { }
因为CommonModule与系统内的module重名,所以我重命名为CommonProvateModule。这样我们就可以在AngularModule中使用共享模块的内容。
angular.component.html
common directive
common pipe: {{1 | numberFilter}}
这个html文件中我使用了之前创建的 StepComponent, NumberFilterPipe, ButtonDirective。
4. Service
service前面在Common的文件加下,但是没有在CommonModule provide。这是为什么呢,因为service靠Angular 的依赖注入体系实现的,而不是模块体系。如果我们在CommonModule provide,那么我们在各个模块使用的service不是一个实例,而是多个实例。下面我们就来测试一下。
先说一下例子的模块结构, AppModule,HomeModule(AppModule的子模块), AngularModule(HomeModule的子模块)。然后分别在三个模块中引入CommonModule。
修改一下上面的CommonModule,将HttpCommonService 提供出去。
@NgModule({
imports: [
NgZorroAntdModule,
AngularCommonModule
],
declarations: [
CommonComponent,
NumberFilterPipe,
ButtonDirective,
StepComponent
],
exports: [
CommonComponent,
NumberFilterPipe,
ButtonDirective,
StepComponent
],
providers: [
HttpCommonService
],
})
HttpCommonService
import { Injectable } from '@angular/core';
import {Http, Request, RequestOptions} from '@angular/http';
import {Observable} from 'rxjs/Observable';
import {NzMessageService} from 'ng-zorro-antd';
@Injectable()
export class HttpCommonService {
private testService: number;
constructor(public httpService: Http, private _message: NzMessageService) {
}
set(number) {
this.testService = number;
}
get() {
return this.testService;
}
}
这里在service内部有两个方法,一个用于设置变量testService,一个用于取这个变量。
AppComponent
export class AppComponent implements OnInit {
title = 'app';
constructor(private httpCommonService: HttpCommonService) {}
ngOnInit(): void {
console.log('appmodule 取值之前的number:' + this.httpCommonService.get());
this.httpCommonService.set(1);
}
}
HomeCompoent
export class HomeComponent implements OnInit {
constructor(private httpCommonService: HttpCommonService) { }
ngOnInit() {
console.log('homemodule 取值之前的number:' + this.httpCommonService.get());
this.httpCommonService.set(2);
}
}
AngularComponent
export class AngularComponent implements OnInit {
firstString: string;
constructor(private httpCommonService: HttpCommonService) { }
ngOnInit() {
console.log('angularmodule 取值之前的number:' + this.httpCommonService.get());
}
}
最后看一下控制台的输出:
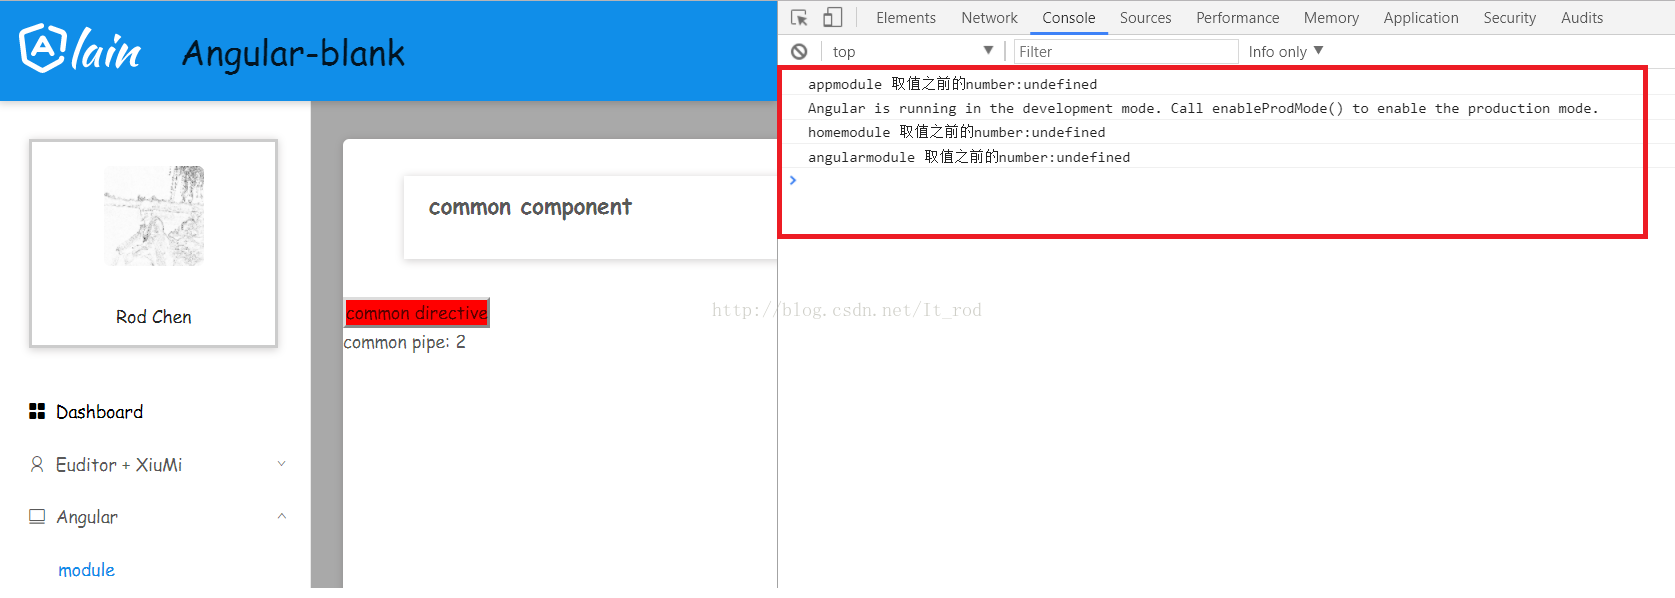
可以看到service内部的变量每一次都是一个新值。
然后我们在将CommonModule中的service去掉,就是这个公共模块不提供service。然后在将AppModule修改一下,提供HttpCommonService。 我们再看一下页面控制台的输出。
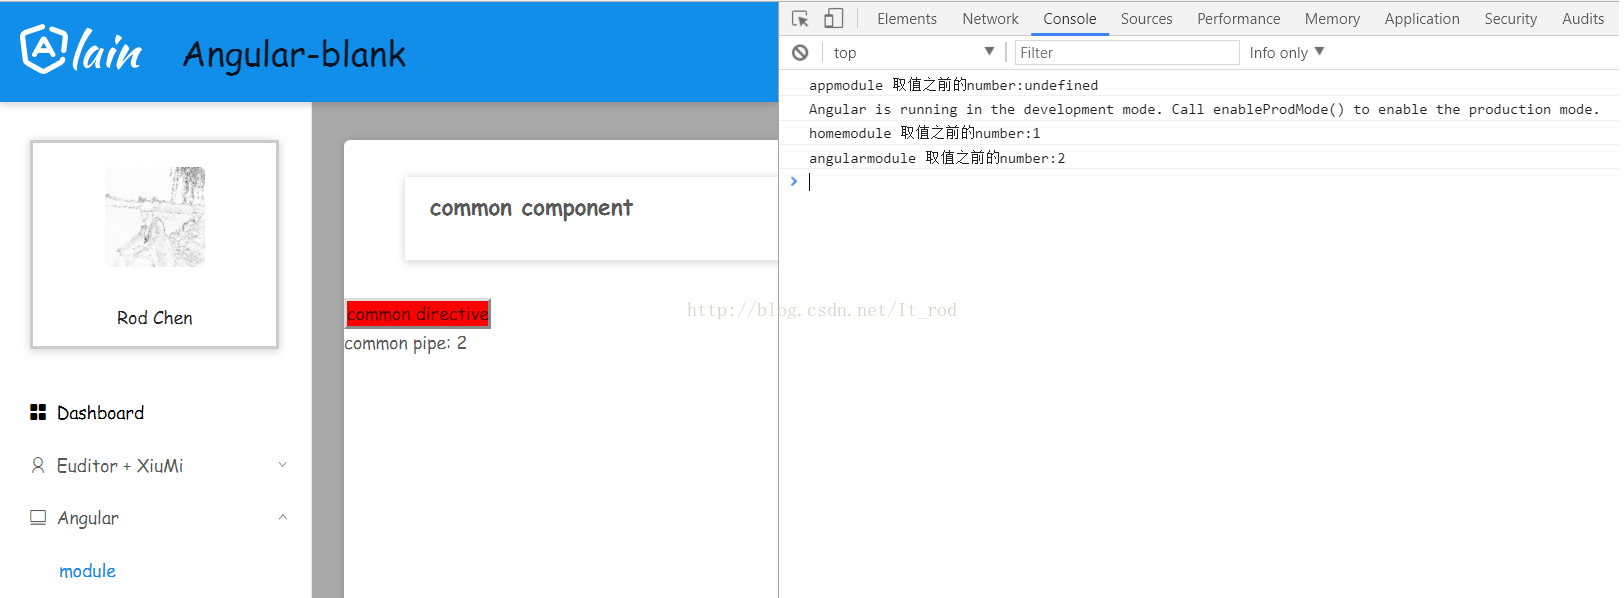
可以看到现在是一个实例,而且service内部的变量也是缓存起来的。
所以对于service我们还是放在模块中去提供,不要放在共享模块中了。
至于页面的模板可以访问angular - blank .
更多编程相关知识,请访问:编程入门!!


 6254
6254


 被折叠的 条评论
为什么被折叠?
被折叠的 条评论
为什么被折叠?
 到【灌水乐园】发言


