


前言
本篇文章主要介绍的是SpringBoot项目实现文件上传和邮件发送的功能。
SpringBoot 文件上传
说明:如果想直接获取工程那么可以直接跳到底部,通过链接下载工程代码。
开发准备
环境要求
JDK:1.8
SpringBoot:1.5.9.RELEASE
首先还是Maven的相关依赖:
pom.xml文件如下:
UTF-81.81.81.8org.springframework.boot spring-boot-starter-parent 1.5.9.RELEASEorg.springframework.boot spring-boot-starter-web org.springframework.boot spring-boot-starter-test testorg.springframework.boot spring-boot-starter-thymeleaf 然后就是application.properties的文件配置。
application.properties:
banner.charset=UTF-8server.tomcat.uri-encoding=UTF-8spring.http.encoding.charset=UTF-8spring.http.encoding.enabled=truespring.http.encoding.force=truespring.messages.encoding=UTF-8server.port=8182spring.http.multipart.maxFileSize=100Mbspring.http.multipart.maxRequestSize=100MbfilePath=F:/test/注:其中spring.http.multipart.maxFileSize和spring.http.multipart.maxRequestSize是设置上传文件的大小,这里我设置的是100Mb,filePath是文件上传的路径,因为个人使用的是Windows系统,所以将路径设置在F:/test/。
代码编写
SpringBoot自身对于文件上传可以说是非常的友好了,只需要在控制层的参数中使用MultipartFile这个类,然后接受file类型的数据上传就可以了,至于将上传得到的文件如何处理就是我们开发者自己决定了。
首先我们先写一个前端界面,在界面上新增一个按钮用于上传文件。由于SpringBoot对thymeleaf的支持非常友好,所以这里我们就直接使用thymeleaf编写一个简单的界面,用于上传文件。
html代码如下:
uploading.html注: 如果不想编写前端界面的话,也可以通过Postman等工具实现。
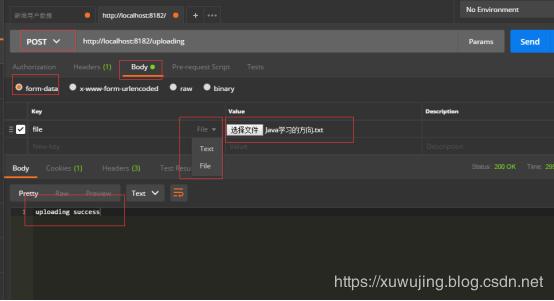
Postman的操作方式为:
填写url路径,选择post方式 -> body 选择form-data 格式-> key选择file类型,选择文件,然后点击send就可以实现文件上传。
因为我们这里只进行文件上传,并不做其它的业务逻辑处理,因此我们只用在控制层实现即可。定义一个文件上传的接口,然后使用MultipartFile类进行接收即可。
代码如下:
@Controllerpublic class FileUploadController { @Value("${filePath}") private String filePath; @GetMapping("/upload") public String uploading() { //跳转到 templates 目录下的 uploading.html return "uploading"; } //处理文件上传 @PostMapping("/uploading") public @ResponseBody String uploading(@RequestParam("file") MultipartFile file, HttpServletRequest request) { try { uploadFile(file.getBytes(), filePath, file.getOriginalFilename()); } catch (Exception e) { e.printStackTrace(); System.out.println("文件上传失败!"); return "uploading failure"; } System.out.println("文件上传成功!"); return "uploading success"; } public void uploadFile(byte[] file, String filePath, String fileName) throws Exception { File targetFile = new File(filePath); if(!targetFile.exists()){ targetFile.mkdirs(); } FileOutputStream out = new FileOutputStream(filePath+fileName); out.write(file); out.flush(); out.close(); } } 注:上述的代码只是一个示例,实际的情况下请注意异常的处理!上述的流关闭理应放在finally中,实际为了方便才如此的编写。
App 入口
和普通的SpringBoot项目基本一样。
代码如下:
@SpringBootApplicationpublic class FileUploadApplication { public static void main(String[] args) { SpringApplication.run(FileUploadApplication.class, args); System.out.println("FileUploadApplication 程序启动成功!"); }}功能测试
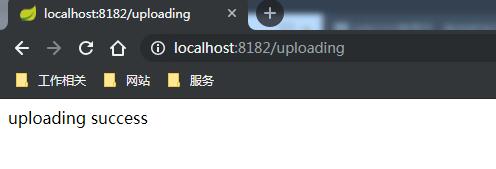
我们成功启动该程序之后,在浏览器上输入:http://localhost:8182/upload,然后选择一个文件进行上传,最后我们再到F:/test/路径下查看是否有该文件。
示例图如下:


使用Postman上传的示例图:
最后说明一下,如果文件重复上传,后面上传的文件会替换掉之前的那个文件。
SpringBoot 邮件发送
说明:如果想直接获取工程那么可以直接跳到底部,通过链接下载工程代码。
开发准备
环境要求
JDK:1.8
SpringBoot:1.5.9.RELEASE
首先还是Maven的相关依赖:
pom.xml文件如下:
UTF-81.81.81.8org.springframework.boot spring-boot-starter-parent 1.5.9.RELEASEorg.springframework.boot spring-boot-starter-web org.springframework.boot spring-boot-starter-test testorg.springframework.boot spring-boot-starter-thymeleaf org.springframework.boot spring-boot-starter-mail org.springframework spring-context-support 然后就是application.properties的文件配置,这里我们需要根据自己的实际情况进行填写。如下述的配置文件示例中,个人使用的是qq邮箱,因此spring.mail.host配置的是smtp.qq.com。下述的示例中,只需填写个人邮箱的账号和密码即可。如果出现了535 错误,则需要该邮箱开启POP3/SMTP服务,并且使用授权码替换密码进行发送。
application.properties:
server.port = 8182spring.mail.host=smtp.qq.comspring.mail.username=xxx@qq.comspring.mail.password=xxxspring.mail.default-encoding=UTF-8spring.mail.properties.mail.smtp.auth=truespring.mail.properties.mail.smtp.starttls.enable=truespring.mail.properties.mail.smtp.starttls.required=true代码编写
SpringBoot这块已经集成了mail邮件发送的功能,我们引入相关架包之后,只需使用JavaMailSender这个类中的send方法即可完成邮件的发送。如果还想发送静态资源和附件的邮件,在JavaMailSender这个类中的方法也可以实现。如果想使用自定义的模板内容发送的话,则需要使用TemplateEngine 该类中的方法。
在我们使用邮件发送的时候,这四样最为重要,发件人、收件人、发送主题和发送的消息。因此我们可以根据这四样来创建一个简答的邮件实体类,方便进行相关的业务处理。
实体类代码
代码如下:
public class Mail { /** 发送者*/ private String sender; /** 接受者 */ private String receiver; /** 主题 */ private String subject; /** 发送 消息*/ private String text; //getter 和 setter 略}这里我们还是定义接口来进行邮件的发送,我们发送邮件的时候依旧只需要知道发件人、收件人、发送主题和发送的消息这四点就可以了,其余的可以在代码中完成。这里我们就简单的定义几个接口,用于实现上述的要求
控制层代码:
代码如下:
@RestController@RequestMapping("/api/mail")public class MailController { private static Logger LOG=LoggerFactory.getLogger(MailController.class); @Autowired private JavaMailSender mailSender; @Autowired private TemplateEngine templateEngine; /* * 发送普通邮件 */ @PostMapping("/sendMail") public String sendMail(@RequestBody Mail mail) { SimpleMailMessage message = new SimpleMailMessage(); message.setFrom(mail.getSender()); message.setTo(mail.getReceiver()); message.setSubject(mail.getSubject()); message.setText(mail.getText()); mailSender.send(message); LOG.info("发送成功!"); return "发送成功!"; } /* * 发送附件 */ @PostMapping("/sendAttachments") public String sendAttachmentsMail(@RequestBody Mail mail) throws MessagingException { MimeMessage mimeMessage = mailSender.createMimeMessage(); MimeMessageHelper helper = new MimeMessageHelper(mimeMessage, true); helper.setFrom(mail.getSender()); helper.setTo(mail.getReceiver()); helper.setSubject(mail.getSubject()); helper.setText(mail.getText()); FileSystemResource file = new FileSystemResource(new File("1.png")); helper.addAttachment("附件.jpg


 6157
6157


 被折叠的 条评论
为什么被折叠?
被折叠的 条评论
为什么被折叠?
 到【灌水乐园】发言


