


webpack
首先我们要知道webpack是干什么用的?
- 转译代码(es6转es5,scss转css)
- 构建build
- 代码压缩
- 代码分析
直接干
在学习一个新知识时,第一步进入它的官网,抄可以用的代码,然后在电脑上运行,先抄了再说。
学习webpack也是一样,我们先进入一下它的官网,点击DOCUMENTATION,打开它的参考资料,点击GUIDES跟着他的导览路线出发,最后点击getting started就正式起步了
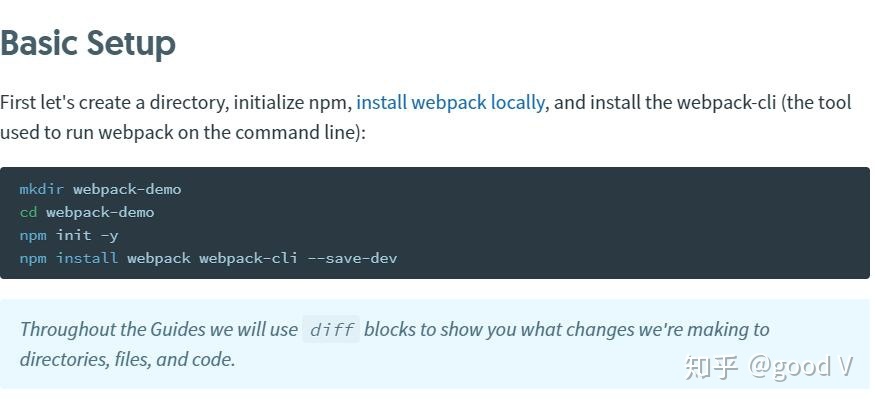
根据代码提示内容,我们先建一个webpack的文件夹,然后进入到文件夹中,打开终端,运行下面的两行代码
npm init -y
npm install webpack webpack-cli --save-dev
他会生成一个node-modules文件夹、一个package.json文件、一个package-lock.json文件,这时候我们的基础工作已经做完了,下面我们尝试用它来实现一些小功能
用webpack转译js
在webpack文件夹中创建一个src的文件夹,在src文件夹里面新建index.js和x.js文件在文件中分别写入
index.js
import x from "./x.js"
console.log(x);
x.js
export default { xxx }
然后根据官网提示 在终端运行 npx webpack,稍等一会,就会生成一个dist目录,dist的目录里生成一个main.js文件,我们只需看它最后的代码,确实把我们src文件里面的index.js编译了
var n={xxx:xxx};console.log(n)}]);但是这是会有黄色警告WARNING in configuration,这是我们再去官网去找
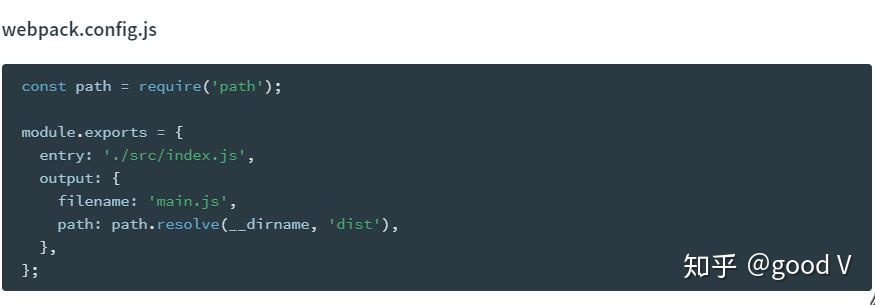
找到了config,这是我们还是按照要求创建一个webpack.config.js文件,然后把代码抄进去
const path = require('path');

module.exports = {
    mode: 'development',
    entry: './src/index.js',
    output: {
        filename: 'main.[contenthash].js',
        path: path.resolve(__dirname, 'dist'),
    },
};
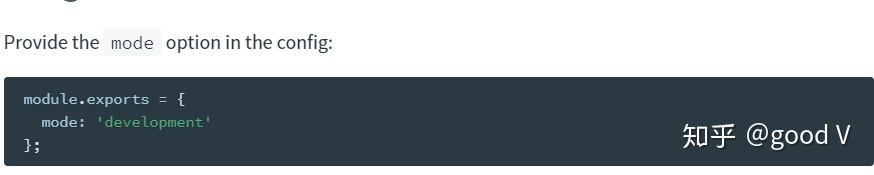
可以尝试得出
mode:当后面为development为开发模式,后面为production为上线模式;
entry:表示入口,写上要变得文件路径
output:表示输出,filename后跟输出文件的文件名,path后面为路径
下面我们尝试一下用webpack转译html
在src文件夹下建一个assets文件夹,然后在里面新建index.html
通过搜资料大概了解了,编译HTML也是在webpack.config.js里面设置
const HtmlWebpackPlugin = require("html-webpack-plugin");
const path = require("path");

module.exports = {
  entry: "./src/index.js",
  output: {
    filename: "index.[contenthash].js"
  },
  plugins: [
    new HtmlWebpackPlugin({
      title: "XDML - 写代码啦",
      template: "src/assets/index.html"
    })
  ]
}
引入HtmlWebpackPlugin,然后在下面写上相关配置
title:就是HTML文件的title标题
template:就是要编译的HTML
在新建的HTML文件的title里面写上,然后再设置webpack.config.js里面的title
<title>
        <%= htmlWebpackPlugin.options.title %>
</title>
这样新生成的HTML中会自动引入我们编译过的js
js、html都尝试,接下来就是css了
我们需要在webpack.config.js新增module模块
const HtmlWebpackPlugin = require("html-webpack-plugin");
const path = require("path");

module.exports = {
  entry: "./src/index.js",
  output: {
    filename: "index.[contenthash].js"
  },
  plugins: [
    new HtmlWebpackPlugin({
      title: "XDML - 写代码啦",
      template: "src/assets/index.html"
    })
  ],
   module: {
    rules: [
      {
        test: /.(png|svg|jpg|gif)$/,
        use: ["file-loader"]
      },
      {
        test: /.styl$/,
        loader: ["style-loader", "css-loader", "stylus-loader"]
      },
      {
        test: /.less$/,
        loader: ["style-loader", "css-loader", "less-loader"]
      },
      {
        test: /.scss$/i,
        use: [
          "style-loader",
          "css-loader",
          {
            loader: "sass-loader",
            options: {
              implementation: require("dart-sass")
            }
          }
        ]
      }
    ]
  }
}
在module模块中写上相关配置,这里要注意,各种loader都需要单独下载,在loader里面编译css是直接作用于页面上的,不会生成css文件,正式发布的时候是需要css文件的,这时候我们就不能用loader了,在 plugins里设置
const HtmlWebpackPlugin = require("html-webpack-plugin");
const path = require("path");

module.exports = {
  entry: "./src/index.js",
  output: {
    filename: "index.[contenthash].js"
  },
  plugins: [
    new HtmlWebpackPlugin({
      title: "XDML - 写代码啦",
      template: "src/assets/index.html"
    }),
     new MiniCssExtractPlugin({
      filename: '[name].[contenthash].css',
      chunkFilename: '[id].[contenthash].css',
      ignoreOrder: false, // Enable to remove warnings about conflicting order
    })
  ],
   module: {
    rules: [
      {
        test: /.(png|svg|jpg|gif)$/,
        use: ["file-loader"]
      },
      {
        test: /.styl$/,
        loader: ["style-loader", "css-loader", "stylus-loader"]
      },
      {
        test: /.less$/,
        loader: ["style-loader", "css-loader", "less-loader"]
      },
      {
        test: /.scss$/i,
        use: [

          {
            loader: "sass-loader",
            options: {
              implementation: require("dart-sass")
            }
          }
        ]
      }
    ]
  }
}
最后实现一下webpack懒加载
首先新建一个lazy.js文件
export default function lazy() {
  console.log("我是一个懒加载的模块");
}
我们现在index.js中写入
import x from './x.js'
import png from './assets/1.png' //引入图片地址
console.log(png)

const div = document.getElementById('app')
console.log('div')
console.log(div)
div.innerHTML = `
  <img src="${png}"> //写上图片地址
`

const button = document.createElement('button')
button.innerText ='懒加载'
button.onclick = ()=>{
  const promise = import('./lazy')
  promise.then((module)=>{
    const fn = module.default
    fn()
  }, ()=>{
    console.log('模块加载错误')
  })
}

div.appendChild(button)
当我们点击按钮的时候,才会加载lazy模块
总结:
1.js:通过内置“babel-loader”,将index.js编译成main.js
2.css:通过“style-loader”、 "css-loader",将css编译成内置的style标签
3.css:通过“MiniCssExtractPlugin”,将css编译成一个文件(n个css变成一个css)
4.html:通过“HtmlWebpackPlugin”,将HTML编译成一个新的HTML文件(0个或者1个编译成1个)
loader和 plugin的区别
loader是加载器;plugin是插件
loader是用来加载一些资源文件的,因为webpack本身commonjs规范的js文件,对于其他资源,如css资源、图片资源是没办法加载的,需要相应的loader将资源转化,加载进来;比如说:它可以加载js文件,把它转译低版本浏览器支持的js、他还可以加载css文件,把css文件变成页面上的style标签、它还可以加载图片文件,对图片进行一些优化
plugin是用来扩展、加强功能的,直接作用与webpack功能更强大,当然loader也是变相的扩展webpack,但它只专注于转化文件这一领域,plugin功能更加丰富,不仅局限于功能的加载;比如说:有一个插件是“HtmlWebpackPlugin”,他是用来生成html文件的、还有一个插件是“MiniCssExtractPlugin”, 他是用来抽取css代码,把它变成一个文件的


 1564
1564

 被折叠的 条评论
为什么被折叠?
被折叠的 条评论
为什么被折叠?
 到【灌水乐园】发言


