


 本文详述了如何在GitHub上从零开始搭建VuePress网站,包括新建GitHub仓库、全局安装VuePress、配置VuePress主题、部署到gh-pages分支,以及设置Base URL、忽略文件和自动部署脚本等步骤。
此文详细介绍如何部署VuePress[1]到GitHub[2]的gh-pages上
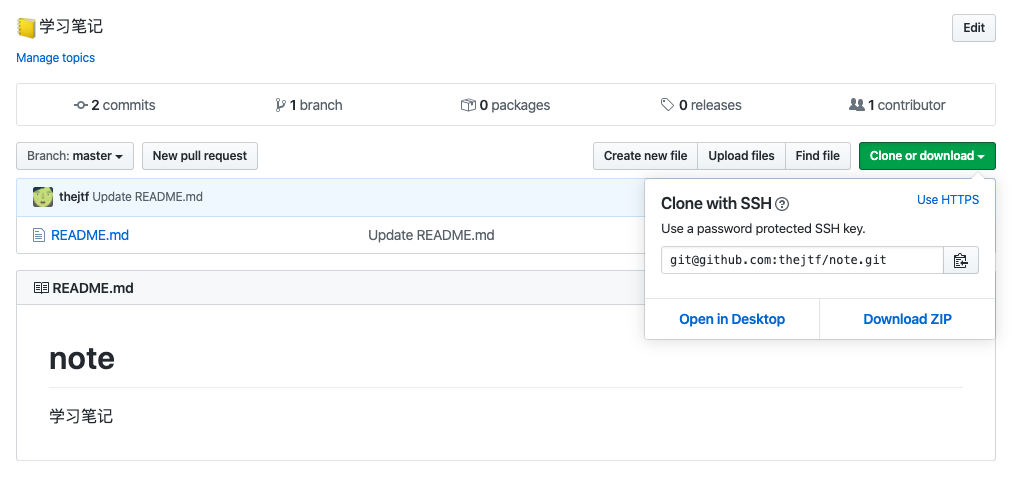
在 GitHub 新建仓库 note
在GitHub中新建仓库名称为note
全局安装 VuePress
# 安装
yarn global add vuepress # 或者:npm install -g vuepress
# 克隆项目到本地并新建和仓库同名的文件夹 note
git clone git@github.com:thejtf/note.git note
# 进入本地 note 文件夹
cd note
# 新建 docs 文件夹
mkdir docs
# 新建一个 markdown 文件
echo '# Hello VuePress!' > README.md
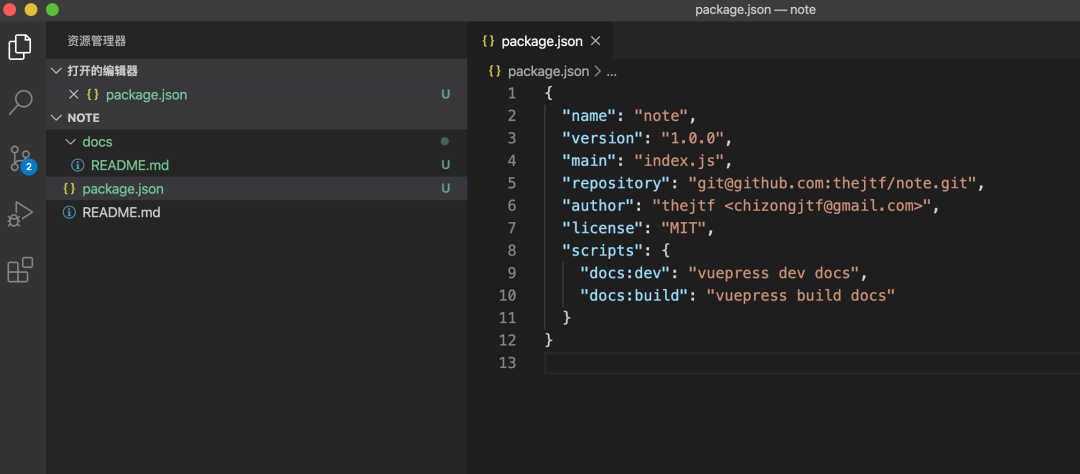
# 创建并初始化 package.json
yarn init -y
复制下方代码到 package.json
  "scripts": {
    "docs:dev": "vuepress dev docs",
    "docs:build": "vuepress build docs"
  }
如下图所示?
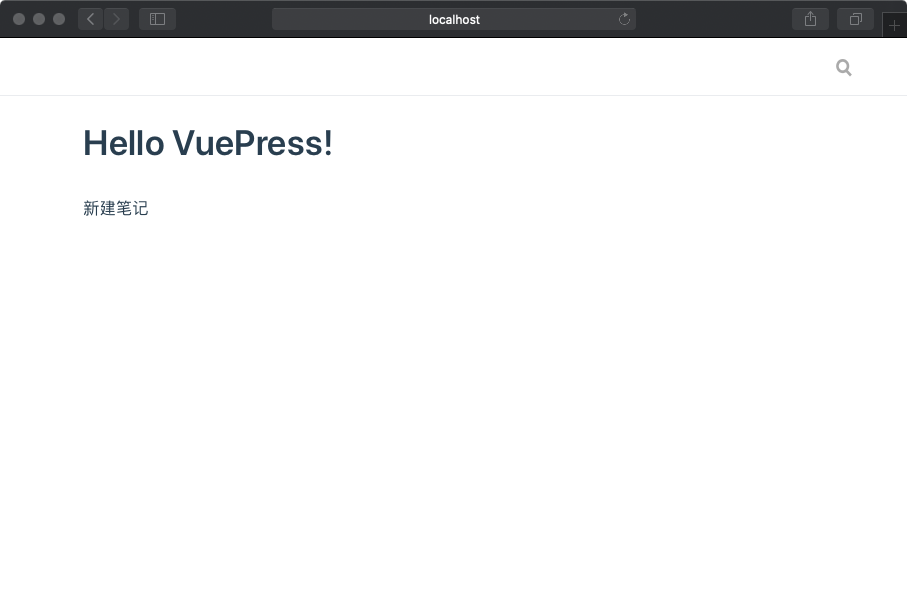
本地启动 VuePress
# 运行以下命令
yarn docs:dev
打开浏览器访问 http://localhost:8080/ 效果如下图?
配置 VuePress
在docs文件夹下新建.vuepress文件夹,在.vuepress下新建config.js文件
# 复制下方代码到 config.js
module.exports = {
  title: '学习笔记',
  description: '知识点记录'
}
效果如下图?

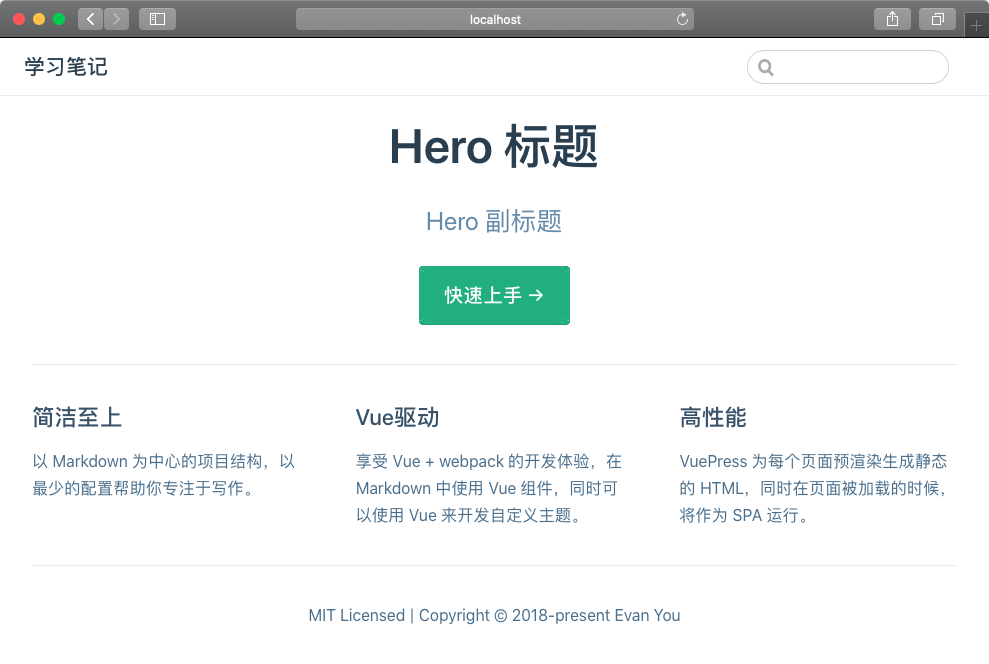
默认主题配置
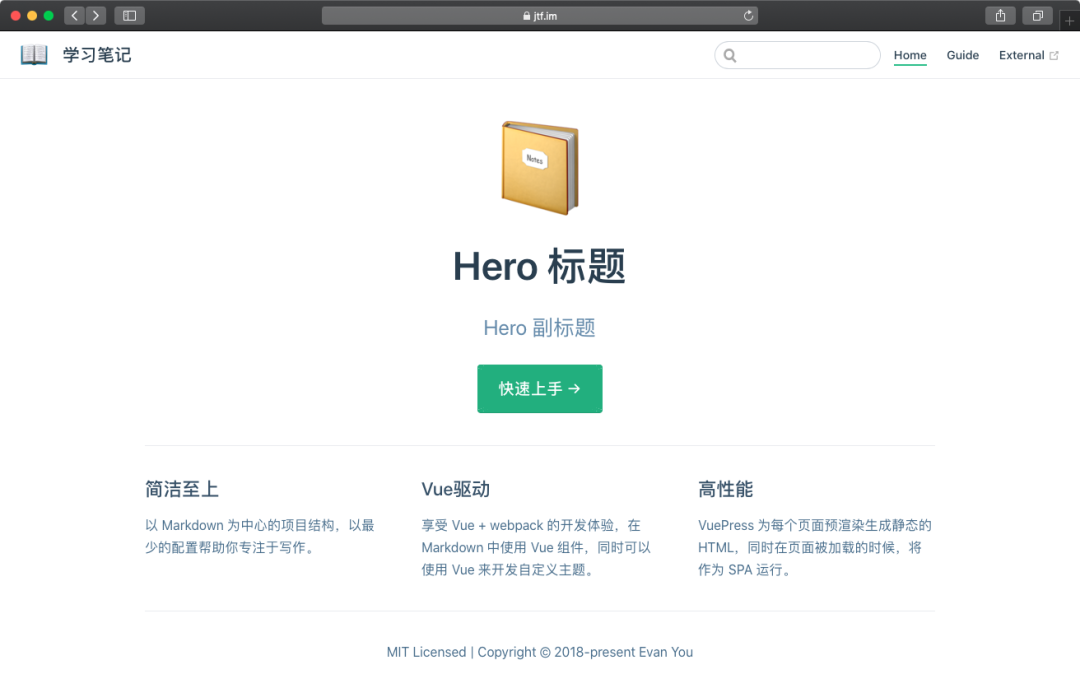
复制下方代码到 docs 的 README.md
---
home: true
heroImage: /hero.png
heroText: Hero 标题
tagline: Hero 副标题
actionText: 快速上手 →
actionLink: /zh/guide/
features:
- title: 简洁至上
  details: 以 Markdown 为中心的项目结构,以最少的配置帮助你专注于写作。
- title: Vue驱动
  details: 享受 Vue + webpack 的开发体验,在 Markdown 中使用 Vue 组件,同时可以使用 Vue 来开发自定义主题。
- title: 高性能
  details: VuePress 为每个页面预渲染生成静态的 HTML,同时在页面被加载的时候,将作为 SPA 运行。
footer: MIT Licensed | Copyright © 2018-present Evan You
---
效果如下图?
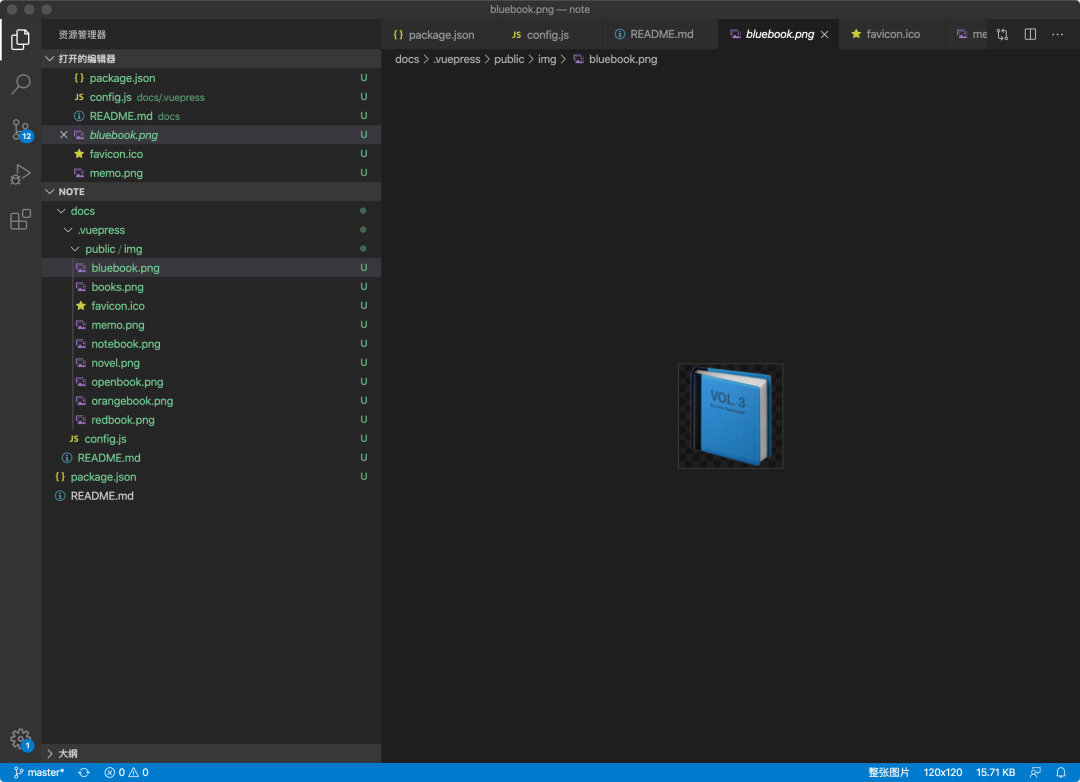
在.vuepress文件夹下新建一个public文件夹,再在public文件夹下新建一个img文件夹,把图片文件放到此文件夹下?
修改首页图片
在docs文件夹下的README.md修改heroImage
home: true
# 修改此下方路径添加图片
heroImage: /img/notebook.png
heroText: Hero 标题
tagline: Hero 副标题
actionText: 快速上手 →
actionLink: /zh/guide/
features:
- title: 简洁至上
  details: 以 Markdown 为中心的项目结构,以最少的配置帮助你专注于写作。
- title: Vue驱动
  details: 享受 Vue + webpack 的开发体验,在 Markdown 中使用 Vue 组件,同时可以使用 Vue 来开发自定义主题。
- title: 高性能
  details: VuePress 为每个页面预渲染生成静态的 HTML,同时在页面被加载的时候,将作为 SPA 运行。
footer: MIT Licensed | Copyright © 2018-present Evan You
修改首页导航 logo
在.vuepress文件夹下修改config.js文件
module.exports = {
    title: '学习笔记',
    description: '知识点记录',
    themeConfig: {
        logo: '/img/novel.png',
      }
  }
添加网页的 ico 文件
在.vuepress文件下修改config.js文件
  head: [
    ['link', { rel: 'icon', href: '/logo.png' }]
  ]
添加导航栏链接
在.vuepress文件夹下修改config.js文件
module.exports = {
    title: '学习笔记',
    description: '知识点记录',
    head: [
        ['link', { rel: 'icon', href: '/img/favicon.ico' }]
      ],
    themeConfig: {
        logo: '/img/novel.png',
      //  在下方修改添加
        nav: [
            { text: 'Home', link: '/' },
            { text: 'Guide', link: '/guide/' },
            { text: 'External', link: 'https://google.com' },
          ]
      //  在上方修改添加
      }
  }
部署到 GitHub 仓库中
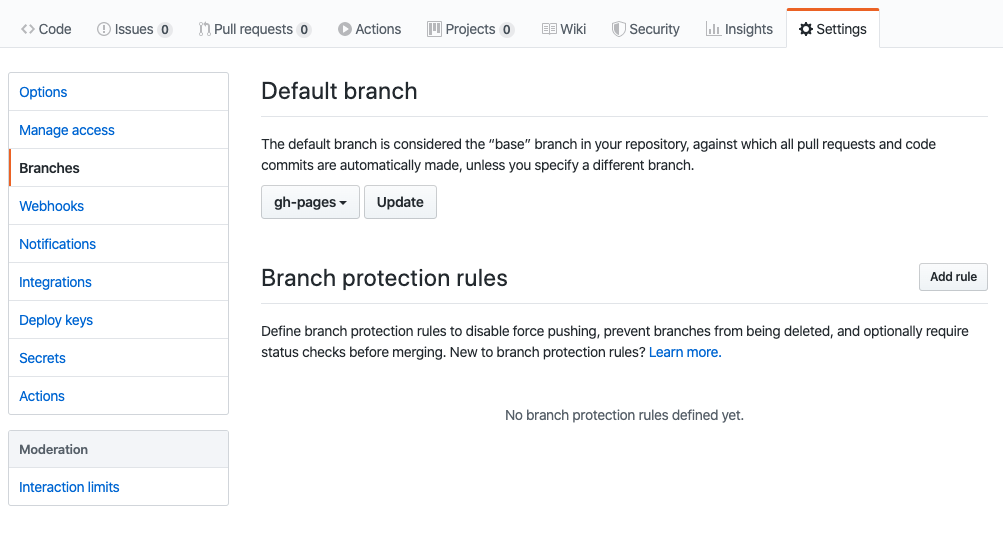
新建 gh-pages 分支
在GitHub上新建一个gh-pages的分支,并在Settings中在Branches更改Default branch为gh-pages,如下图?
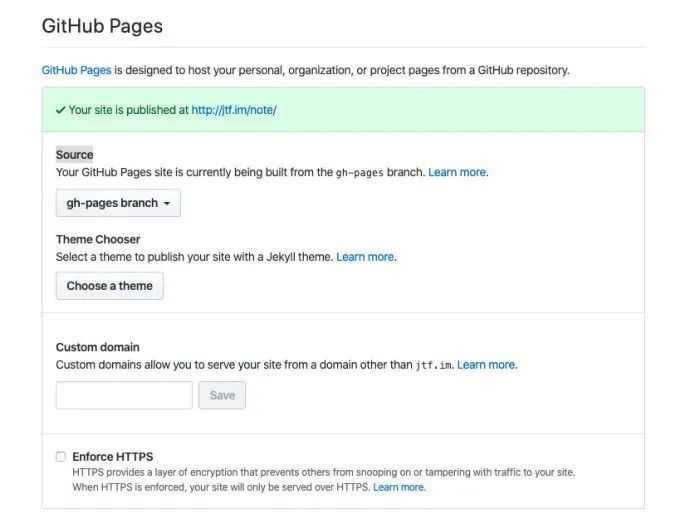
更改Settings中的Options的GitHub Pages的 Source 为gh-pages branch如下图?
Base URL
本文要把vuepress部署到github page上,部署在https://{your-github-name}.github.io/{repo-name}/地址上,需要在config.js中定义base的值为/{repo-name}/。
//config.js
module.exports = {
    base: '/note/',
    title: '学习笔记',
    description: '知识点记录',
    head: [
        ['link', { rel: 'icon', href: '/img/favicon.ico' }]
      ],
    themeConfig: {
        logo: '/img/novel.png',
        nav: [
            { text: 'Home', link: '/' },
            { text: 'Guide', link: '/guide/' },
            { text: 'External', link: 'https://google.com' },
          ]
      }
  }
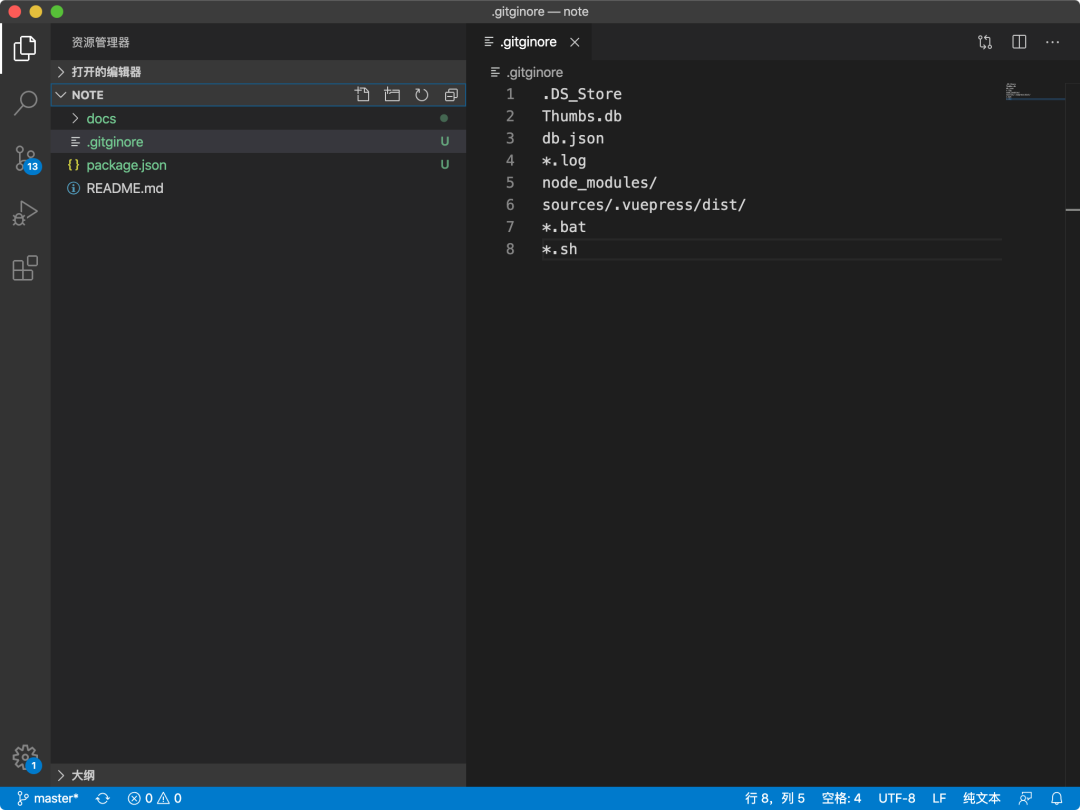
新建 .gitginore
在本地note根目录下创建忽略文件.gitginore,填入如下内容。第6行可以根据情况修改,不需要把生成的静态文件提交到github上:
.DS_Store
Thumbs.db
db.json
*.log
node_modules/
sources/.vuepress/dist/
*.bat
*.sh
如下图?
新建 deploy.sh
在本地note根目录创建deploy.sh,填入以下内容:
#!/usr/bin/env sh# 发生错误时停止
set -e

git init
git add -A
git commit -m 'init'
git config --local user.name "{name}"
git config --local user.email {email}

# 如果部署到 https://{USERNAME}.github.io
# git push -f git@github.com:{USERNAME}/{USERNAME}.github.io.git master:{branch-name}

# 如果部署到 https://{USERNAME}.github.io/{REPO}
git push -f git@github.com:{USERNAME}/{REPO}.git master

cd -
提交部署
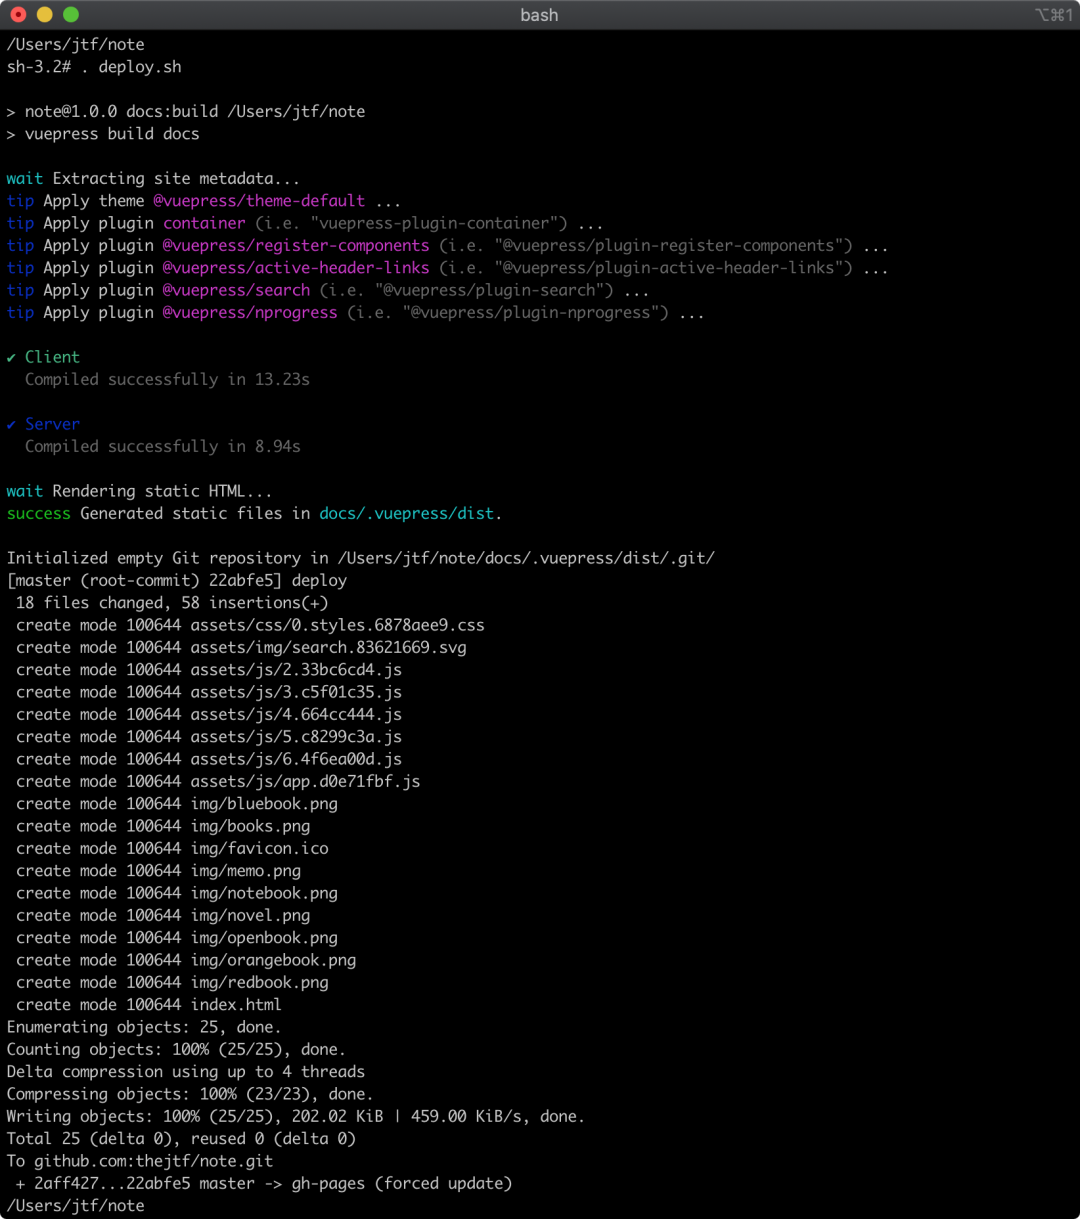
运行命令. deploy.sh,把源码提交到github上。
. deploy.sh
如下图?
部署上线
在浏览器打开 jtf.im/note/[3] 即可访问?
大功告成?。
参考资料
[1]VuePress: https://vuepress.vuejs.org/
[2]GitHub: https://github.com/
[3]jtf.im/note/: https://jtf.im/note/
博 客 地 址
https://jtf.im

?扫我直接访问
? https://jtf.im

长按扫描即可打开?
▽ 点击「」,体验一下。


 1681
1681

 被折叠的 条评论
为什么被折叠?
被折叠的 条评论
为什么被折叠?
 到【灌水乐园】发言


