


一、SpringMVC的简介
[1]目前学习的知识
mybatis---sql语句和java代码之间的耦合--dao层
spring----业务层和其他各层直接的耦合---优化了service层
springmvc---解决java代码和servlet之间的耦合---controller层
[2]为什么学习SpringMVC
现在遇到的问题
A、我们发现,每当用户发送一个请求,就对应后台一个servlet,如果用户有100个请求,这个时候就需要用户书写100个servlet。
B、使用现在servlet进行页面数据接受的时候,我们发现相当的麻烦。
C、我们书写的java代码和servlet 之间的耦合太高
[3]解决方案
Springmvc
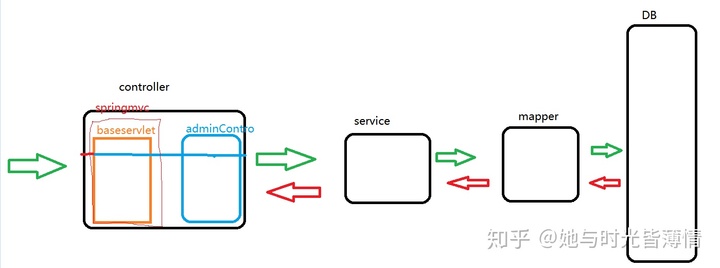
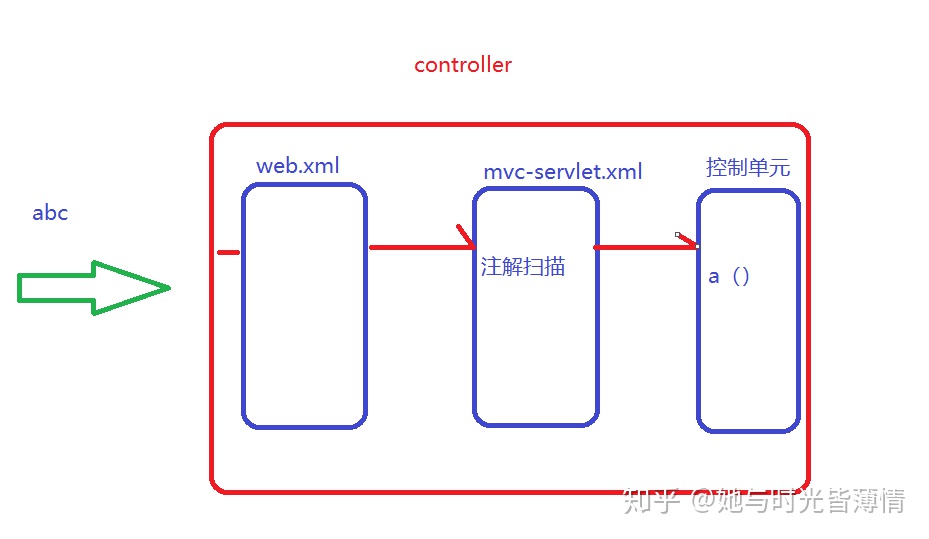
通过图形可以发现,springmvc就是对servlet进行的封装,实现了java代码和servlet 直接的解耦
Spring mvc 的概念
Spring MVC属于SpringFrameWork的后续产品,已经融合在Spring Web Flow里面
类似框架
Struts 2 、JFinal
理解示意图
二、SpringMVC框架的搭建
搭建步骤:
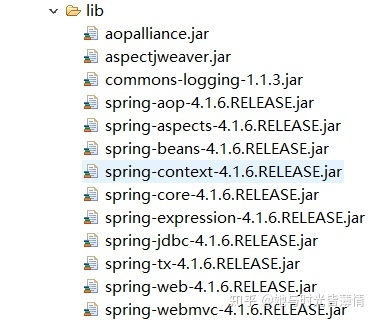
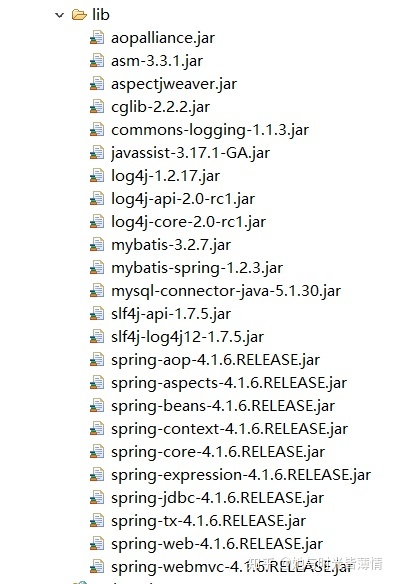
[1]导包
[2]配置web.xml
  <servlet>
  	<servlet-name>mvc</servlet-name>
  	<servlet-class>org.springframework.web.servlet.DispatcherServlet</servlet-class>
  </servlet>
  <servlet-mapping>
  	<servlet-name>mvc</servlet-name>
  	<!--除了jsp以外的所有请求资源  -->
  	<url-pattern>/</url-pattern>
  	<!-- <url-pattern>*.action</url-pattern> -->
  </servlet-mapping>
[3]配置WEB-INF/ mvc-servlet.xml
 <!--扫描注解@Controller-->
    <context:component-scan base-package="com.bjsxt.controller"></context:component-scan>

    <!--@RequestMapping-->
    <mvc:annotation-driven></mvc:annotation-driven>
[4]书写自己的控制单元方法
import org.springframework.stereotype.Controller;
import org.springframework.web.bind.annotation.RequestMapping;

@Controller
public class MyControl {

	@RequestMapping("abc.action")
	public String demo1(){
		//接收页面数据

		//数据处理
		System.out.println("进入了demo1控制单元");
		//做出响应
		return "index.jsp";
	}
}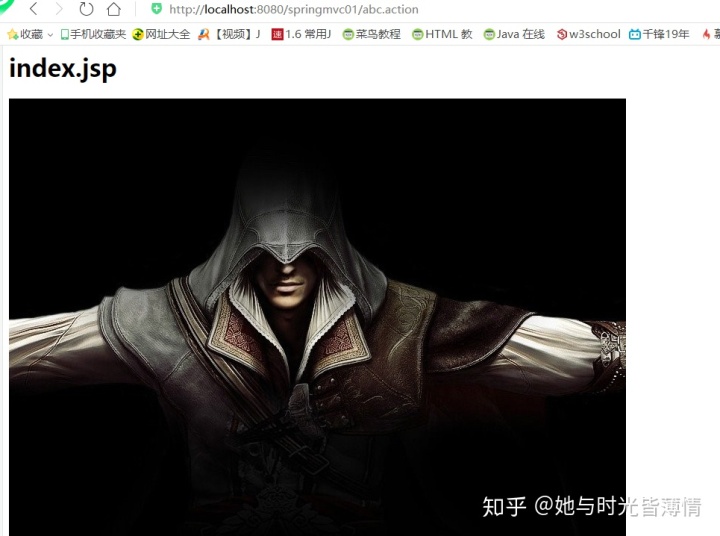
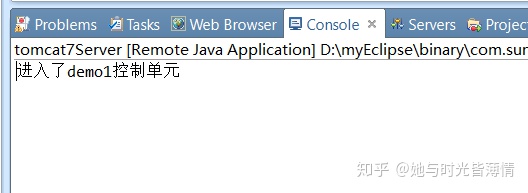
[5]理解示意图
三、SpringMVC框架的完善
[1]寻找文件
	<init-param>
  		<param-name>contextConfigLocation</param-name>
  		<param-value>classpath:springmvc.xml</param-value>
  	</init-param>
[2]使用静态资源放行的时候需要方式两种
静态资源
js、css、img、等
配置使用url-pattern方式
 <servlet-mapping>
     <servlet-name>mvc3</servlet-name>
     <url-pattern>*.do</url-pattern>
     <url-pattern>*.action</url-pattern>
 </servlet-mapping>
自己放行静态资源位置的方式
<mvc:resources location="/js/" mapping="/js/**"></mvc:resources>
<mvc:resources location="/css/" mapping="/css/**"></mvc:resources>
<mvc:resources location="/img/" mapping="/img/**"></mvc:resources>
四、SpringMVC中进行参数接受
如果接收的参数是复选框 那么 我们可以根据需求选择接受数组还是字符串,两者都是可以的。
sql Date不含时分秒。
接收的数据如果含有时分秒 需要使用java.util.Date 并且使用@DateTimeFormat 指定时间的格式.但是一定要注意传入数据的格式 一定要与转换的格式严格匹配(包括空格的数量) 否则报400错误。
RESTFUL 是一种网络应用程序的设计风格和开发方式,基于HTTP,可以使用XML格式定义或JSON格式定义。RESTFUL适用于移动互联网厂商作为业务使能接口的场景.使用这种设计风格需要使用@PathVariable 注解获取url中的参数
import java.util.Date;
import javax.servlet.http.HttpServletRequest;
import org.springframework.format.annotation.DateTimeFormat;
import org.springframework.stereotype.Controller;
import org.springframework.web.bind.annotation.PathVariable;
import org.springframework.web.bind.annotation.RequestMapping;
import com.sxt.pojo.User;
@Controller
public class MyCon2 {
/**
* 参数获得方式一:
*
* String uname = request.getParameter("uname");
*
* 需要注意:我们需要的内置对象直接可以当作参数进行传递过来直接使用。
* */
@RequestMapping("demo1")
public String demo1(HttpServletRequest request){
String uname = request.getParameter("uname");
String pwd = request.getParameter("pwd");
System.out.println(uname+"---"+pwd);
return "success.jsp";
}
/**
* 参数接受方式二:
*
* 需要注意: 使用这种方式进行数据接受的时候,需要保证形参的名称和
* 前台form表单name的值必须要一致
*
* 400 :数据类型转化处理错误!!!
* */
@RequestMapping("demo2")
public String demo2(String uname,String pwd,int age){
System.out.println(uname+"---"+pwd+"---"+age);
return "success.jsp";
}
/**
* 参数接受方式三:
*
* 参数可以直接使用对象进行接受
*
* 如果使用对象进行接受参数的时候需要注意;
* 现在表单中的name属性必须和接受参数对象中的实体属性名保持一致
* */
@RequestMapping("demo3")
public String demo3(User user){
System.out.println(user);
return "success.jsp";
}
/***
* 参数接受方式四:
*
* 可以接受字符串或者是字符串数组
*
* sql的Date 只是含有年月日
*
* util 中的Date 不仅含有年月日还有时分秒
*
* @DateTimeFormat :接受日期格式的数据
*
* @DateTimeFormat(pattern = "指定日期的格式")
* */
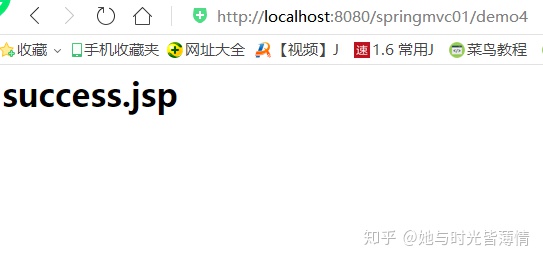
@RequestMapping("demo4")
public String demo4(String[] hobby,@DateTimeFormat(pattern="yyyy-MM-dd") Date birthday){
System.out.println(hobby[0]+"--"+birthday);
return "success.jsp";
}
/**
* springmvc01/demo5/sxt/123/uuu
* 这种数据传递的方式,就是可以叫数据传递变得更加的安全
* */
@RequestMapping("/demo5/{name}/{pwd}")
public String demo5(@PathVariable String name,@PathVariable String pwd){
System.out.println(name+"--"+pwd);
return "success.jsp";
}
}
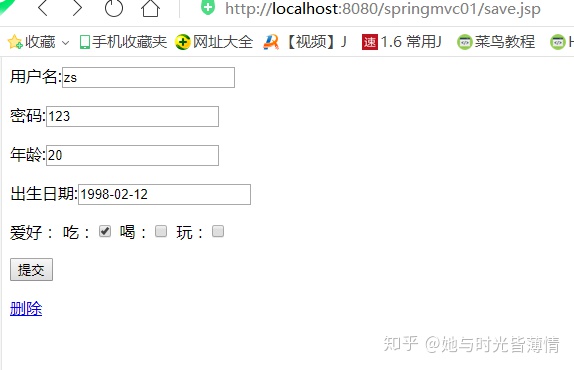
前端代码:save.jsp
<%@ page language="java" import="java.util.*" pageEncoding="utf-8"%>
<%
String path = request.getContextPath();
String basePath = request.getScheme()+"://"+request.getServerName()+":"+request.getServerPort()+path+"/";
%>

<!DOCTYPE HTML PUBLIC "-//W3C//DTD HTML 4.01 Transitional//EN">
<html>
  <head>
    <base href="<%=basePath%>">

    <title>My JSP 'save.jsp' starting page</title>

	<meta http-equiv="pragma" content="no-cache">
	<meta http-equiv="cache-control" content="no-cache">
	<meta http-equiv="expires" content="0">
	<meta http-equiv="keywords" content="keyword1,keyword2,keyword3">
	<meta http-equiv="description" content="This is my page">
	<!--
	<link rel="stylesheet" type="text/css" href="styles.css">
	-->

  </head>

  <body>
   	<form action="demo5" method="post">
   		<p>
   			用户名:<input type="text" name="uname">
   		</p>
   		<p>
   			密码:<input type="text" name="pwd">
   		</p>
   		<p>
   			年龄:<input type="text" name="age">
   		</p>
   		<p>
   			出生日期:<input type="text" name="birthday">
   		</p>
   		<p>
		        爱好:

		        吃:<input type="checkbox" name="hobby" value="chi"/>

		        喝:<input type="checkbox" name="hobby" value="he"/>

		        玩:<input type="checkbox" name="hobby" value="wan"/>
    	</p>
   		<p>
   			<input type="submit" value="提交">
   		</p>


   	</form>
   	<a href="demo5?name=sxt&pwd=123">删除</a>
  </body>
</html>
数据传递变得更加的安全

五、SSM框架的整合
[1]导包
项目的整体结构:

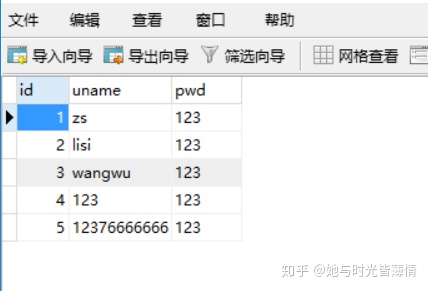
数据库表admin:
实体类:
package com.sxt.pojo;

import java.io.Serializable;

public class Admin implements Serializable{

	private int id;
	private String uname;
	private String pwd;
	public int getId() {
		return id;
	}
	public void setId(int id) {
		this.id = id;
	}
	public String getUname() {
		return uname;
	}
	public void setUname(String uname) {
		this.uname = uname;
	}
	public String getPwd() {
		return pwd;
	}
	public void setPwd(String pwd) {
		this.pwd = pwd;
	}
	public Admin() {
		super();
		// TODO Auto-generated constructor stub
	}
	public Admin(int id, String uname, String pwd) {
		super();
		this.id = id;
		this.uname = uname;
		this.pwd = pwd;
	}
	@Override
	public String toString() {
		return "Admin [id=" + id + ", uname=" + uname + ", pwd=" + pwd + "]";
	}
}
AdminMapper接口
package com.sxt.mapper;

import com.sxt.pojo.Admin;

public interface AdminMapper {
	//查询单个操作
	public Admin selectOne(String uname,String pwd);
}
AdminMapper.xml配置文件
<?xml version="1.0" encoding="UTF-8"?>
<!DOCTYPE mapper
        PUBLIC "-//mybatis.org//DTD Mapper 3.0//EN"
        "http://mybatis.org/dtd/mybatis-3-mapper.dtd">

   <mapper namespace="com.sxt.mapper.AdminMapper">
   		<select id="selectOne" resultType="admin">
   			select *  from  admin   where  uname =#{0} and pwd =#{1}
   		</select>
   </mapper>
applicationContext-mybatis.xml配置文件
<?xml version="1.0" encoding="UTF-8"?>
<beans xmlns="http://www.springframework.org/schema/beans"
    xmlns:xsi="http://www.w3.org/2001/XMLSchema-instance"
    xmlns:aop="http://www.springframework.org/schema/aop"
    xmlns:context="http://www.springframework.org/schema/context"
    xmlns:tx="http://www.springframework.org/schema/tx"
    xsi:schemaLocation="http://www.springframework.org/schema/beans
        http://www.springframework.org/schema/beans/spring-beans.xsd
        http://www.springframework.org/schema/aop
        http://www.springframework.org/schema/aop/spring-aop.xsd
        http://www.springframework.org/schema/context
        http://www.springframework.org/schema/context/spring-context.xsd
        http://www.springframework.org/schema/tx
        http://www.springframework.org/schema/tx/spring-tx.xsd">

	<!--连接数据库数据源  -->
	<bean id="ds" class="org.springframework.jdbc.datasource.DriverManagerDataSource">
		<property name="driverClassName" value="com.mysql.jdbc.Driver"></property>
		<property name="url" value="jdbc:mysql://localhost:3306/bjsxt"></property>
		<property name="username" value="root"></property>
		<property name="password" value="1234"></property>
	</bean>
	<!--获得SQLSession工厂对象  -->
	<bean id="factory" class="org.mybatis.spring.SqlSessionFactoryBean">
	 	<property name="dataSource" ref="ds"></property>
	 	<property name="typeAliasesPackage" value="com.sxt.pojo"></property>
	</bean>
	 <!--扫描mapper文件  -->
     <bean id="mapper" class="org.mybatis.spring.mapper.MapperScannerConfigurer">
        <property name="sqlSessionFactoryBeanName" value="factory"></property>
        <property name="basePackage" value="com.sxt.mapper"></property>
     </bean>

</beans>
applicationContext-service.xml配置文件
<?xml version="1.0" encoding="UTF-8"?>
<beans xmlns="http://www.springframework.org/schema/beans"
    xmlns:xsi="http://www.w3.org/2001/XMLSchema-instance"
    xmlns:aop="http://www.springframework.org/schema/aop"
    xmlns:context="http://www.springframework.org/schema/context"
    xmlns:tx="http://www.springframework.org/schema/tx"
    xsi:schemaLocation="http://www.springframework.org/schema/beans
        http://www.springframework.org/schema/beans/spring-beans.xsd
        http://www.springframework.org/schema/aop
        http://www.springframework.org/schema/aop/spring-aop.xsd
        http://www.springframework.org/schema/context
        http://www.springframework.org/schema/context/spring-context.xsd
        http://www.springframework.org/schema/tx
        http://www.springframework.org/schema/tx/spring-tx.xsd">

	 <!--配置注解扫描  -->
	 <context:component-scan base-package="com.sxt.service.impl"></context:component-scan>

	 <!--增加AOP的切面  -->
</beans>
springmvc.xml配置文件
<?xml version="1.0" encoding="UTF-8"?>
<beans xmlns="http://www.springframework.org/schema/beans"
       xmlns:xsi="http://www.w3.org/2001/XMLSchema-instance"
       xmlns:aop="http://www.springframework.org/schema/aop"
       xmlns:tx="http://www.springframework.org/schema/tx"
       xmlns:mvc="http://www.springframework.org/schema/mvc"
       xmlns:context="http://www.springframework.org/schema/context"
       xsi:schemaLocation="http://www.springframework.org/schema/beans
        http://www.springframework.org/schema/beans/spring-beans.xsd
        http://www.springframework.org/schema/aop
        http://www.springframework.org/schema/aop/spring-aop.xsd
        http://www.springframework.org/schema/tx
        http://www.springframework.org/schema/tx/spring-tx.xsd
        http://www.springframework.org/schema/context
        http://www.springframework.org/schema/context/spring-context.xsd
         http://www.springframework.org/schema/mvc
        http://www.springframework.org/schema/mvc/spring-mvc.xsd">

        <!--扫描注解@Controller  -->
        <context:component-scan base-package="com.sxt.controller"></context:component-scan>

        <!--@RequestMapping-->
        <mvc:annotation-driven></mvc:annotation-driven>

</beans>
service业务层
package com.sxt.service;

import com.sxt.pojo.Admin;

public interface AdminService {

	public Admin login(String uname,String pwd);
}
业务层实现类
package com.sxt.service.impl;

import org.springframework.beans.factory.annotation.Autowired;
import org.springframework.stereotype.Service;

import com.sxt.mapper.AdminMapper;
import com.sxt.pojo.Admin;
import com.sxt.service.AdminService;
@Service
public class AdminServiceImpl implements AdminService{

	@Autowired
	AdminMapper adminMapper;
	@Override
	public Admin login(String uname, String pwd) {

		return adminMapper.selectOne(uname, pwd);
	}

}
前端配置文件web.xml
<?xml version="1.0" encoding="UTF-8"?>
<web-app xmlns:xsi="http://www.w3.org/2001/XMLSchema-instance" xmlns="http://java.sun.com/xml/ns/javaee" xsi:schemaLocation="http://java.sun.com/xml/ns/javaee http://java.sun.com/xml/ns/javaee/web-app_2_5.xsd" id="WebApp_ID" version="2.5">
<display-name>ssm-login</display-name>
<context-param>
<param-name>contextConfigLocation</param-name>
<param-value>classpath:applicationContext-*.xml</param-value>
</context-param>
<!--配置读取xml的监听器-->
<listener>
<listener-class>org.springframework.web.context.ContextLoaderListener</listener-class>
</listener>
<servlet>
<servlet-name>mvc</servlet-name>
<servlet-class>org.springframework.web.servlet.DispatcherServlet</servlet-class>
<init-param>
<param-name>contextConfigLocation</param-name>
<param-value>classpath:springmvc.xml</param-value>
</init-param>
</servlet>
<servlet-mapping>
<servlet-name>mvc</servlet-name>
<!--除了jsp以外的所有请求资源 -->
<url-pattern>/</url-pattern>
<!-- <url-pattern>*.action</url-pattern> -->
</servlet-mapping>
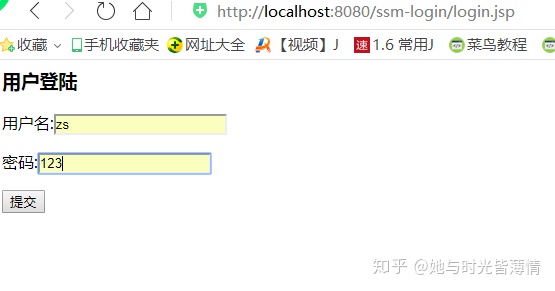
</web-app>前端页面login.jsp
<%@ page contentType="text/html;charset=UTF-8" language="java" %>
<html>
	<head>
	    <title>Title</title>
	</head>
	<body>
		<h3>用户登陆</h3>

		<form action="adminLogin" method="post">

		    <p>
		        用户名:<input type="text" name="uname"/>${msg}

		    </p>
		    <p>
		        密码:<input type="text" name="pwd"/>

		    </p>
		    <p>
		        <input type="submit" value="提交"/>

		    </p>

		</form>
	</body>
</html>
success.jsp
<%@ page contentType="text/html;charset=UTF-8" language="java" %>
<html>
	<head>
	    <title>Title</title>
	</head>
	<body>
		<h1>登陆成功页面</h1>
	</body>
</html>


 124
124

 被折叠的 条评论
为什么被折叠?
被折叠的 条评论
为什么被折叠?
 到【灌水乐园】发言


