


php7.1.6+Apache24 环境配置
准备工作,下载Apache24和PHP
PHP下载地址:http://windows.php.net/download
Apache24下载地址:http://www.apachelounge.com/download/
一、配置+安装Apache24
1、编辑修改http.conf文件。
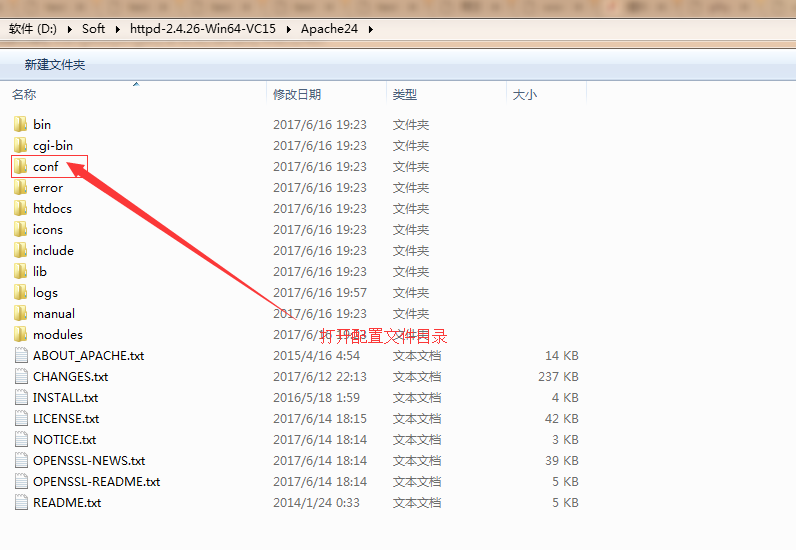
编辑修改http.conf配置文件
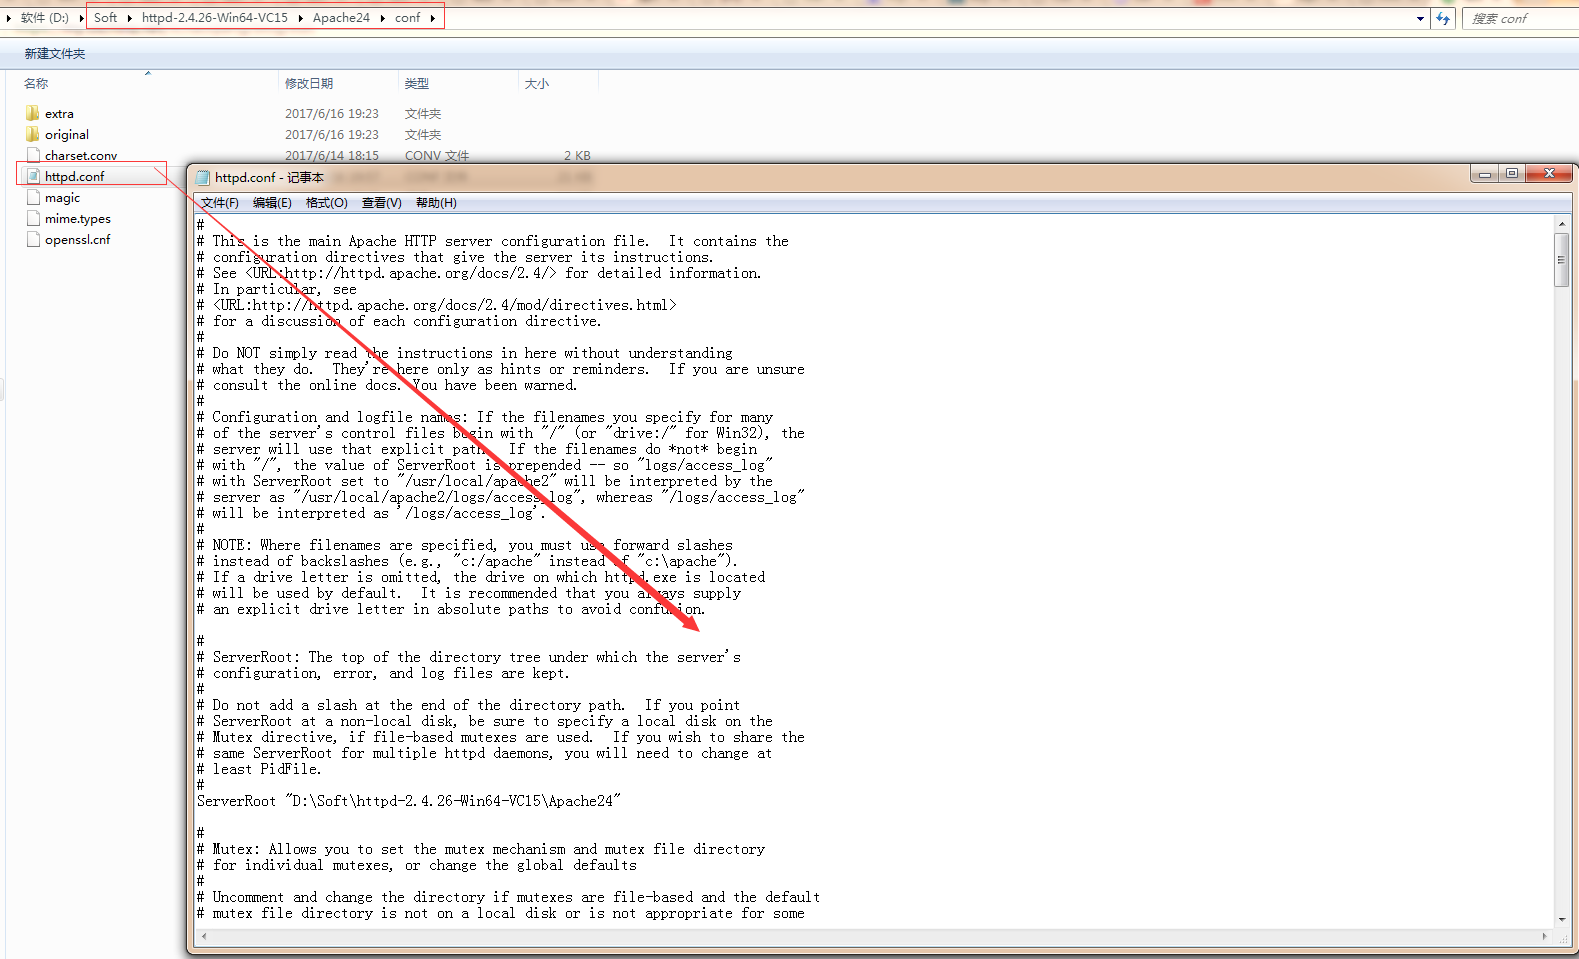
配置Apache24服务器根目录:ServerRoot "D:\Soft\httpd-2.4.26-Win64-VC15\Apache24"
设置管理员邮箱(可省略):ServerAdmin xxxx@example.com
域名配置(本地测试可省略):ServerName www.example.com:80
2、修改所有文件夹的权限
<Directory />
    AllowOverride none
    #Require all denied
    Order deny,allow
    Deny from all
</Directory>
3、配置根目录
DocumentRoot "D:\wwwroot"
<Directory "D:\wwwroot">
    #
    # Possible values for the Options directive are "None", "All",
    # or any combination of:
    #   Indexes Includes FollowSymLinks SymLinksifOwnerMatch ExecCGI MultiViews
    #
    # Note that "MultiViews" must be named *explicitly* --- "Options All"
    # doesn't give it to you.
    #
    # The Options directive is both complicated and important.  Please see
    # http://httpd.apache.org/docs/2.4/mod/core.html#options
    # for more information.
    #
    Options Indexes FollowSymLinks

    #
    # AllowOverride controls what directives may be placed in .htaccess files.
    # It can be "All", "None", or any combination of the keywords:
    #   AllowOverride FileInfo AuthConfig Limit
    #
    AllowOverride None

    #
    # Controls who can get stuff from this server.
    #
    Require all granted
</Directory>
4、配置根目录的权限
<Directory "c:/Apache24/htdocs">
    Options Indexes FollowSymLinks
    AllowOverride all
        Order allow,deny
        Allow from all
    Require all granted
</Directory>
5、配置默认页
<IfModule dir_module>
    DirectoryIndex index.html index.php
</IfModule> 6、配置加载php模块
在httpd.conf文件中,找到#LoadModule xml2enc_module modules/mod_xml2enc.so,在下面添加
LoadModule php7_module "D:/php7.1.6/php7apache2_4.dll"
PHPIniDir "D:/php7.1.6/"
AddHandler application/x-httpd-php .php
<IfModule unixd_module>
7、配置php
1.用编辑器打开D:/php7.1.6目录下的php.ini文件,修改内容:extension_dir = "D:/php7.1.6/ext"
extension=php_mysql.dll
extension=php_mysqli.dll
8、启动Apache服务
运行cmd,窗口,进入到D:\Soft\httpd-2.4.26-Win64-VC15\Apache24\bin目录,执行2步安装操作
1>.安装服务: httpd.exe -k install
2>.启动服务: 双击ApacheMonitor.exe, 在dos窗口中输入httpd.exe -k start
注意:删除服务命令: httpd.exe -k uninstall -n Apache2.4(服务名)
【常见问题】
安装启动过程中如果出现以下错误:
网上大多说法是php5_module小写,但这里是PHP7.1.6,我想再使用php5_module就不太合适了吧,于是把php5_module更改为php7_module,一切就正常了。另外需要注意,PHPIniDir配置也要写上哈。
二、PHP环境搭建,这里以php7.1.6为例。
接下来我们要做的事非常简单,只需要解压下载的php压缩包,把它放到指定的目录。然后在php7.1.6
中找到php.ini-development的文件,复制一份,重命名为php.ini,它就是PHP的配置文件。
编辑php.ini文件,指定extension_dir目录。
extension_dir = "D:\php7.1.6\ext"extension=php_bz2.dll
extension=php_fileinfo.dll
extension=php_gd2.dll
extension=php_gmp.dll
extension=php_mysqli.dll以上,根据需要启用即可。
至此,我们的PHP+Apache环境已经搭建完毕,看看效果吧。在配置的文档根目录中,这里是D:\wwwroot中,创建一个index.php文件,
<?php
echo phpinfo();
?>
接下来,我们访问下http://loalhost地址看看,
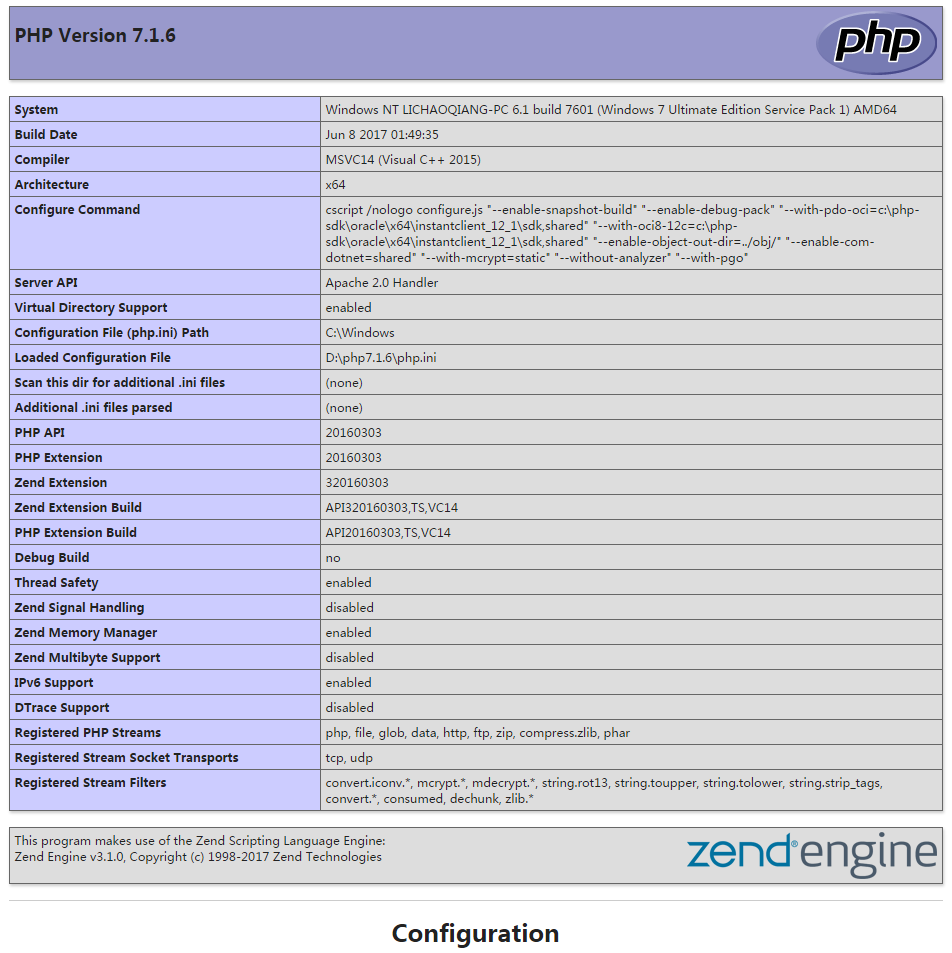
是不是很简单哈。


 226
226

 被折叠的 条评论
为什么被折叠?
被折叠的 条评论
为什么被折叠?
 到【灌水乐园】发言


