


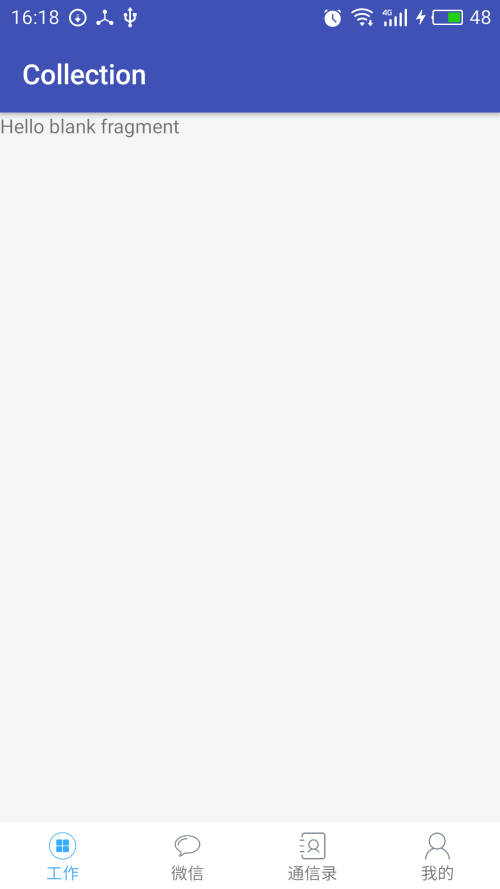
许多的App都使用底部导航栏来实现导航功能,我们可以使用RadioGroup+RadioButton的形式或者直接Button数组的方式实现,而谷歌官方提供了FragmentTabHost来方便快捷实现底部导航栏。
android.support.v4.app.FragmentTabHost

主要代码:
fragmentTabHost.setup(this, getSupportFragmentManager(), R.id.layout_content);

for (int i = 0; i < TAB_NUM; i++){
    TabHost.TabSpec tabSpec = fragmentTabHost.newTabSpec(mTitles[i]);
    tabSpec.setIndicator(getTabView(i));
    fragmentTabHost.addTab(tabSpec, mFragments[i], null);
}
布局文件:
<LinearLayout xmlns:android="http://schemas.android.com/apk/res/android"
    xmlns:tools="http://schemas.android.com/tools"
    android:id="@+id/activity_fragment_tab_host"
    android:orientation="vertical"
    android:layout_width="match_parent"
    android:layout_height="match_parent"
    tools:context="com.cheng.collection.ui.FragmentTabHostActivity">

    <FrameLayout
        android:id="@+id/layout_content"
        android:layout_width="match_parent"
        android:layout_height="0dp"
        android:layout_weight="1">

    </FrameLayout>

    <android.support.v4.app.FragmentTabHost
        android:id="@+id/tabhost"
        android:layout_width="match_parent"
        android:layout_height="48dp">

    </android.support.v4.app.FragmentTabHost>
</LinearLayout>
实现代码:
public class FragmentTabHostActivity extends AppCompatActivity {

    private static final int TAB_NUM = 4;

    private Class[] mFragments = new Class[]{//tab对应的Fragment
            AFragment.class,
            BFragment.class,
            CFragment.class,
            DFragment.class
    };

    private int[] mTabDrawables = new int[]{//tab图片
            R.drawable.tab_work,
            R.drawable.tab_im,
            R.drawable.tab_ebook,
            R.drawable.tab_me,
    };

    private String[] mTitles = new String[]{//tab标题文字
            "工作",
            "微信",
            "通信录",
            "我的"
    };

    @Override
    protected void onCreate(Bundle savedInstanceState) {
        super.onCreate(savedInstanceState);
        setContentView(R.layout.activity_fragment_tab_host);

        FragmentTabHost fragmentTabHost = (FragmentTabHost) findViewById(R.id.tabhost);
        fragmentTabHost.setup(this, getSupportFragmentManager(), R.id.layout_content);

        for (int i = 0; i < TAB_NUM; i++){
            TabHost.TabSpec tabSpec = fragmentTabHost.newTabSpec(mTitles[i]);
            tabSpec.setIndicator(getTabView(i));
            fragmentTabHost.addTab(tabSpec, mFragments[i], null);
        }
        //部分机型可能会显示tab之间的分割线,设置为null取消掉
        fragmentTabHost.getTabWidget().setDividerDrawable(null);
    }

    private View getTabView(int index) {
        View view = View.inflate(this, R.layout.tab_indicator, null);
        ImageView iv = (ImageView) view.findViewById(R.id.maintab_iv);
        TextView tv = (TextView) view.findViewById(R.id.maintab_tv);

        iv.setImageDrawable(getDrawable(mTabDrawables[index]));
        tv.setText(mTitles[index]);

        return view;
    }
}
备注:
这个实现方式有一个弊端,就是每次切换tab都会重新加载Fragment。实际项目过程种可能并不需要,而是需要在切换过程中保留Fragment状态。
原因:
FragmentTabHost在切换tab的时候使用detach和attach的方法来显示/隐藏Fragment。
解决方法:
修改FragmentTabHost的源代码将doTabChanged方法中的
ft.detach(mLastTab.fragment); 改成 ft.hide(mLastTab.fragment);
ft.attach(newTab.fragment); 改成 ft.show(newTab.fragment);
转载于:https://blog.51cto.com/weijiancheng/1896085


 被折叠的 条评论
为什么被折叠?
被折叠的 条评论
为什么被折叠?
 到【灌水乐园】发言


